

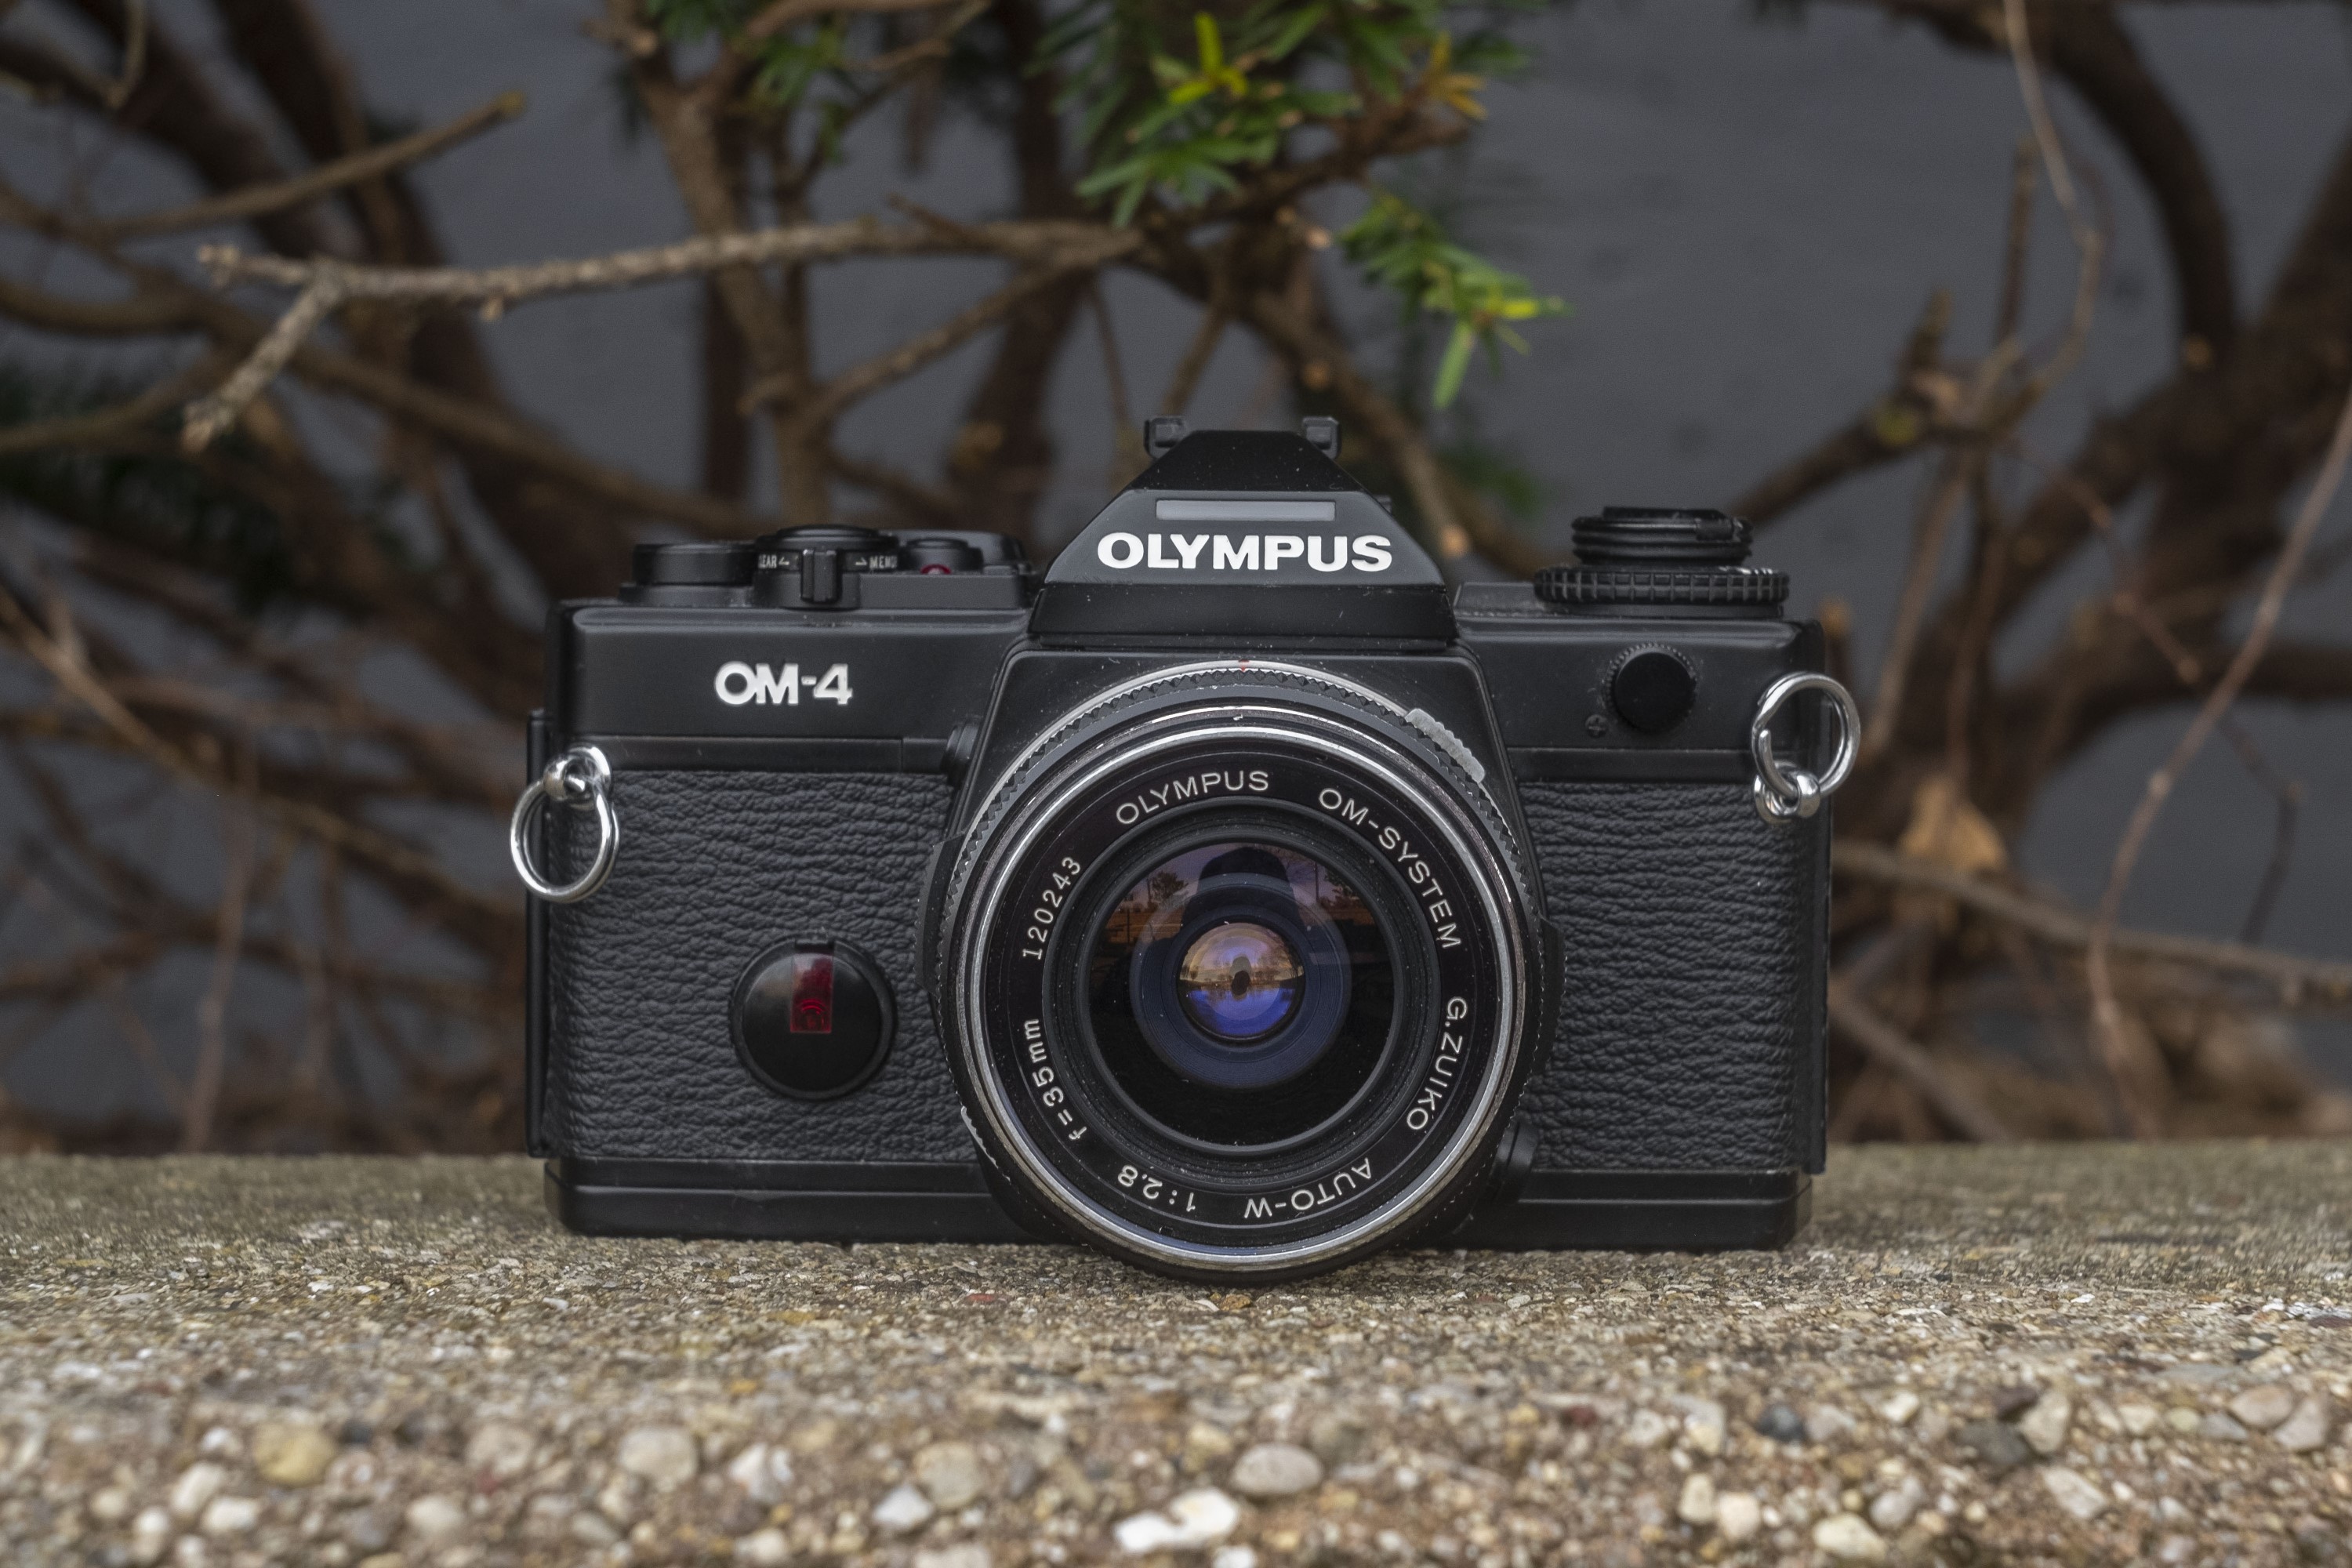
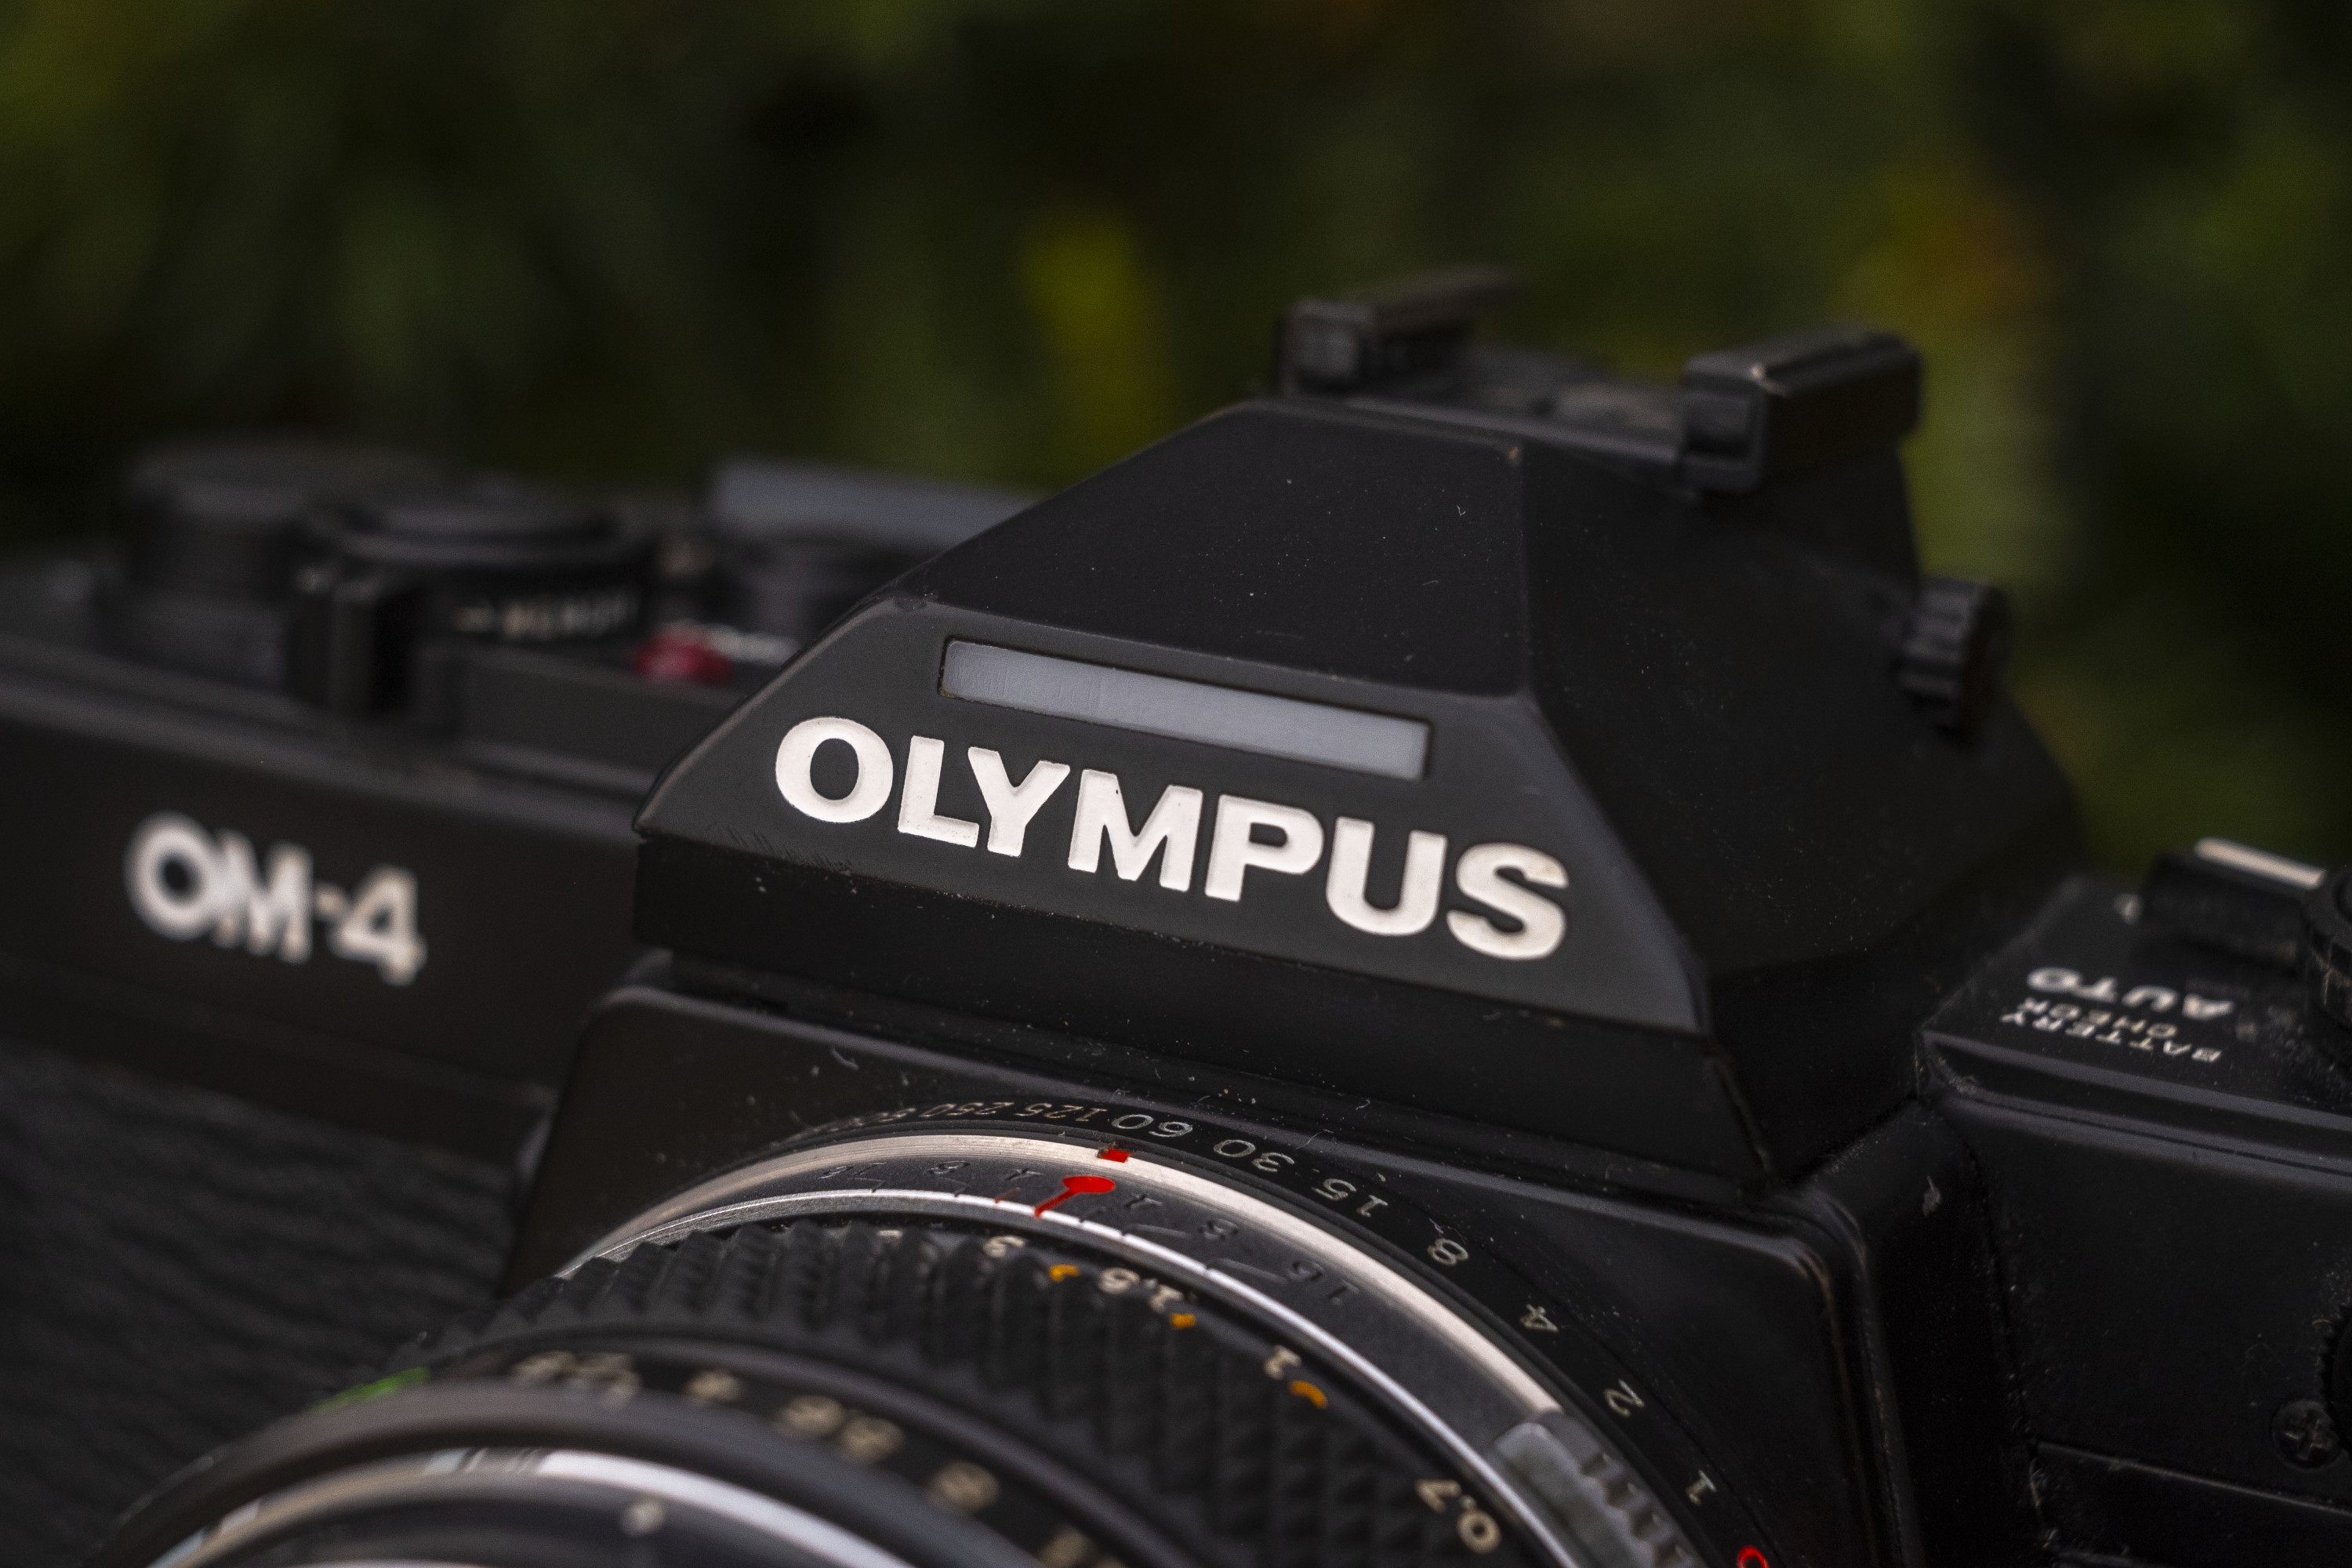
This is an Olympus OM-4, a 35mm single lens reflex camera produced by Olympus Optical Company of Japan between the years 1983 to 1987. It was the successor to the Olympus OM-2N, and was the most advanced in the Olympus OM-series dating back to the original model from 1972. The OM-4 supported aperture priority AE, and had an electronic shutter that could be used with a dead battery. Improvements from the earlier OM-2 were a stronger, weatherproofed body, an integrated hot shoe, new LCD viewfinder display, and a state of the art multi-spot exposure meter that was capable of taking up to 8 simultaneous readings and averaging them together. The OM-4 lived on with the release of the OM-4Ti in 1987 which was largely the same camera, save for Titanium body panels and a few internal improvements. The OM-4Ti remained in production until 2002 making it one of the longest lived Olympus SLRs.
Film Type: 135 (35mm)
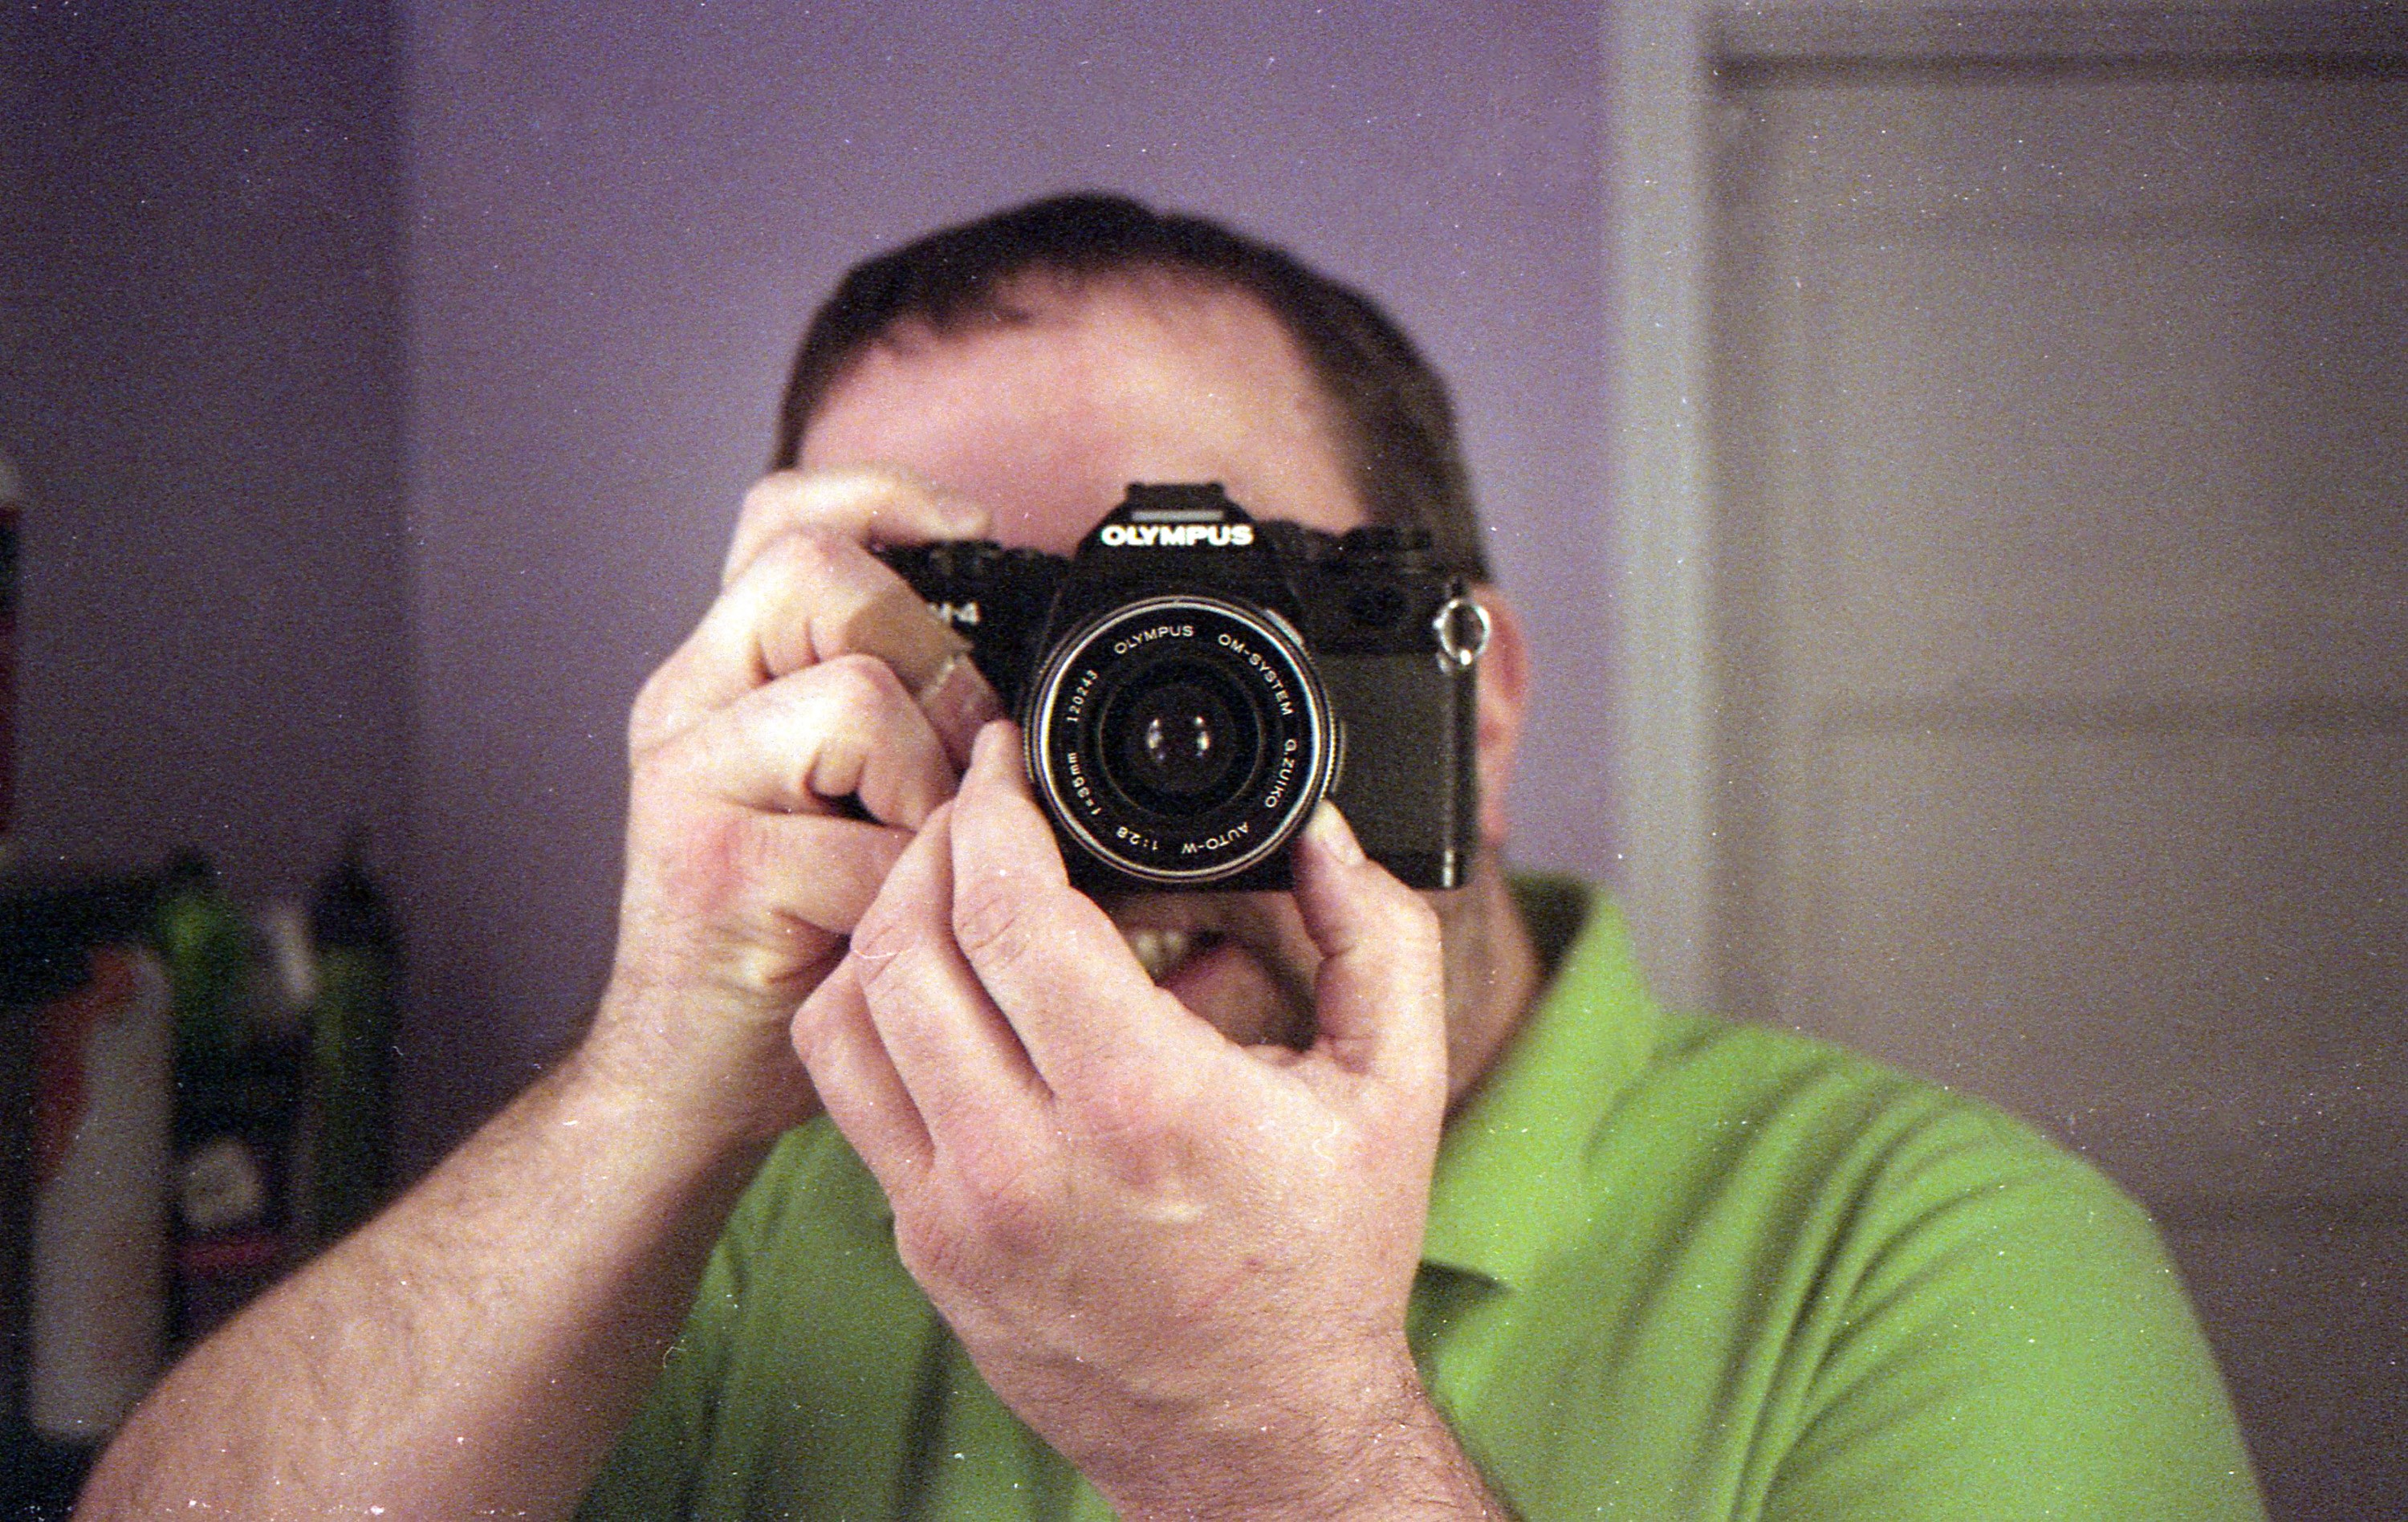
Lens: 35mm f/2.8 Olympus G.Zuiko coated 7-elements
Lens Mount: Olympus OM Bayonet Mount
Focus: Variable
Viewfinder: Fixed SLR Pentaprism
Shutter: Cloth Focal Plane
Speeds (Auto): 240 – 1/2000 seconds, Stepless
Speeds (Manual): B, 1/60 mechanical, 1 – 1/2000 seconds
Exposure Meter: Dual Silicon Blue Cell (SBC) “Off the Film” and Spot meters with Aperture Priority AE
Battery: 2 x SR44 1.5v Silver Oxide
Flash Mount: Hotshoe with 1/60 Flash Sync
Weight: 722 grams (w/ lens), 545 grams (body only)
Manual: https://mikeeckman.com/media/OlympusOm4Manual.pdf
How these ratings work |
The Olympus OM-4 was one of the most advanced 35mm SLRs when it was first released, and remains a very sought after camera for photographer’s today. Featuring a compact body that managed to fit a huge amount of technology into it, a large and bright viewfinder with an excellent LCD display, all the while supporting the entire OM-family of lenses and accessories, the OM-4 is one of my all time favorite SLRs made by any company, ever. | ||||||
| Images | Handling | Features | Viewfinder | Feel & Beauty | History | Age | |
| 2 | 2 | 2 | 2 | 2 | 1 | 0% | |
| Bonus | +2 for overall excellent and supremacy, simply, this one of of the greatest cameras ever made | ||||||
| Final Score | 13.0 | ||||||
History
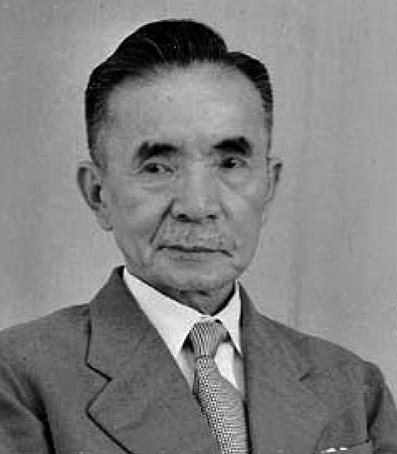
Olympus was founded in Tokyo, Japan on October 12, 1919 as K.K. Takachiho Seisakusho, or Takachiho Works Co., Ltd. in English by Yamashita Takeshi. Mr. Yamashita had previously worked for an industrial manufacturing company known as Tokiwa Shōkai who operated in many Japanese industries at the time.
Takachiho Seisakusho was formed using financial support from Tokiwa who maintained a share of the new company’s ownership and handled all of the company’s marketing.
Although Japan’s industry was growing quickly in the early part of the 20th century, it still relied heavily on many imported products from Europe and other parts of the world. Takachiho Seisakusho’s first products were microscopes and thermometers based on German designs of the time. An early goal of the company was to compete with the likes of Leitz and Zeiss who up until this point had gone unchallenged in these industries.
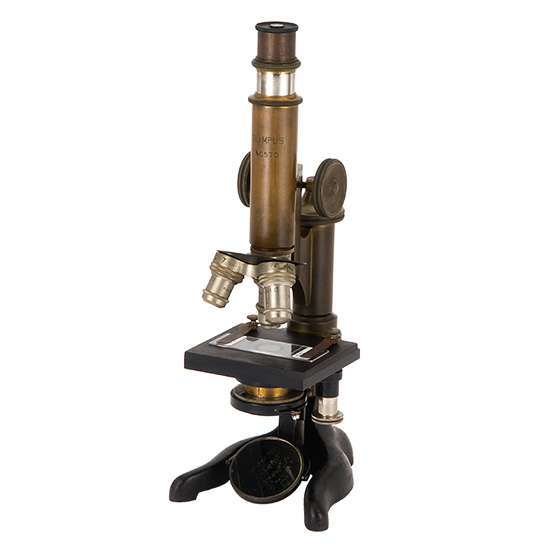
Takachiho Seisakusho would release the first Japanese made microscope in March 1920. It was given the name “Asahi” which stands for “morning sun” which is the symbol of the Japanese people. The Asahi was made with a gunmetal body, and sold for 125 yen. The Asahi was sold under the brand name Tokiwa in 1920, but the very next year, the brand name was changed to Olympus. In total, Takachiho Seisakusho had 7 different models available for a variety of industries, one of the biggest of which was the Japanese textile industry. Tokiwa/Olympus microscopes were very successful, and a source of pride for the company and all of Japan.
The company would continue to improve and innovate new microscope designs throughout the rest of the 1920s and well into the 30s where the Olympus brand became known worldwide as a leader in microscope and optical design.
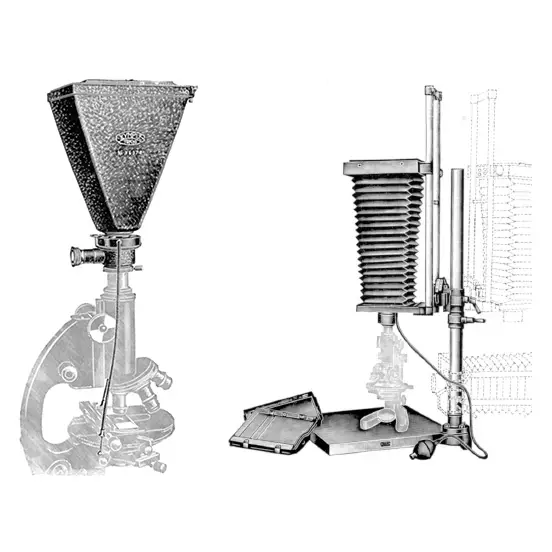
In 1933, Takachiho would sign an agreement with the Japanese Navy as an exclusive maker of microscopes and other optical equipment. One of their products was a device called the Olympus PM I and II which allowed photographs to be taken through a microscope. It wasn’t exactly a camera by traditional standards, rather an apparatus that consisted of a prism, a ground glass, a rudimentary shutter, and a dark box. It would make plate film exposures that were 56mm x 93mm. A later version of this apparatus used a bellows instead of a dark box.
Perhaps due to the success, or at least some level of interest, in this rudimentary microscope camera, in 1935 Takachiho would diversity it’s portfolio by developing it’s own optical lenses. Initially operated as a separate, but co-owned company known as Mizuho Kōgaku Kenkyūjo, the company’s first lenses were released in 1936 and were based off Zeiss Tessar formulas and came in focal lengths of 105mm and 75mm. These lenses were given the name Zuikō as a result of a contest among company employees to select a name.
Mizuho’s original intent was to market and sell their lenses as stand alone products, but could not find any interested parties to buy them. In an effort to drum up interest in their lenses, Mizuho decided to sell the lenses together with a camera body to increase interest in their design.
Without any actual expertise in developing camera bodies or shutters, Takachiho would partner with Miyazaki Shizuma who was the owner of yet another Japanese optics company called Proud-Sha and would use a model they made called the Semi-Proud, a 6cm x 4.5cm folding camera that itself was based of the German made Balda Baldax.
As a result, in 1936 Takachiho would package it’s own Zuiko lenses made by Mizuho Kōgaku, with a camera made by Proud-Sha, and would market it under Takachiho’s Olympus name as the Semi Olympus.
It’s worth mentioning that many Japanese 6cm x 4.5cm folding cameras had the name “Semi”, which is another way of saying “half” for half frame 6cm x 9cm which was the common size for 120 format roll film.
In 1937, Takachiho would release the Semi Olympus II which was inspired heavily by the original Proud-Sha designed Semi Olympus, except this time the body, shutter, and the lenses were all made in house by Takachiho.
It is said that Yamashita Takeshi had a great admiration of Zeiss and wanted to compete with them with their own quality lenses and cameras. The Zuiko was based off Zeiss’s Tessar formula but was not an identical copy, and the Semi Olympus II was built to compete with the Zeiss Ikonta which was also not an exact copy. This was in contrast to other Japanese companies who made near identical copies of German cameras with only minor differences. Takeshi wanted Takachiho’s products to stand alone in the marketplace and be 100% Japanese designs, and not just another German copy.
At this time, there was a great deal of innovation in the Japanese camera industry, and Takachiho would design a revolutionary new 35mm rangefinder known as the Olympus Standard, which was going to compete with the Zeiss Contax rangefinder, but the complexity of the design and the onset of war caused production of the Standard to be halted after only 10 prototypes were made.
World War II changed the entire Japanese optics industry, including Takachiho who fell under control of another Japanese optics company called Ataka Shōkai in 1942. Founder and CEO Yamashita Takeshi would resign in 1943 and the company’s name would be changed to Takachiho Kōgaku Kōgyō K.K. From 1940 – 45, the only model being made was the Olympus Six, a 6cm x 6cm folding camera which was also made for the Japanese military.
Then in 1945, several of Takachiho’s factories, including one in Hatagaya where Takachiho’s shutters were made, were destroyed by US bombers, halting production for at least a year. Production of the Olympus Six resumed in 1946, and then in 1948, the Olympus 35 would be introduced which was the company’s first ever 35mm film camera.
On January 1, 1949, the company’s name would be changed once again to Olympus Kōgaku Kōgyō K.K. which was the first time the company was officially known as Olympus.
Throughout the 1950s and 60s, Olympus would release a wide variety of folding, TLR, and solid bodied full frame and half frame 35mm cameras that were highly successful. At the time, Olympus was one of Japan’s premiere optics companies. Despite their recent popularity as a maker of cameras and lenses, the company would continue to follow in the footsteps of the original Takachiho’s reputation as a quality microscope maker. Many of the company’s most successful microscopes were designed during this period elevating their reputation as one of the world’s leading microscope makers, a reputation the company still has to this very day.
By the early 1970s, Olympus started to fall behind in sales to other Japanese companies like Nippon Kogaku (Nikon), Canon, and Pentax, so the company took on it’s most ambitious task yet. It was going to enter into the highly competitive single lens reflex (SLR) market that was dominated by both Nikon and Canon. Olympus wisely knew that they would struggle to compete with the professional grade Nikon F-series, or the highly regarded semi-pro SLR lines by Canon, Minolta, and several other manufacturers, so instead, Olympus targeted a relatively new market, which was the compact and lightweight SLR market. Until this time, most SLRs were large and quite heavy. Asahi Pentax, and Petri were the only makers of lightweight SLR bodies, but their Spotmatic and Petri-Flex lines were relatively basic models. Olympus wanted to design a whole new SLR system with state of the art features, quality lenses, and high quality, but light weight bodies.
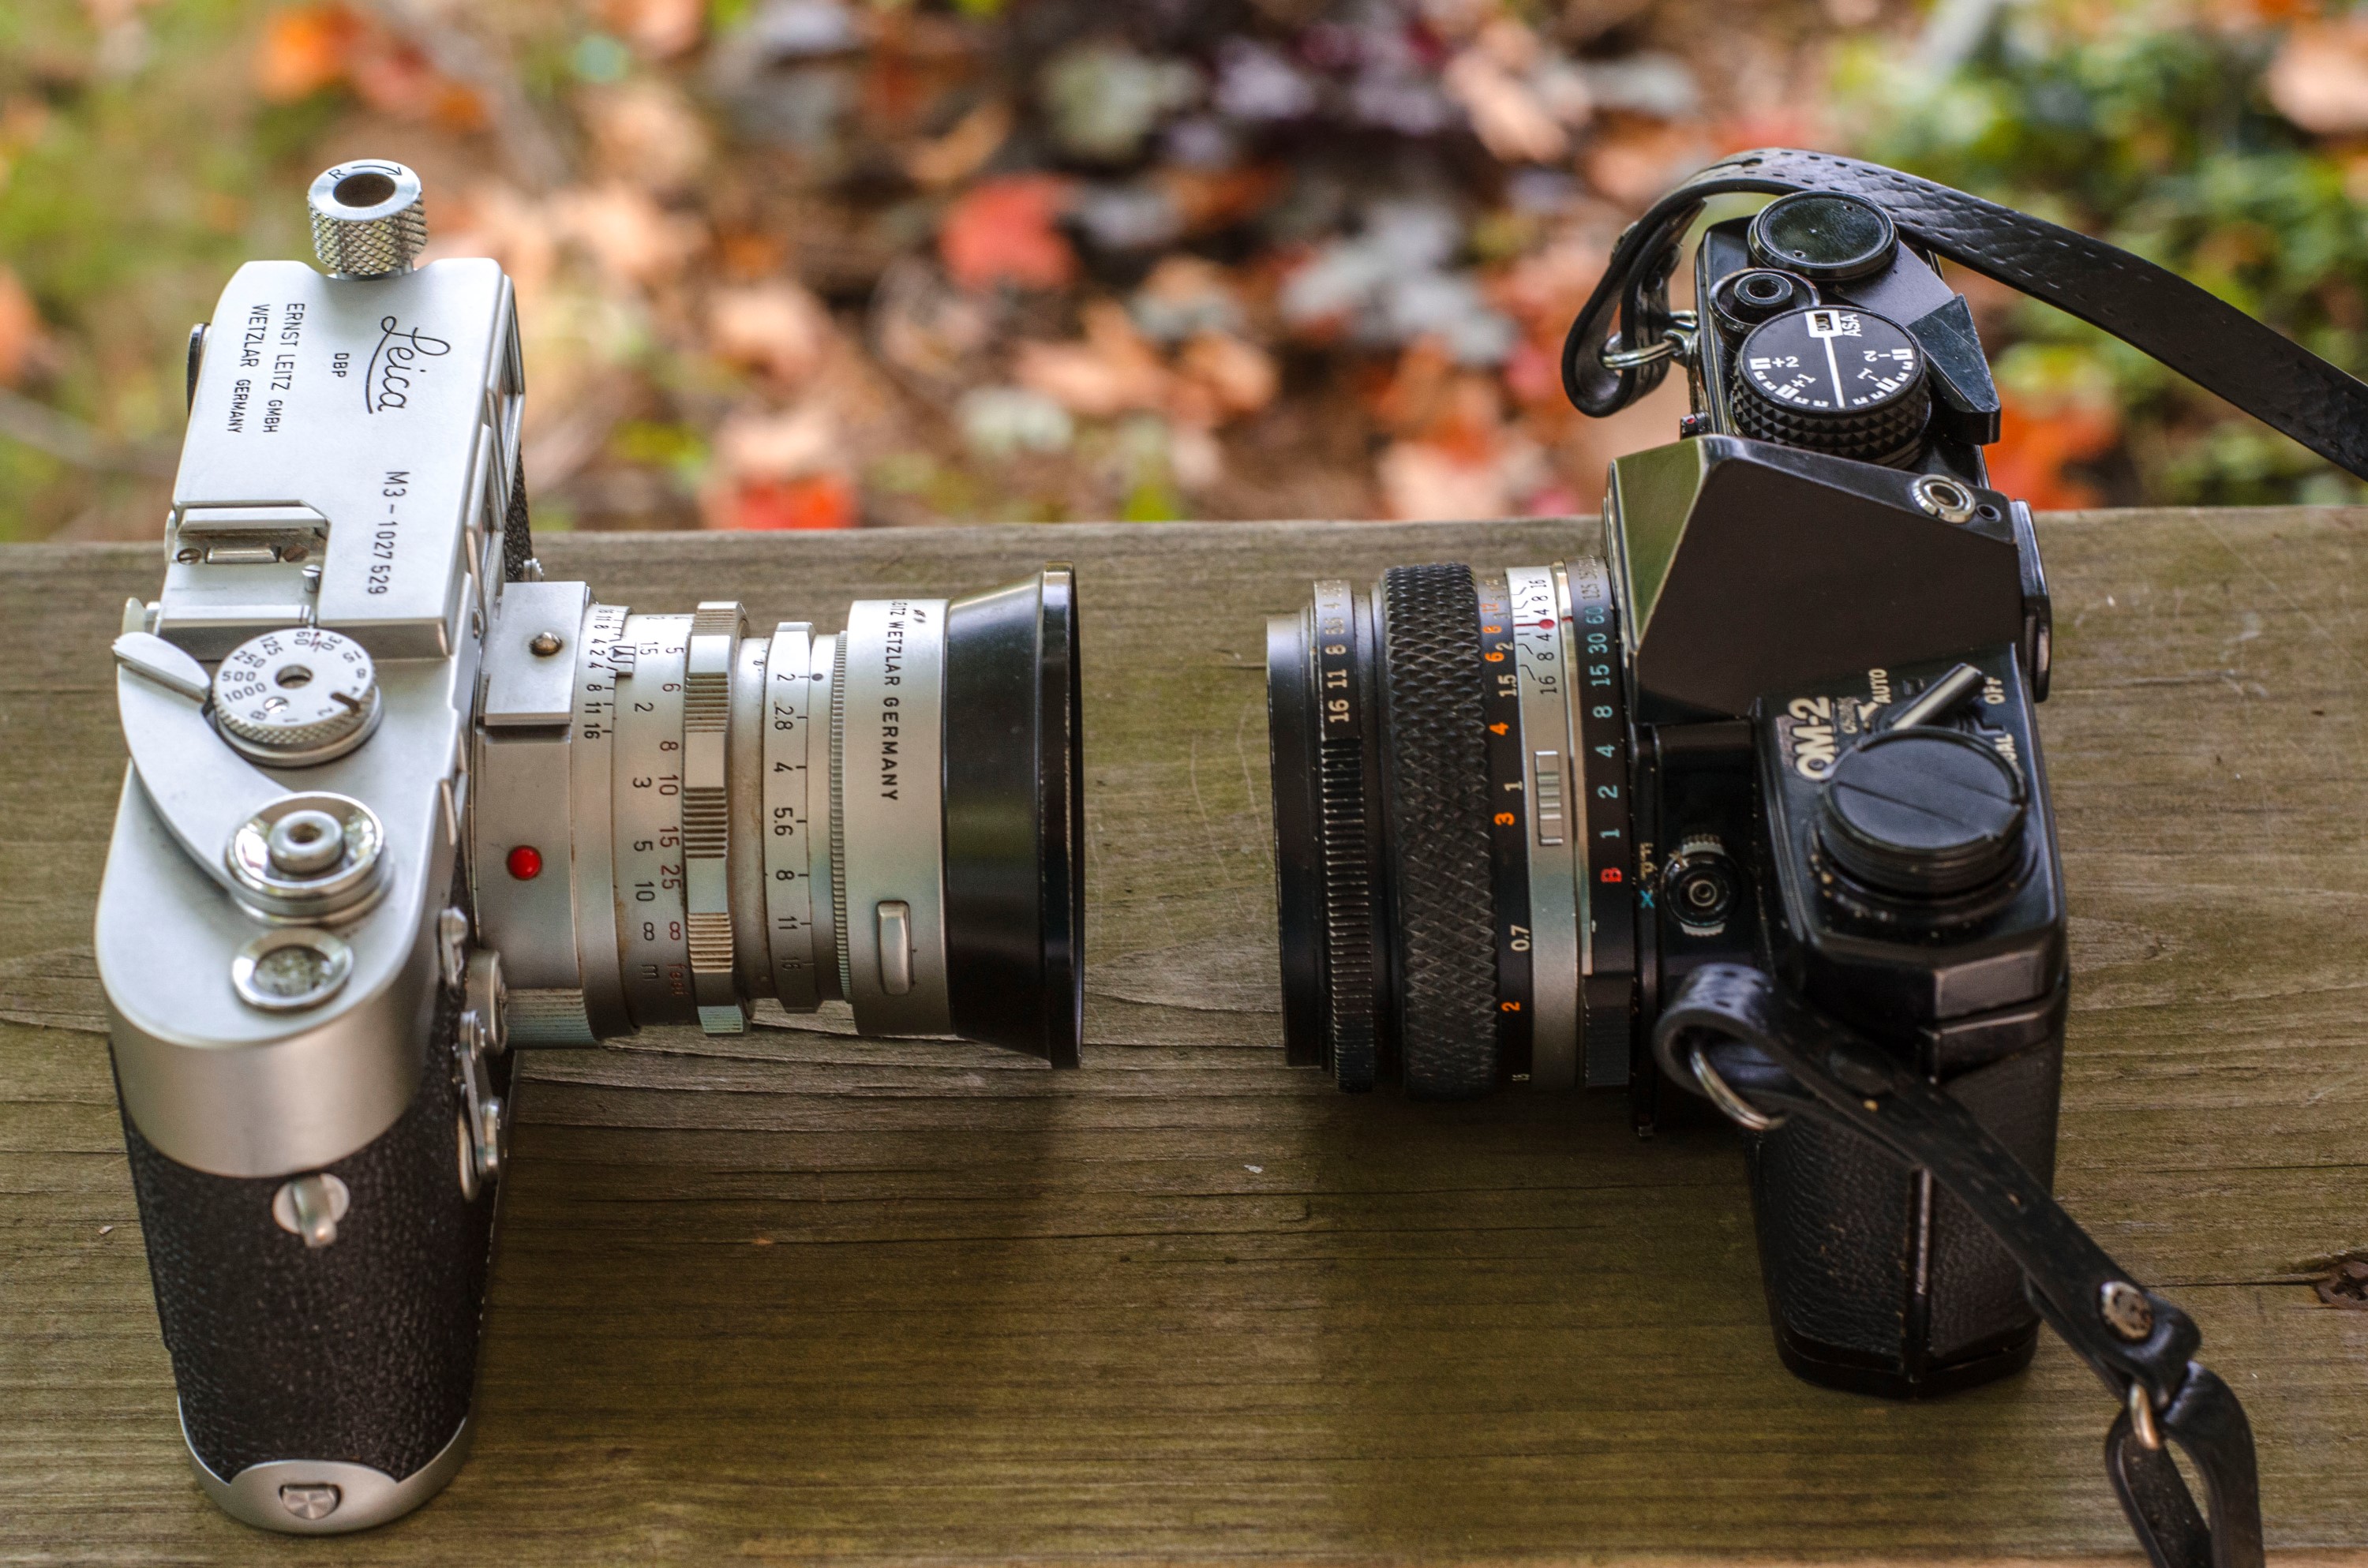
In 1972, the Olympus M1 was released. Designed by a team led by Maitani Yoshihisa who had previously designed the Olympus Pen series, it is said that Yoshihisa was inspired by the Leica M-series rangefinder in designing the M1 as the goal was to have the camera be no larger or heavier than the Leica. In an ironic twist, Leitz got into a legal argument with Olympus over the Olympus M1 name because Leitz already had a model called the M1. As a result, the Olympus M1 was renamed the OM-1 to avoid any copyright infringement. An estimated 52,000 Olympus M1s were sold before the name changed to OM-1, and as such are very expensive and highly sought after by collectors.
The Olympus OM-1 was a huge hit. It was an entirely mechanical camera with a CdS cell exposure meter. It had specially designed air dampers which would quiet down the sound of the shutter firing. It’s body only weight of 510 grams was significantly lighter than other cameras of the day such as the Pentax Spotmatic SP at 621 grams, Yashica TL Electro X at 722 grams, Canon FTb at 740 grams, and Nikkormat FTn at 755 grams (all body only).
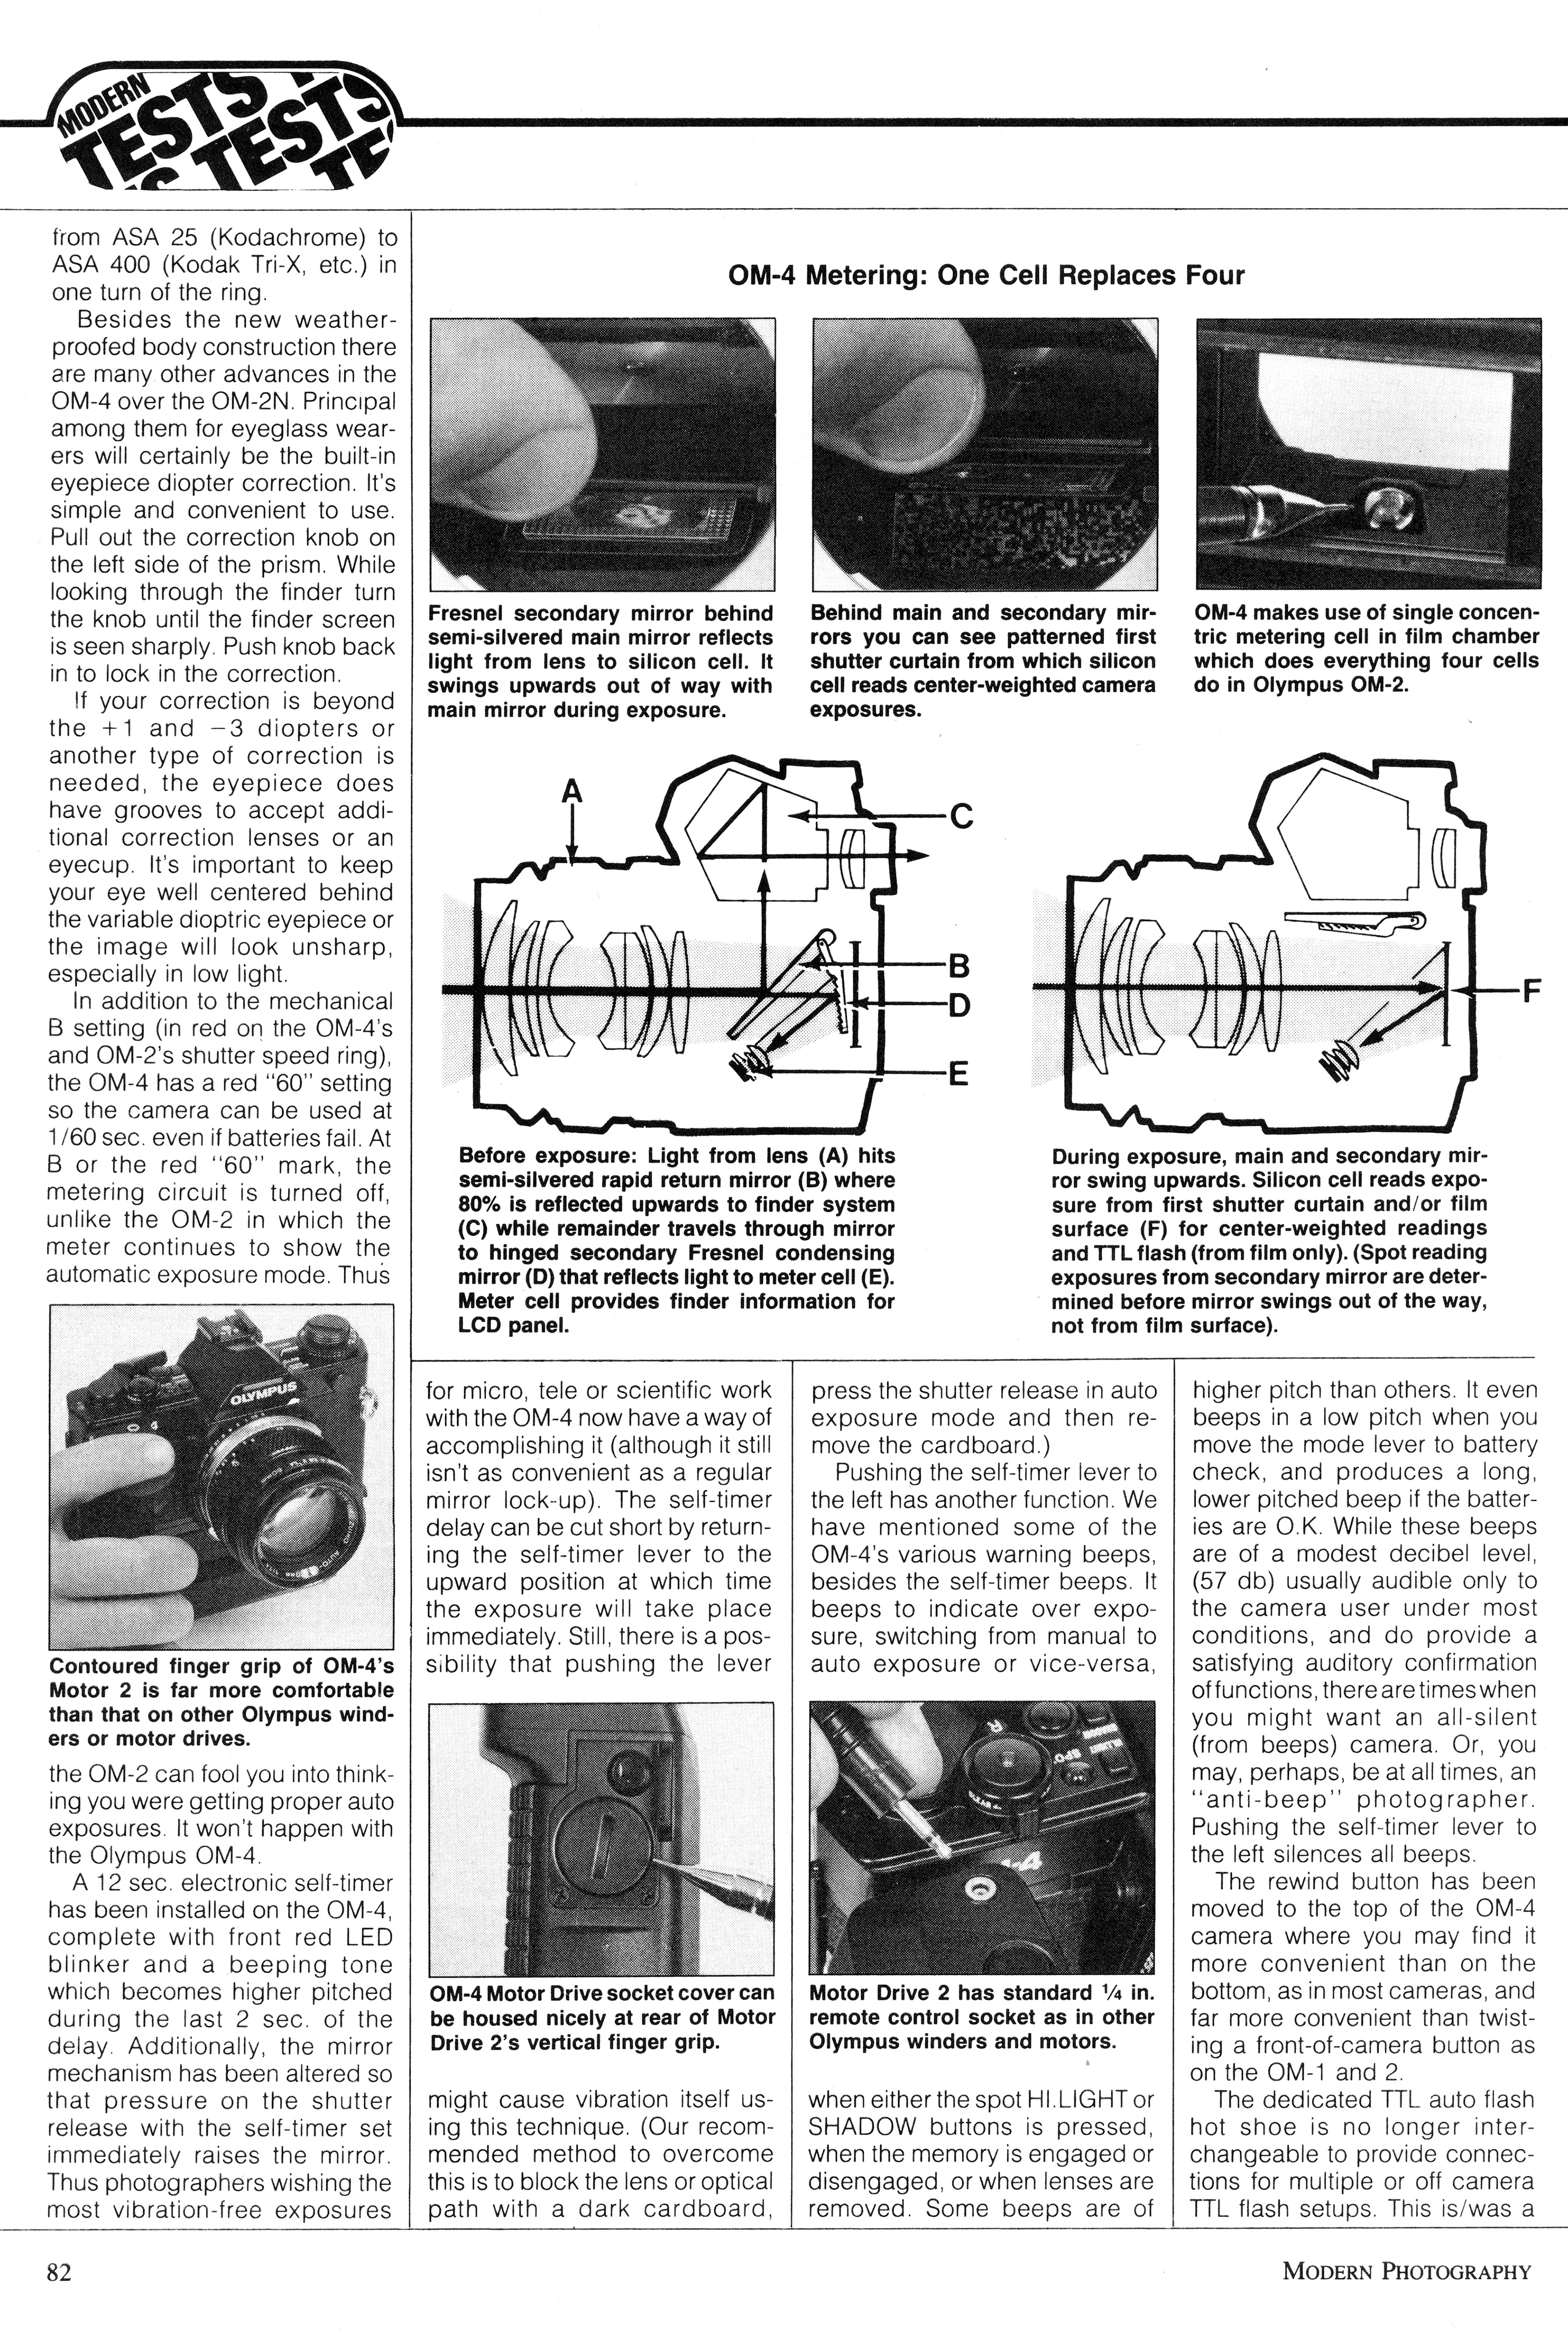
The Olympus OM-2 followed it 2 years later and was the automatic version of the OM-1 with a fully electronic shutter. It carried over most of the features that made the OM-1 great like it’s compact size, quiet shutter, and compatibility with all OM series lenses and accessories. The OM-2 had aperture priority auto exposure with TTL flash exposure metering. Instead of a traditional CdS meter, it used twin silicon blue cell (SBC) meters which took a reading by measuring reflected light off the film itself at the exact moment of exposure. Combined with a randomized white checkerboard pattern on the back of the first shutter curtain, the meter would detect light reflecting off the curtain using shutter speeds slower than 1/60th of a second before the exposure is made, and then on the film itself after 1/60th of a second. I won’t pretend to fully understand how it worked, but if you’d like a more technical explanation, MIR has a pretty good write up with some illustrations that explain it better than I could. Despite all of these advancements, the OM-2’s body weight increased by less than 10 grams compared to the OM-1.
The OM-2 would go on to be a tremendous success and spawned several different variations that were in production for well over a decade after it’s release. The OM-2 represented a tremendous value for the amateur photographer wanting a step up in features, without the large price tag (or size) of a pro camera like the Nikon F2 or Canon F-1, so when it came time to replace it, Olympus knew they had very large shoes to fill.
With their new model, Olympus made it a priority to not only build on what was good about the OM-2, but improve the feature set to include new technologies and new features that photographers didn’t yet know they needed. Using dual Silicon Photo Diodes that can make a reading off the film plane like the OM-2. the new camera was upgraded with several new exposure modes, including a multi-point spot meter that could take up to 8 different spot readings in different parts of the same image.
The shutter would be upgraded to have a new top speed of 1/2000th of a second, the viewfinder would receive a state of the art LCD display that provided full information about the operation of the camera, and the body was upgraded to be fully shock and weather resistant.
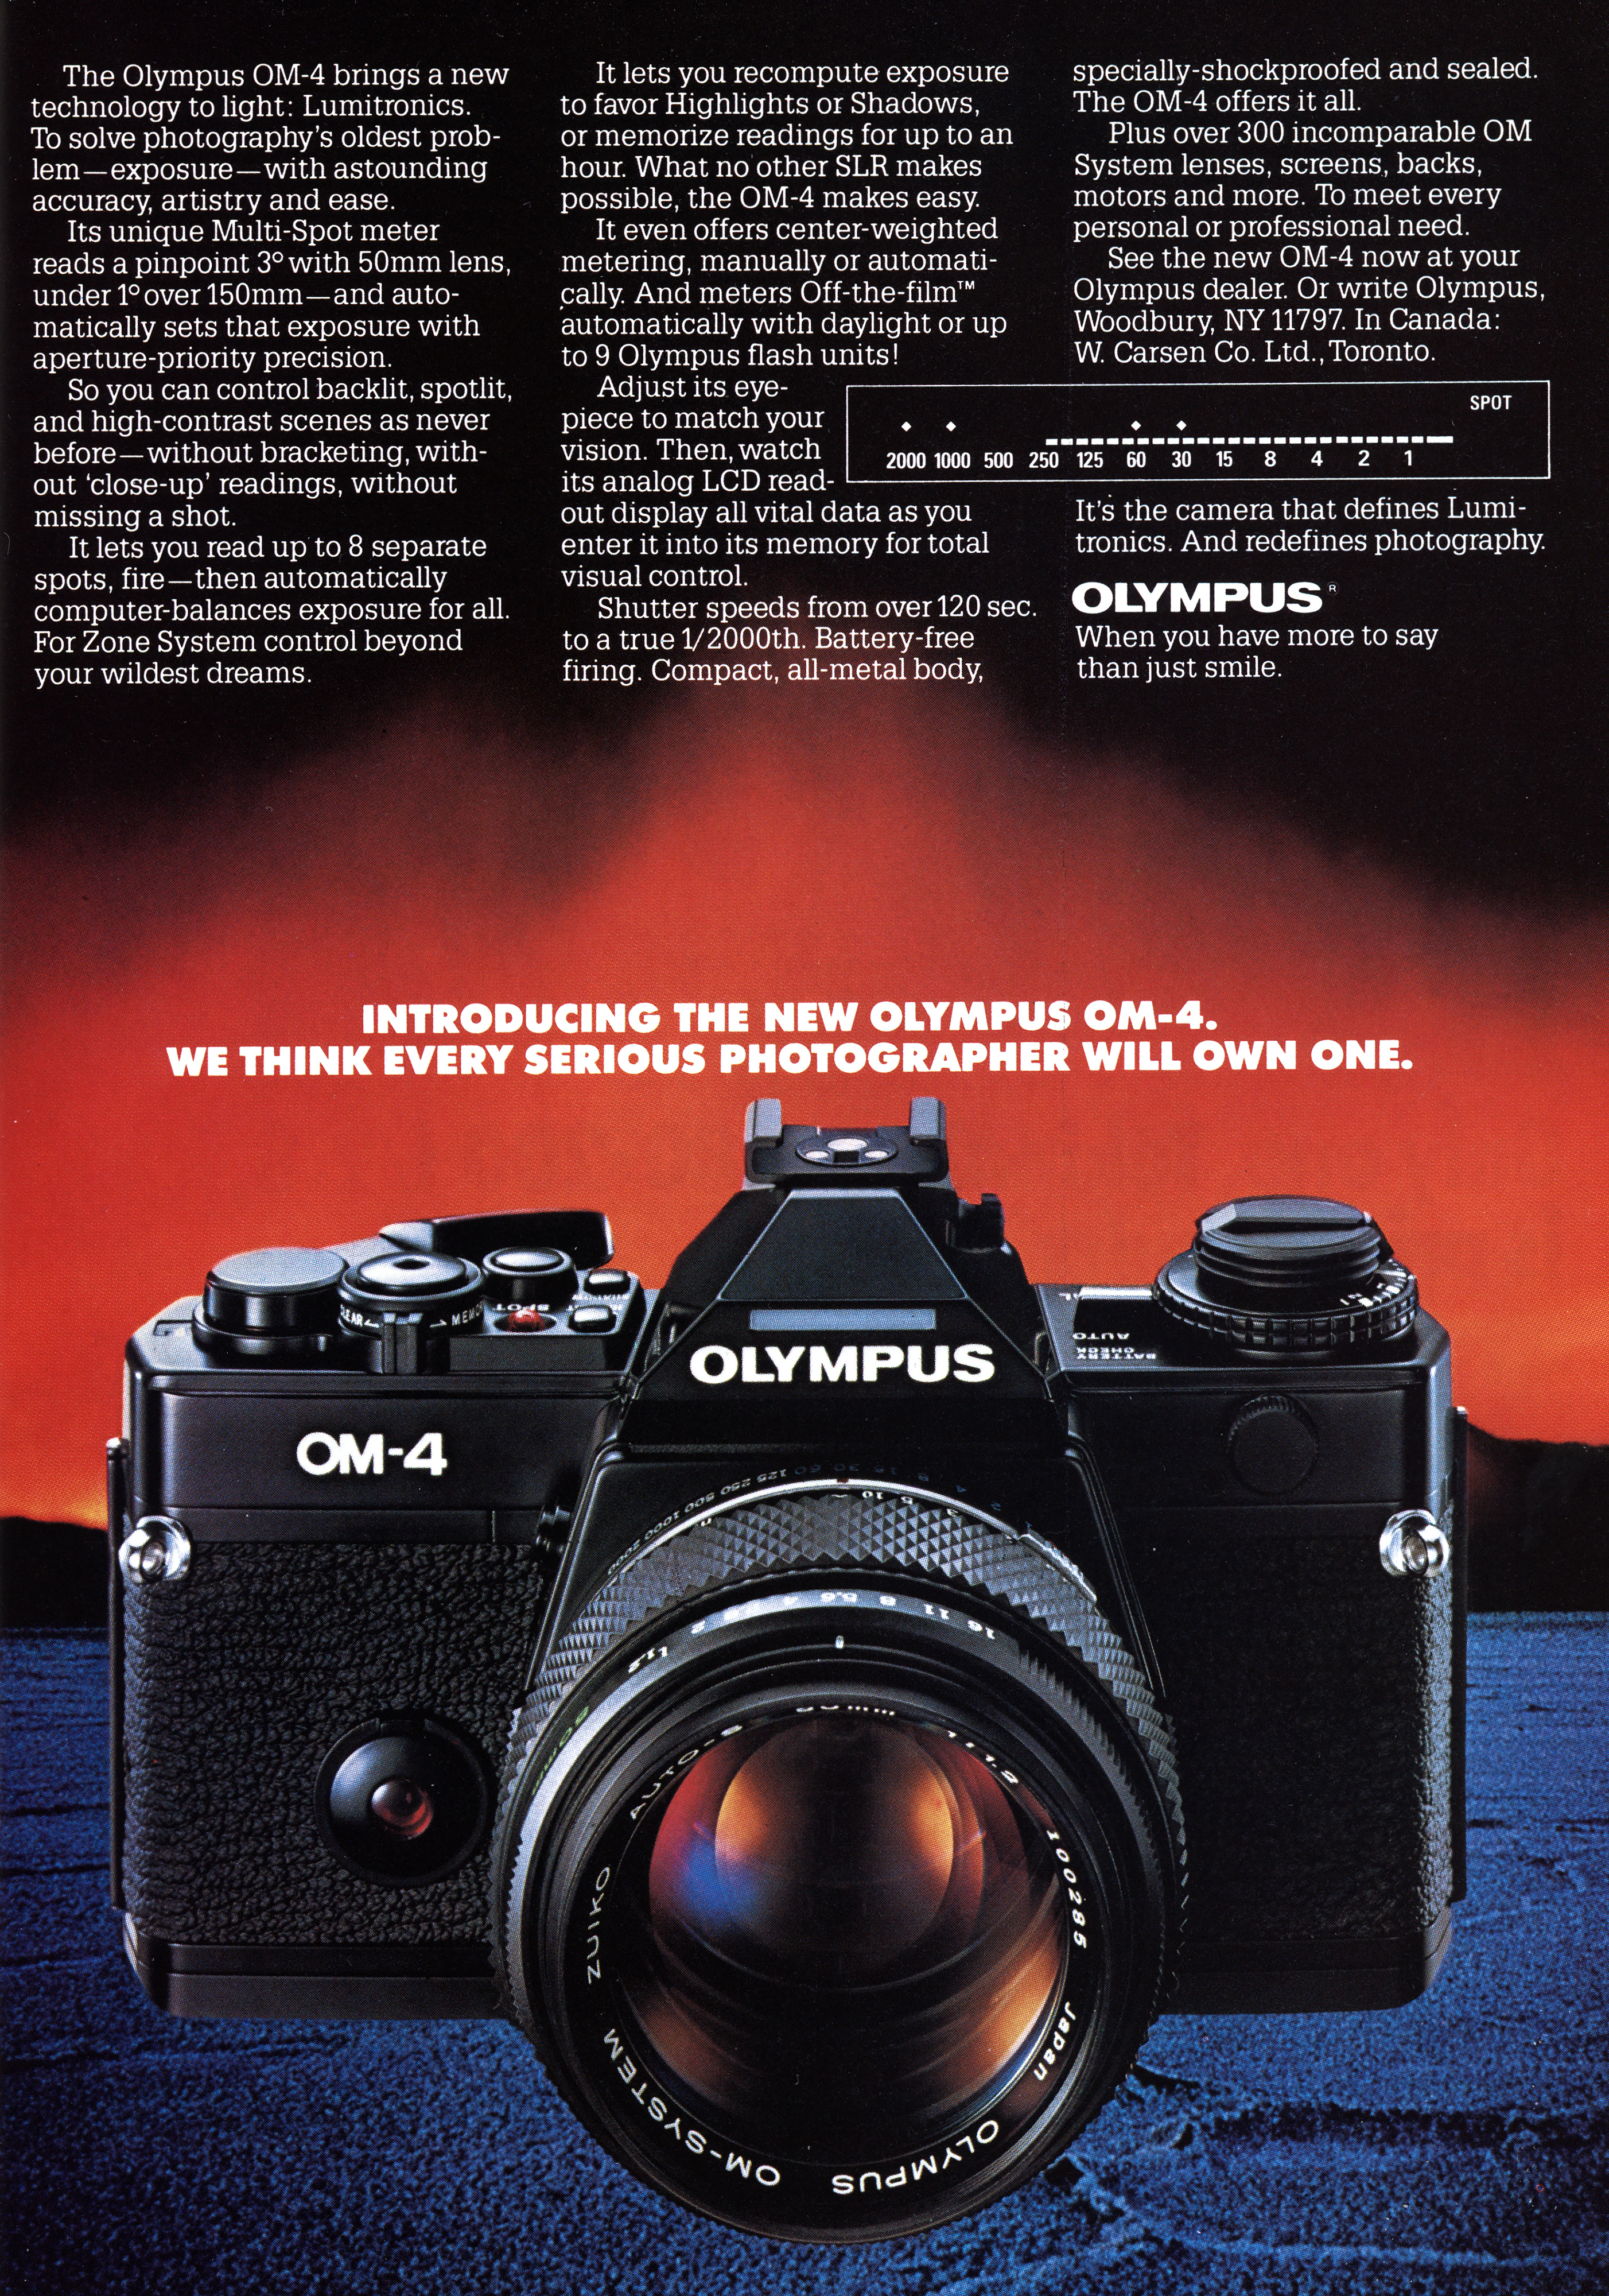
The Olympus OM-4 would make it’s debut in 1983 to critical acclaim. I couldn’t find any information about it’s original MSRP, but advertisements from the same period suggest it sold in April 1984 with a 50mm f/1.8 Zuiko lens for $425 which when adjusted for inflation is comparable to about $1050 today.
Edit: Shortly after publishing this article, I found MSRP prices for the OM-4. With an 50mm f/1.4 Zuiko lens, the OM-4 retailed for $855, with 50mm f/1.8 Zuiko lens, $785, and body only, $685. These are considerably higher than the street prices I found in photo catalogs of the era, but that was quite normal back then.
Upon it’s release, Olympus was proud of their new camera, and rightfully so. This was their flagship model. One that included the entirety of the technological prowess that the company had developed over the past decades into a single model. Upon it’s release, Olympus put a considerable amount of effort into promoting their new flagship. Below is a 44 page brochure created by Olympus for the OM-4 covering a wide array of promotional information about the camera. If you’d rather download it to your computer, click here.
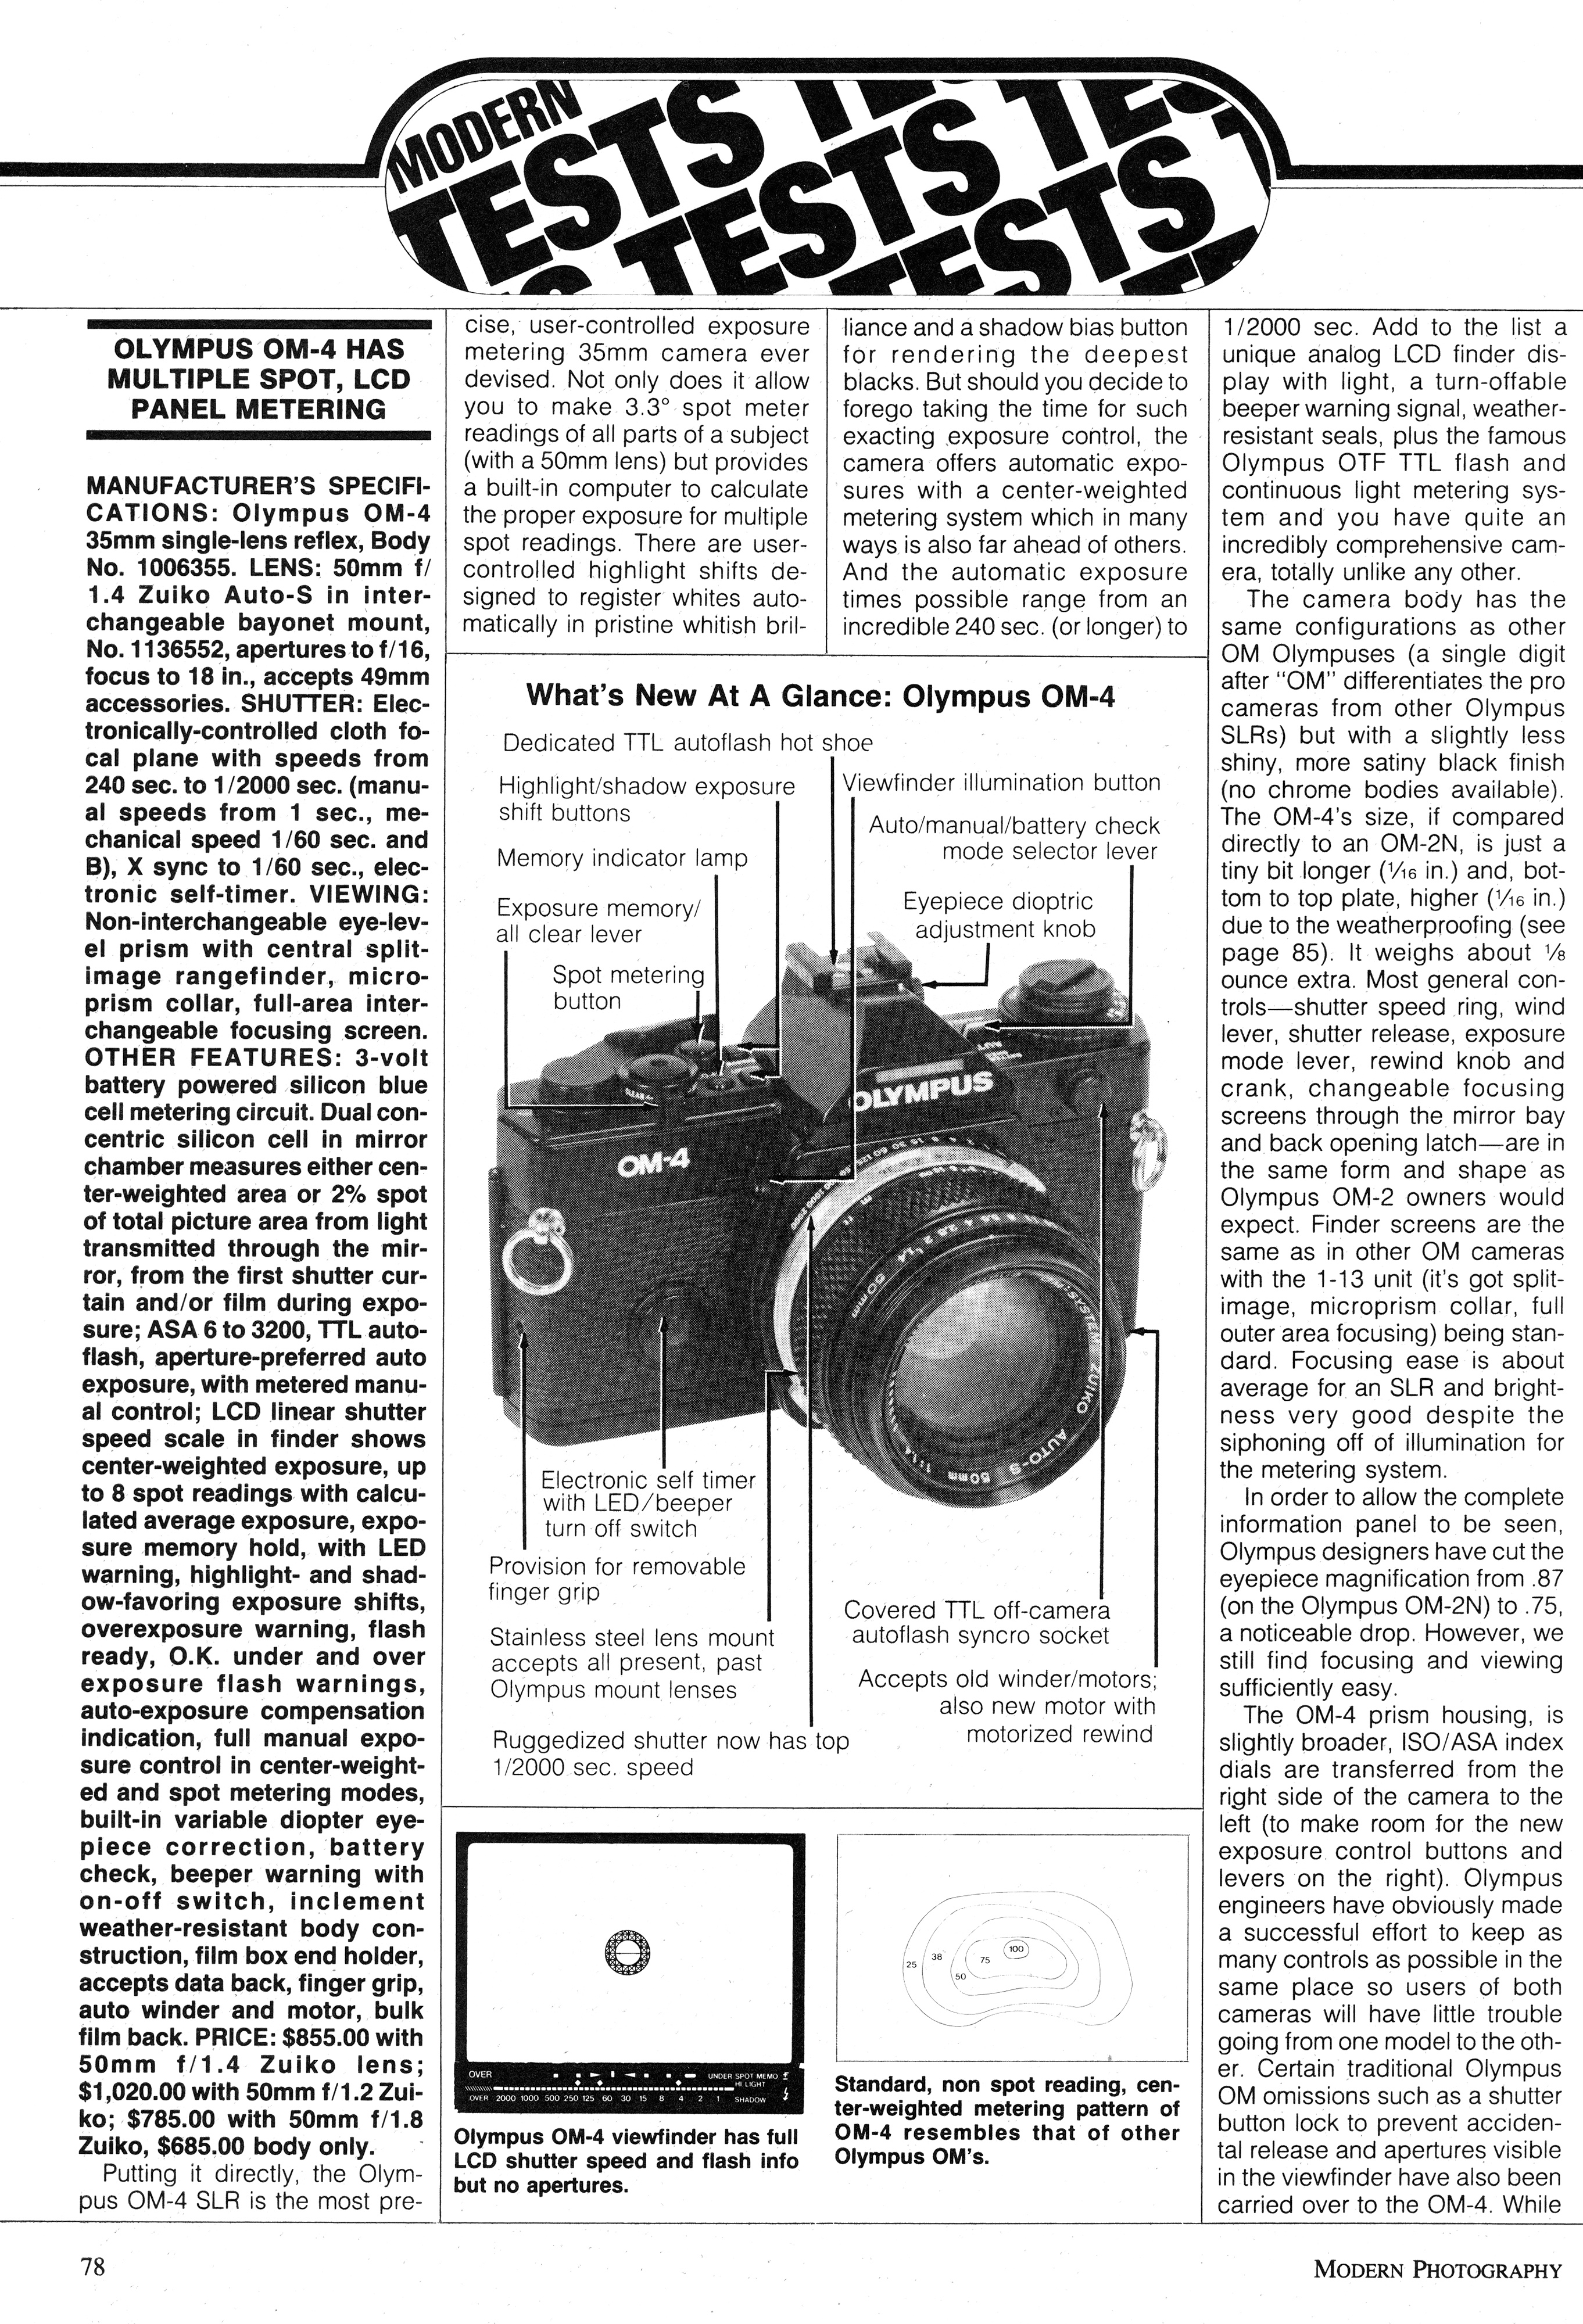
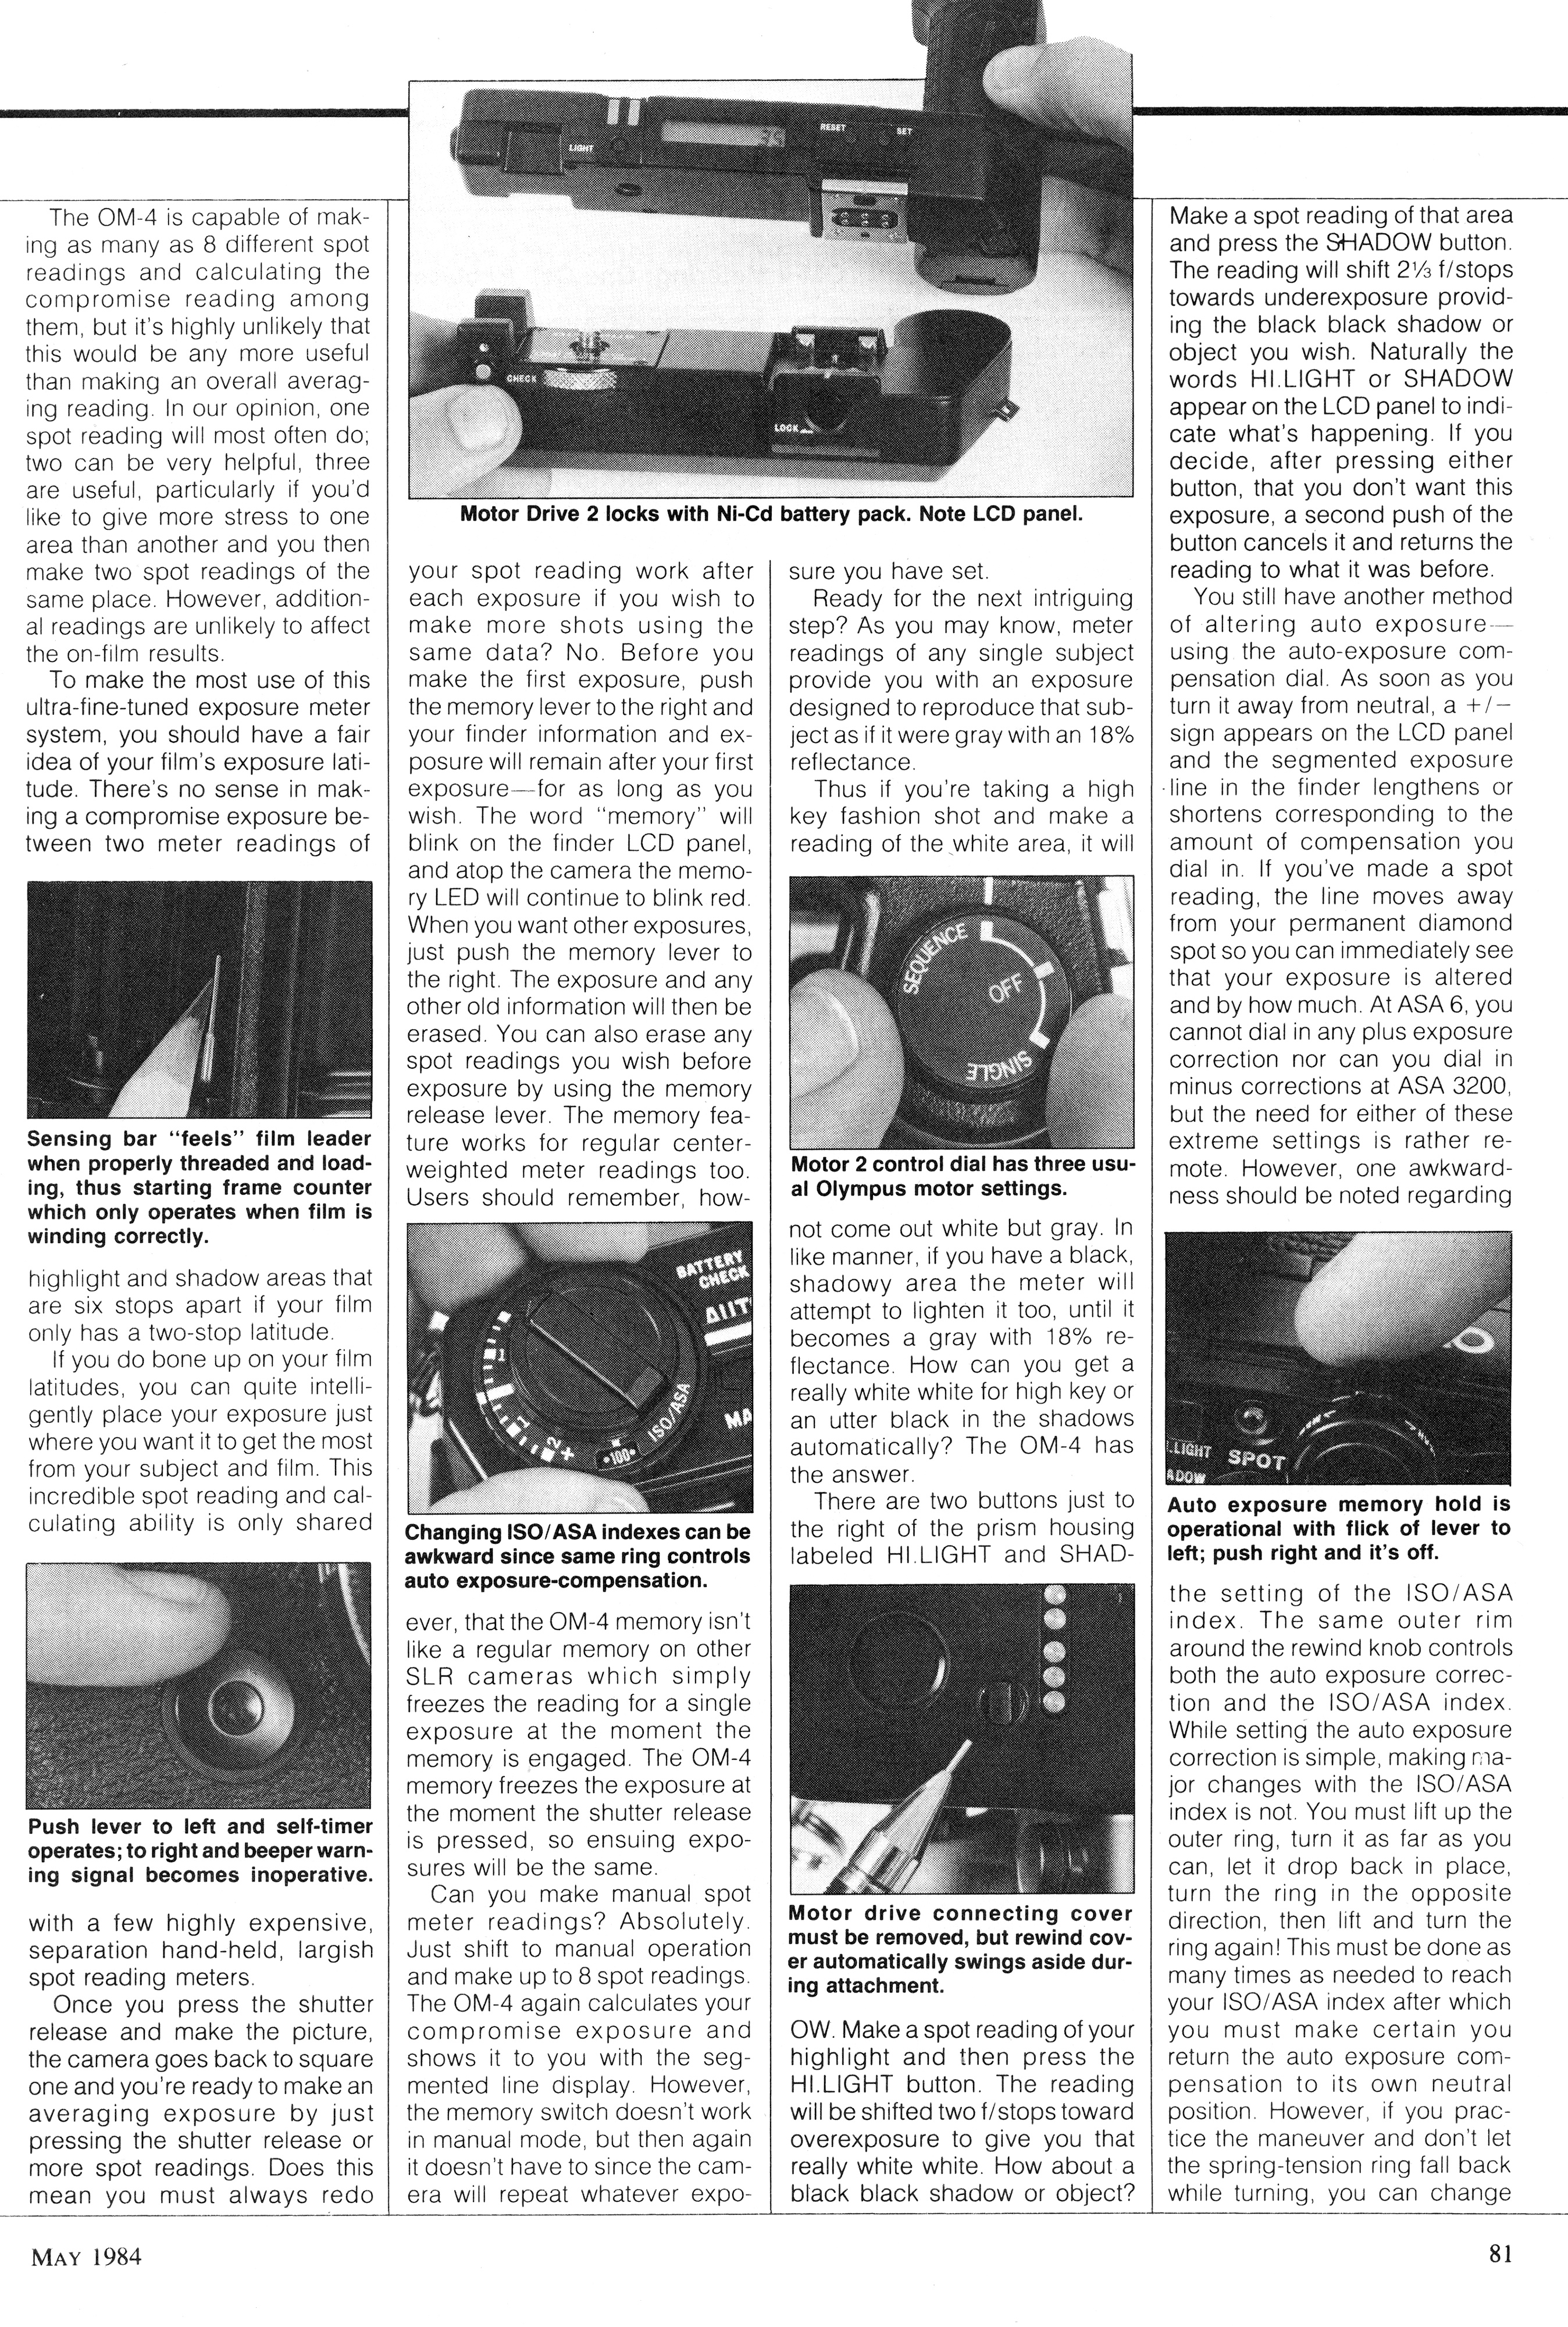
Photography magazines were excited about the OM-4 as well, and in May 1984, Modern Photography did an in depth analysis of the camera, publishing this 9 page review.


The OM-4 would be upgraded in 1987 as the OM-4Ti and would receive titanium top and bottom plates, additional weatherproofing upgrades, improved electronics, and a mode that when used with the Olympus F280 flash, offered flash synchronization all the way to the camera’s top 1/2000 shutter speed. This Titanium model would remain in production into the 21st century and would not finally be discontinued until 2002, making it one of the longest lived 35mm SLRs ever made by any company.
Today, the Olympus OM-4 (and the OM-4Ti) remain one of the most desirable 35mm SLRs out there. Their value isn’t quite as high as that of a rarer camera like a Zeiss Contarex, but that in no way shape or form suggests the OM-4 isn’t still a viable model for anyone interested in photography. They’re certainly not the cheapest to find on the used market, but considering the model was available for nearly 20 years, a ton of them are out there. In addition, unlike other electronic SLRs of the 80s and 90s which have not aged well, OM-4s seem to have dodged the “electronic gremlin bullet” as many are still found in good working condition today. This was a highly desirable camera back in 1983, and it still is today.
My Thoughts
In my collection, I currently have three Olympus OM-series SLRs, an OM-10, OM-2, and this OM-4. Of those three cameras, the OM-10 is the one I paid the most for, a princely sum of $10. As luck would have it, I’ve been fortunate to stumble upon bargain basement prices for the other two as they were both sold in non-working condition without lenses. In both cases, a gentle wipe down of the body and fresh batteries were all that was needed to “revive” both cameras.
I was quite fond of the OM-2, but strangely it never saw another roll of film after my review from February 2017. When I picked up the OM-4, I felt that I owed it a bit more of my attention. After all, isn’t the OM-4 supposed to be an improved version of the OM-2, an already excellent camera? Since shooting that OM-2, I had picked up an Olympus G.Zuiko 35mm f/2.8 lens, and having a preference for semi-wide angle lenses over 50mm primes, I mounted it to the OM-4 for it’s inaugural roll.
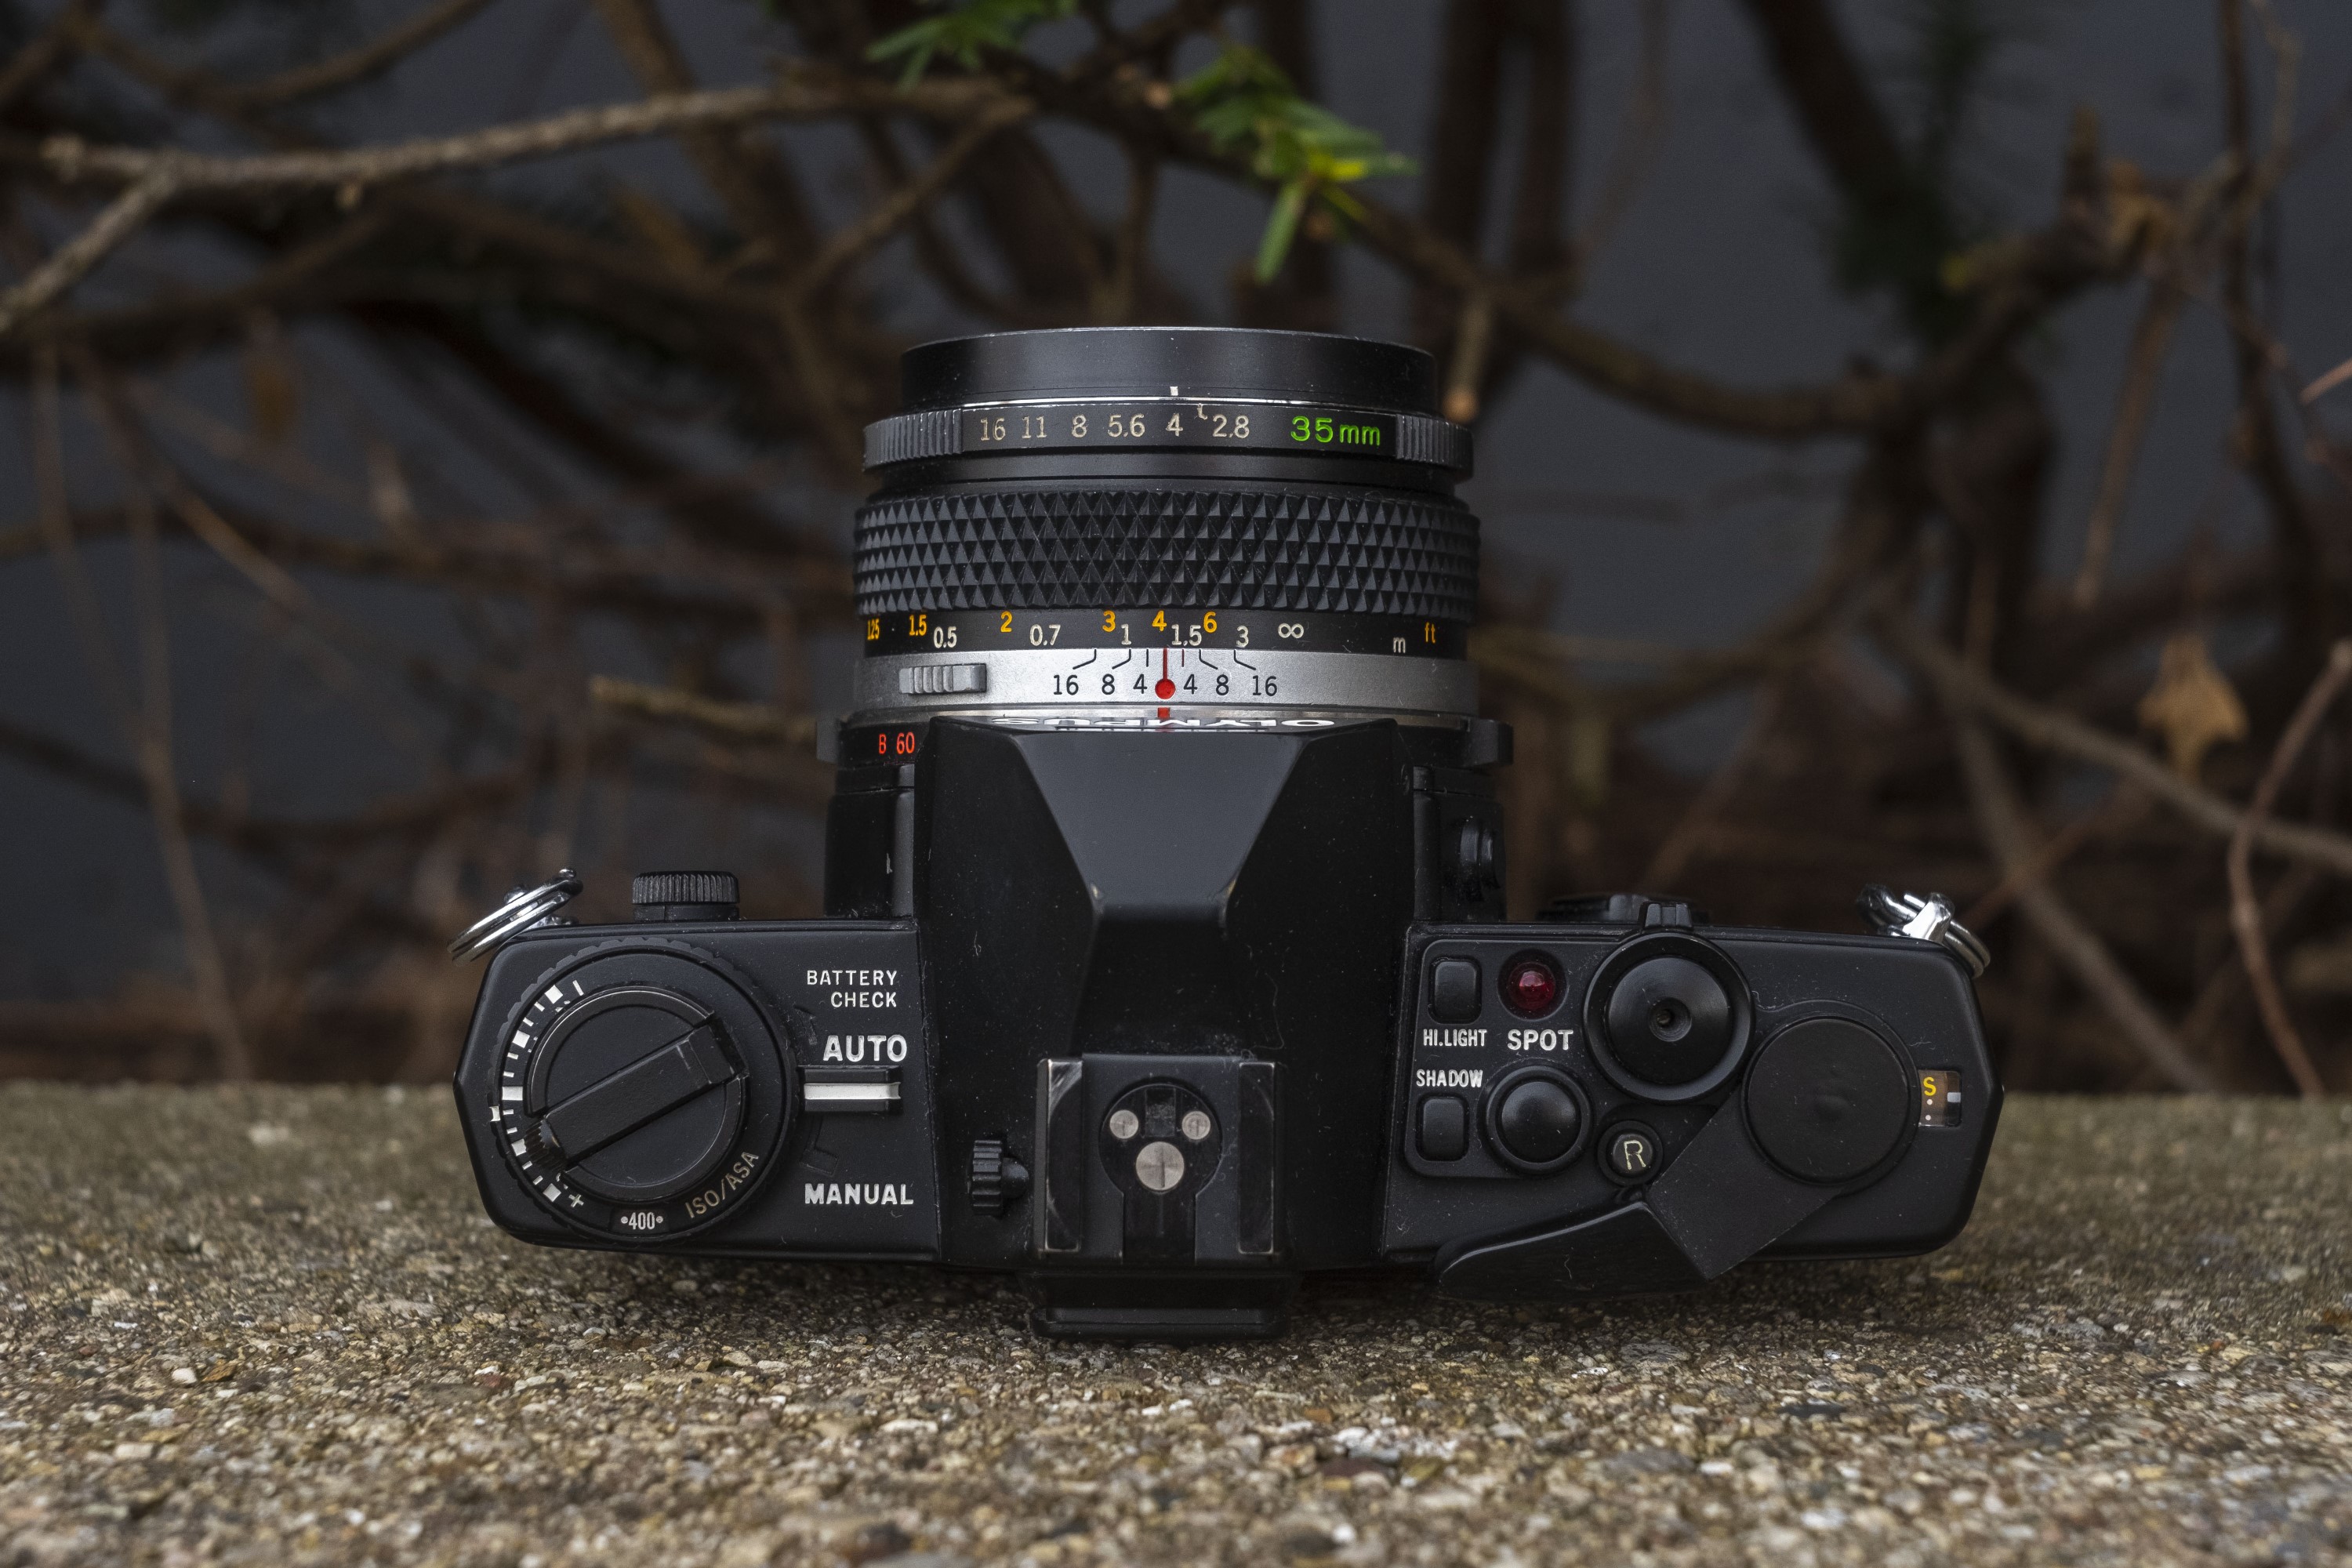
Consistent with all cameras in the Olympus OM-series, there is no shutter speed selector on the top plate. Like the Nikkormat, the shutter speed selector is a ring around the perimeter of the lens mount. This location is a point of much debate among photographers who find it’s location to be limiting, as it’s pressed so closely to the body of the camera. I commented in my OM-2 review that it caused me to fumble around when trying to change shutter speeds, but this is something that over time, I have grown accustomed to, and while shooting the OM-4, I didn’t find it to be as bothersome as I remember with that OM-2.
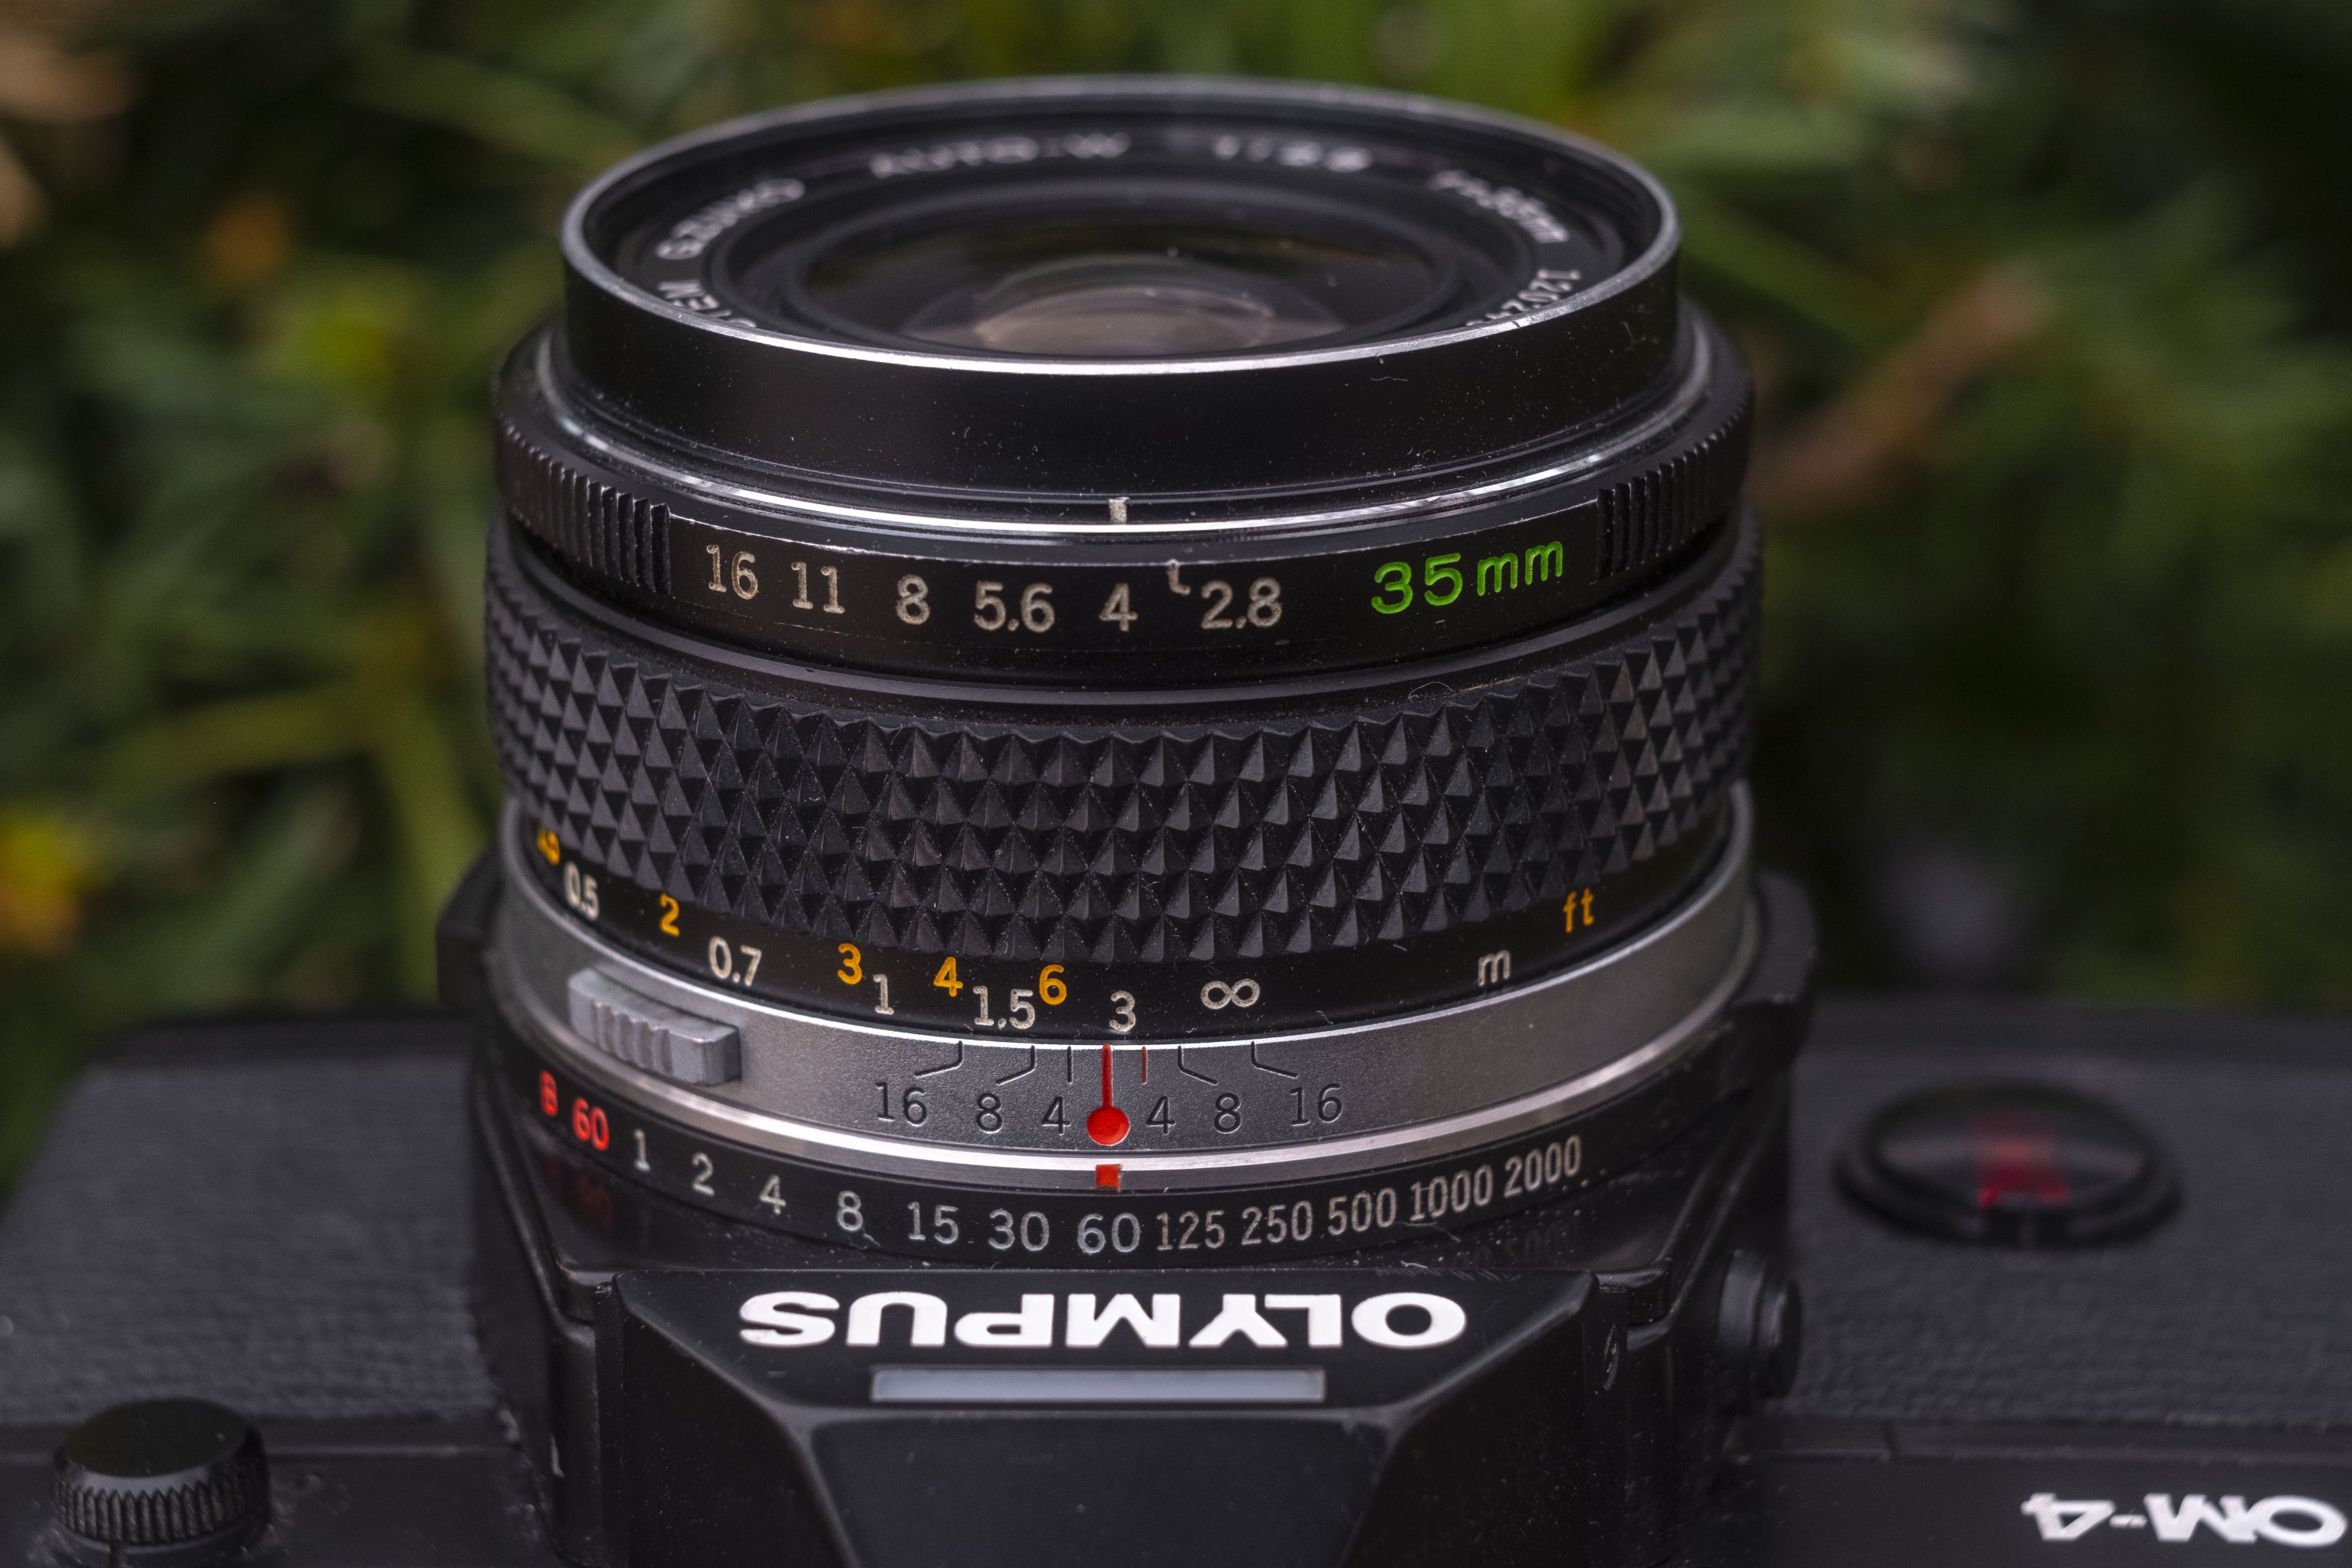
The theory behind this location is that all three critical controls of the camera, shutter speed, aperture, and focus, are all in the same location, easily changed by the photographers left hand. This wasn’t obvious to me the first time I used an OM-series camera (or even the Nikkormat which is very similar), but it does make sense. Most cameras which have the shutter speed dial on the right side of the top plate, require the camera to be lowered from the eye, and the right hand positioned in a way to change the dial. This of course assumes that you change shutter speeds on the fly, which to be honest, most people don’t. The OM-4 uses aperture priority automatic exposure, which requires the photographer to more frequently change f/stops, and not shutter speeds.
The shutter on the OM-4 is electronically controlled, but will still fire at “B” and a specially marked 1/60th speed with a dead battery. This is not only useful because it allows the camera to still be used with a dead battery, but also allows for easy testing of the camera if you find one at a garage sale or thrift store and don’t have any batteries handy.
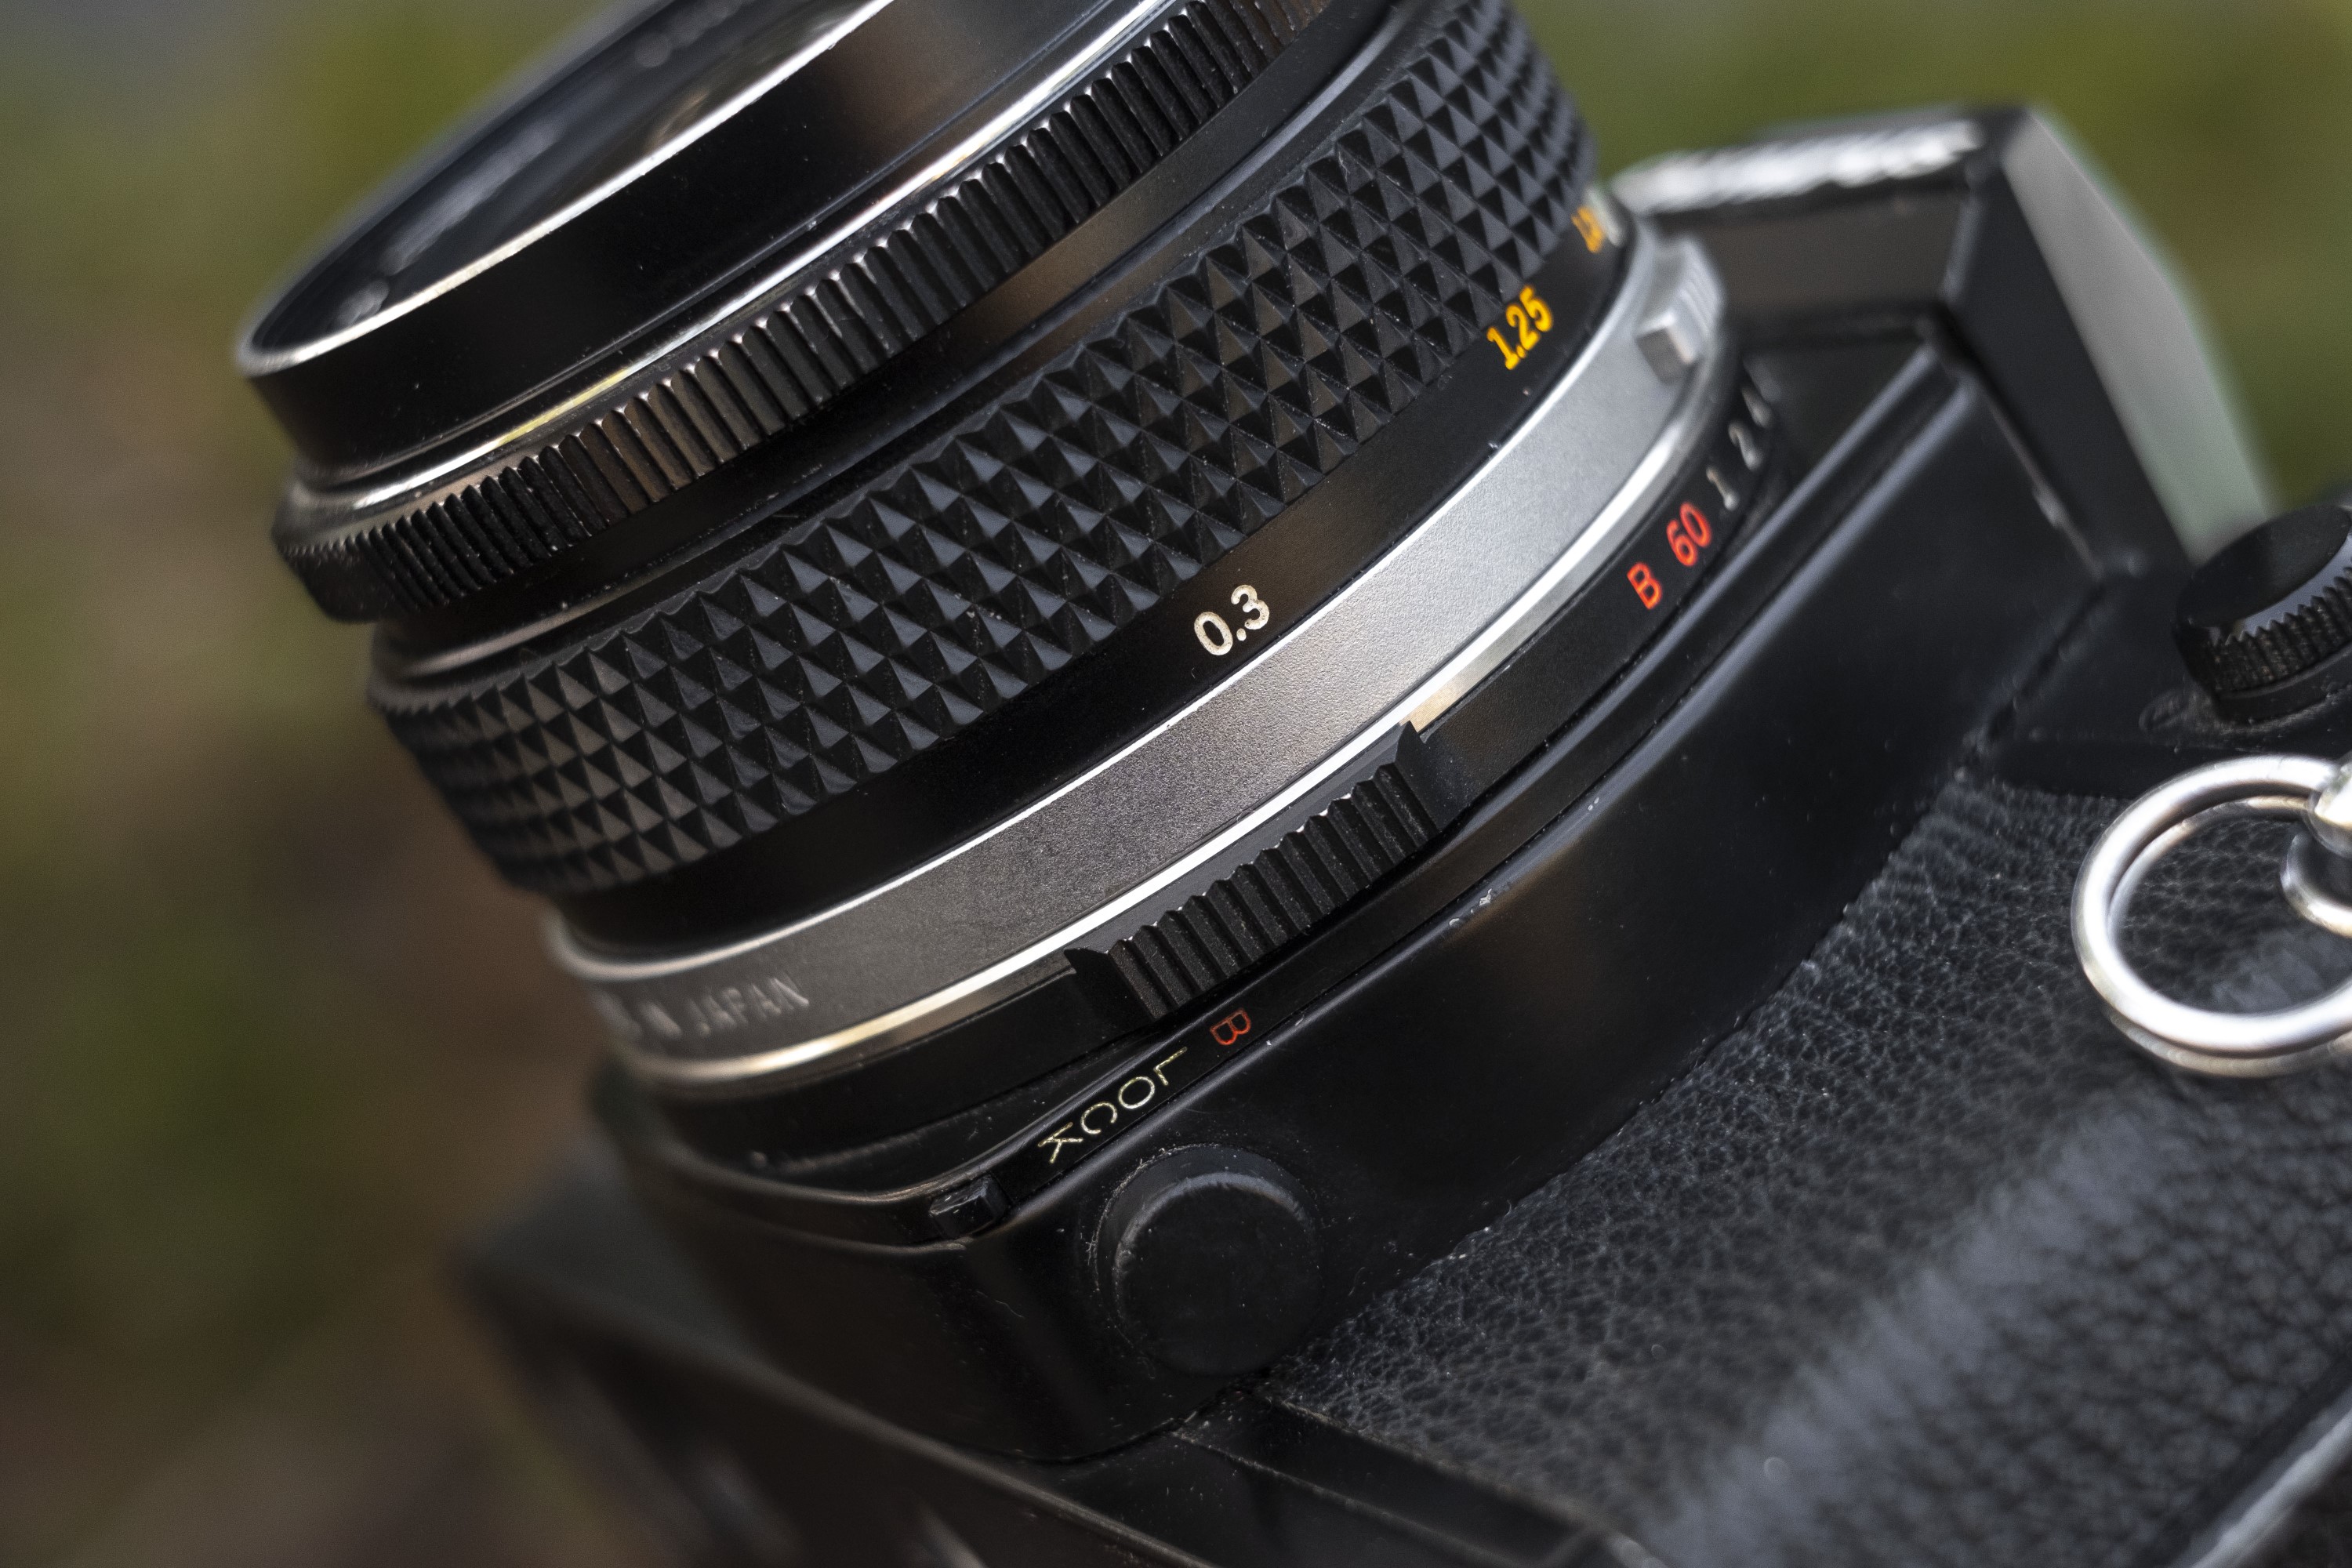
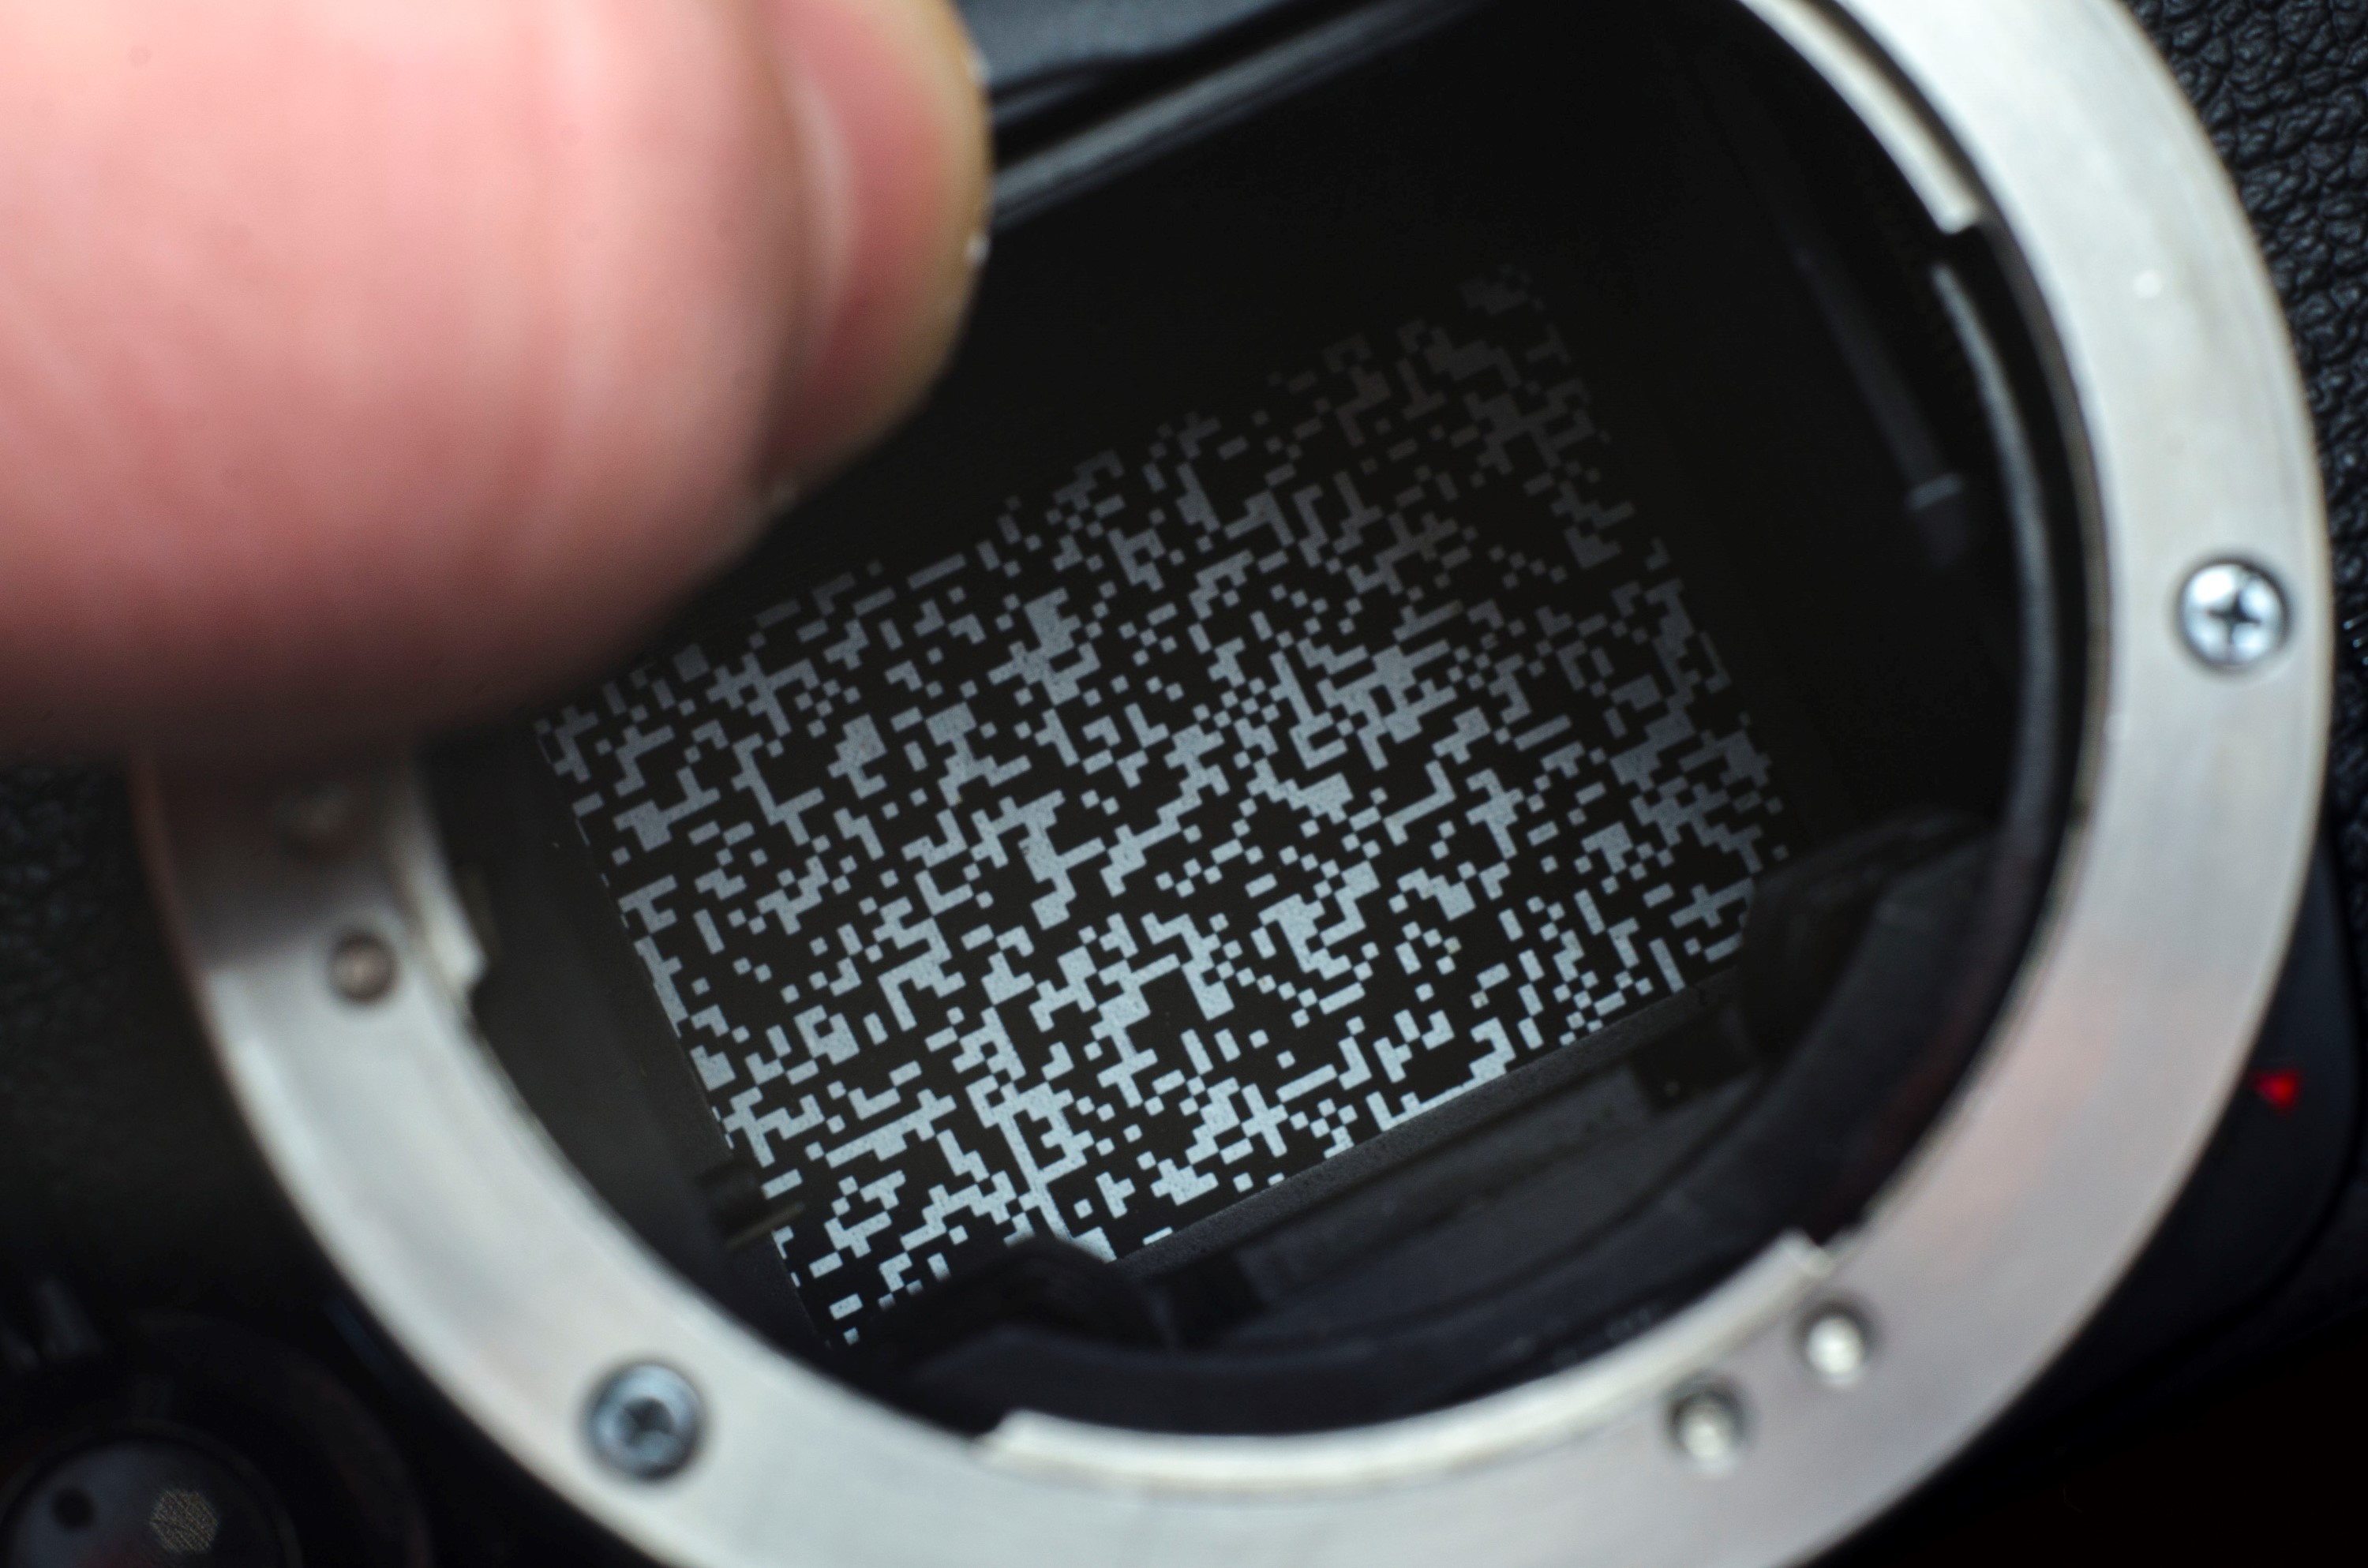
To engage both the “B” and 1/60th modes on the shutter speed dial (indicated in orange), you must first press the tiny rectangle “lock” button near the bottom of the shutter (it’s not that round thing, which is just a cover for the PC sync port). Do not try to force the shutter speed dial into either B or 60 without first pressing this button as you may damage the camera! With a dead battery, the mirror on the OM-4 (and the OM-2) will get stuck in the up position revealing the unique grid-like pattern on the back of the shutter curtain. If you ever encounter one of these cameras like this, try setting it to B or 60 which will cause the mirror to drop back into position.
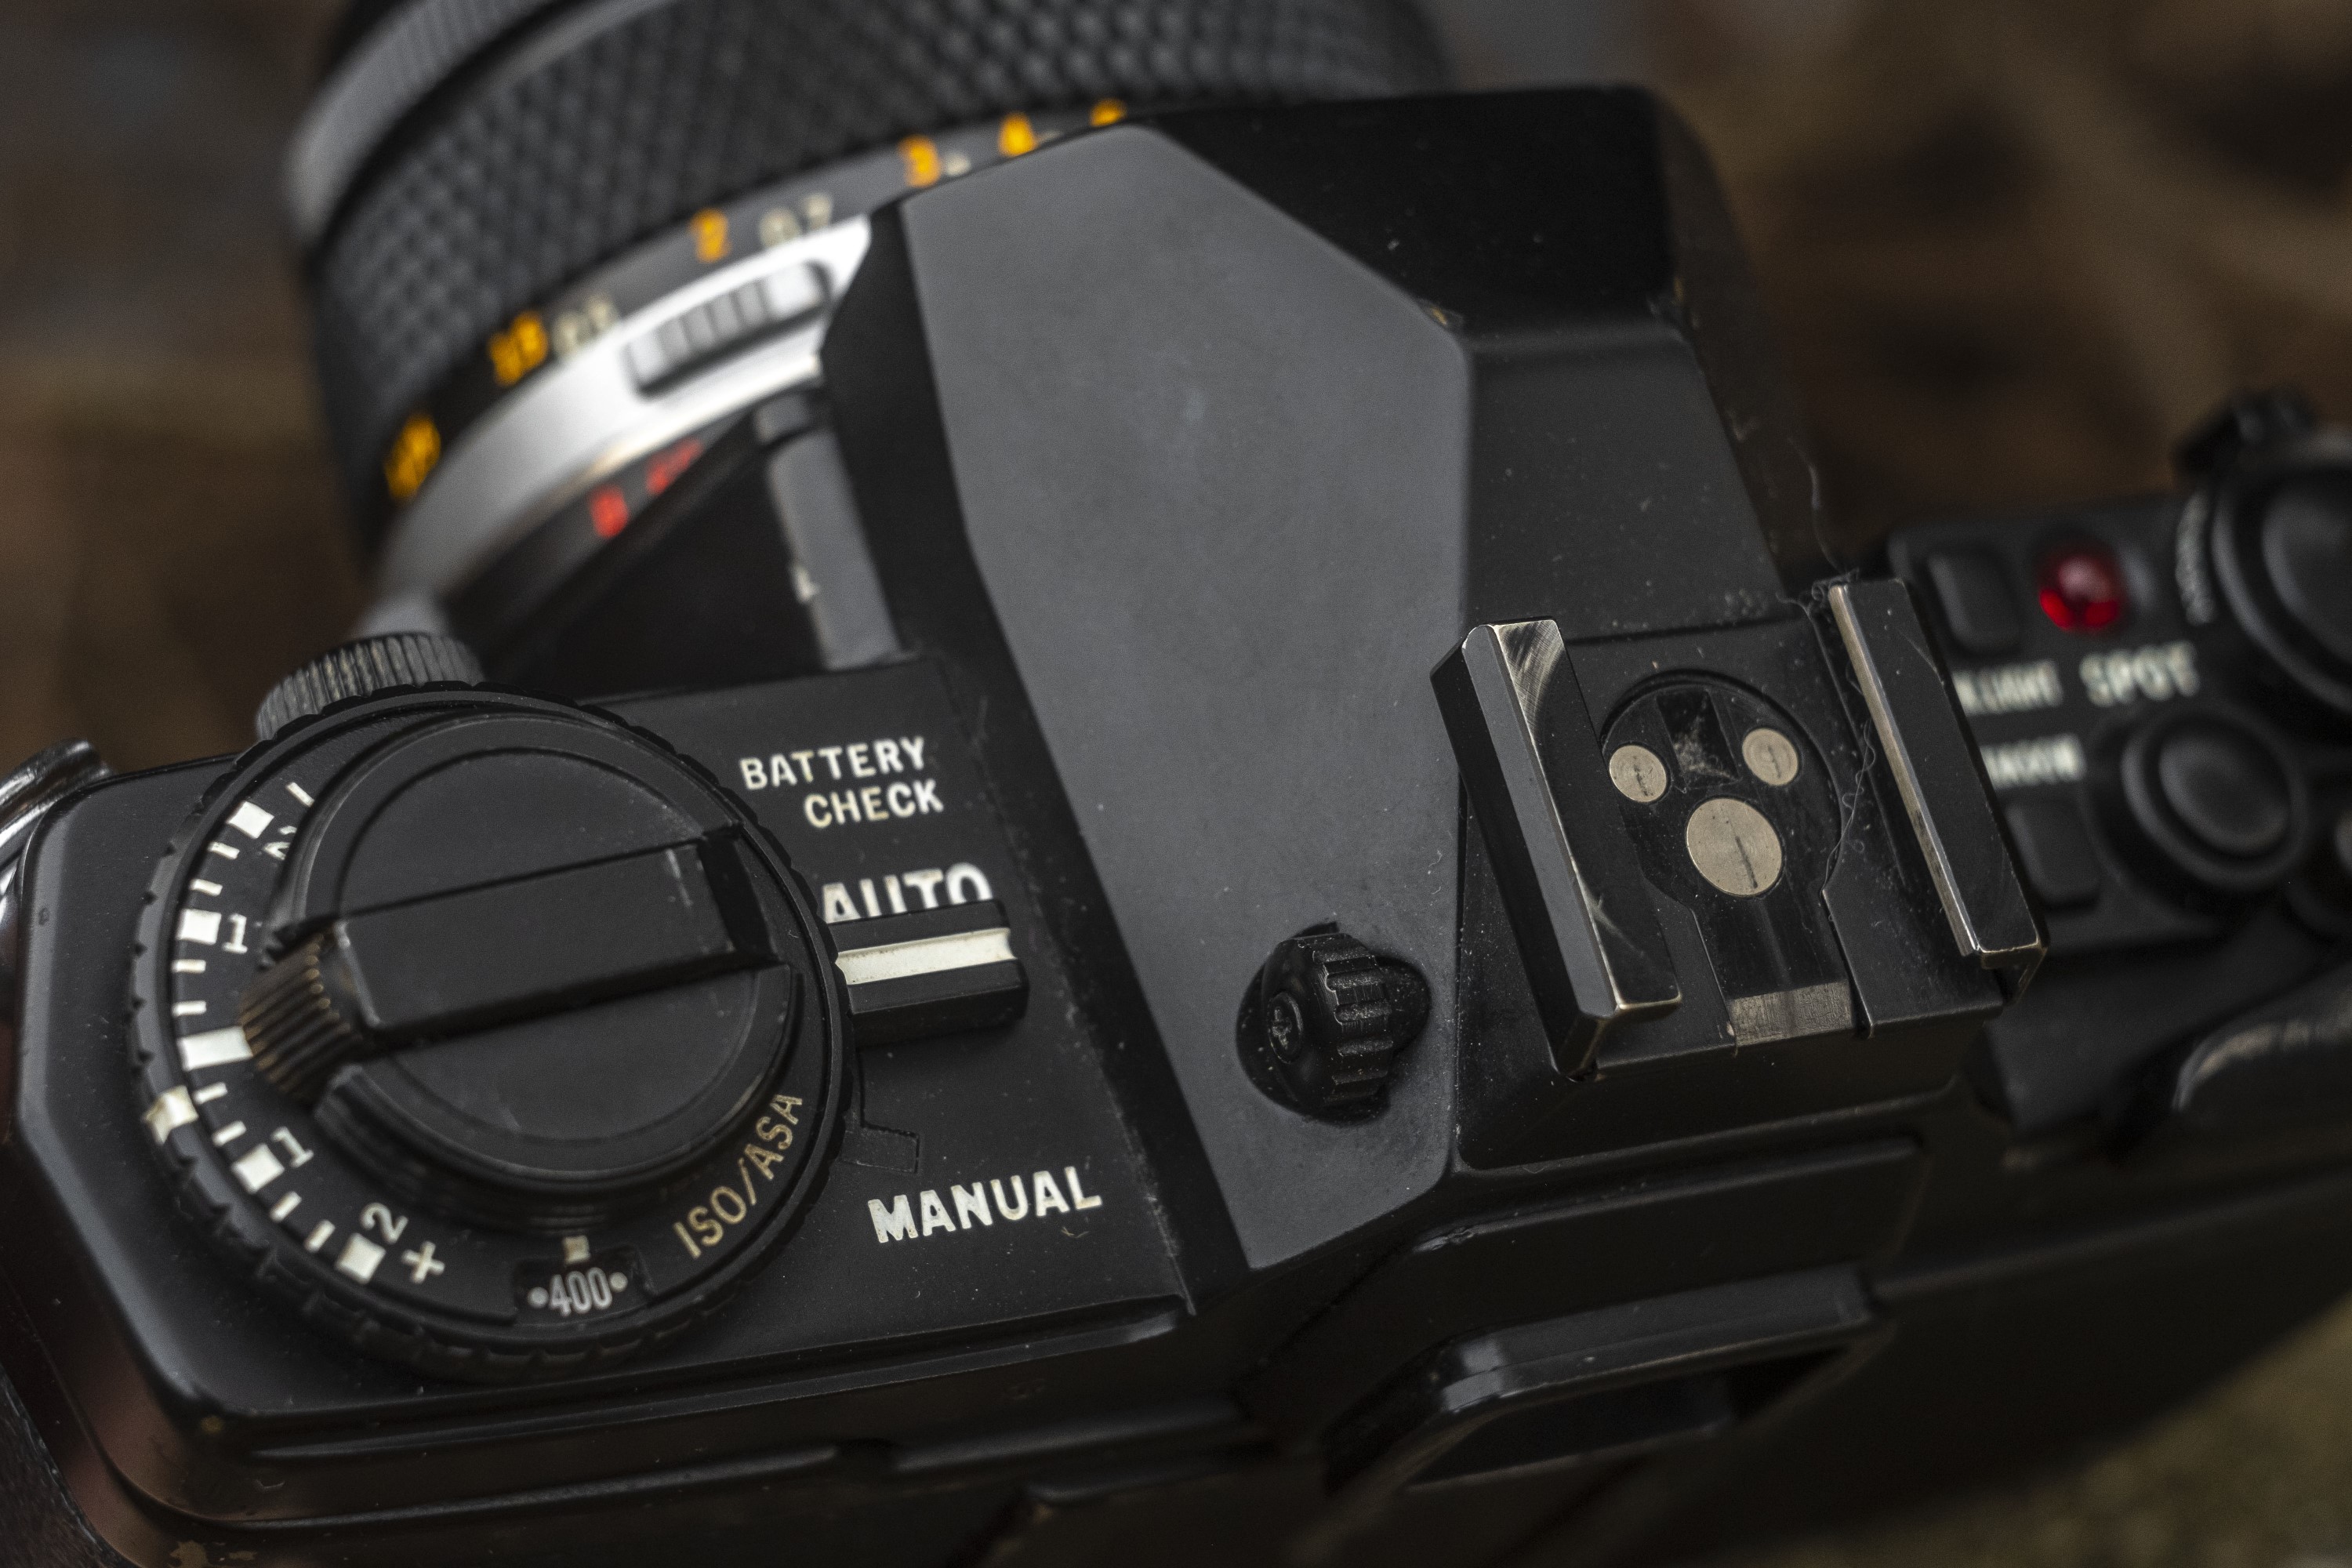
The rest of the top plate has from left to right the swing out rewind knob with a +2 / -2 exposure compensation dial around it, a lever for switching between auto exposure and manual mode, a clever diopter adjustment wheel on the side of the prism, and the flash hot shoe with synchronization contacts. On the other side of the prism is a button for spot metering, and two other buttons for highlight and shadow metering. Activating any of these specialized modes triggers an audible warning. A red LED is illuminated to indicate exposure memory control which is useful when needing to recompose your image after taking a reading. Around the shutter release is a ring that is used to erase any stored exposure readings in the camera’s memory, and to the right of the film advance lever is the automatic resetting exposure counter.
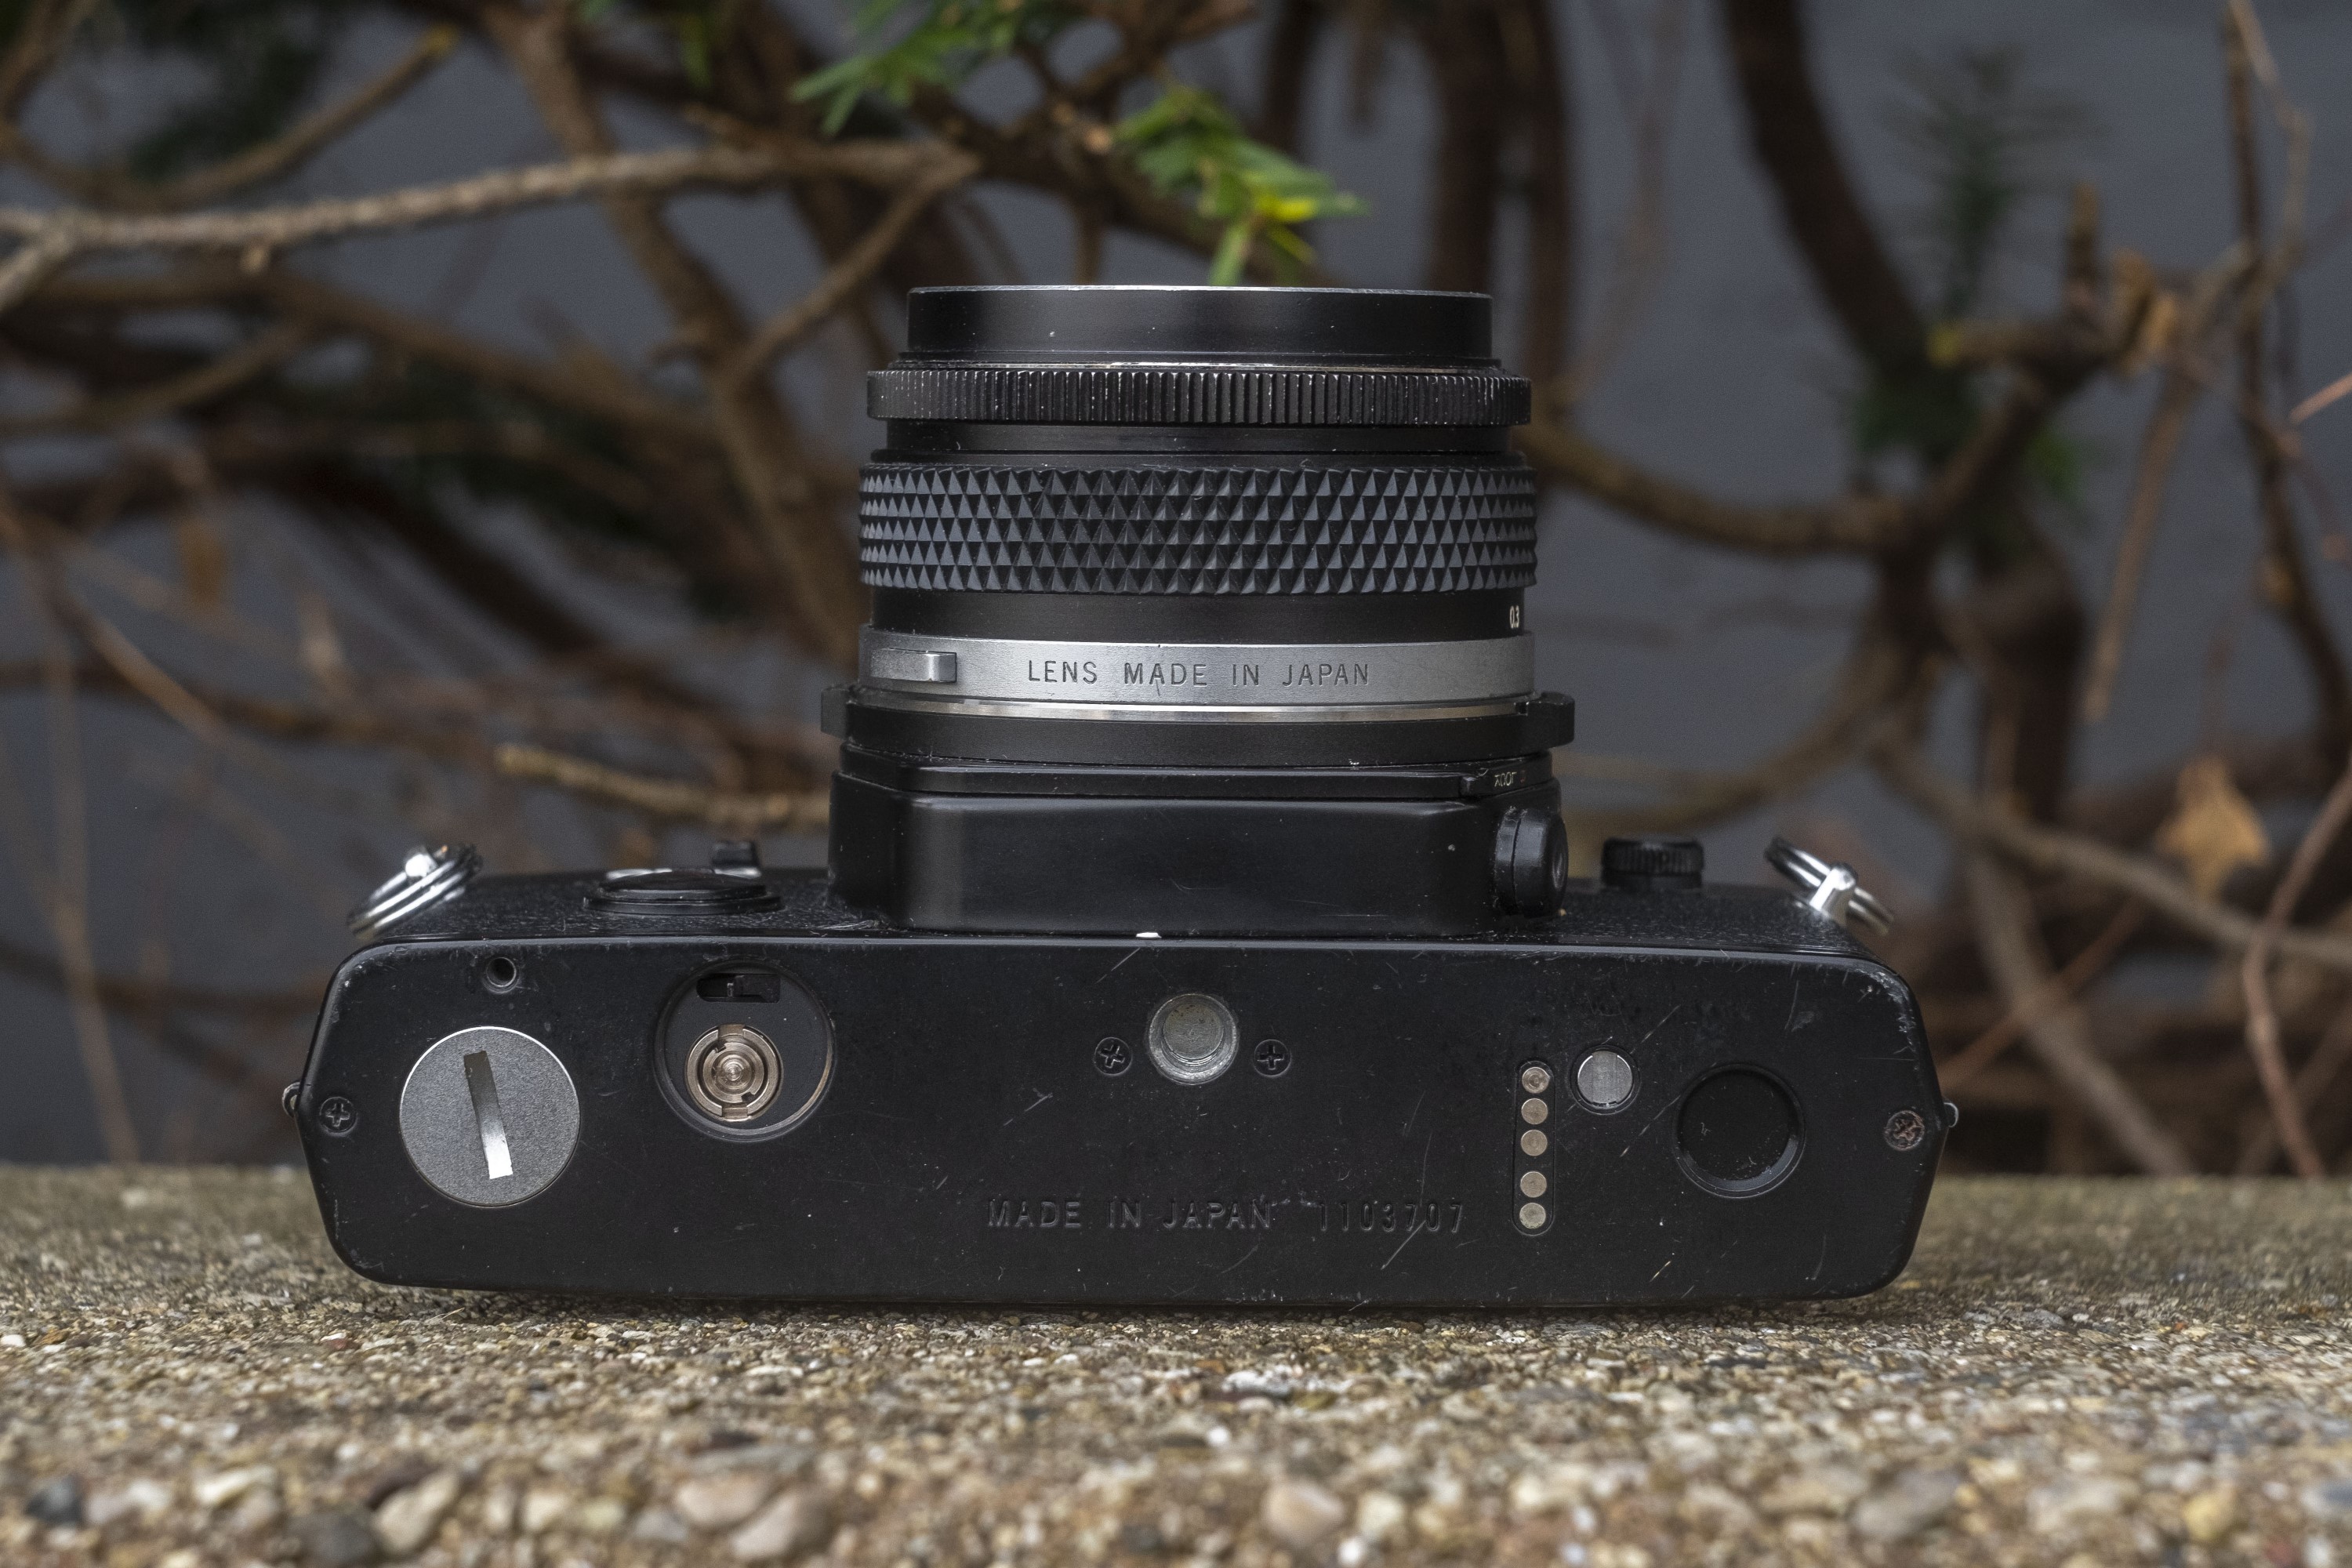
The bottom plate of the camera from left to right has the battery compartment for the two LR44 batteries, the connecting gear for the optional motor drive that was available, tripod socket, and electric connections for the motorized drive.
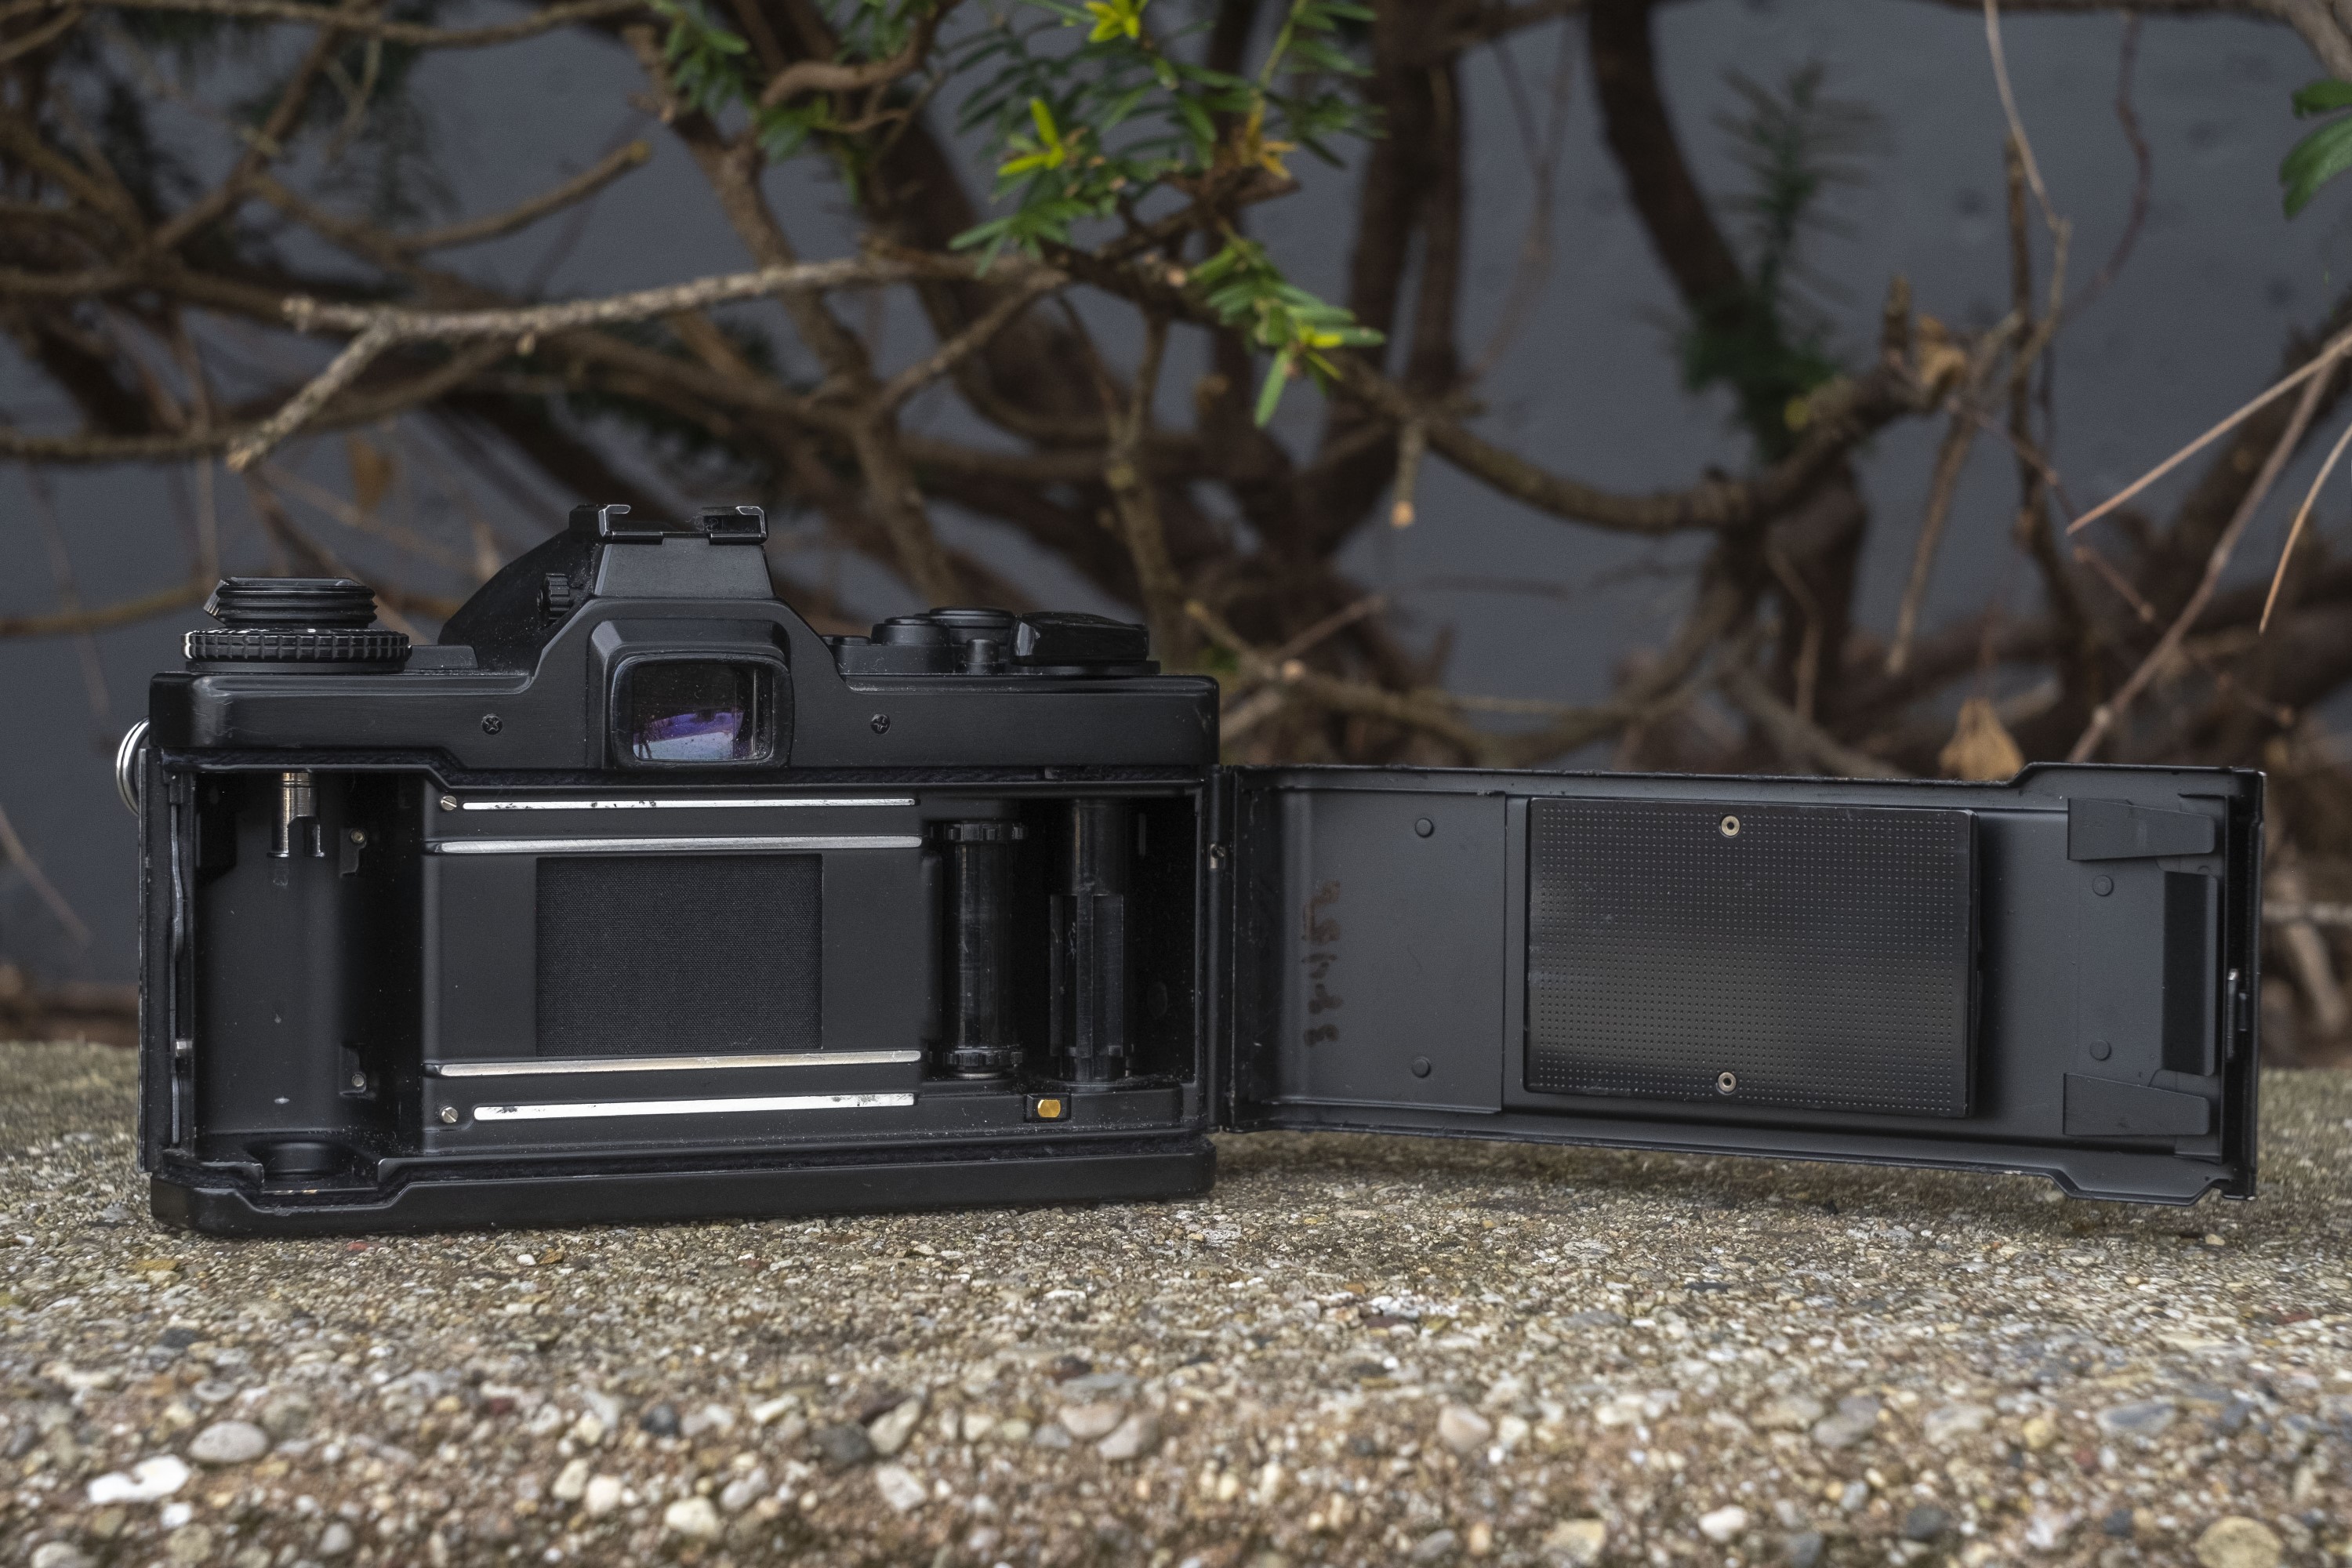
By the time the OM-4 was released, loading film into a 35mm camera was largely an established procedure. Gently tug up on the rewind crank to pop open the right hinged door. A new cassette loads on the left, with the leader stretched across the film plane and secured to the multi-slotted take up spool. There is no automated film loading procedure, so everything, including advancing the film to the first exposure is done manually. The film door is also removable, for installing an optional data back or a 250 exposure back.
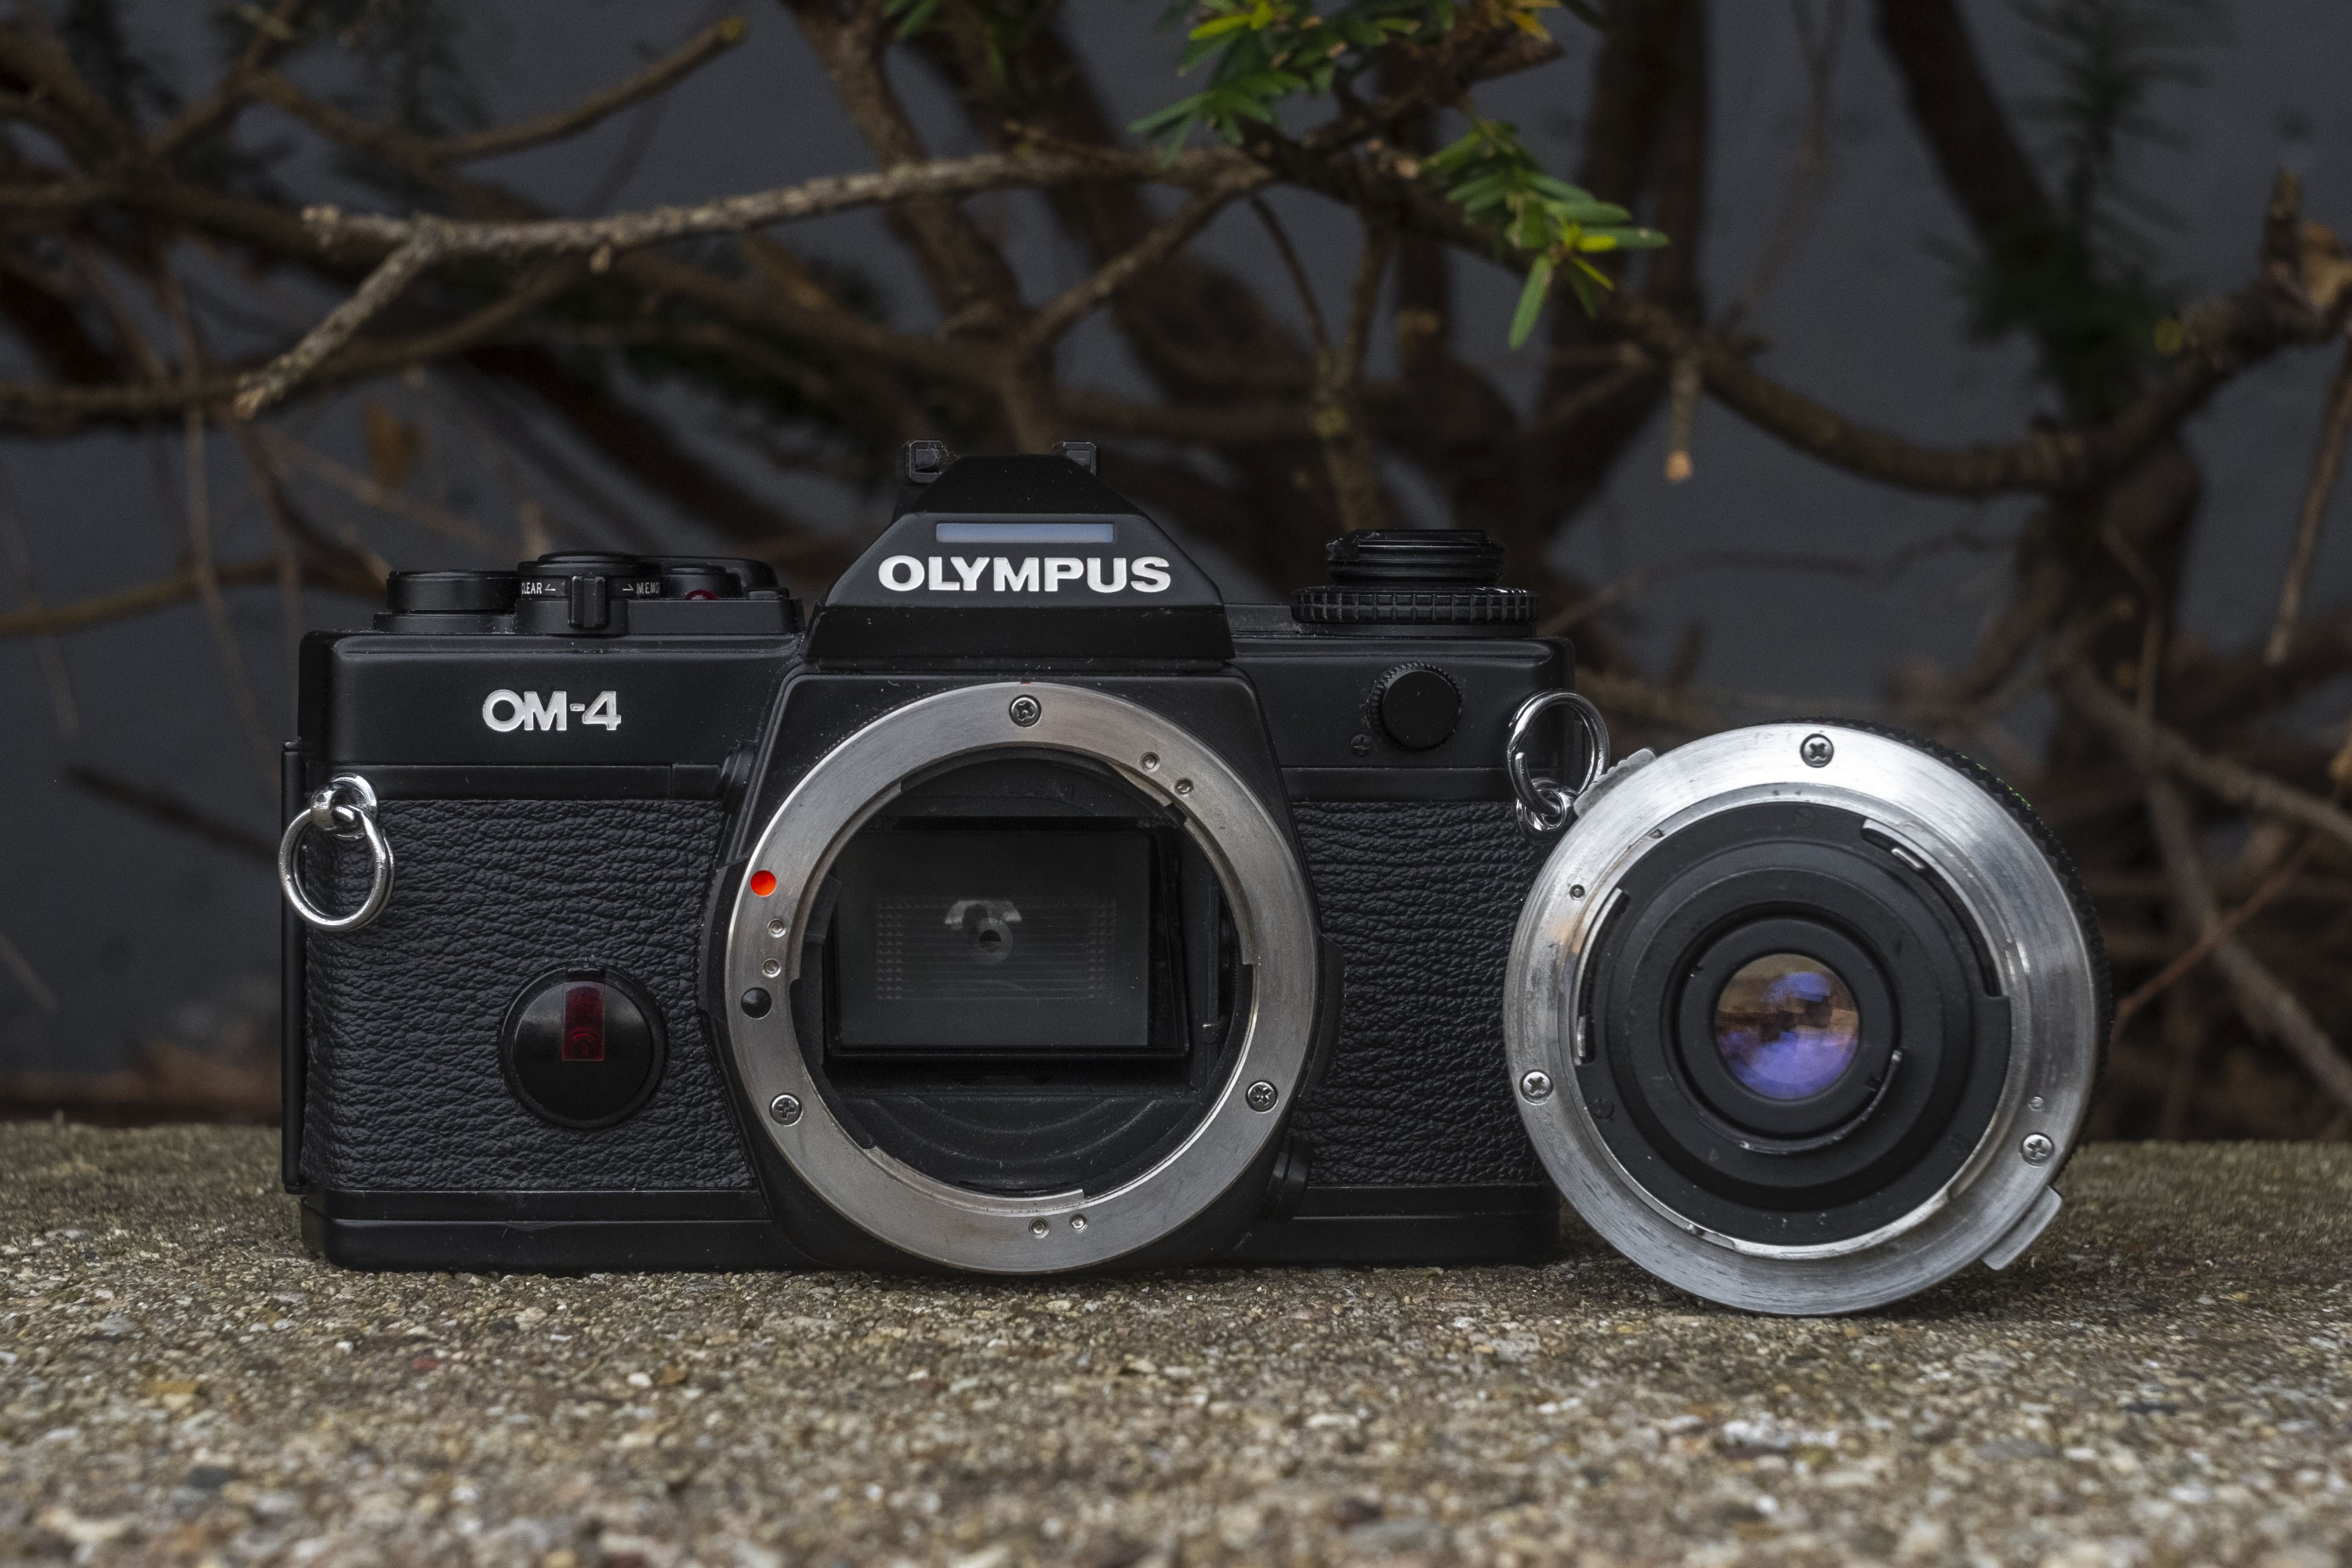
The Olympus OM-mount is a bayonet style mount like Nikon, Minolta, and many other manufacturers used, but unlike most bayonet mounts in which the release button (or pin) is on the camera body, each OM-mount lens has two buttons around the lens collar that when squeezed together, allow you to quickly twist and remove the lens. I quite prefer this method as it feels natural. You already have to grip the lens to remove it, so why not just grip it where those buttons and and not have to use a third finger to press a separate button. Don’t get me wrong, I’m not suggesting it’s difficult to remove a Nikon F-mount lens, I just think the OM-mount’s method is more comfortable.
The viewfinder on the OM-4 is one of my favorites of any camera I’ve used. It has that right combination of modern technology with a wealth of information, but with a design that still looks “retro”. For starters, the entire viewing screen is modern and bright, just like you’d expect an advanced SLR from the 1980s to be. There are the usual split image rangefinder and microprism collar focus aides like you’d expect, but that’s not what earns this viewfinder it’s high marks.
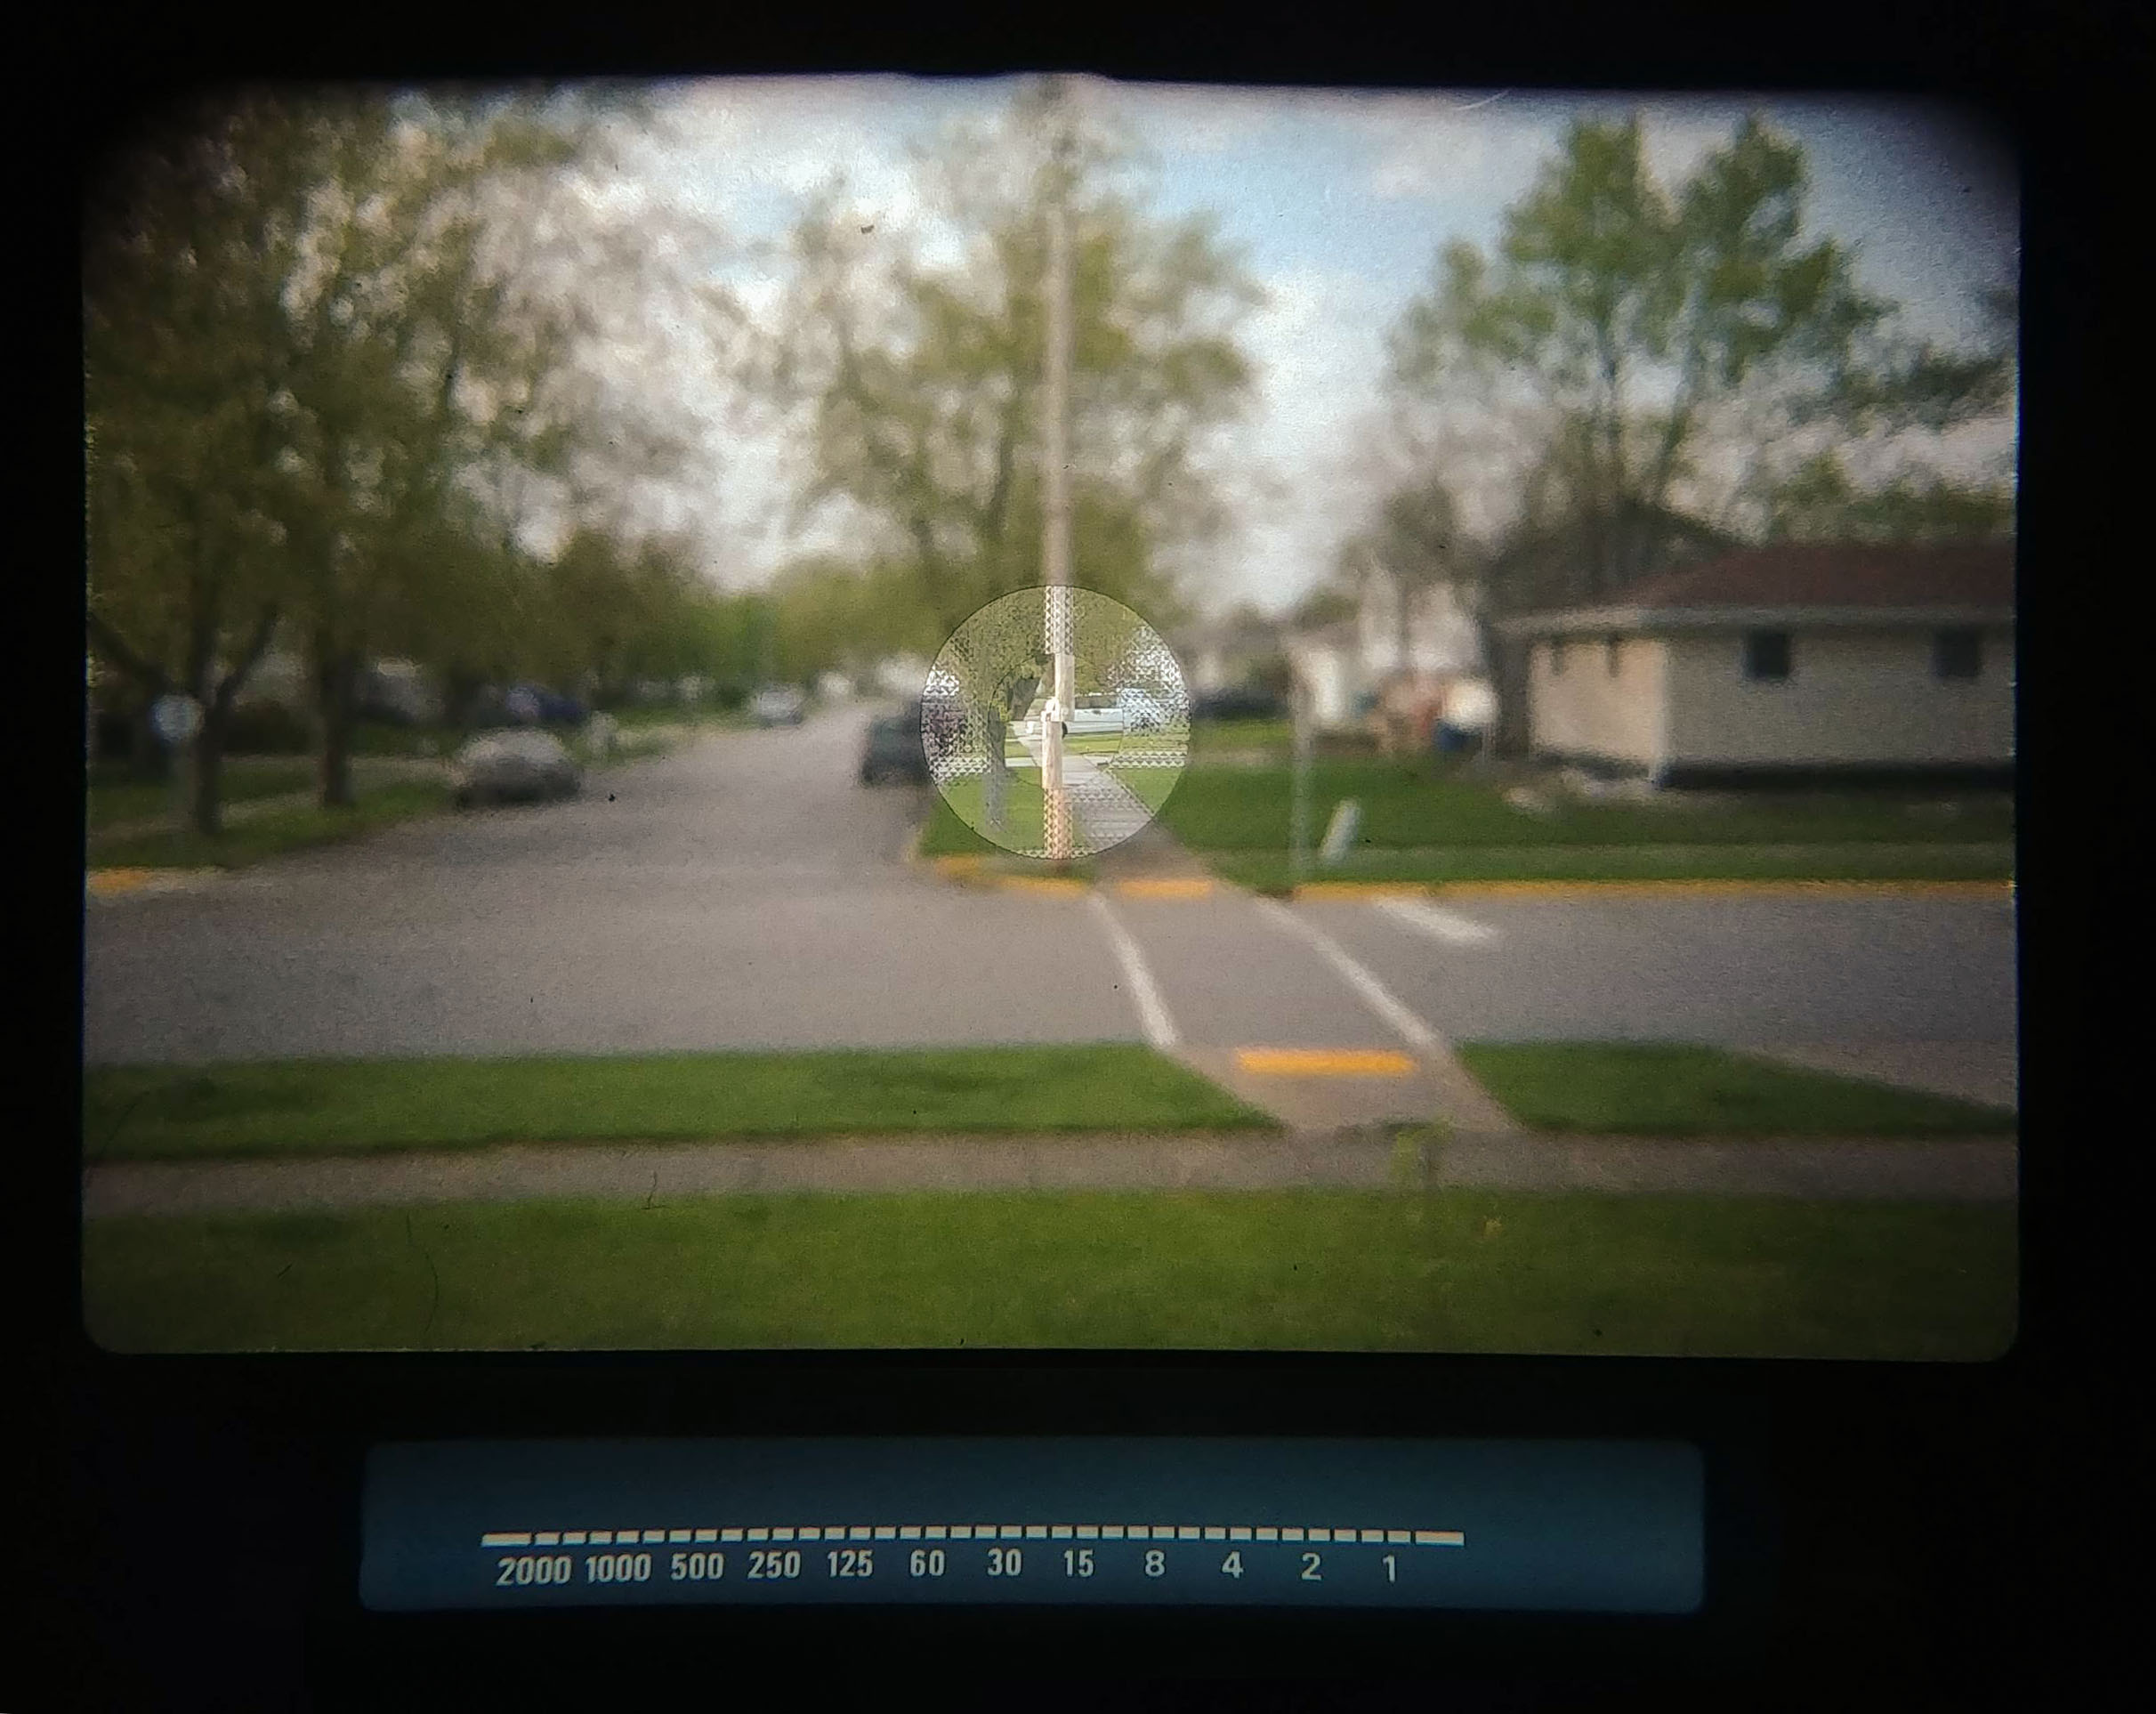
Along the bottom of the viewfinder is a prominent back-lit LCD display that gives a wealth of information about the camera’s various modes. In auto exposure mode, you see the full range of shutter speeds from 2000 to 1 along the bottom. A 36-segment bar graph will indicate which shutter speed a given scene requires for correct exposure at the chosen f/stop. A cool feature of the LCD display that serves no useful purpose, but is just “neat” is that upon turning the camera on, the bar graph sweeps each segment from right to left, as if it was powering up. Not useful at all, but I get a small thrill each time I see it do it!
 If the exposure meter determines that the chosen f/stop will result in an overexposed image beyond the 1/2000th shutter speed, the word OVER will appear to the left of the 2000 speed and an audible warning will sound. There is no such warning for under exposed shots however, the camera’s display bottoms out at one second, when in reality, the meter will allow the shutter to remain open far longer than that.
By default, the metering system on the OM-4 takes a center weighted average reading, but you can optionally choose one of four spot metering modes: single-spot, multi-spot, highlight, and shadow modes. Pressing each of these three buttons on the top plate of the camera illuminates one of three different indicators in the viewfinder. Multi-spot mode requires pressing the Spot button up to three different times to lock in three different light meter readings. Each reading will be indicated with separate dots above the bar graph scale and each mode produces an audible sound to indicate the mode.
 Both Highlight and Shadow modes require first pressing the SPOT button, and then a second press of the button for the mode you wish to use, allowing the meter to automatically adjust for either the highlights of shadows in that given scene.

 If while shooting in auto exposure mode, you can manually adjust the exposure with the + / – wheel beneath the rewind knob. This wheel allows for up to 2 full stops of over or under exposure. Whenever the camera is at any setting other than zero, a + – symbol is illuminated in the viewfinder to remind you that it’s set.
 Perhaps my favorite feature of the OM-4’s display is when the camera is placed in full Manual mode using the lever on the top plate next to the rewind knob. Doing this changes the display to remove the numbered shutter speeds, and instead, replaces them with a familiar segmented over/under scale like you’d expect to see on many match needle (or LED) cameras of the era.
 Using the 32-segment bar graph, the meter will indicate where on that scale the selected combination of shutter speed and f/stop will expose what it determines to be correct exposure. Ideally, the bar graph will indicate the vertical line in the middle, but over and under exposure can be chosen at any point between the middle and either the + or – icons on the scale. If this sounds confusing, it’s not. It works exactly as you’d expect any match needle camera to work, and a welcome alternative to aperture priority auto exposure.
Being a visually impaired person, I appreciate a good viewfinder probably more than the average photographer. I am much more likely to use a crappy camera with a great viewfinder than a great camera with a crappy viewfinder, but what happens when you have a great viewfinder on a great camera? The OM-4 is such a camera and one that even before I loaded it’s first roll of film, I KNEW I was going to like. But what happened after shooting it?
My Results
I tend to favor black and white film in the winter months as the area in which I lives loses nearly all of the color of outdoor photography and I feel like more creative with monochromatic film in monochromatic environments. For the first roll through the OM-4, I used some bulk Tri-X that I had picked up at an estate sale the previous summer using a combination of the 35mm f/2.8 lens pictured in this review and a 50mm f/1.8 lens that was mounted to my OM-2. The film had an expiration date of about 1994, so I figured it was good to shoot box speed, which is what I shot it at.


After finishing and developing that first roll, I was so impressed with the results that I had to shoot it again, but this time with the color. Proving my original claims of the drabness of winter in my area, the following images were shot using Kodak Gold 200 in the areas where I live. Hopefully they don’t depress you too much.


I shot the Olympus OM-4 at a time of the year when colors are in short supply, and my motivation to go out and make great photos is generally quite low. But in the short time I had this camera loaded with both rolls of film, I could clearly see that this was a camera that fit me and my style perfectly. I loved the size, weight, viewfinder, and ergonomics of it.
There’s very little to not like about this camera. It did take some getting used to the location of the shutter speed control, but that’s a trademark of the entire OM series, not just the OM-4, and I guess it might have been nice to have a vertically traveling metal blade shutter for it’s faster flash sync speed, but flash sync is something I rarely use on film cameras.
By the 1980s when the OM-4 had made it’s debut, most companies had figured out what worked and what didn’t in 35mm SLR design. Even the most basic cameras by then were pretty good. Entry level Chinon SLRs had great K-mount lenses, capable SPD exposure meters, viewfinders were bright and easy to use, and the ergonomics of cameras were pretty much standardized.

So what did it take to make a truly exemplary SLR that both succeeded back then and stands the test of time today, nearly 40 years after it’s debut? Is it only the viewfinder, or a capable lens mount and lens selection, perhaps it was a switch to lighter weight composite materials that both made the camera smaller and easier to carry around?
I’d say its a combination of all of those things, and balance. The OM-4 is a well balanced camera where everything works together in harmony to create a truly seamless shooting experience. The OM-4 can be used in automatic mode, leaving nearly everything except focus up to the camera, or you can choose one of many manual modes for any type of photography you might want.
There were other high-spec full featured cameras that competed for the advanced amateur photographer’s buying dollar, and while I likely would have never been able to afford a camera like this when it first made it’s debut, its one that I have come to love. I used to call myself a Nikon guy, and to some degree I still am, but when it comes time to pick my favorite 35mm SLR of all time, I’d be hard pressed to pick something better than this.
Related Posts You Might Enjoy
External Links
https://en.wikipedia.org/wiki/Olympus_OM-4
http://www.alexluyckx.com/blog/index.php/2018/08/20/ccr-review-95-olympus-om-4/
https://www.35mmc.com/12/09/2016/olympus-om4ti/
http://attemptsat35mm.com/olympus-om-4-mini-review-with-sample-photos/
https://www.flickr.com/groups/om-4ti/
https://web.archive.org/web/20051029221153/http://kotisivu.dnainternet.fi/lauro/olympus4.htm
I have been an Olympus user since 1982 when I bought a used OM-1 for a class in uni. I still own it and it still works well, needing only one service since then. I just picked up an OM-4 about a month ago after wanting one for many years, and I’ve been very impressed. There must be something wrong with it, but I haven’t figured out what it is yet. Unless you just don’t want a film camera I can’t imagine what more someone could ask for. Your lens is a really early version and one of the original offerings with the OM-1, single coated.
Two points, Mike:
You say (in that small photo caption, about seven pictures down from the top) “You wouldn’t know it from looking at them, but the Leica M-series was the inspiration for the size and dimensions of the Olympus OM series.”
But no, it wasn’t ..and that’s why “You wouldn’t know it from looking at them”.
Mr Maitani, when designing the OM-1, OM-2, etcetera, decreed that the size should be no bigger than the small Barnack-style Leica which he’d used as a young man ..those small Leicas which were made long before the ‘M’ Leica of 1954. If you ignore the pentaprism bump on the top of the OMs, and ignore the lens mount which extends forward of the rest of the camera body, those early OM camera bodies are indeed the same height, and thickness – front to back, and width as an old Barnack Leica. Put an OM base-to-base with a Barnack Leica like the IIIc and you’ll see that they’re an exact fit.
You say “..each OM-mount lens has two buttons around the lens collar that when squeezed together, allow you to quickly twist and remove the lens”. No; the button at the TOP of the lens – with little serrated marks on it, at about the two o’clock-ish position (as you look at the camera or lens from the front) – is, indeed, the “unmount” or “unclip” button, which releases each lens from the camera’s lens mount.
But the button at the BOTTOM of each lens – at about the eight o’clock-ish position – is the ‘stop-down button’, which closes the iris to whatever aperture you’ve chosen on the lens, so that you can assess the depth-of-field (what’ll be in focus) at your chosen aperture!
You CAN squeeze both buttons to remove a lens, but the bottom button doesn’t actually do anything to unlock the lens ..it’s just for temporarily stopping-down a lens to its ‘taking’ aperture, and then the aperture springs open again as soon as you release that spring-loaded button!
(I hate to mention a third point, but the viewfinders of the OM-3 and OM-4 are NOWHERE near as bright as the wonderfully bright finders of the original OM-1 and OM-2, as the 3 and 4 have half-silvered mirrors, and hinged secondary mirrors behind those, to direct light down to the built-in light-measuring cells. This reduces the light available in the viewfinder itself. The OM-1 and OM-2 are far easier to focus – with their much brighter finders – because they use CdS cells inside the pentaprism hump at the top, and silicon cells pointing at the film and shutter curtains down at the bottom of the mirror box, and so don’t need any light to be diverted away from the viewfinder itself ..a much more elegant – and brighter! – way of doing things!)
Many thanks for the rest of this great write-up!
Thanks for the clarification on all three points! Regarding the inspiration (or lack of) from the Leica M3, you could say that Maitani was “inspired” of what not to do! 🙂
And since writing this review for the OM-2, I have written one about the OM-4 and while I agree, it’s not quite as bright, it’s still very good, comparing favorably to the best of what was out there at the time.
B-b-but, Mike ..this IS the review about the OM-4..! ..Or is my mind going..?
Doh! I’m really going to have to fire my proofreader!! 🙂 I guess I should stop responding to comments before having my first cup of coffee in the morning! Yes, this is the OM4 review! I also reviewed the OM2 at one point and I even have an OM1 but never got around to writing about it as it’s in very rough (although perfectly working) condition!
Yes, I like your OM-2 review, too!
Thanks Mike. Just stumbled on your OM-4 review. A very enjoyable article. The history section is great! I purchased an OM-1 in my last year of high school and still use it from time to time, but my favorites of course are the OM-4 series, with the spot metering. What a great advancement of the era that was. I have 2 4T cameras in for CLA now and expect to use them for the foreseeable future. I just love the OMs 🙂
Another great, thorough review. I bought an OM-4 last year for $60 in great condition. Haven’t used it much but intend to, and soon. Has your camera suffered from the battery drain problem that is prevalent with this camera (which I think they fixed with the OM-4T/Ti)?
Thanks for the compliments Andrew!
Regarding the battery life, I can’t be sure as I’ve only used my OM-4 a handful of times. When I do these reviews, I usually shoot a couple rolls of film back to back and then once the review is out, they sit on my shelf. On occasion I do come back to a camera, but I always remove the batteries when they’re not in use. So I can’t say that in the short time I had batteries in mine, I noticed any drain. I was able to make it through the test rolls without issue.
I have the OM 4Ti where they fixed the leakage. For the previous series, the shutter speed ring is the “real” electric switch on the OM 4: if you set it to “B”, the light meter is of and no battery is used nor leakes.
This is a great tip! Although I don’t typically leave batteries in my cameras when not using them, it’s good to know that if you periodically use your OM-4 but let short gaps of time in between uses where it’s not practical to keep removing the batteries, turning the shutter ring to B is a good way to preserve power.
Actually, turning the ring to “B” only protects the camera from accidentally activating the meter if the camera’s shutter button isn;t locked and something bumps it while in the camera bag. The OM-4 will still continually drain battery power, even in Bulb mode. Best to simply remove the batteries when not in use for a while. Also, some of the OM-4 cameras were repaired by Olympus to include the updated electrical of the OM-4T/Ti. To test whether your OM-4 has the upgraded circuitry, put the camera in battery test mode and hold the lever. If the beeping stops after 30 seconds, it has the newer circuitry. If it keeps beeping, it has the older circuitry.