

 What is it?
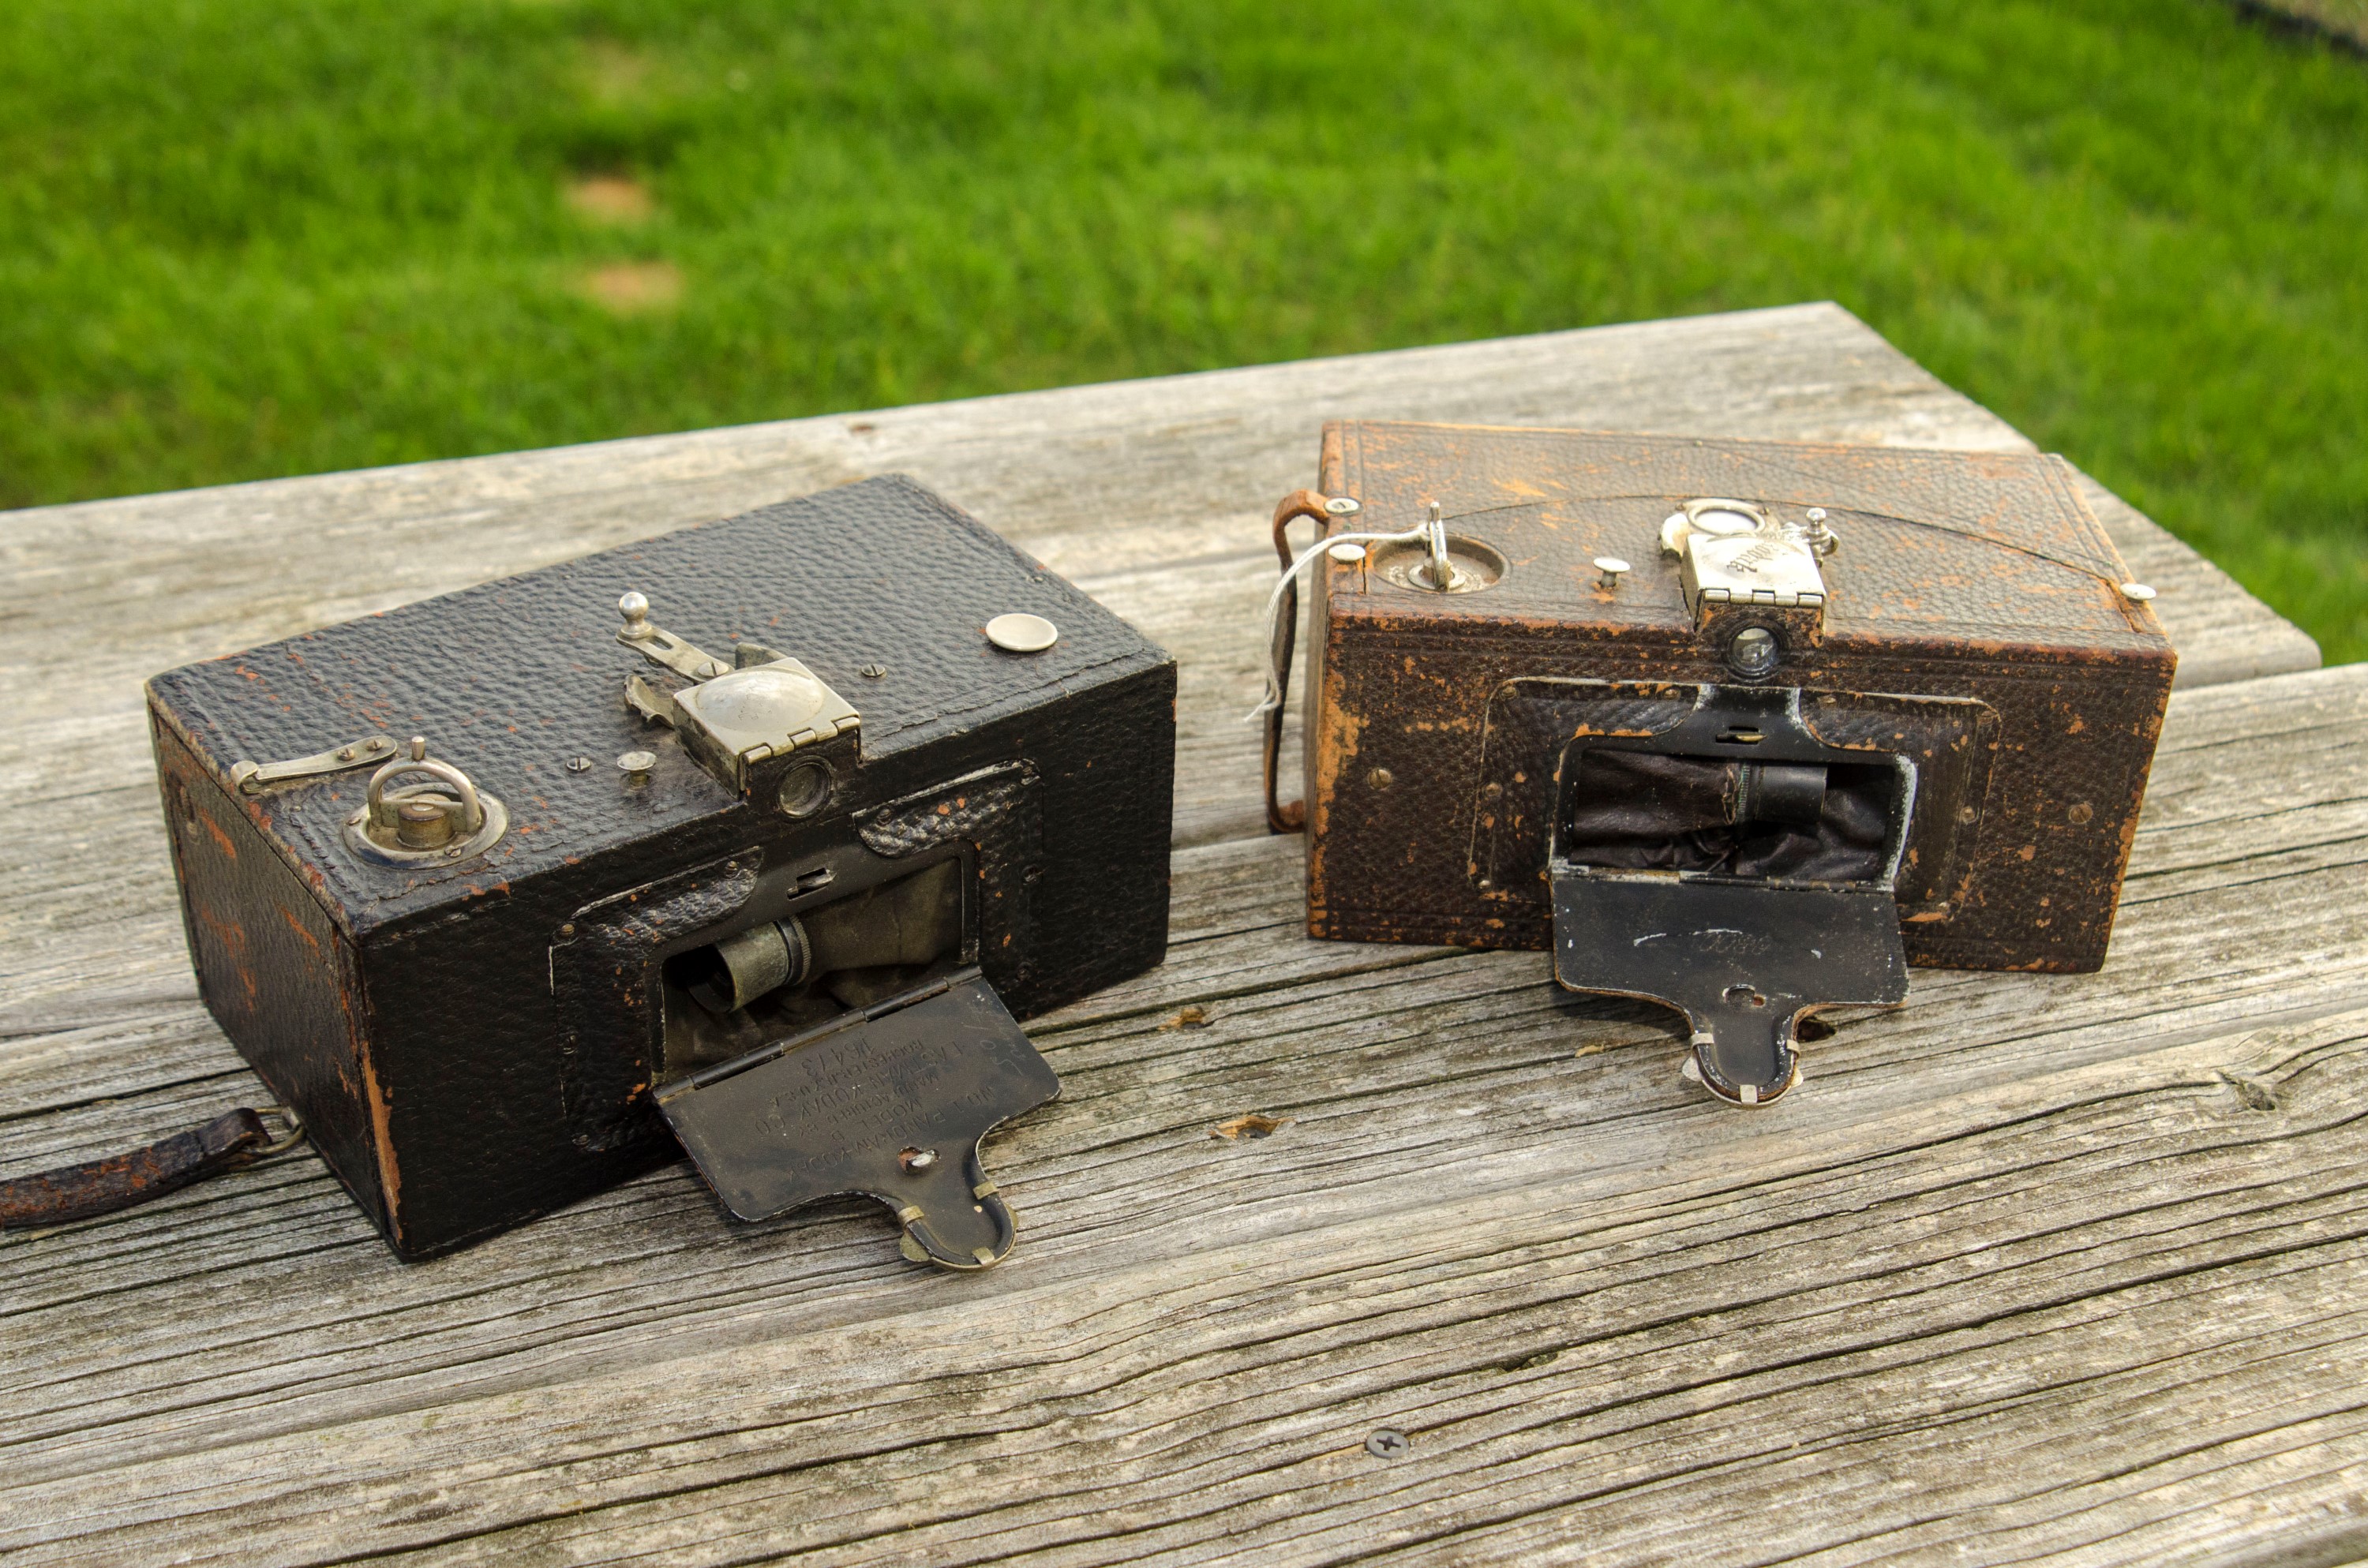
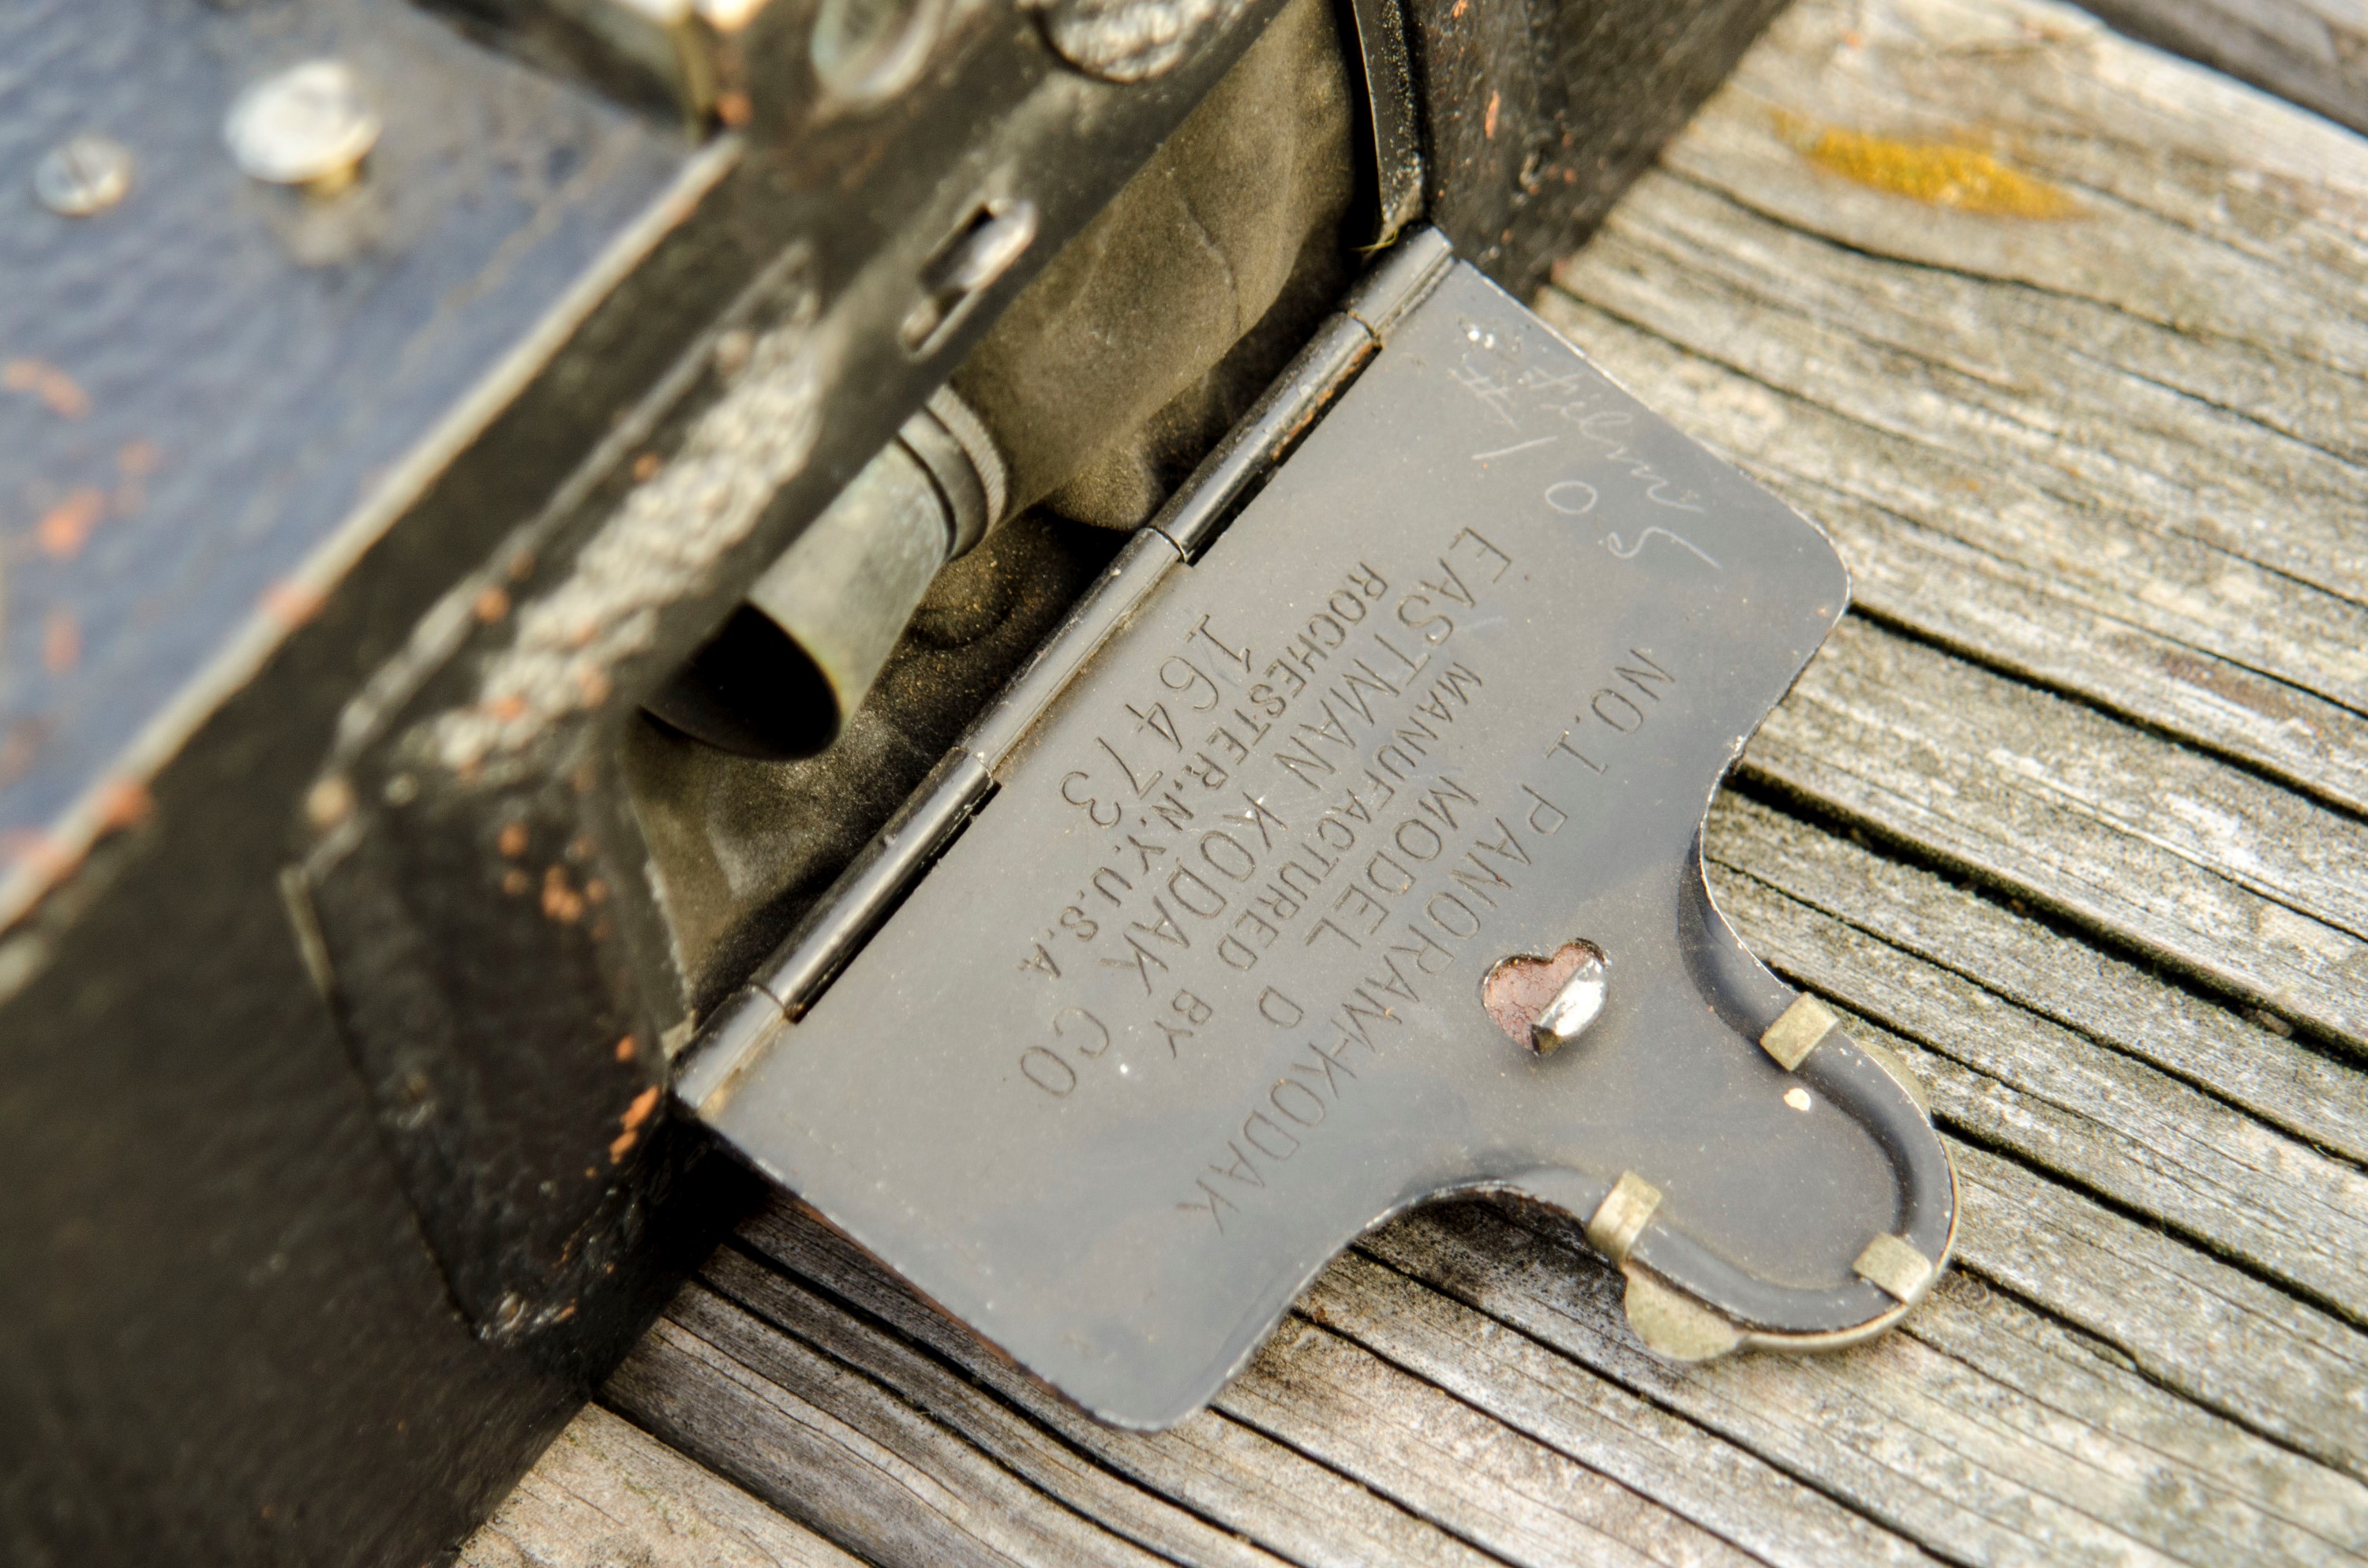
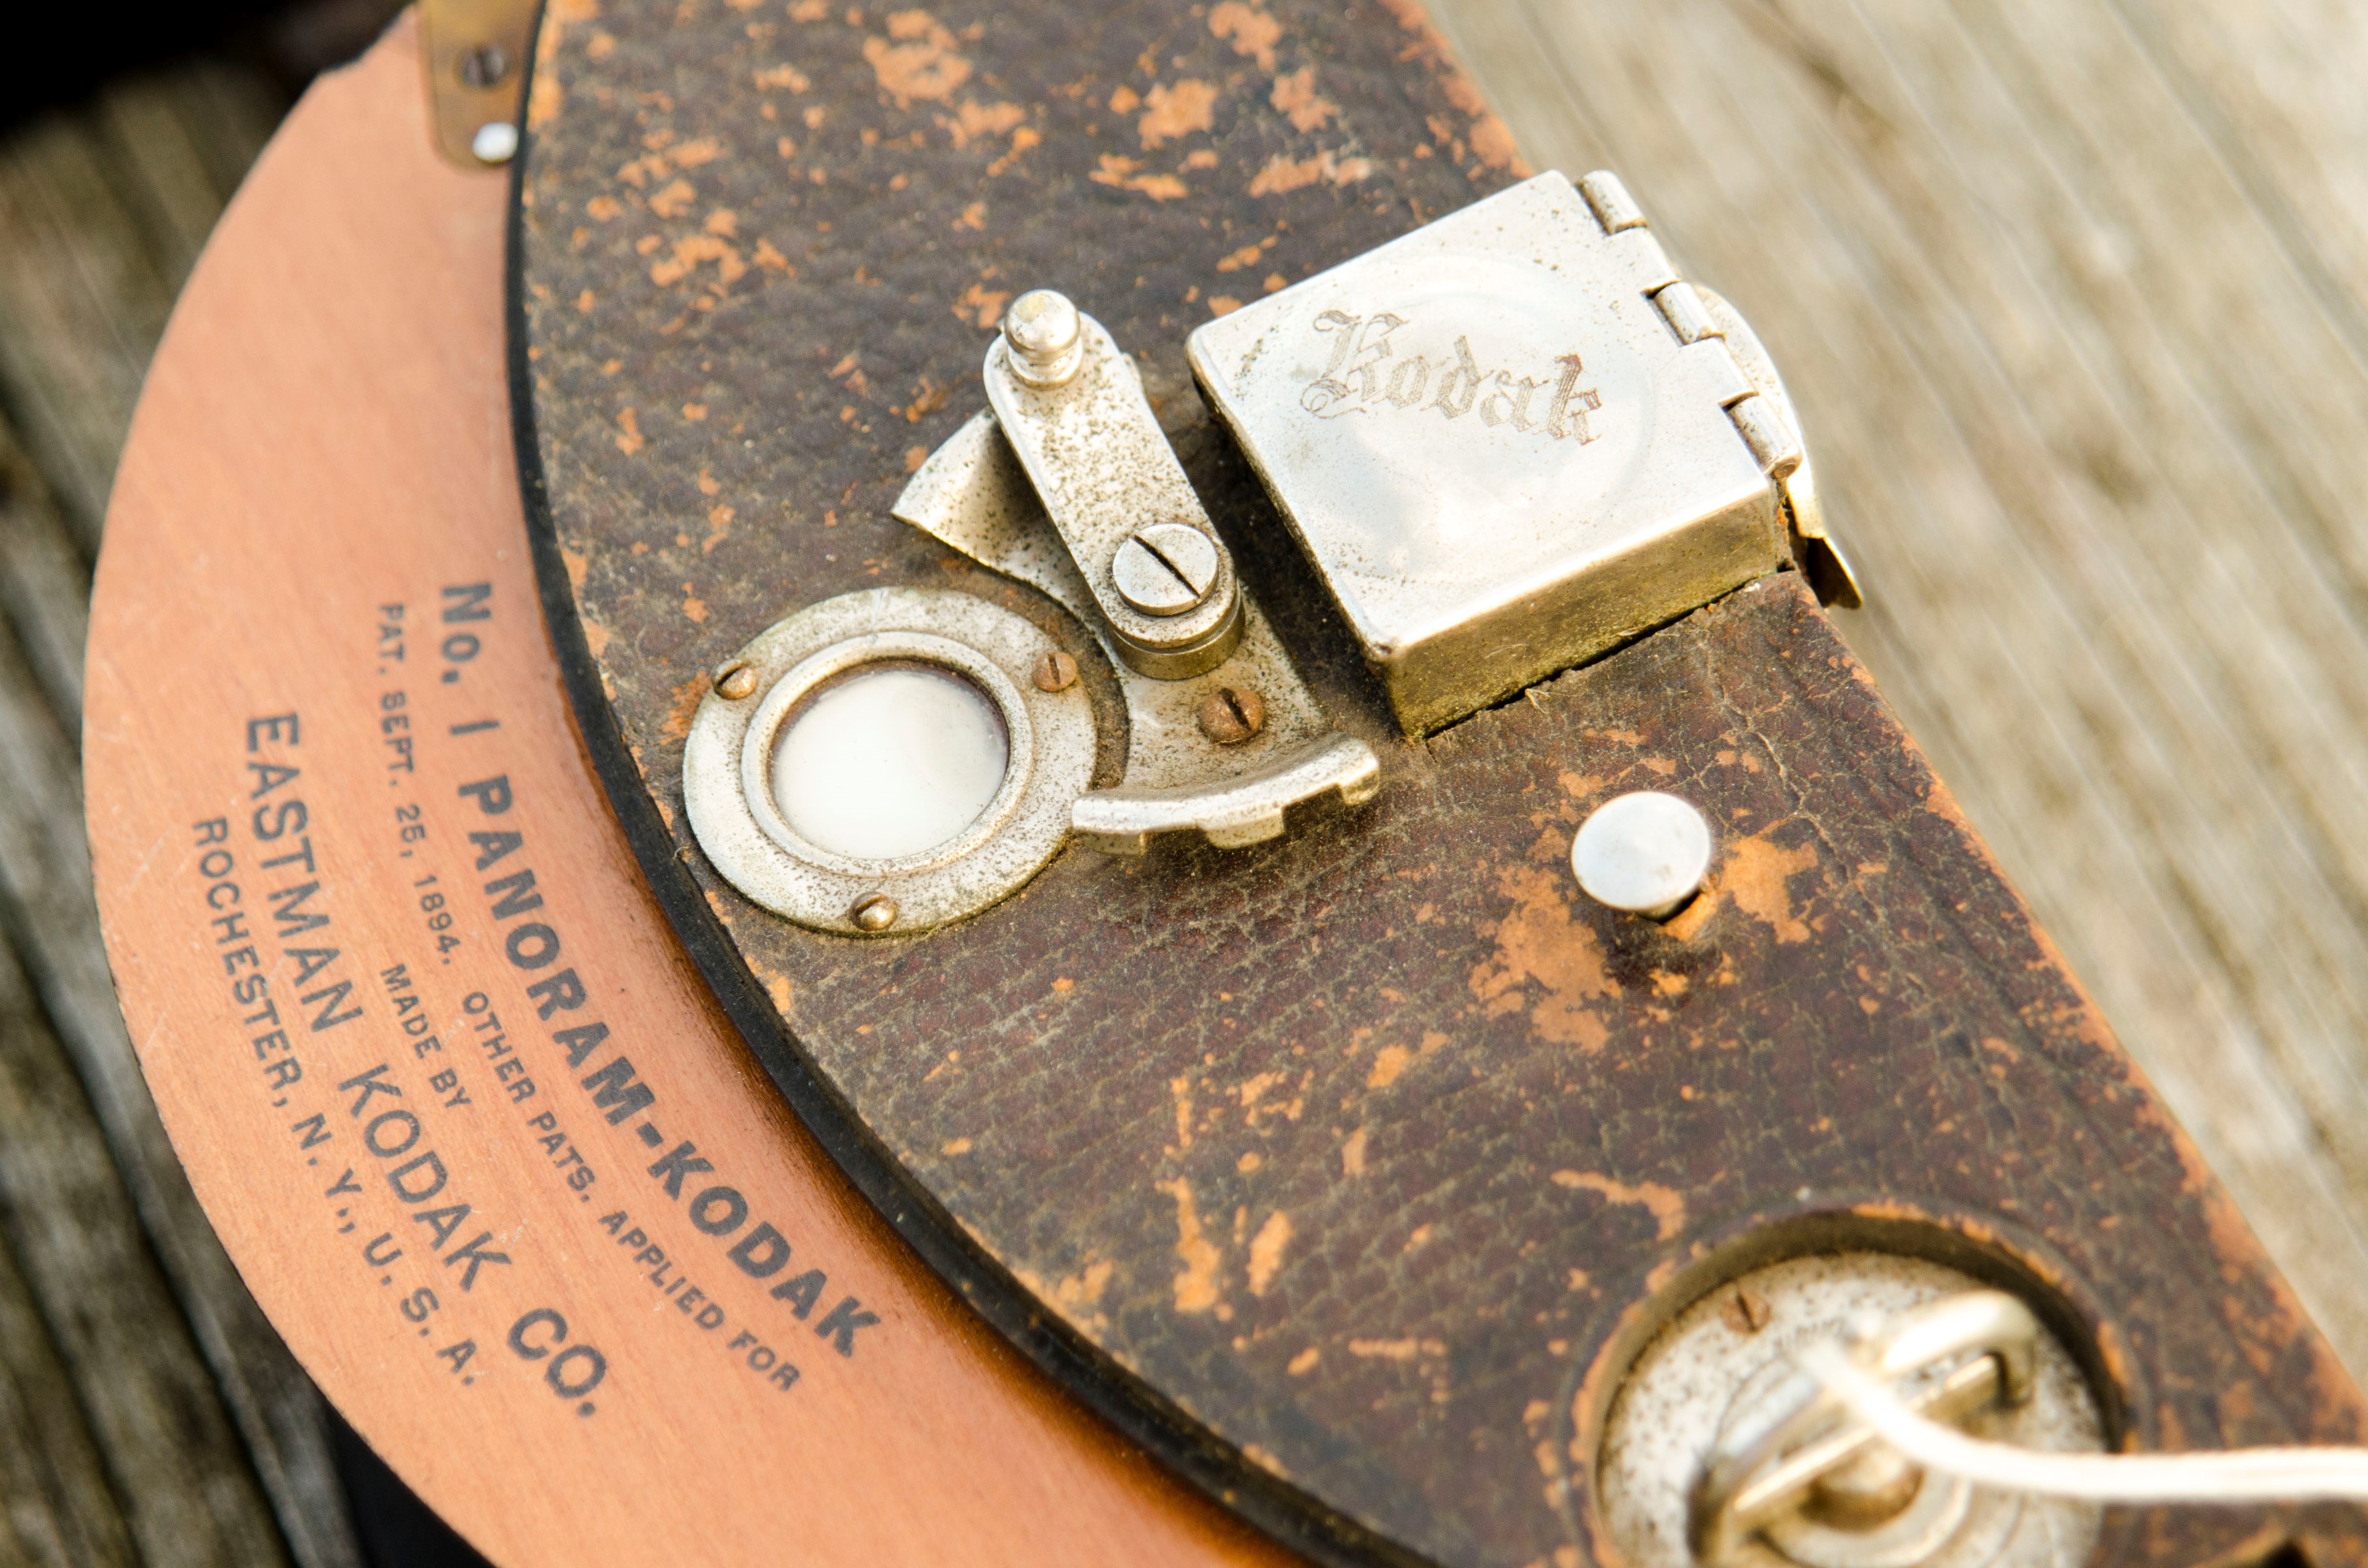
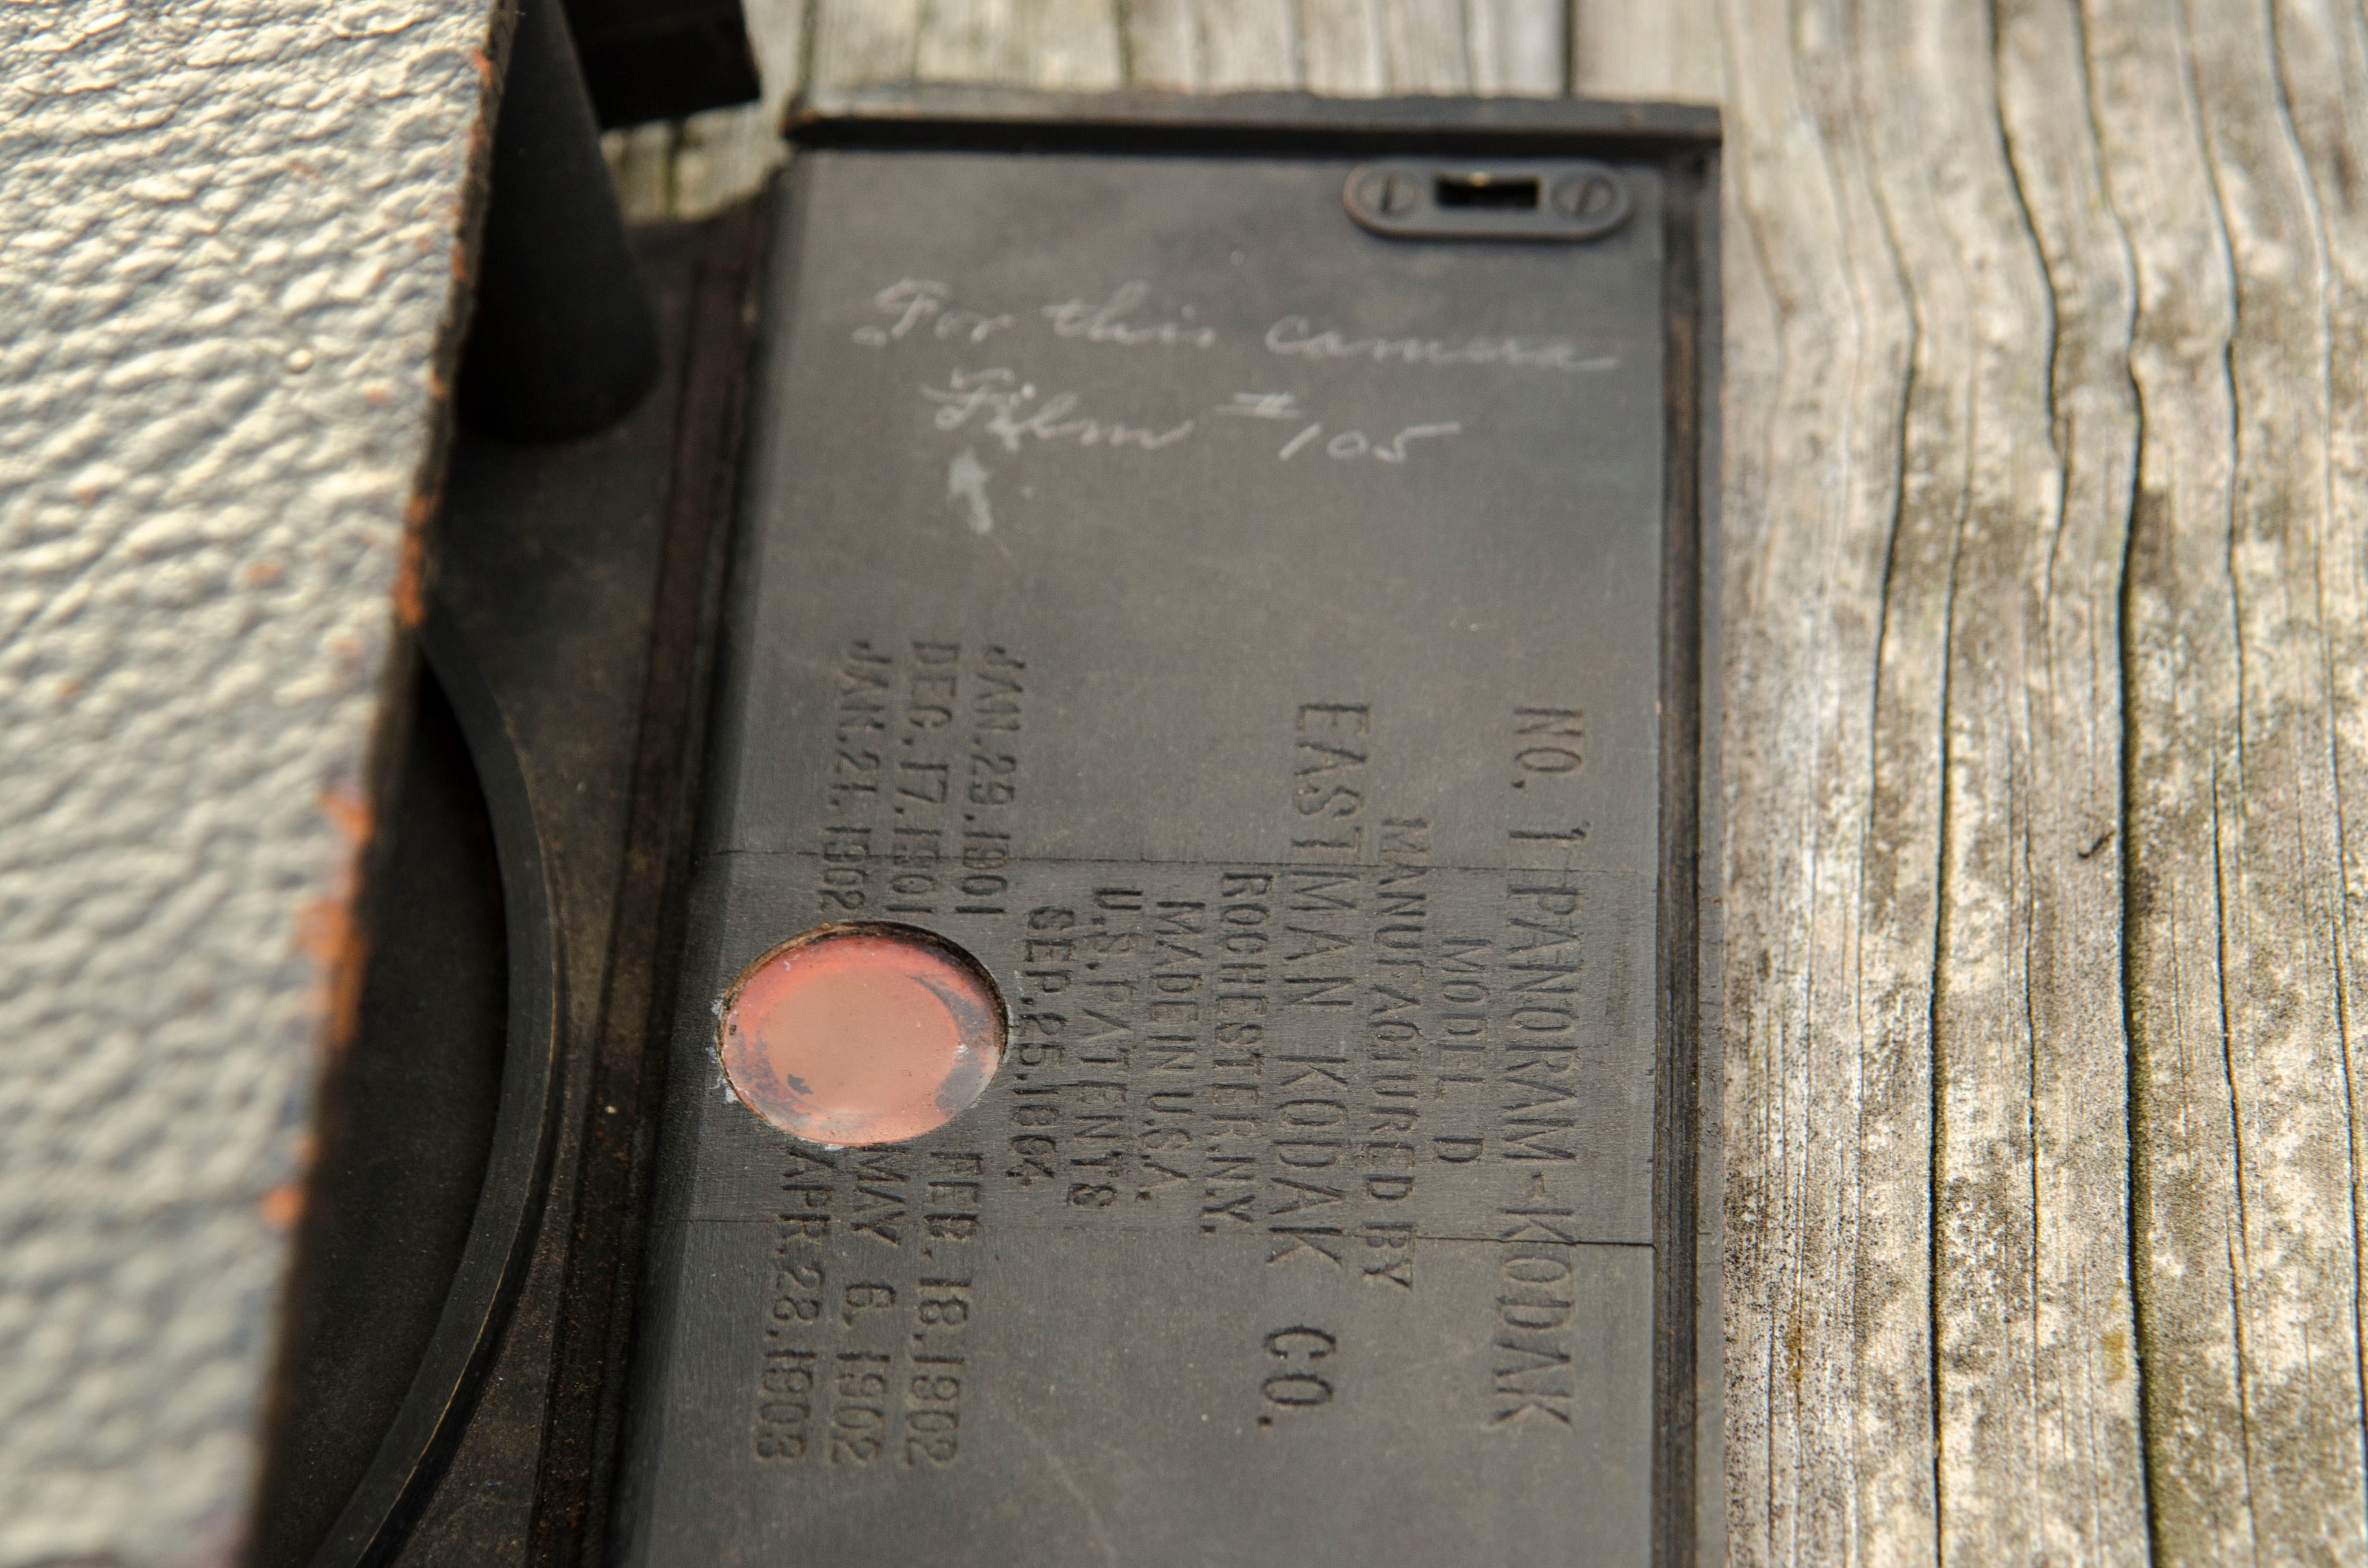
These are two different variants of the No. 1 Panoram- Kodak. The model on the left is the Model D, and the one on the right is an earlier version, simply called the No. 1 Panoram-Kodak. Both cameras were designed for 105 format roll film, and took 6 panoramic exposures measuring 2¼” x 7″ each. These cameras have a leather covered wooden body and use a “swing” style lens that captures an image through a 112 degree arc. The resulting images allow the photographer to capture breathtaking images. The No. 1 Panoram-Kodak was in production until 1926, making it a very popular model.
Film Type: 105 roll film (six 2¼” x 7″ panoramic exposures)
Lens: Unknown focal length Meniscus lens, probably around f/11
Focus: Fixed focus (approx 20 feet to Infinity)
Shutter: None
Speeds: Fast/Slow
Exposure Meter: None
Battery: None
Manual: http://www.cameramanuals.org/kodak_pdf/kodak_panoram_no-1_no-4.pdf
History
If you were to go back in time to the late 19th century, photography was still a new and largely unexplored industry. There was no real standard for film type, camera size, aspect ratio, or pretty much anything else, so manufacturers like the Eastman Kodak company had to be pretty creative when coming up with new designs that would attract customers.
One way in which Kodak aimed to stand apart from their competition was with the first Panoram-Kodak from 1899. A monster of a camera, it took 3½” x 12″ exposures across a 142 degree arc on type 103 film. The No. 1 Panoram-Kodak being reviewed here came out a year later and was the small version, taking 2¼” x 7″ exposures across a 112 degree arc on 105 film. There would be several revisions to the Panoram-Kodak line, but they all maintained the same basic design. A wooden box, covered in leather, with a swinging fixed aperture lens with fixed focus, and with one or two shutter speeds.
The Panoram-Kodak was pretty basic compared to other cameras of the day, but their modest specs rarely limited their use as most photographers wishing to shoot a panoramic image were probably already outside in a well lit area with a subject more than 20 feet away.
 The Panoram-Kodak could also be used to shoot pictures of groups of people if they were arranged in a semi-circle so that the people standing on the edges were the same distance away from the camera as the people in the center. The group photo to the left was not shot with a Panoram-Kodak, but was done using the same technique that would be required of one. Click here for a website and video that shows how the people had to be arranged to capture this image successfully.
It’s not that hard to make a good panoramic image, but when done successfully, there was nothing like it. It was this uniqueness that likely led to widespread use of the Panoram-Kodak. The entire line was in production from 1899 – 1926, spanning nearly 3 decades. I was not able to find any type of production numbers for the series, but for any camera to be made for 27 years, it seems it probably sold pretty well.
The BBC has a very interesting article about explorer Captain William Shakespear, who explored Saudi Arabia in the early 20th century and took several panoramic photos using a No.1 Panoram-Kodak.
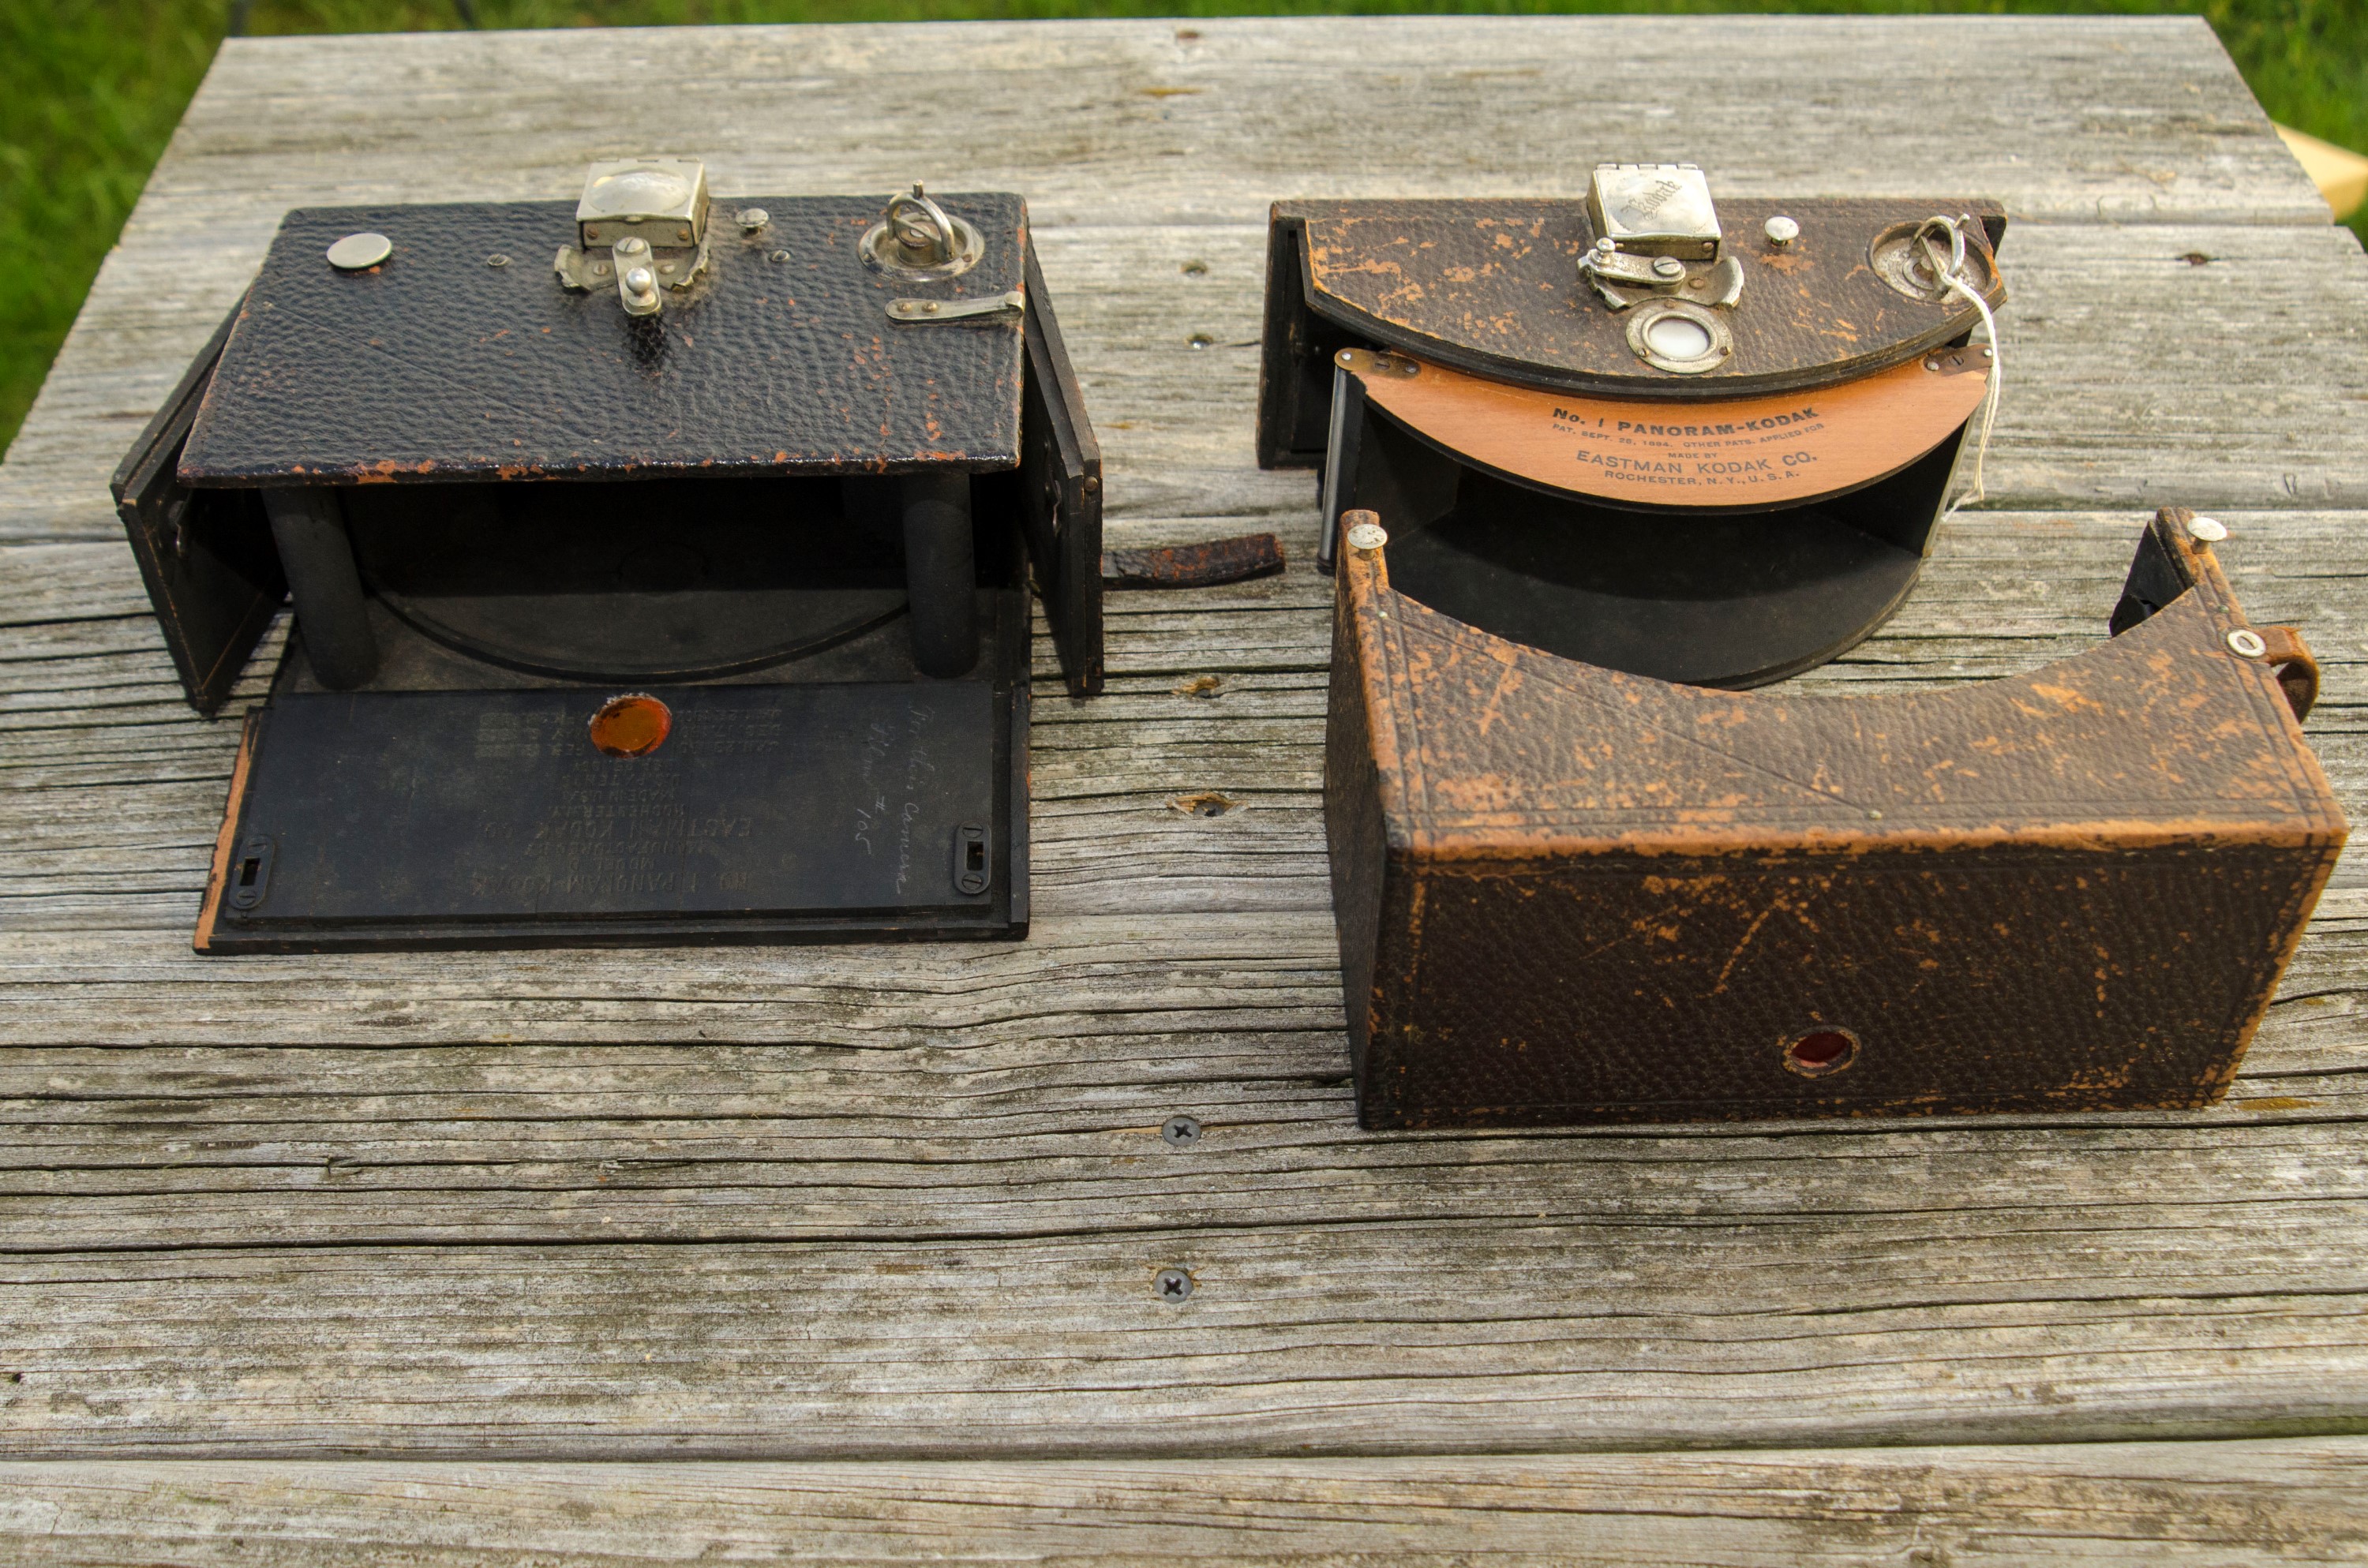
I was fortunate to have not one, but two different Panoram-Kodaks for this review. The older of the two was an original No.1 model made prior to 1908. The second was a later No.1 Model D made probably in the 19-teens. The only way I know these approximate ages is that the two cameras have different designs. The older model has a two piece box with a curved back. To open the camera, you separate the front half of the camera from a solid rear piece. The later Model D changed it’s design so that both sides and the back of the camera have doors that swing open. This change was likely done to keep production costs low, it has the negative side effect of being less reliable and more likely to allow light leaks into the camera.
Sadly, of the two cameras, only the Model D had a functioning shutter. The earlier model was jammed somehow, and since I was borrowing these cameras, I did not feel comfortable trying to perform any type of repair.
In the years that followed the discontinuation of the Panoram-Kodak, other companies would try their hand with panoramic cameras. Some, like the Lomo Horizon and the Widelux would stick to a swinging lens element to capture a wide angle of view, but others like the Fuji GX617 and Hasselblad Xpan, would simply just employ a very wide angle lens with an elongated film plane to make panoramic images.

While panoramic photography was always a ‘niche’ way of shooting an image, it still remains popular with modern smartphones who can automatically stitch together multiple images.
Today, panoramic cameras are very desirable by collectors for their unique look and capabilities. Used Panoram-Kodaks can go for well over $100 in good condition and other models like the Widelux can sell for several hundred dollars.
Using the Camera
Shooting with the Panoram-Kodak is a unique experience. While resembling a box camera, there are a few things that make shooting with it different from just another box camera. For one, the type of film that this camera was designed for has not been made in over half a century, so a bit of improvisation is required before thinking about using this camera.
The Panoram-Kodak was designed for 105 format roll film which was discontinued around 1949. 120 format film is easily adaptable in the Panoram-Kodak as the overall width of the film is exactly the same, but there are still a couple of things you need to know.
First, 105 format film was longer than 120 film allowing for a total of 6 exposures per roll. When shooting 120 in the Panoram-Kodak, you will only get 4 exposures per roll.
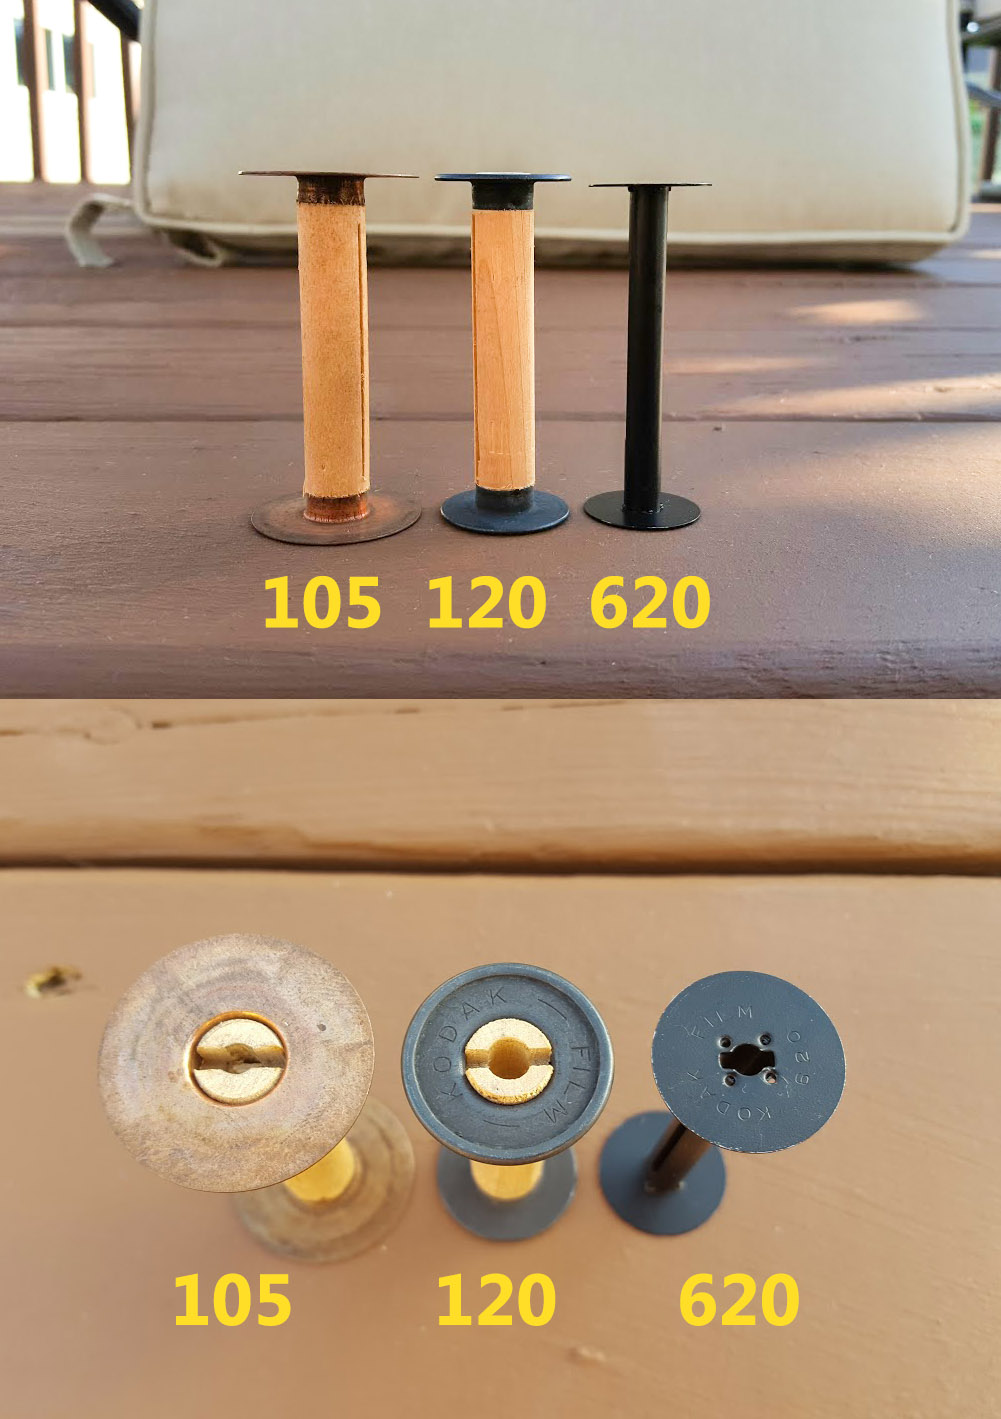
Second, the spools for 105 film have a much larger flange diameter which makes loading and unloading 120 spools into the camera a bit more difficult. The following information comes from Wikipedia and it suggests that a 105 spool’s flange is more than a quarter of an inch larger in diameter than a 120 spool’s flange.
- 105 1.250″ flange, 0.468″ core
- 120 0.990″ flange, 0.468″ core
- 620 0.905″ flange, 0.280″ core
Look at the image to the right where I have an original metal and wood 105 spool, a metal and wood 120 spool, and an all metal 620 spool for comparison. Notice that the 120 spool is ever so slightly taller than the 105 spool, which makes ever so slightly tighter of a fit.
Although a 120 spool should slide right in place of a 105 spool, I had difficulty with a modern plastic 120 spool. I found that the older metal 120 spools seemed to fit just a little better. I also read on another review site where someone suggested a 620 spool works well on the supply side as it is ever so slightly narrower. In any case, I would recommend trying to respool your 120 film into a metal 120 spool if it has a plastic spool.
From this point forward, my instructions will pertain to the later Mode D with the doors since that is the model I actually shot with. If you have the curved back one, you’ll need to revise your steps to match that model.
The first thing you need to do is choose a film that can be correctly exposed in the Panoram-Kodak. In my research for this article, I could not find any information about what the two speeds of the camera are, other than ‘fast’ and ‘slow’. To come up with a best guess of the speeds, I went with the assumption that the “Instant” speeds of most Kodak Brownie box cameras of the era had a shutter speed somewhere around 1/50th of a second. If the Panoram-Kodak was designed to use the same types of films as those early Brownies, then my guess is that the film speeds had to be the same, and therefore, the shutter speeds would be the same as well. It’s a stretch, but I’ll guesstimate that the fast speed of the Panoram-Kodak is equivalent to around 1/50th of a second, and the slow speed is roughly half that, or 1/25th of a second.
The user’s manual for the Panoram-Kodak suggests that for all ordinary exposures, the slow speed is recommended and that the fast speed should only be used “for views on the seashore, when the light is extremely bright”. Film from the turn of the last century was much slower than it is today. During my research for this article, I could not find any information about what speed film this camera was designed for, but a best guess would be somewhere around ASA 12 or 25. If so, then that matches up pretty well with my best guess of 1/50th and 1/25th of a second for the fast and slow shutter speeds. Using an aperture of approximately f/8, this would match up pretty well to the Sunny 16 rules for outdoor photography.
There are some very slow film stocks still available on the market that can go as slow as ASA 12 or 25, but I did not have access to any of these during my time with the Panoram-Kodak. Instead, I made the decision to go with Kodak Portra 160 and stick to using the fast shutter speed at all times. Sure, 160 speed film is much faster than the films that this camera was designed for, but Portra has a great reputation for having a lot of latitude, and even if my images were a bit overexposed, I should still get something from them. In hindsight, Ilford Pan F Plus (ISO 50), or Kodak Ektar (ISO 100) might have been better choices than Portra 160.
Edit: After seeing my results from the first roll of Portra 160, it worked extremely well using the fast speed. I don’t know that Ektar would have been any better, plus being able to use the fast speed for general photography instead of the slow speed as suggested by the Panoram-Kodak’s manual, allowed for less chance of camera shake while hand holding the camera.
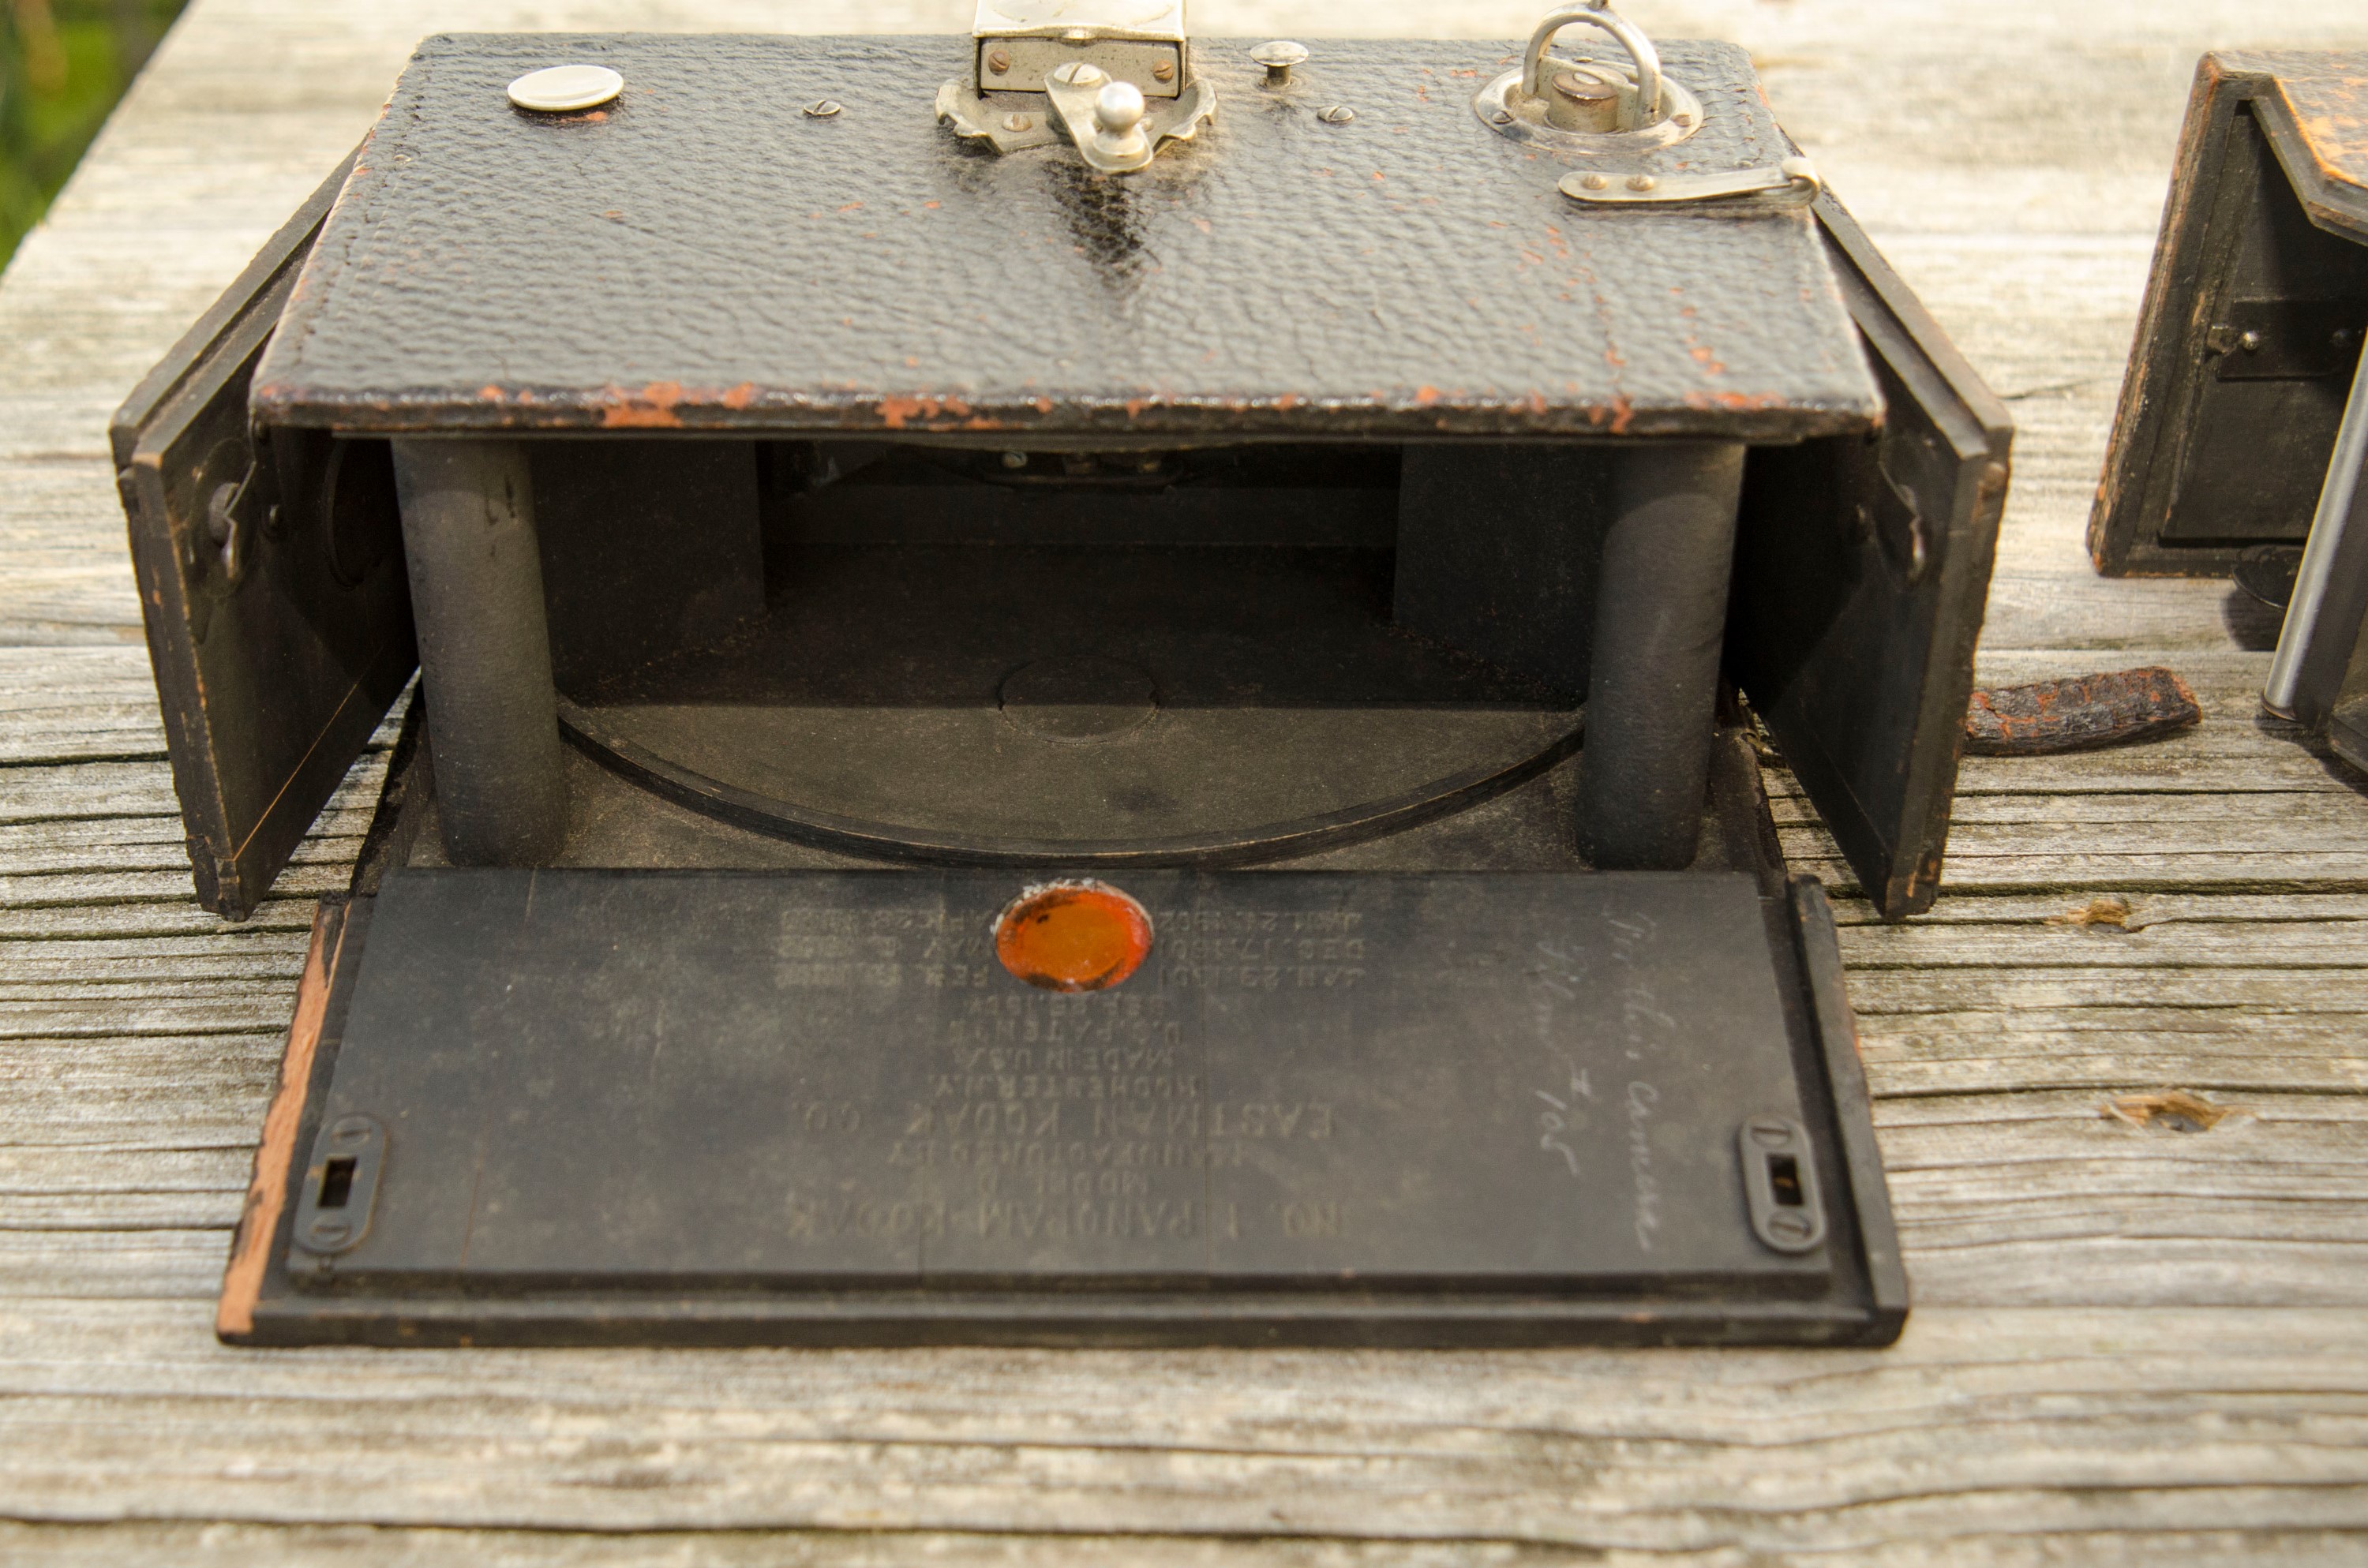
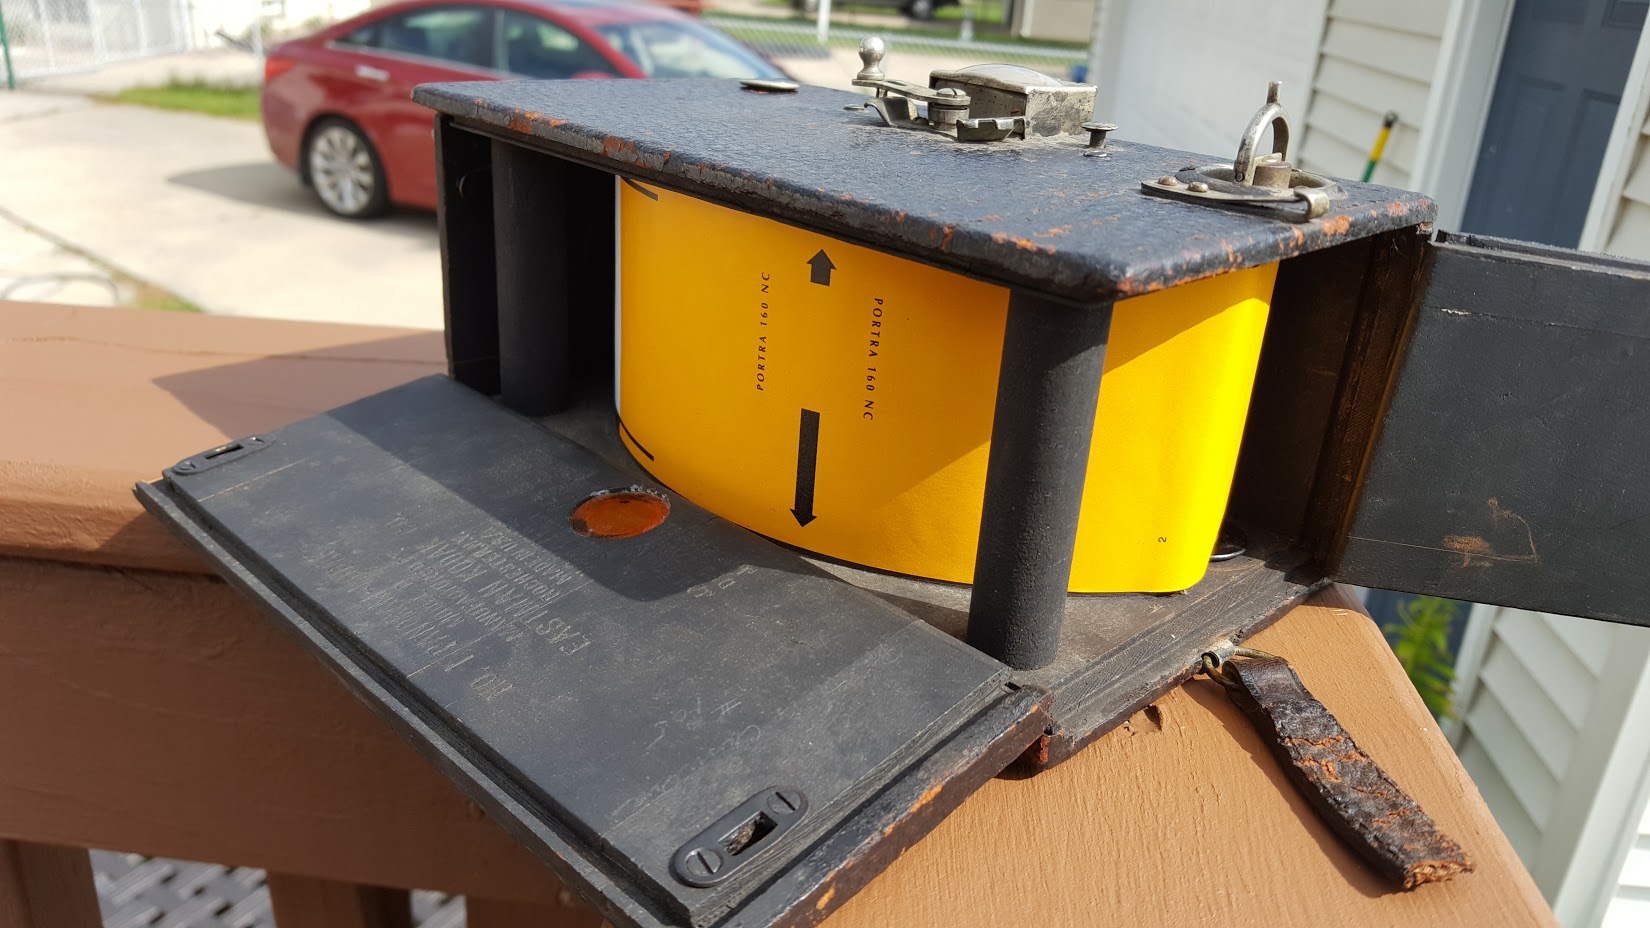
Looking at the back of the Panoram-Kodak, the fresh roll of film goes on the left side of the camera. There are two metal pins that must be pulled up in order to slide the spool into position. With the original 105 spool, the large flange allowed the spool to be dropped into place and the flange would naturally position the spool to line up with the pins. Using the smaller flange of 120 film is a little trickier as you have to line up the center hole of the 120 film spool to match where the pin is on the camera, but once you have the spool lined up, press the pins back into position to secure the film in place.
The next step is to pull out the paper leader and stretch it across the curved film plane inside of the camera. If the film does not follow this curved plane correctly, your images will be badly out of focus. If you installed the film into the camera correctly, the supply spool should rotate freely. If it feels like it is binding, you’ll want to correct that now, rather than later. If nothing seems to help, you may want to consider trying a different spool. Notice that there are two wooden posts near the corners of the camera that the film must go beneath. I’ve seen some images online where there is writing on these posts saying that the film must go under, but my particular example had no such writing on them.
Thread the paper leader across the curved film plane, beneath both posts and attach it to the takeup spool as seen on the image to the left. There is one pin on the bottom of the camera that must be pulled along with the wind knob that must be pulled out in order to install the takeup spool. I found that both plastic and metal 120 spools worked fine on the takeup side. You cannot use a 620 spool on the takeup side since the “keyhole” in the spool is too small on 620 spools to fit the 120/105 sized keyhole.
Once you are sure that your film is loaded correctly across the curved film plane beneath the two wooden posts, and is traveling smoothly from the supply to the takeup spool, you can close the camera.
This Panoram-Kodak is the oldest camera I have ever used, and although it appeared to be in mechanically good shape, it was cosmetically very rough. The body covering was crumbling, the door hinges were extremely loose, and the door on the left side of the camera had come completely detached from the camera. I found that if I was very careful closing the doors of the camera, I could get them to stay shut, however any amount of handling of the camera would cause them to pop open. Worrying about light leaking into the camera, I knew that if I was going to shoot with this camera outdoors, I would have to come up with a way to protect the camera from allowing unwanted light to expose the film.
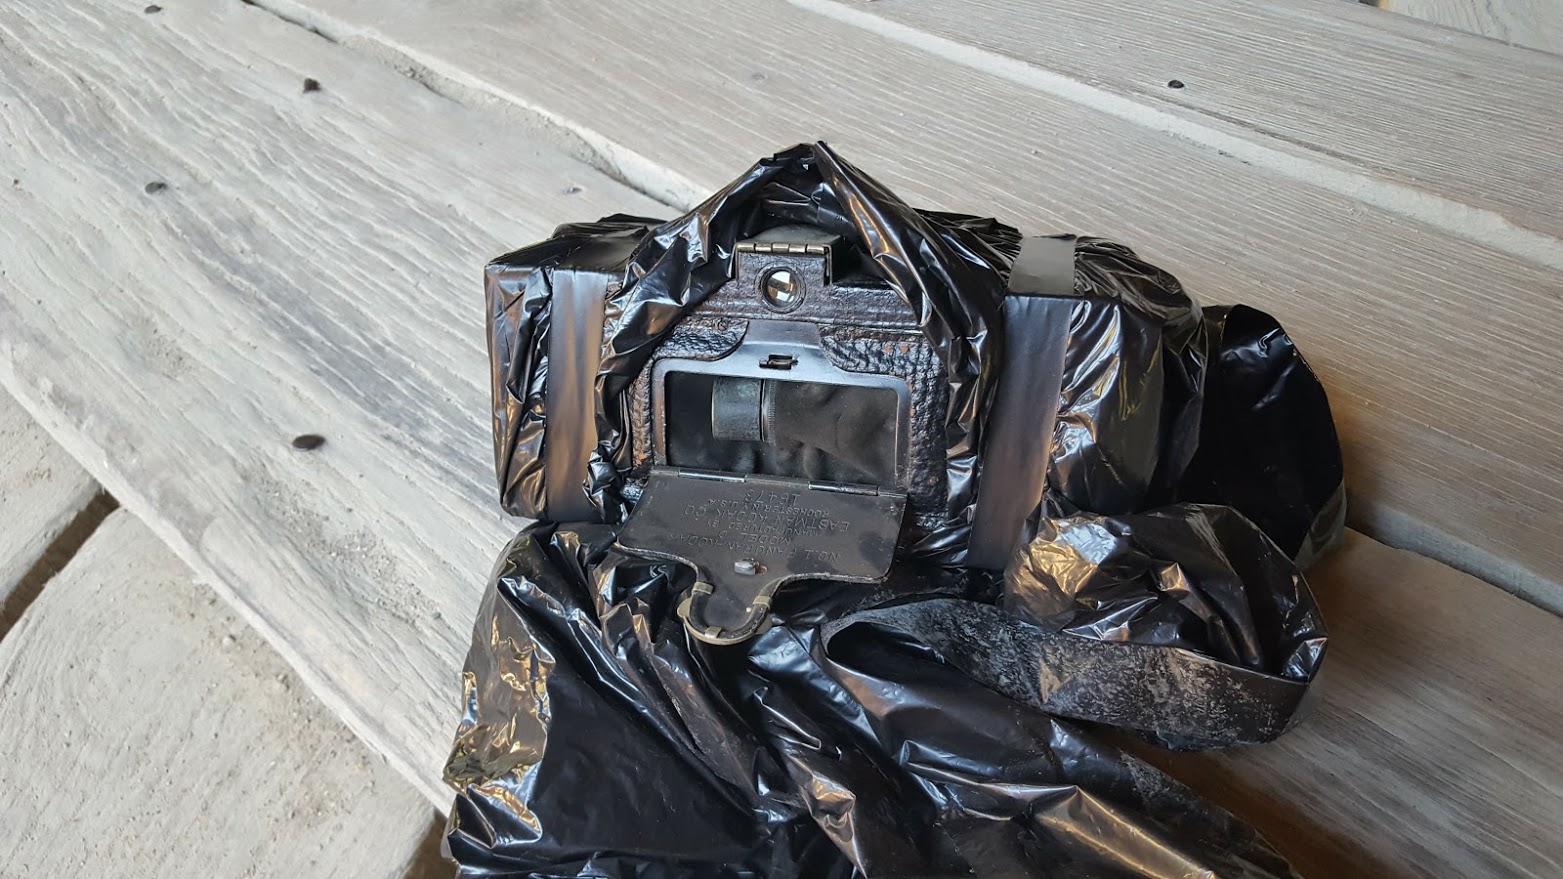
 My solution was as simple as a black garbage bag, electrical tape, and a small piece of red rubylith for the exposure counter. I put the camera into the black bag in a way that the front of the camera could easily point outward from the bag, and carefully wrapped it in electrical tape. The body covering of the camera peeled very easily, so I was careful not to allow any of the adhesive of the tape touch the camera directly. Instead, I wrapped the tape around the exterior of the garbage bag like a giant rubber band to keep the camera from moving around inside of the bag.
With my fingers, I carefully tore small holes in the bag for the exposure counter, viewfinder, shutter release, and wind knob. Since the original red window on the camera had turned orange and I questioned it’s ability to keep unwanted light out of the exposure counter window, I cut a square piece of rubylith and taped it over the hole for the exposure counter. This made the exposure counter very hard to see, but it was just barely visible to see through.
The two images to the left and right above, show how the camera looked as I shot with it. I would leave the front door shut and the excess amount of the garbage bag folded over the front of the camera when it was not in use. When I was ready to take another shot, I would unfold the excess bag and open the front door, exposing the lens. I am sure that a Panoram-Kodak in better condition wouldn’t require this amount of light-proofing, but you can never be too safe with light leaks in a 100+ year old wooden camera.
Once you have the film loaded and ready to shoot, you must advance the film to get ready for the first shot. I mentioned above that 120 format film only allows for 4 exposures on a roll, but you also need to know where to start the film in order to correctly space all four 7″ images. Thankfully, the frame numbers of 120 format film line up perfectly with the exposure window, so for the first frame, advance the film until you see a ‘2’ in the red window. After your first shot, advance the film 4 times to frames ‘6’, then ’10’, and then ’14’ for the last shot.
To get 4 properly spaced 7″ exposures on a roll of 120 film in a No. 1 Panoram-Kodak, you must advance the film to frames ‘2’, ‘6’, ’10’, and ’14’.
When shooting, it goes without saying that the Panoram-Kodak requires good stabilization to prevent blurred shots. The camera does have tripod sockets on the side and bottom of the camera for use on a tripod, but the user manual does state that a handheld shot is still possible, as long as you take care to hold the camera as steady as possible. This is where using a slightly faster film like Portra 160 helps, because you can use the faster shutter speed more often, further reducing camera shake, but you can never be too careful.


The Panoram-Kodak does not have a shutter in the traditional sense. The lens is a swinging post that when not in use points to a “curtain” of fabric inside of the camera preventing light from exposing the film. Upon firing the shutter, the lens “swings” in a 180 degree arc to the other side of the camera. During the moment in which the lens is swinging, an opening exposes light from the lens to the film plane.
Looking at the image to the left, the lens is in a position where it would be mid-swing. You can see straight through the lens to the front of the camera. The image on the right shows the lens in it’s resting position on the right side of the camera. It would remain in this position until the next shot is fired, at which time, it would swing back to the left and then stay there. Each exposure of the camera causes the lens to swing to the other side.
Watch the following video to see the shutter in action. It’s also worth nothing the distinct sound of the Panoram-Kodak as it sounds like no other camera!
Cocking the shutter is accomplished by moving the nickel plated arm on the top of the camera into one of 4 positions. To put proper tension on the spring which moves the lens, you must have the nickel arm on the side opposite to where the front of the lens is pointing. So, if the lens is pointing to the left side of the camera, you must move the arm to the right side of the camera, and vice versa.
On each side, the nickel arm has two notches where it can be locked by pulling up gently on the arm. Each of these two notches represent both the slow and fast speeds of the camera. The first notch encountered is the slow speed, and moving the arm all the way to the second position puts it in the fast speed.
To the right of the nickel arm is the shutter release button. When the arm is in one of the two cocked positions, pressing this button will cause the lens to swing in it’s 180 degree arc exposing the film, so be careful when film is in the camera to not accidentally press this button. Since the lens is physically blocked from moving when the front door is shut, it is wise to keep the front door of the camera shut up until right before the exact moment you want to capture an image. The door also adds an extra level of light protection, but effectively disables the camera in the event you prematurely press the shutter release button.
It should probably go without saying that the Panoram-Kodak has absolutely no type of double exposure prevention, nor does it have any capability of Bulb or Timed exposures. Although the user’s manual discourages use of the camera indoors or in low light, you could duplicate the effect of a long shutter speed by repeatedly swinging the lens multiple times over the same piece of film to lengthen the exposure time in low light. Of course doing this would require stabilization of the camera and a completely still subject.

As the name suggests, the Panoram-Kodak is designed for panoramic photos, which generally means selecting a subject that is far away, such as a mountainous landscape, a seashore, or a large group of people. The user’s manual says that no subject should be closer than 20 feet to the camera and to avoid any shots with a clear horizontal line in it, as it’s perspective would exhibit perspective distortion.
Although I doubt this was done often, the Panoram-Kodak can also take vertical panoramic photos by simply holding the camera to the side. The user’s manual states that this field for artistic work is a new one, and well worth cultivating. In my time with this camera, I made one attempt at a vertical picture of a church steeple. It was definitely an awkward experience.
Once you have the camera ready to shoot and you have a suitable subject, it’s time to compose your image and take your shot. The Panoram-Kodak has a brilliant finder centered in the front of the top of the camera. This finder works similarly to other box cameras with the notable exception that it does not represent the entire panoramic image which will be captured on film. The brilliant finder gets most of the height of the image, but cuts off both sides of the image. As a result, a little bit of imagination must be used when composing your images. Thankfully, Kodak added an aide to the Panoram-Kodak that isn’t immediately obvious which is an embossed “V” on the top of the camera that can be used as a guide to approximate the entire scope of the image which will be captured in film. Since many Panoram-Kodaks have various condition issues after all these years, if yours has has been restored with new leather, its likely this “V” will be missing. Although I am mostly writing about the later variant of the Panoram-Kodak with the 3 doors, I can confirm that this “V” exists on the earlier, curved back model as well.
Some models of the Panoram-Kodak have a circular bubble level immediately behind the nickel arm, that can be used to check that the camera is level, but the example I used did not have this feature. I am not sure if this was added before or after my particular example was made. Even without the bubble level, special care must be taken to assure that the camera is level as the panoramic images greatly exaggerate an uneven image.
At this point, you have all of the knowledge you need to shoot with a Panoram-Kodak. Assuming you have film loaded in the camera that can take advantage of the speeds available to you, and you’ve taken steps to avoid light leaks, shooting the camera is pretty easy. The sound of the swinging lens is quite interesting. Remember to advance your film 4 frames after each exposure so as not to overlap your shots. Once you’ve shot the fourth and final shot, advance the film until the paper trailer has wound around the film on the takeup spool, open the camera, and remove the exposed film.
A word about developing your film is that although 120 film shot in a Panoram-Kodak should develop no differently than 120 film shot in a 6×6 or any other aspect ratio camera, many labs will charge you extra for scanning panoramic shots. Both Dwayne’s Photo and The Darkroom have add-on fees for scanning panoramic film. In fact, Dwayne’s even told me that their scanner could not handle the entire 7″ image at once, so I asked them to scan it in sections, and I would stitch them back together using Photoshop. If you scan your own film, this isn’t an issue, but it’s worth mentioning for those of you who send out your film.
My Thoughts
I want to first start out here by saying special thanks to Dan Colucci from www.antiquecameras.net, who graciously loaned both of these Panoram-Kodaks to me. Dan contacted me in spring of 2016 asking if I would be willing to shoot and review these cameras. I accepted with the understanding that it would take me several months to finally get around to completing, to which he agreed, but sadly, as with many things, life kept getting in the way, and it took me far longer than I had originally estimated to get through this review. As I write this, I’ve had these cameras for over 6 months and Dan is eager to get his cameras back. Although it’s not unusual for me to take many months to complete reviews (I have had a review for the Kodak Bantam in draft status since Sept 2015 that still hasn’t posted), I probably shouldn’t have promised any sort of deadline on a camera so unlike any that I had ever shot before.
So as this is a camera sent to me for the purpose of reviewing, I can say that it’s not one I probably would have thought to look for on my own. For one, panoramic cameras require a lot of special handling to account for the extreme age and the types of shots they are capable of. You would not want to get a camera like this and take candid snapshots at the zoo or a park. Quite a bit of thought and effort should be put into each shot to make the most out of the extremely large negative. But also, these cameras are very old, and are rather fragile. Each of these two cameras had body covering that was peeling in many places. The hinges on the 3 doors were very weak, with one completely detached when I received it. The older model didn’t work at all, even though it actually looked a bit nicer. There so many things that could go wrong with these cameras that a lot of special attention must be paid when shooting with them. I’ve used a lot of strange tricks when shooting old cameras, but this is the first time I’ve ever employed a garbage bag when shooting with a camera!
As I learned more about what to expect from this camera, I grew more and more excited. What really intrigued me was that the swinging lens captures a type of image that isn’t easy to capture today. Sure, we have wide angle fish-eye lenses that can get extremely wide angle shots, some even rivaling the 112 degree image of the Panoram-Kodak, and sure, modern smartphones have stitching capabilities to make your own digital panoramic shots. But for each of these panoramic solutions, none can really recreate the look of an actual swinging lens.
I found some sample images posted online shot by other photographers and I started to see the appeal of this camera. I was really fascinated that we were able to somewhat easily capture these kinds of shots over 100 years ago, but since then, what the Panoram-Kodak can do, has largely gone extinct.
This is a pretty cool camera, and its great that the 105 format film is so easily adapted with modern 120 film to where you can still shoot this camera today. It’s worth noting that there were two other Panoram-Kodaks called the No. 4 from 1899 – 1926 which used a larger format film called 103 format and that camera shot massive 3½” x 12″ images, and then a later model called the No. 3A from 1926 – 1928 which used 122 film and shot 3¼” x 10 3/8″ images. 103 format film went extinct in 1949, and 122 in 1971. There are no known easy ways to adapt modern film to be used in these cameras, so if you wish to shoot a Panoram-Kodak, the No. 1 is your only option.
My Results
Of any camera I’ve ever shot, I had the most anxiety about this one. For one, its the oldest camera I’ve ever shot, two, I had so little confidence in it’s ability to prevent light leaks that I shot it in a garbage bag, three, it used an aspect ratio I’ve never shot before, and four, I had absolutely no way of knowing its real shutter speed, aperture size, or if even my selection of Kodak Portra 160 would produce usable negatives.
My thought process when shooting the Panoram was less about getting good images, and more about demonstrating the camera’s use. Knowing that there would only be 4 exposures per roll, I had to choose my shots wisely. I figured I would shoot at least 2 shots outdoors in a well lit area. I had read in another review of the Panoram that there are hardly any vertical panoramic shots, so I knew I wanted to get one of those. Finally, I thought it might be fun to try and get an indoor shot using the camera. Although the Panoram is not designed for interior shots, I used a trick that had worked on box cameras where you repeatedly shoot the same image several times over the same piece of film in essence double, triple, or quadruple exposing the same image to recreate the effect of a slower shutter speed.
Due to the extreme panoramic aspect ratio of these images, I will forgo the traditional WordPress gallery layout and just include direct links to the images themselves. If you are viewing this site on a smartphone, I encourage you to check these out on a computer and make sure your browser is set to view the full size (greater than 6000 pixels wide) images to get the full effect.


I’ve included 3 of my 4 images as my attempt at shooting an interior picture of a bowling alley failed even though I triple exposed the image. It is clear that if an interior shot is attempted with this camera, either a very fast film must be used, or an excessive amount of repeated exposures is necessary.
To say that I was astounded when I saw the results from this roll is an understatement. Considering the Panoram-Kodak is nothing more than a box camera with a swinging meniscus lens, and all of the unknown variables that I had to deal with, the fact that I got anything at all is impressive. I had Dwayne’s Photo in Parsons, KS develop and scan this film. They charged me a $5 surcharge for the panoramic scans but they still couldn’t get the entire image at once. They had to scan each of these 3 images in 3 parts and send them to me as individual JPGs. Using Photoshop’s Photomerge feature, I stitched the separate JPGs into one complete image and used the content aware fill to correct any anomalies.
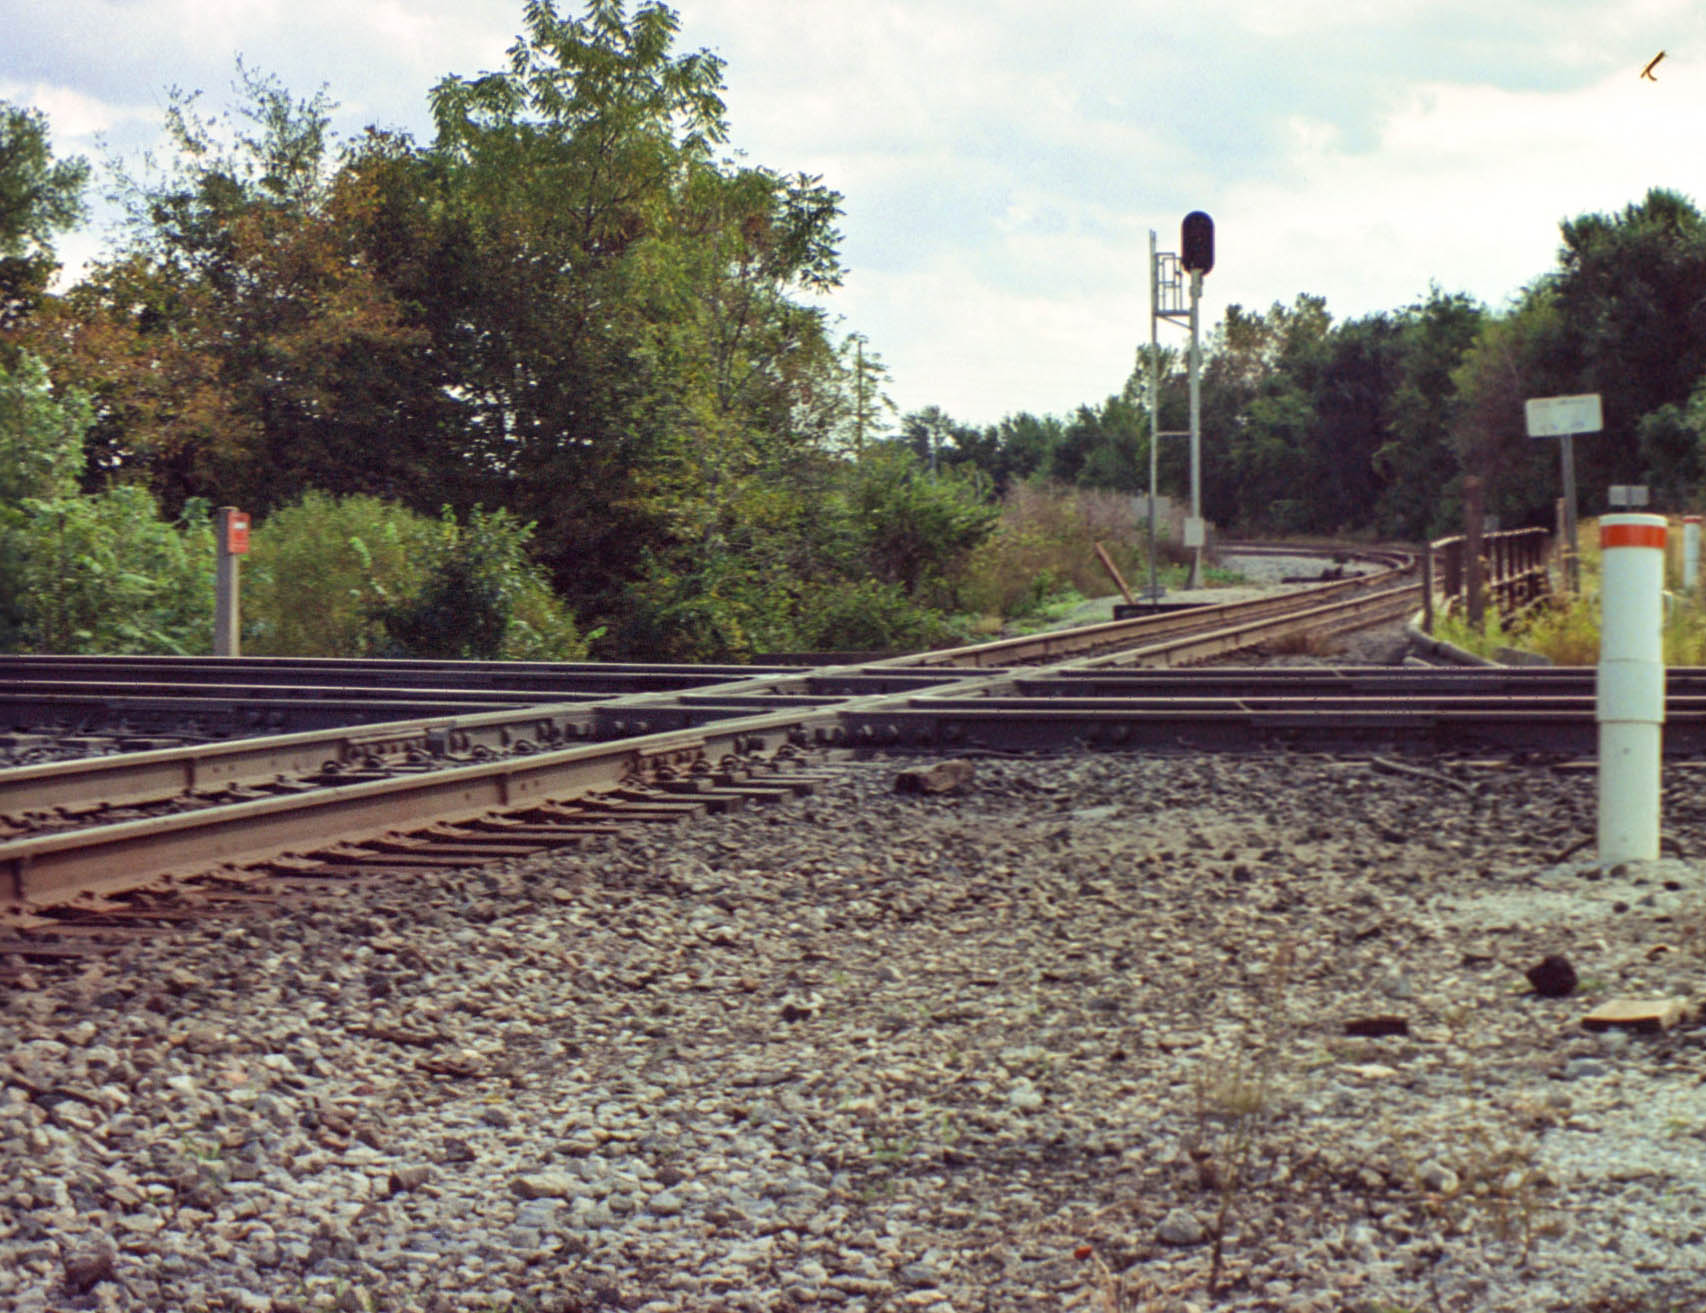
The Portra film was a tad underexposed in all 3 images so I did boost the levels and color vibrance in all three of these. The ones of the railroad tracks and lake came out the best, with the vertical church photo still being a bit dark and soft. I do notice some color distortion around the top and bottom edges of the images and I’m not sure if these are light leaks possibly from the front of the camera, or if they’re just anomalies with the film itself. In either case, the color cast to these images make them even more interesting than just any simple stitched panoramic image.
Center sharpness was pretty good considering the modest single element lens. While crystal clear sharpness would not have been a priority of panoramic camera, I was still impressed with the detail. To the right is a 1:1 crop of the center of the railroad image showing pretty good sharpness.
So after seeing these results, my biggest regret is not allowing myself to spend more time with the Panoram-Kodak. I mentioned above that this camera was a loaner from Dan Colucci and I had the camera for several months before even having an opportunity to shoot it. Before anyone considers adding one of these to your collection, you have to realize that these things are very old, and to find one in working condition is not easy. Prices on eBay are all over the place. If I were to target a specific model, I would definitely look for one of the earlier ones with the curved back as the chances of light leaks are greatly reduced on those. While it might not be necessary to go the extreme length I did and shoot the camera in a garbage bag, it might be a good idea to have a black T-shirt or small blanket to cover the camera while out shooting as there’s no real way to replace light seals on a camera like this.
Its also worth mentioning that the cost to shoot a Panoram-Kodak is higher per exposure than a typical camera as you only get 4 shots per roll. If you consider an average price of $6 per roll of 120 color film, and an average price of $15 for developing and scanning, you’re looking at $21 to shoot 4 images. Of course buying film in bulk and developing and scanning yourself would reduce these costs, its still one of the less economical cameras to shoot.
Despite these challenges, I really enjoyed my time with the Panoram-Kodak. Sure, you could recreate a panoramic shot using a wide angle or fisheye lens on an SLR, or even use some of the creative stitching modes available on most modern smartphones, the experience is nowhere near the same as shooting with a swinging lens camera like this.
My Final WordHow these ratings work |
The Kodak-Panoram is a very unique camera that makes images that no other camera can make. Although it is pretty large even by box camera standards, its not heavy, and it’s single element fixed focus lens is capable of pretty good pictures. While nothing this camera shoots would win any type of sharpness contest, that wasn’t the point. The point was to make really cool panoramic photos and it does that very well. Coming across a working Panoram-Kodak is not easy, and shooting one requires quite a bit of effort as the film it was designed for has not been made in over half a century, but its close similarity to 120 film means that it is possible to shoot. I really enjoyed my time with this camera, and if you are looking for a very unique experience with an extremely old camera, I would definitely recommend trying one out, at least once. | ||||||
| Images | Handling | Features | Viewfinder | Feel & Beauty | History | Age | |
| 2 | 0 | 0 | 0 | 1 | 2 | 40% | |
| Bonus | +1 for the historical significance as a panoramic camera, and +1 for extreme cool factor looking at the beautiful 6×17 images it makes | ||||||
| Final Score | 9.0 | ||||||
Additional Resources
http://camerapedia.wikia.com/wiki/Kodak_Panoram
http://photo.net/classic-cameras-forum/00Mp4i
http://www.kodaksefke.nl/1-panoram.html
http://www.vintagephoto.tv/no1panoram.shtml
http://www.apug.org/forum/index.php?threads/overhauling-kodak-panoram.41489/
Great write up! I saw your youtube video and looked up your website. It is a fun camera to shoot with. I am lucky enough to have a working No. 4 Model B.
It uses the large film size and I cut 11×14 x-ray film to fit the 4×12 size. I found that while X-ray film is a bit higher speed (around 200 ISO) it still works just fine.
I’ve made many satisfying darkroom prints from negatives I’ve made with this camera. Glad to see others trying it out too!
Very cool! Johnny Sisson mentioned it in the Photography with Classic Lenses Podcast today
Thanks for the heads up! I just listened to the podcast. Funny that he Googled the camera and found my article that way!
I have a No. 1 I use fairly often. Great old cameras to play with!
another great article, thank you. I am always astounded at your level of research done and I enjoy your easy to read real world comments (like the garbage bag solution). Sudek shot his Prague Panoramic, dubbed his Love letter to Prague, with a Kodak Panoram in the 1950s and he made 10x30cm contact prints. I am now trying to find all the spots where he stood those 70 years ago and how much Prague has changed. He also has some vertical shots, but it’s a minority (23 out of 284). All the best!
Thanks for the compliments! One of my greatest regrets in my time collecting and reviewing cameras was that this Panoram was offered to me by it’s owner for $75 when I reviewed it. I declined and sent it back to him, regretting it ever since. Have you seen what these go for these days?! And yes, the garbage bag trick is something I’ve employed on other cameras too!
Contrary to what you mentioned about the number 4, it’s actually not that hard to use a piece of cardboard to scribe the same circle of the film guides, then cut some lightweight wood painted black in that same curve…and attach using longer screws from the bottom and top in the brass roller bracket screw holes
To attach the wider guides…then using 3d printed extensions for the film rolls… it’s a little bit clumsy but not that difficult and makes for a really big image.