

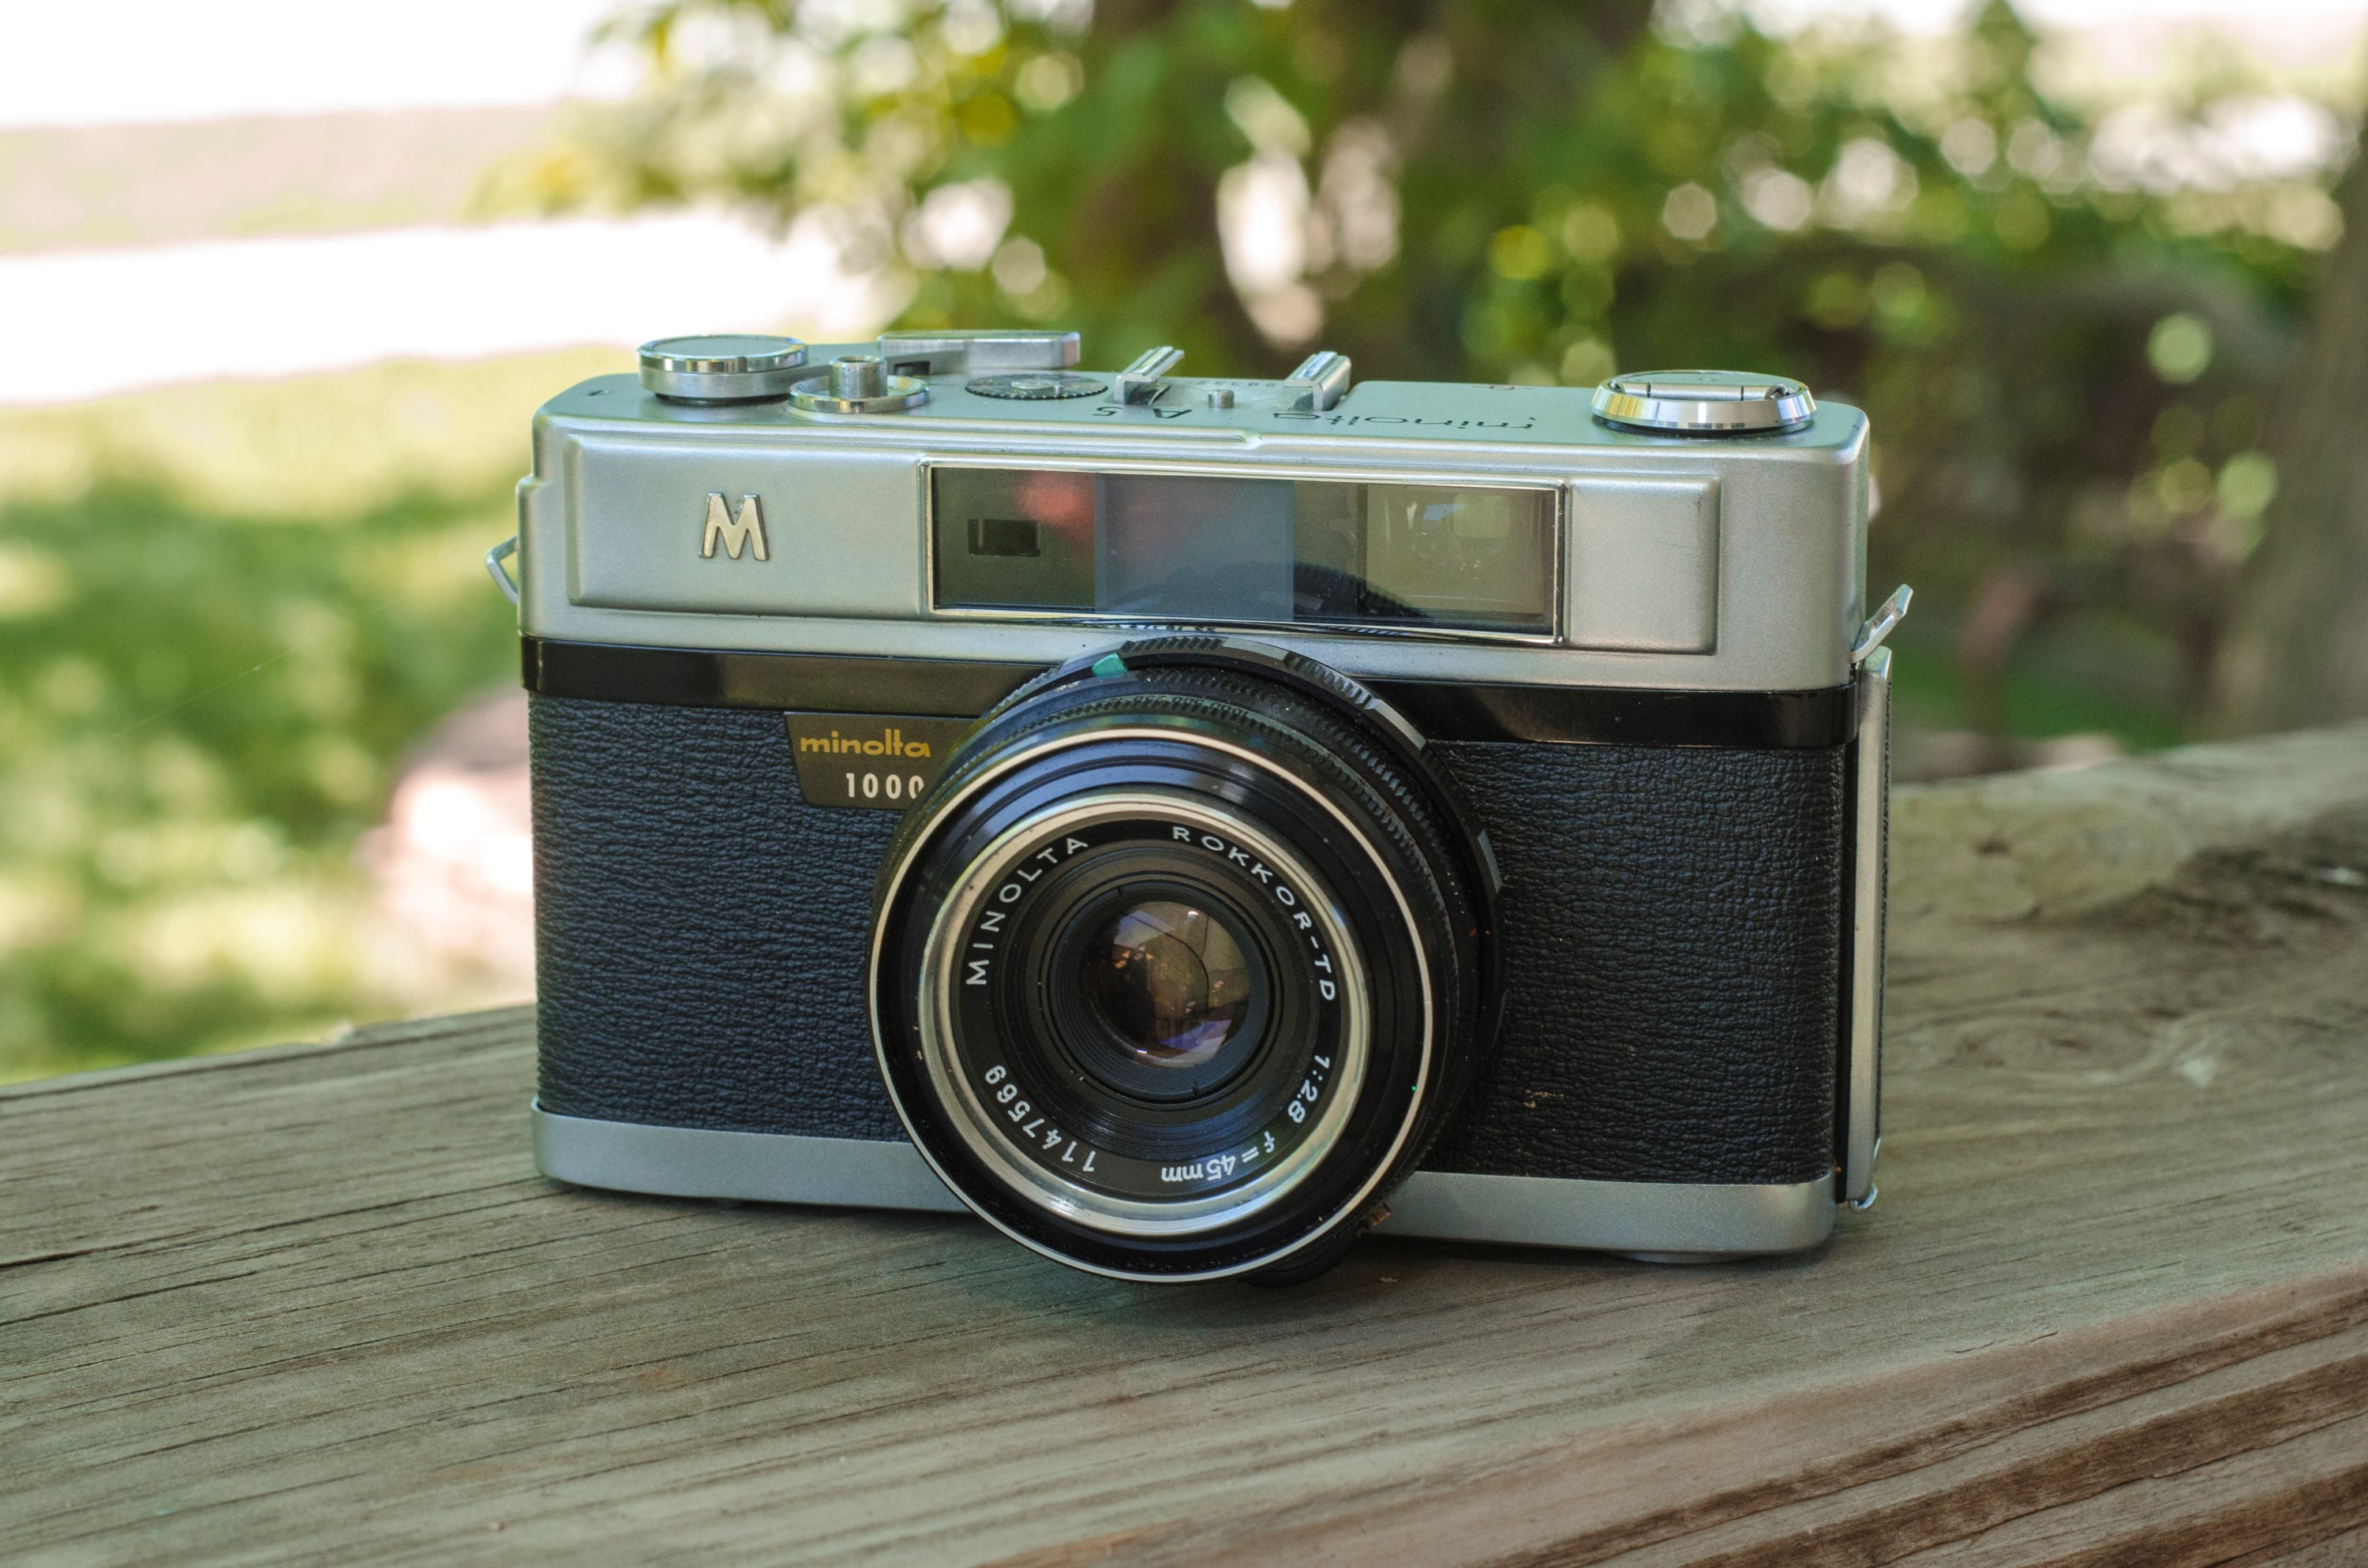
This is a Minolta A5-1000 35mm rangefinder camera equipped with a 4 element Rokkor-TD 45mm f/2.8 lens and a Citizen leaf shutter capable of speeds as fast as 1/1000th of a second. This was an uncommon speed for a leaf shutter and meant that this relatively simple camera could shoot speeds as fast as many focal plane shutters of the day. The A5 was the last of Minolta’s unmetered, all mechanical cameras. While modest in specs, it’s clean lines and lack of any sort of electronics means that many are still in good working condition today. Many Minolta enthusiasts list this as one of the most underappreciated cameras of the 1960s. It was a good looking camera which was smaller than most other rangefinders of the day, had an easy to use rangefinder, an extremely capable lens, and a shutter with a wide range of speeds.
Film Type: 135 (35mm)
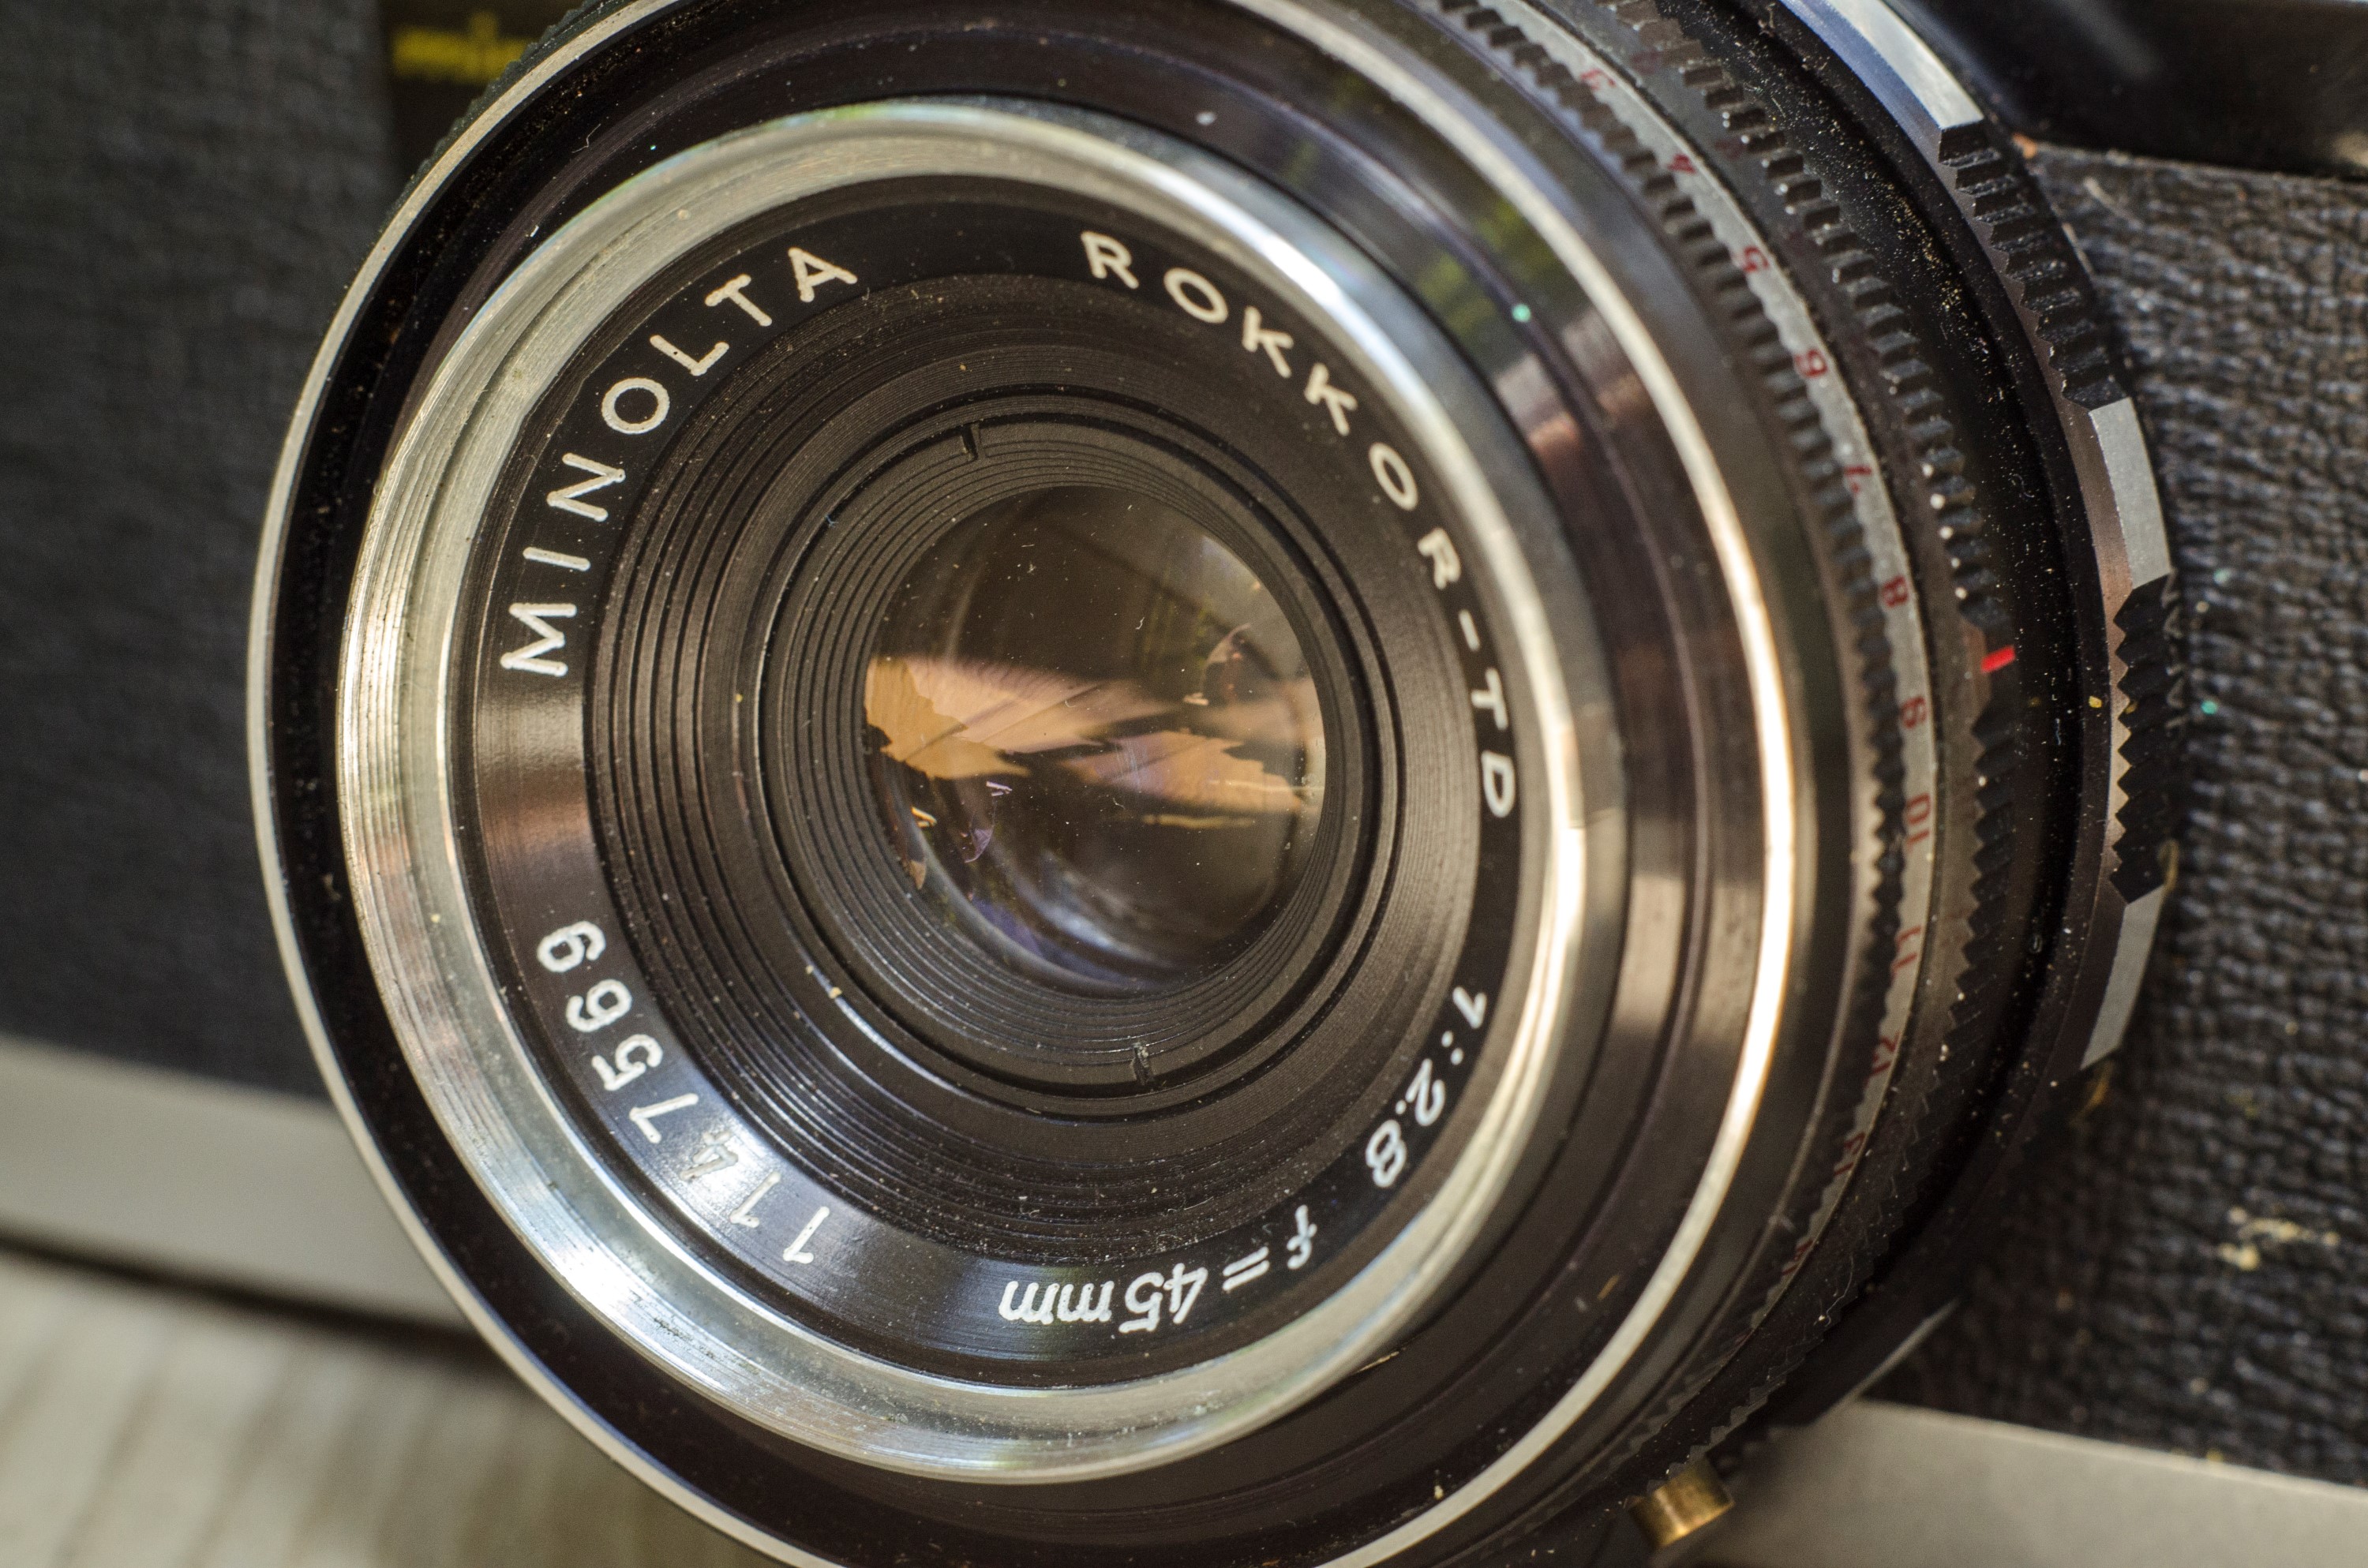
Lens: Minolta Rokkor-TD 45mm f/2.8 coated 4-elements
Focus: 3 feet to Infinity
Type: Coupled Rangefinder
Shutter: Optiper Citizen MLT Leaf
Speeds: B, 1 – 1/1000 seconds
Exposure Meter: None
Battery: None
Flash Mount: Coldshoe and M and X Flash Sync
Manual: http://www.cameramanuals.org/minolta_pdf/minolta_a5.pdf
My Final WordHow these ratings work |
The Minolta A5 isn’t a camera thats discussed very often these days. It’s a forgotten example of early 60s Japanese rangefinder style. On paper, it might seem like it’s not very interesting, but in your hands, it’s a very comfortable and relatively lightweight camera. All of it’s controls feel logically placed and comfortable in your hands. The modest 45mm f/2.8 lens is extremely sharp and renders shots as good as many more technically impressive lenses. The lack of any electronics, even a meter, mean that there’s very little to go wrong with this camera. Assuming the camera has been taken care of throughout it’s life, and the shutter is not stuck, this camera should continue to provide you with an excellent shooting experience with no fuss. After my first use with this camera, I was pleasantly surprised at how well the whole package worked together. I cannot wait to shoot with it again, and if you find one for sale, I absolutely recommend picking it up. | ||||||
| Images | Handling | Features | Viewfinder | Feel & Beauty | History | Age | |
| 2 | 2 | 0 | 1 | 2 | 0 | 20% | |
| Bonus | +1 for the complete package, this camera is great to use, looks great, and makes amazing photographs | ||||||
| Final Score | 9.4 | ||||||
History
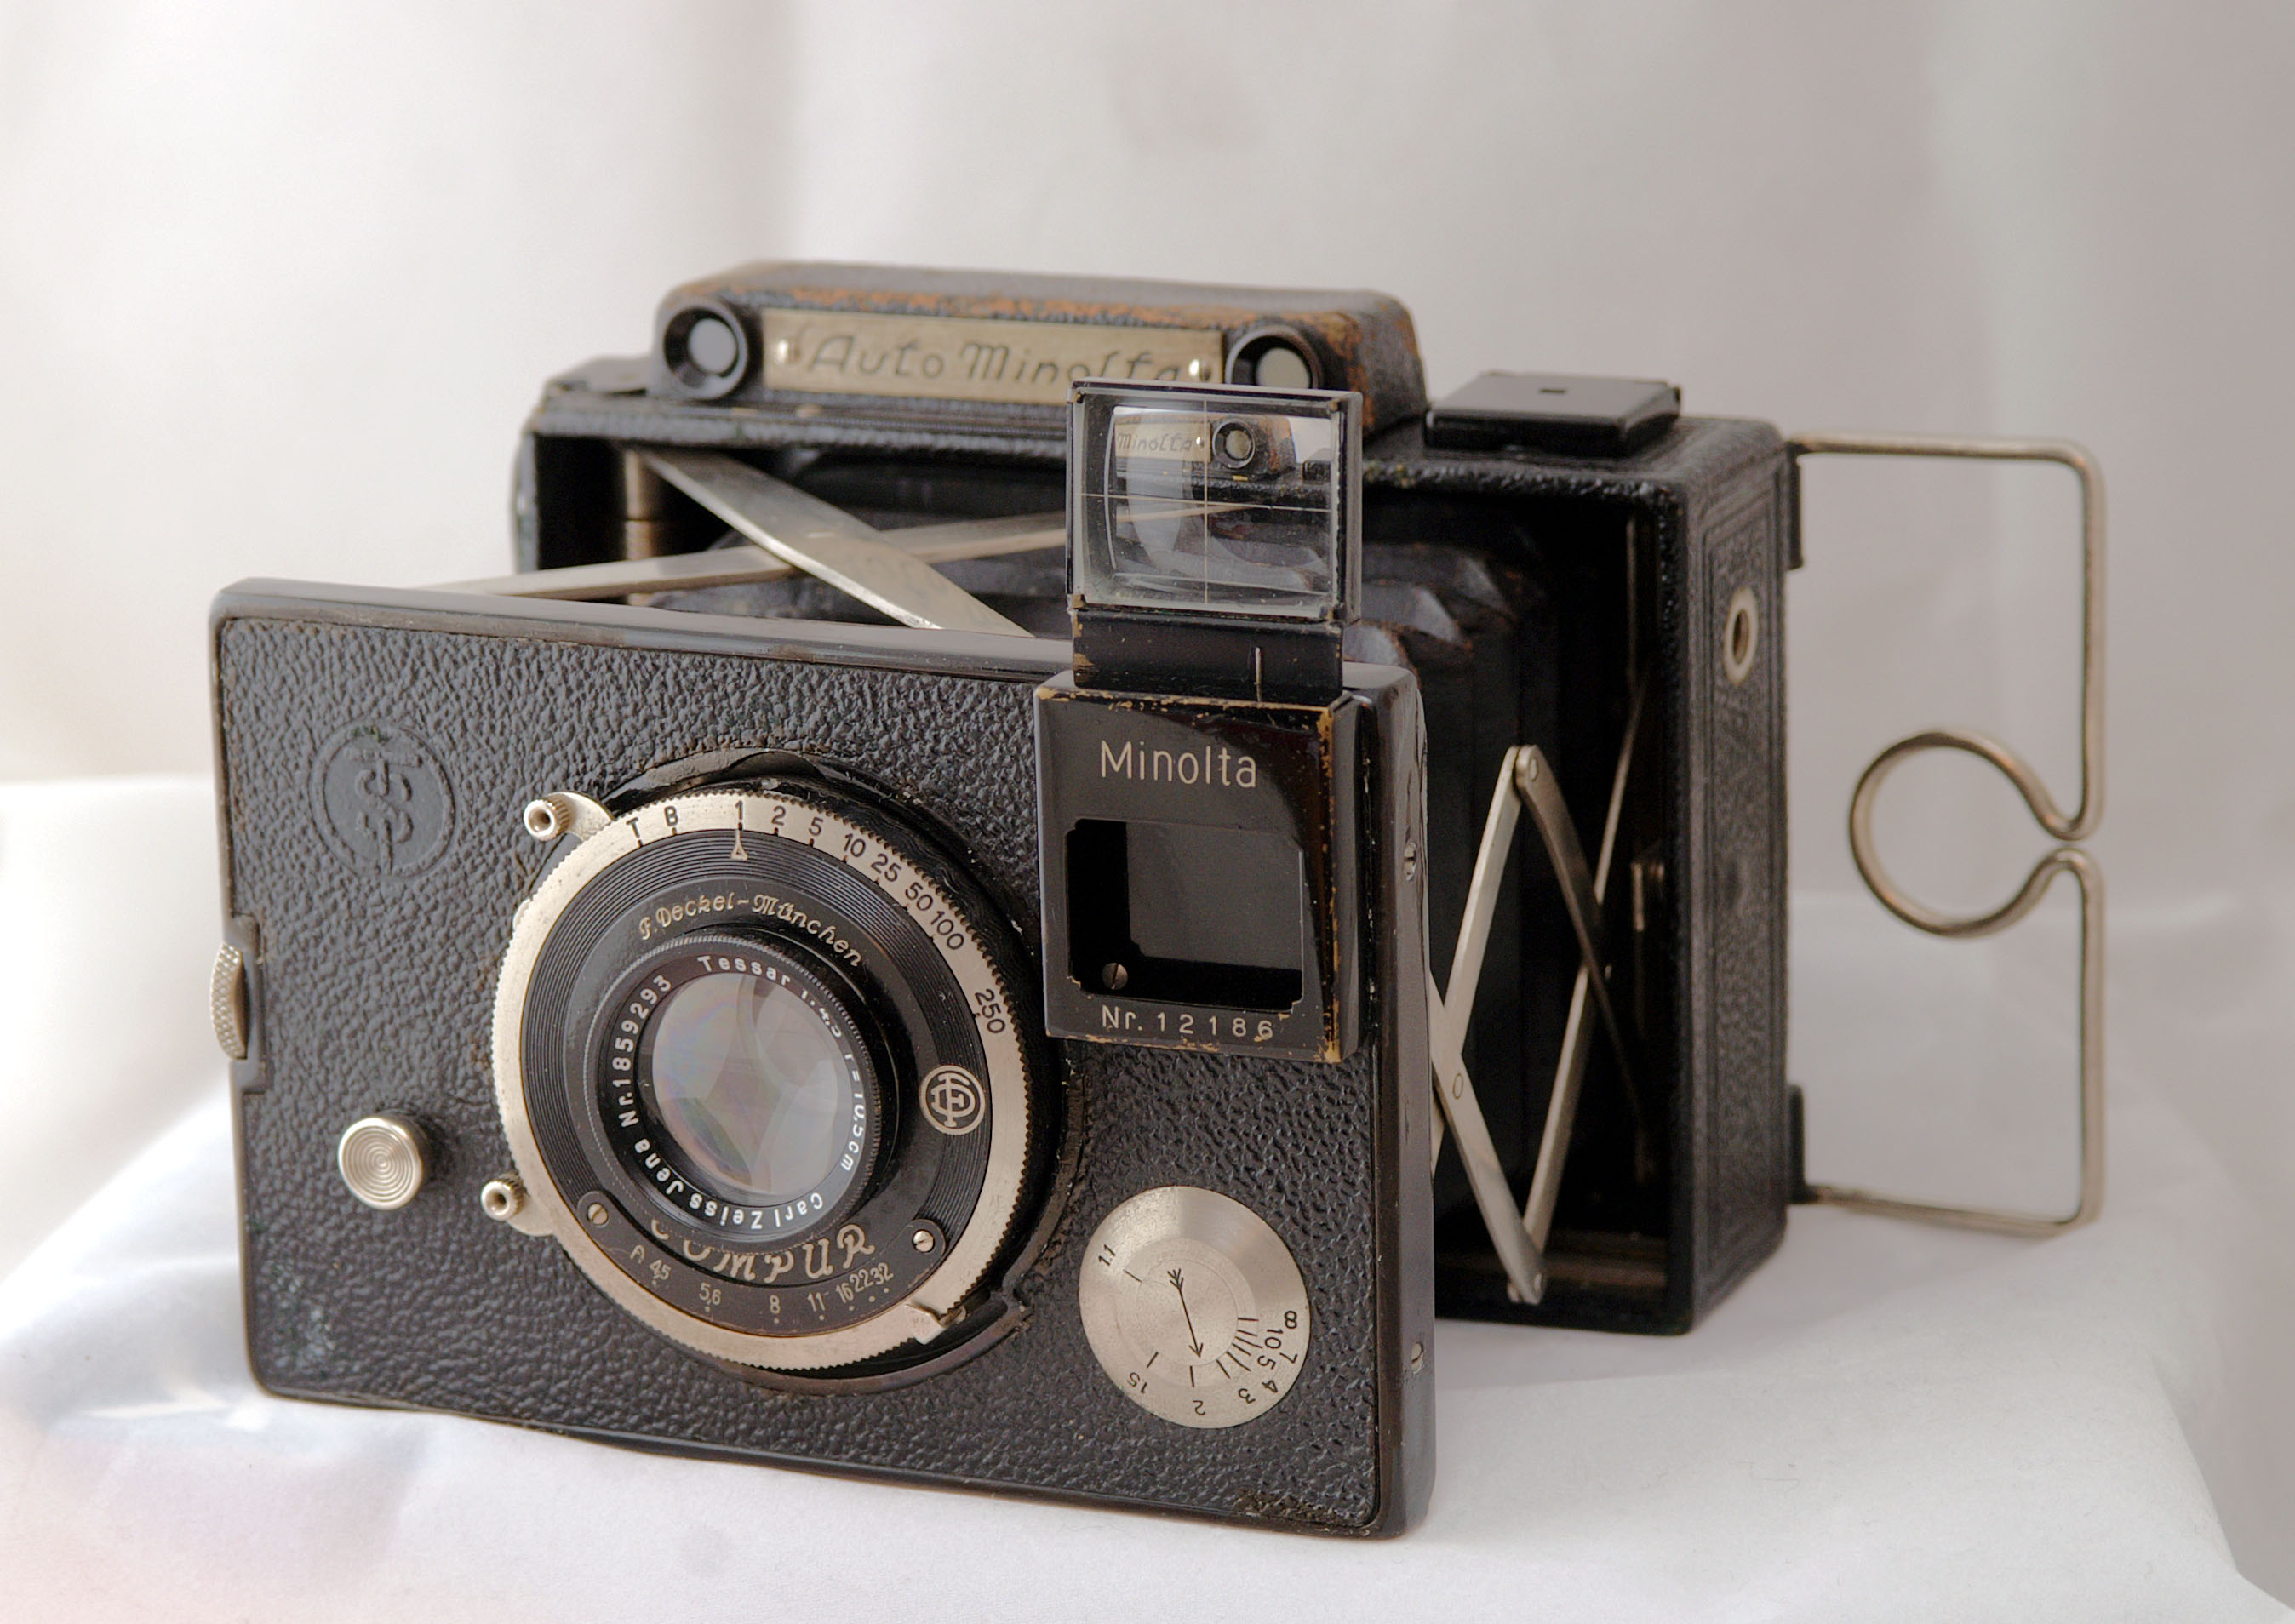
Minolta was a Japanese company founded in 1928 by Kazuo Tashima in Osaka, Japan. Tashima enlisted the help of German camera technicians Billy Neumann and Willy Heilemann to help him design Japanese made cameras, but utilizing German expertise. The company was originally known as Nichi-Doku Shashinki Shōten which translates to “Japanese-German Camera Shop”. In 1929, Nichi-Doku released it’s first camera, a folding 6 x 4.5 cm camera known as the Nifcarette which was inspired by similar German folding cameras of the time.
In 1931, the company changed it’s name to Molta Gōshi-Gaisha. The word “Molta” is an acronym of a German translation meaning “Mechanism, Optics and Lenses by TAshima”. Shortly after this time, both Billy Neumann and Willy Heilemann left the company to form their own company simply called Neumann & Heilemann.
In 1933, Molta Gōshi-Gaisha applied for a trademark for the name Minolta which would be used as a brand name for their forthcoming cameras. After World War II, much of the information regarding the history of the company was lost or destroyed, so it’s hard to know for certain if Minolta was also an acronym like Molta. Some sources say that Minolta stood for “Mechanism, INstruments, Optics and Lenses by TAshima”, but others state that Minolta is taken from the Japanese term “Minoru ta” (稔る田) which means “ripening rice fields”. Ripening rice fields are commonly used as symbolism in Japanese culture for signs of health and prosperity. In addition “Minoru ta” is pronounced exactly the same as the name “Minolta”.
Throughout the 1930s, the company saw great success in Japan and started releasing other lines of cameras and photographic equipment. In 1937, the company changed it’s name once again to Chiyoda Kōgaku Seikō K.K. which is often abbreviated as “Chiyoko” and released it’s first Twin Lens Reflex known as the Minolta-Flex.
In 1940, Chiyoko introduced the Rokkor line of optical lenses for military use only. During the early part of World War II, Chiyoko produced cameras both for military and civilian use, but in 1943 stopped all civilian production. Chiyoko was heavily involved in the Japanese war effort, but by the end of the war, 3 out of the company’s 6 factories were destroyed by US bombings.
In 1946, Chiyoko resumed manufacturing of consumer cameras and optical equipment and continued to expand it’s line of cameras. In 1947, a highly successful line of “Leica-inspired” 35mm rangefinder cameras known as the Minolta 35 was released. The Minolta 35 was the first mass produced 35mm rangefinder built with Leica specifications. It sold very well and was in regular production until the early 1960s. One unique aspect of most Minolta 35s that although they used standard 35mm film, it produced negatives that were 24mm x 32mm, compared to the international standard of 24mm x 36mm. This gave exposed images from the Minolta a more square look, and because the negatives used less space on the roll of film, you would get a few extra exposures per roll. A standard 36 exposure roll of film would yield 40 exposures.
The Minolta 35 would receive 8 revisions throughout it’s production run, and only the very last revision, the Minolta-35 Model IIB would shoot normal 24mm x 36mm exposures. Although the Minolta 35 was an ambitious camera that proved the Japanese were capable of making cameras that approached their German competitors in terms of quality, it was still an expensive camera that many could not afford.
In 1955, Minolta would release a new line of budget rangefinders known as the A-series. The first in this series, the Minolta A was a 35mm fixed lens rangefinder with a much smaller body than that of the Leica inspired Minolta 35. Although considered to be an economy model, it was well built and came with a good Rokkor 45mm f/3.5 lens and a large and bright viewfinder. While the Minolta 35 continued to be the brand’s top of the line model, the A-series sold in much larger numbers.
Minolta would release a second model, called the A-2 a couple of months after the A with a faster f/2.8 lens, faster shutter, parallax correction, and revised rangefinder. These two models would be sold concurrently, until 1959, when Minolta would release the all new A3. Containing a more traditional and modern shape, the A3 came with the same excellent shutter and lens, but lost parallax correction which was available on the A-2. The A3 would replace the original A as the entry level camera, and then a year later, in 1960 the A5 would be released using the same body as the A3, but regaining parallax correction.
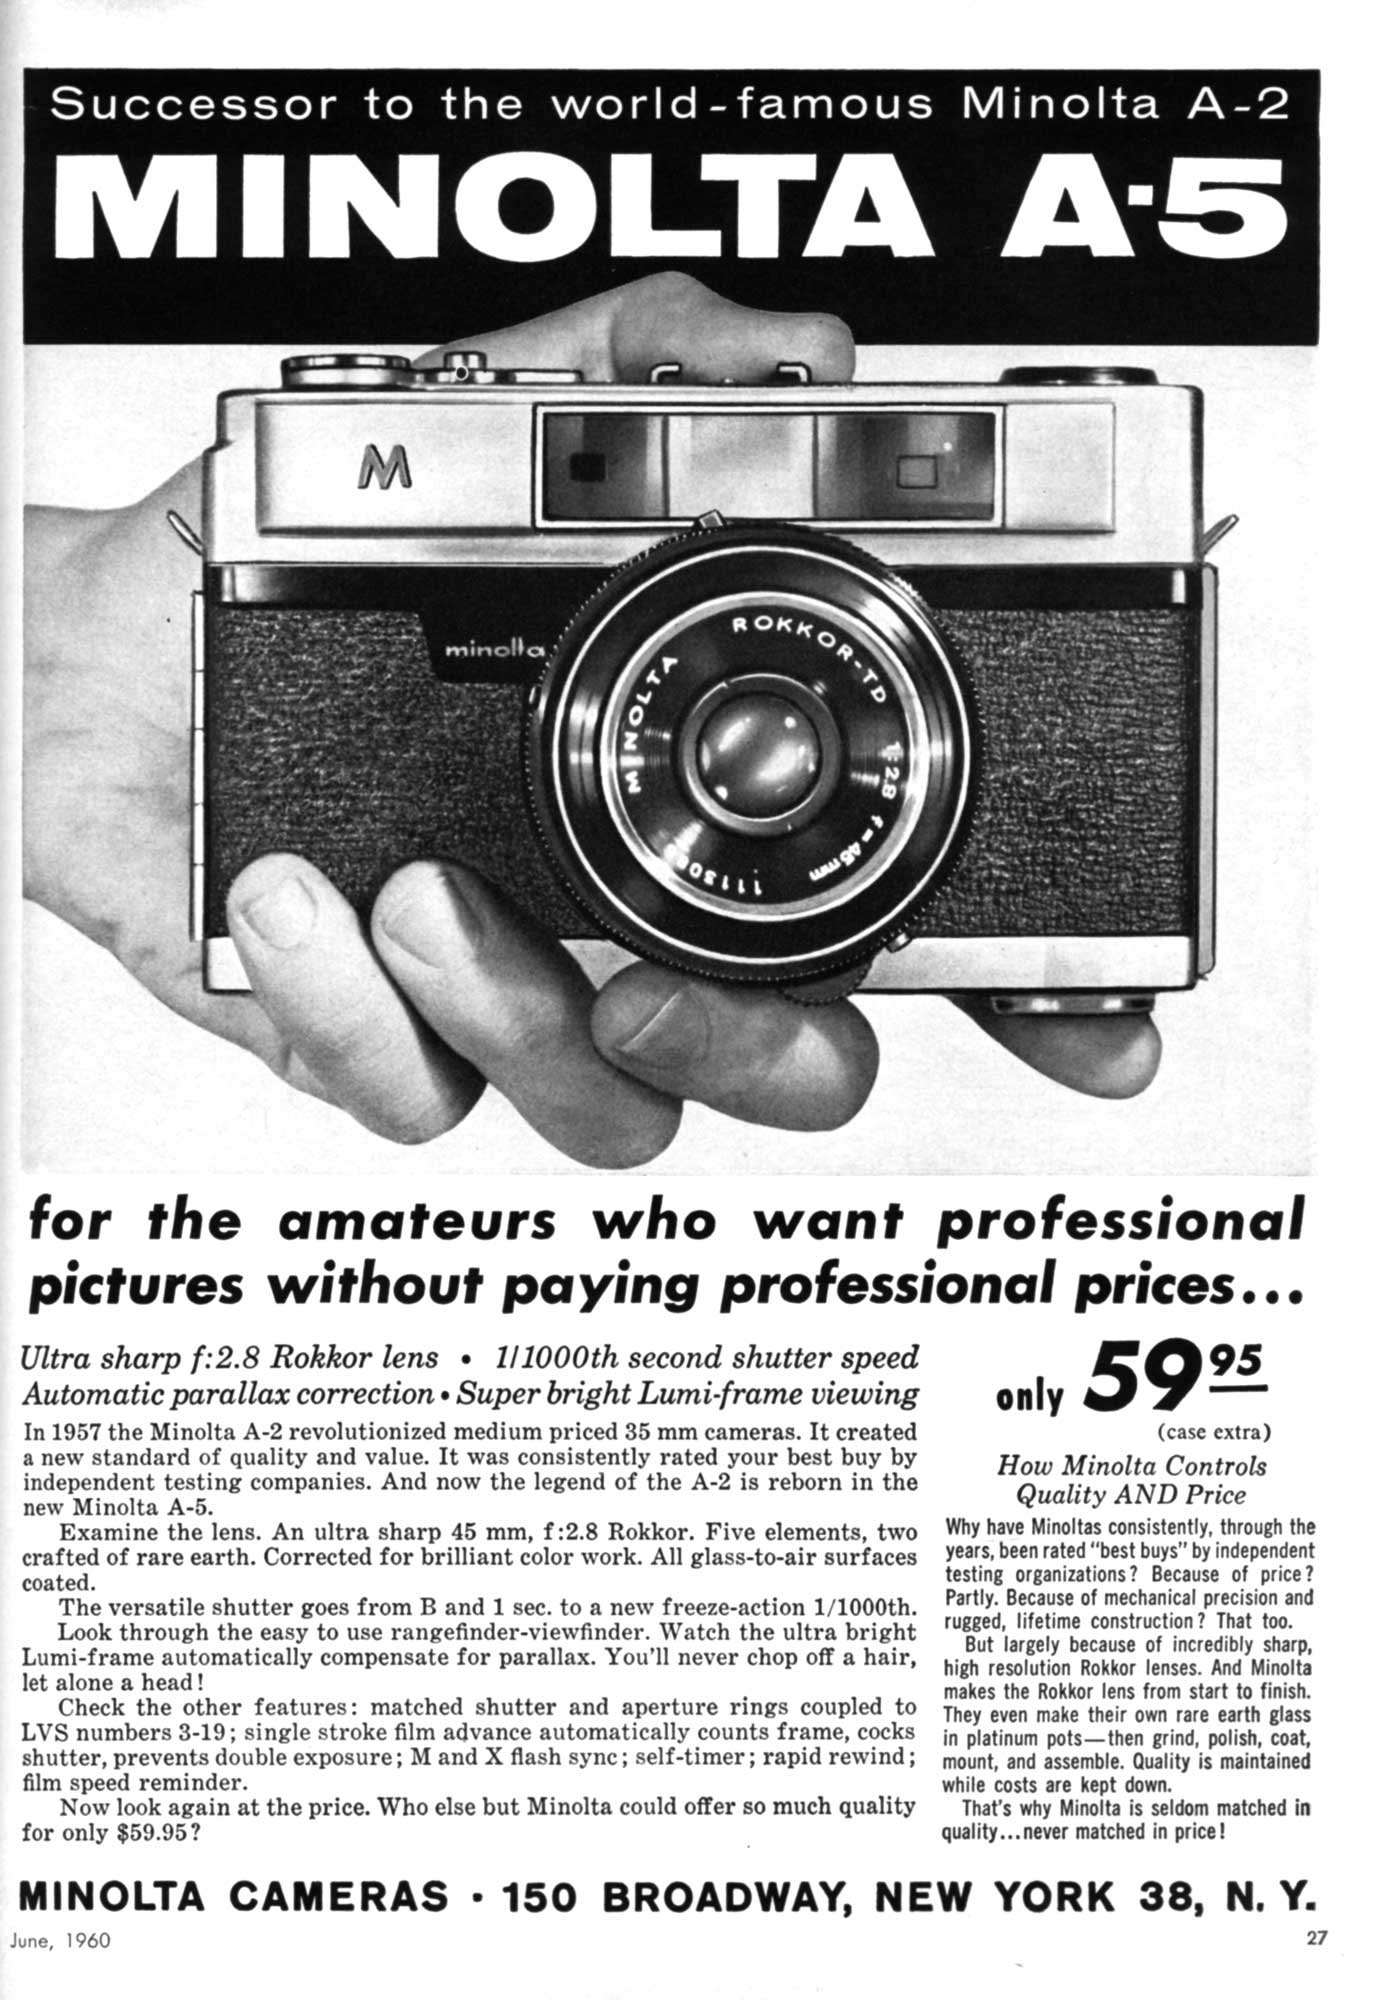
The A5 could be had with a variety of shutter and lens combinations. Some models were sold with a 6-element f/2 Rokkor lens, but most of them had the 4-element f/2.8 lens. There was also the A5-1000 model which is being reviewed here which had a different Citizen shutter with a top speed of 1/1000th second. My example comes with the 4-element f/2.8 lens, but I am not sure if the A5-1000 could also be had with the 6-element f/2 lens. The ad at the right from the June 1960 issue of Modern Photography lists the A5 with a price of $59.95 without the case. The ad lists the A5 as having a top shutter speed of 1/1000, but doesn’t specifically refer to it as the Minolta A5-1000. In any case, when adjusted for inflation, $59.95 is just under $500 today.
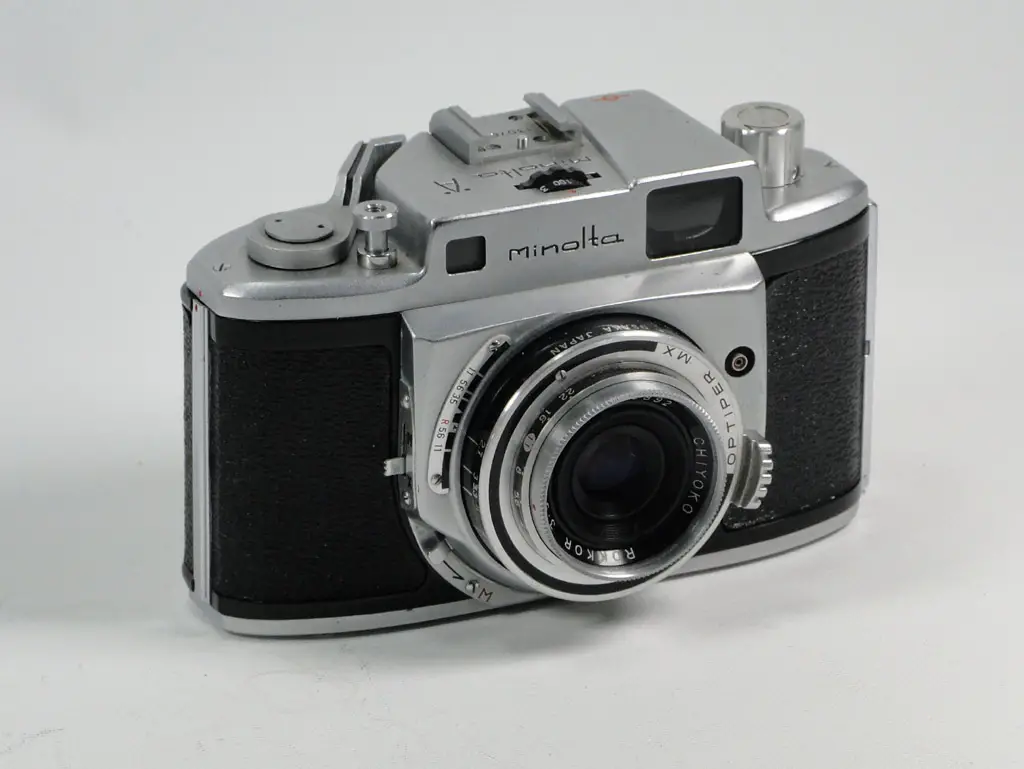
By 1962, the original Minolta 35 had been in production for over a decade and the rest of the industry was starting to embrace more advanced rangefinders with meters. As a result, Minolta would replace the Minolta 35 with their all new Hi-Matic. The Hi-Matic came with a selenium cell light meter which was capable of aperture priority automatic exposure. It was a larger camera than the A-series and it came with a 45mm f/2 lens. For the next two years, the Hi-Matic and A5 would be sold together, but by 1964, the A5 would be replaced by the new Minolta AL series which was larger and contained a light meter.
Both the Hi-Matic and AL series cameras would be highly successful throughout the rest of the 1960s and the Hi-Matic models would eventually morph into completely electronic compact cameras by the 1970s.
Today, Minolta rangefinders are generally highly regarded as quality examples of 1960s Japanese rangefinder design. The Hi-Matic models definitely steal the spotlight with most collectors and often sell for higher prices than the earlier A-series, however the A-series have their following too. I’ve read on a number of websites and on photo.net of people with very fond memories of A-series cameras. The A5 in particular was the best of the bunch, and it’s handsome, yet simple design, all mechanical operation, good shutter, and even better lens make for a heck of a value.
My Thoughts
I can’t really say that I had a lot of thoughts about this one prior to buying it. There are cameras that you know about and want to eventually add to your collection, and then there’s others that just somehow ‘appear’. This is one of those cameras. One day while browsing eBay, I sorted by lowest price first and noticed that this camera had an opening bid of $4.99 so I put in a minimal bid not really thinking I’d get it, but no one else bid, so for less than half a sawbuck, I had this fancy little camera.
When it arrived, I was impressed with it’s physical condition, but upon peering through the viewfinder, I noticed that the rangefinder patch was completely missing. It wasn’t just dim, it was not visible at all. Coincident image rangefinders like this use something called a beamsplitter inside of the viewfinder which is a semi reflective angled mirror that allows light to pass through it while simultaneously reflecting light. The coating on the beamsplitter is very fragile and if someone tries to clean it, this reflective layer can easily be wiped off, rendering it completely useless. I thought that perhaps some previous owner had destroyed the beamsplitter, but then as I was handling the camera, I could hear something rattling around inside of the viewfinder.
I had a problem on a Kodak 35 Rangefinder in which one of the mirrors inside of the viewfinder had simply fallen off from it’s mount causing the rangefinder patch to not be visible. These mirrors are usually just glued into position, and it is certainly plausible that after 50+ years, the glue has hardened and broken away causing the mirror to fall off. Thinking I had nothing else to lose on a $5 camera, I took the top plate off.
Repairs
I didn’t take any pictures showing how to remove the top plate, but it is incredibly easy. First, remove the rewind handle by sticking a screwdriver through the fork inside of the film compartment to keep it from moving and simply unscrew the handle by hand. Then remove the wind lever with a spanner wrench on the two slots around it’s perimeter and lift off. Remove the two screws inside of the wind lever and set aside. Finally, remove the one screw to the right of the wind lever, and then lift off the top plate.
The inside of the viewfinder is very nicely designed. The Minolta A5 has one of the easiest to access and clean rangefinders of any camera I’ve disassembled so far.
When I removed the top plate, I had expected to see a loose mirror or some part that was causing the rattling sound I had heard. At first, nothing seemed to be out of place, but then I saw the problem. The rangefinder on this camera works by having a moving lever which is connected to the back of the lens via a hole in the body of the camera. This lever is what moves the mirror which you are supposed to see in the center of the viewfinder. There is a large spring that is supposed to keep tension on this lever to keep it in position when changing focus on the lens. Somehow, this spring had fallen out of position causing this lever to just flop around. This was the noise I was hearing and is why I could not see the rangefinder patch.
I had initially tried to reseat the spring myself, but it is located in a very awkward position underneath the rangefinder, sandwiched between it and the inner body of the camera. It became quickly evident that I would have to remove the rangefinder to gain access to this spring. Thankfully, the ease of disassembly of the top plate, carries over to the rangefinder as well, as there are only 3 screws holding the entire thing in place. Look at the first picture below and I have 3 arrows pointing to 3 black screws which need to be removed.
Upon unscrewing the 3 screws, the entire rangefinder assembly lifts out of the camera. The second image below shows the camera with the rangefinder removed. You can now easily see the holes where the three screws were. You can also see the hole into the body which reveals the backside of the lens.
The third image below shows the underside of the rangefinder. The large black spring is what maintains tension on the rangefinder mirror. In this picture, the spring is properly seated in it’s correct location. I drew a dotted yellow line to indicate the path of the spring. Prior to reseating this spring, it was just flopping around.


After getting the spring back into it’s correct location, I did a light cleaning of all of the glass elements and the mirrors of the rangefinder. The beamsplitter is the large diagonal piece of glass which is visible in the first image above. The semi-reflective coating on this piece of glass is extremely fragile and you must do everything possible to not touch it. If there is dust on the beamsplitter, just try to blow it off. If there is any remaining debris on it, it is better to just leave it alone, rather than risk damaging it by further attempts at cleaning it.
Once I was happy that everything was clean and the rangefinder was moving as expected, I put everything back together in the reverse of how I took it apart. It’s worth noting that this entire repair, including taking the photos took me maybe 15 minutes. The Minolta A5 was one of the easiest cameras I’ve never taken apart for a repair like this.
My Results
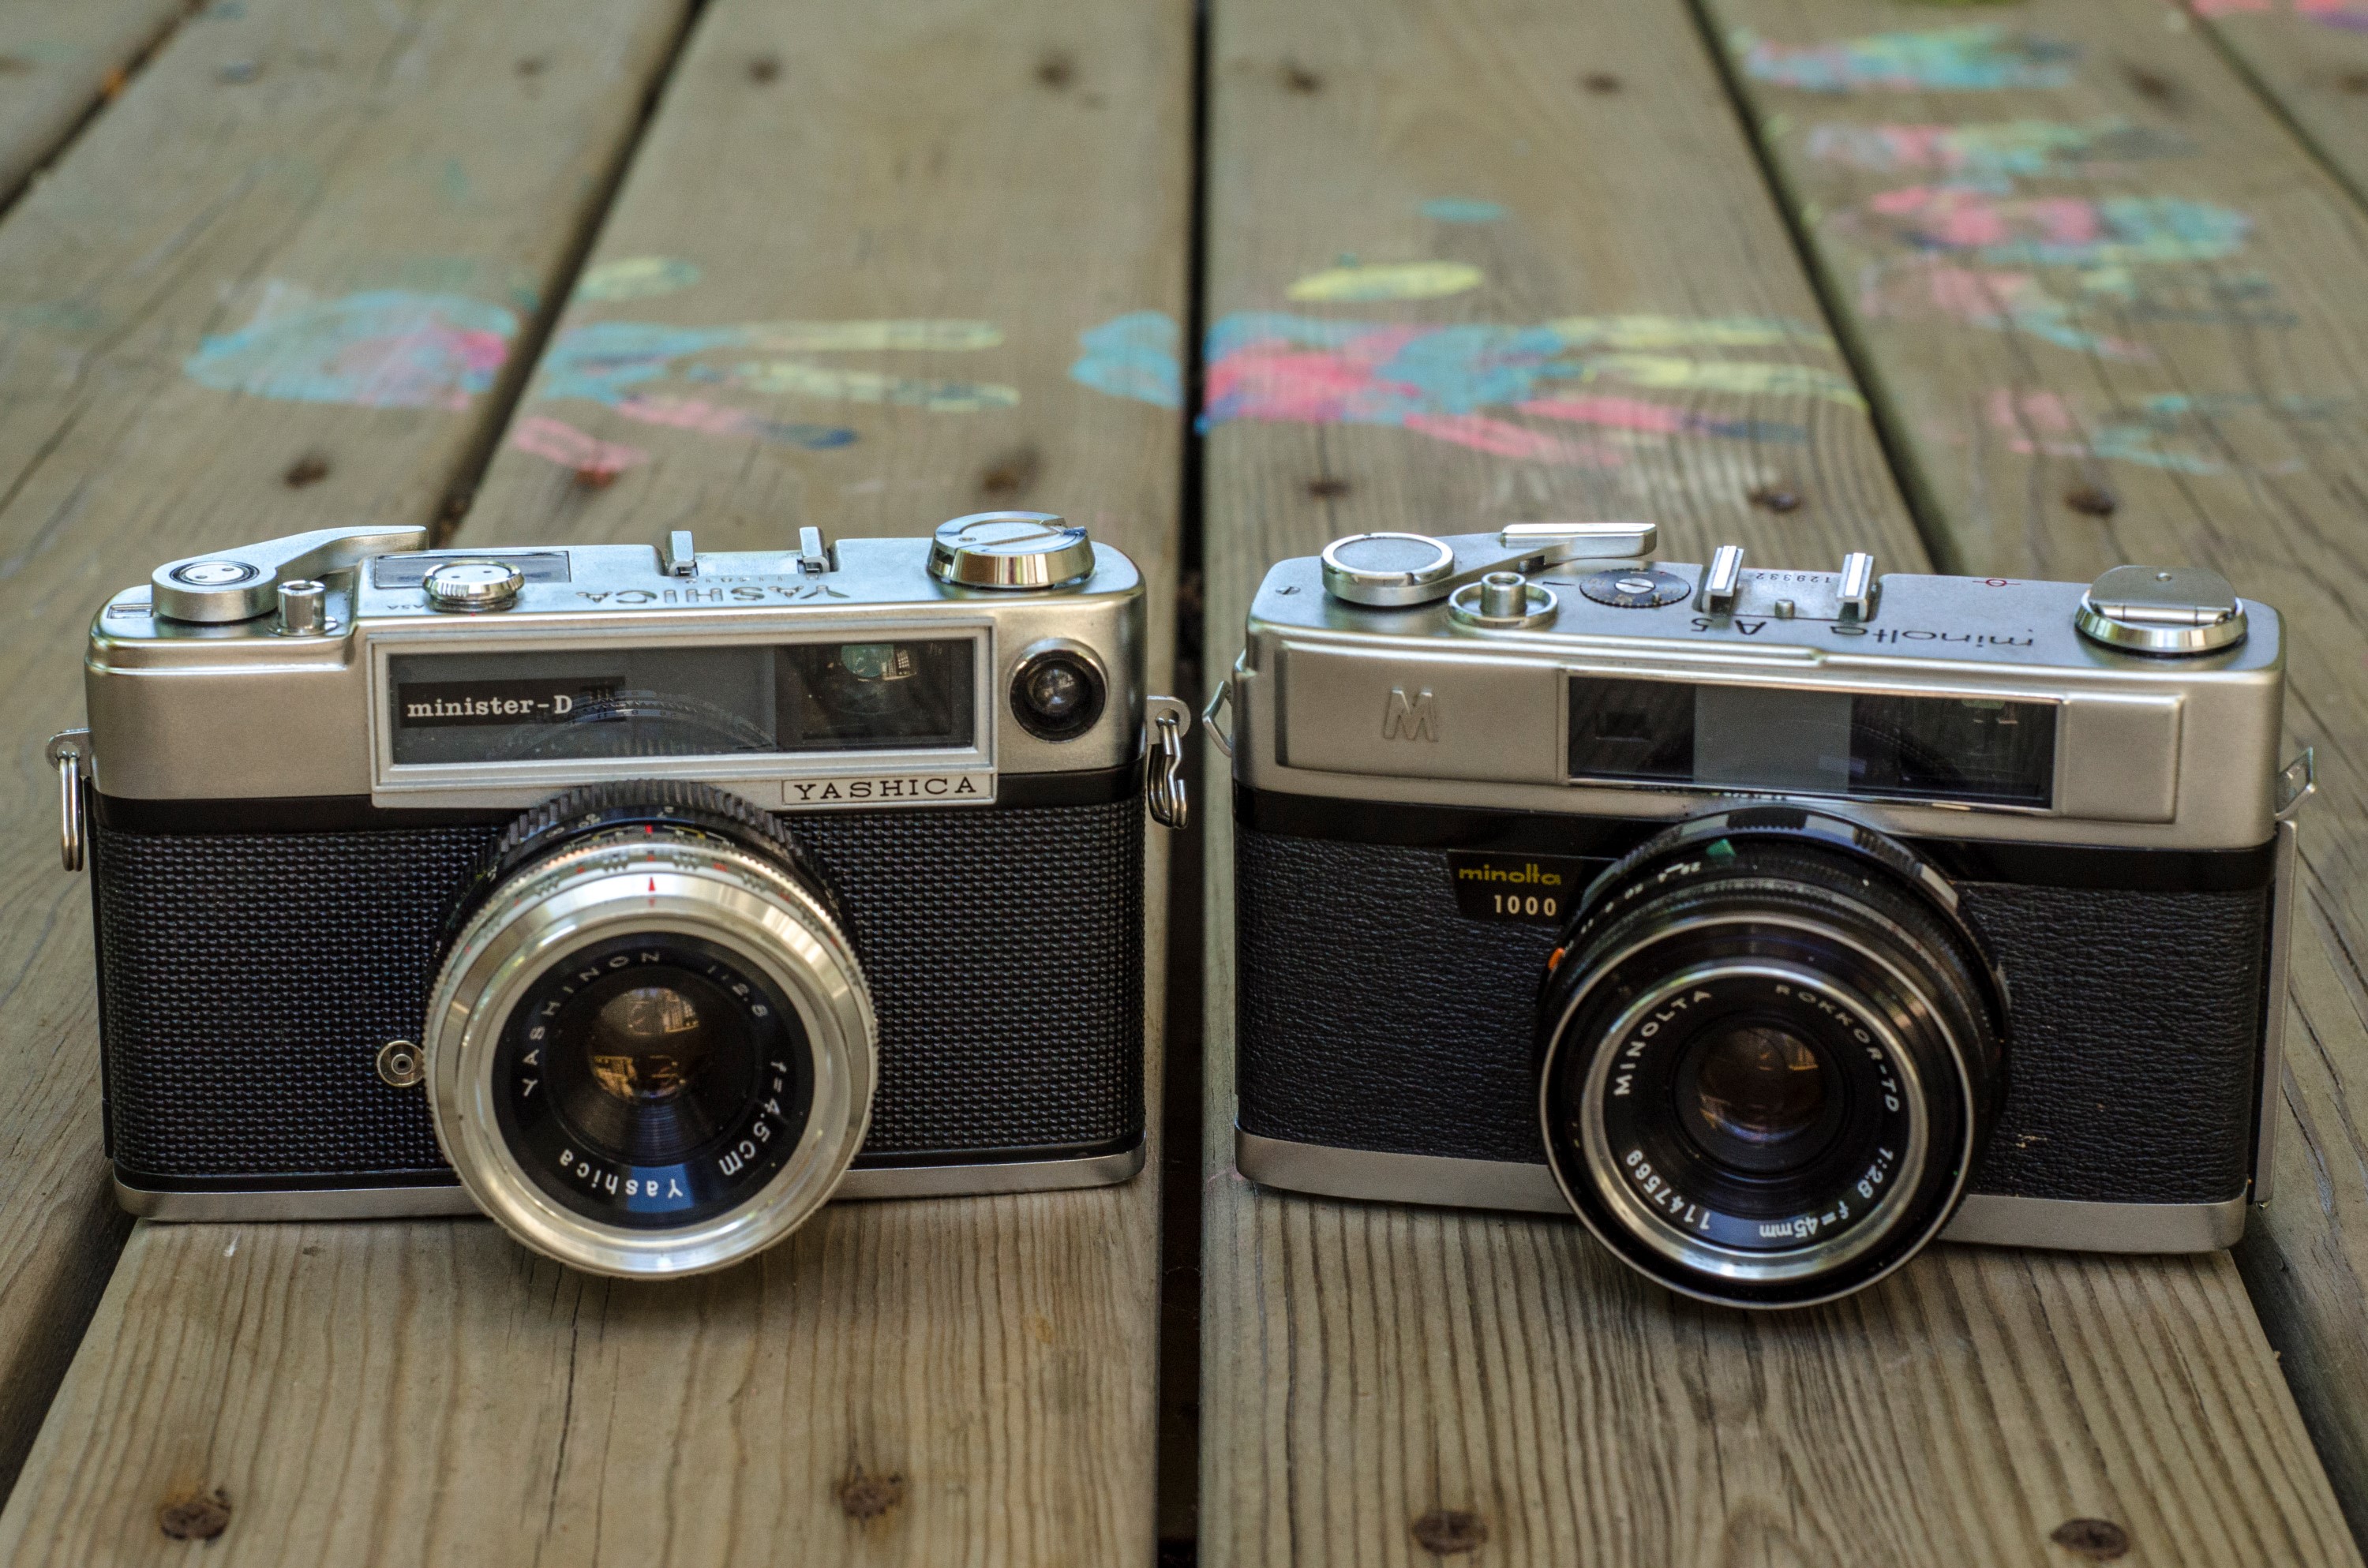
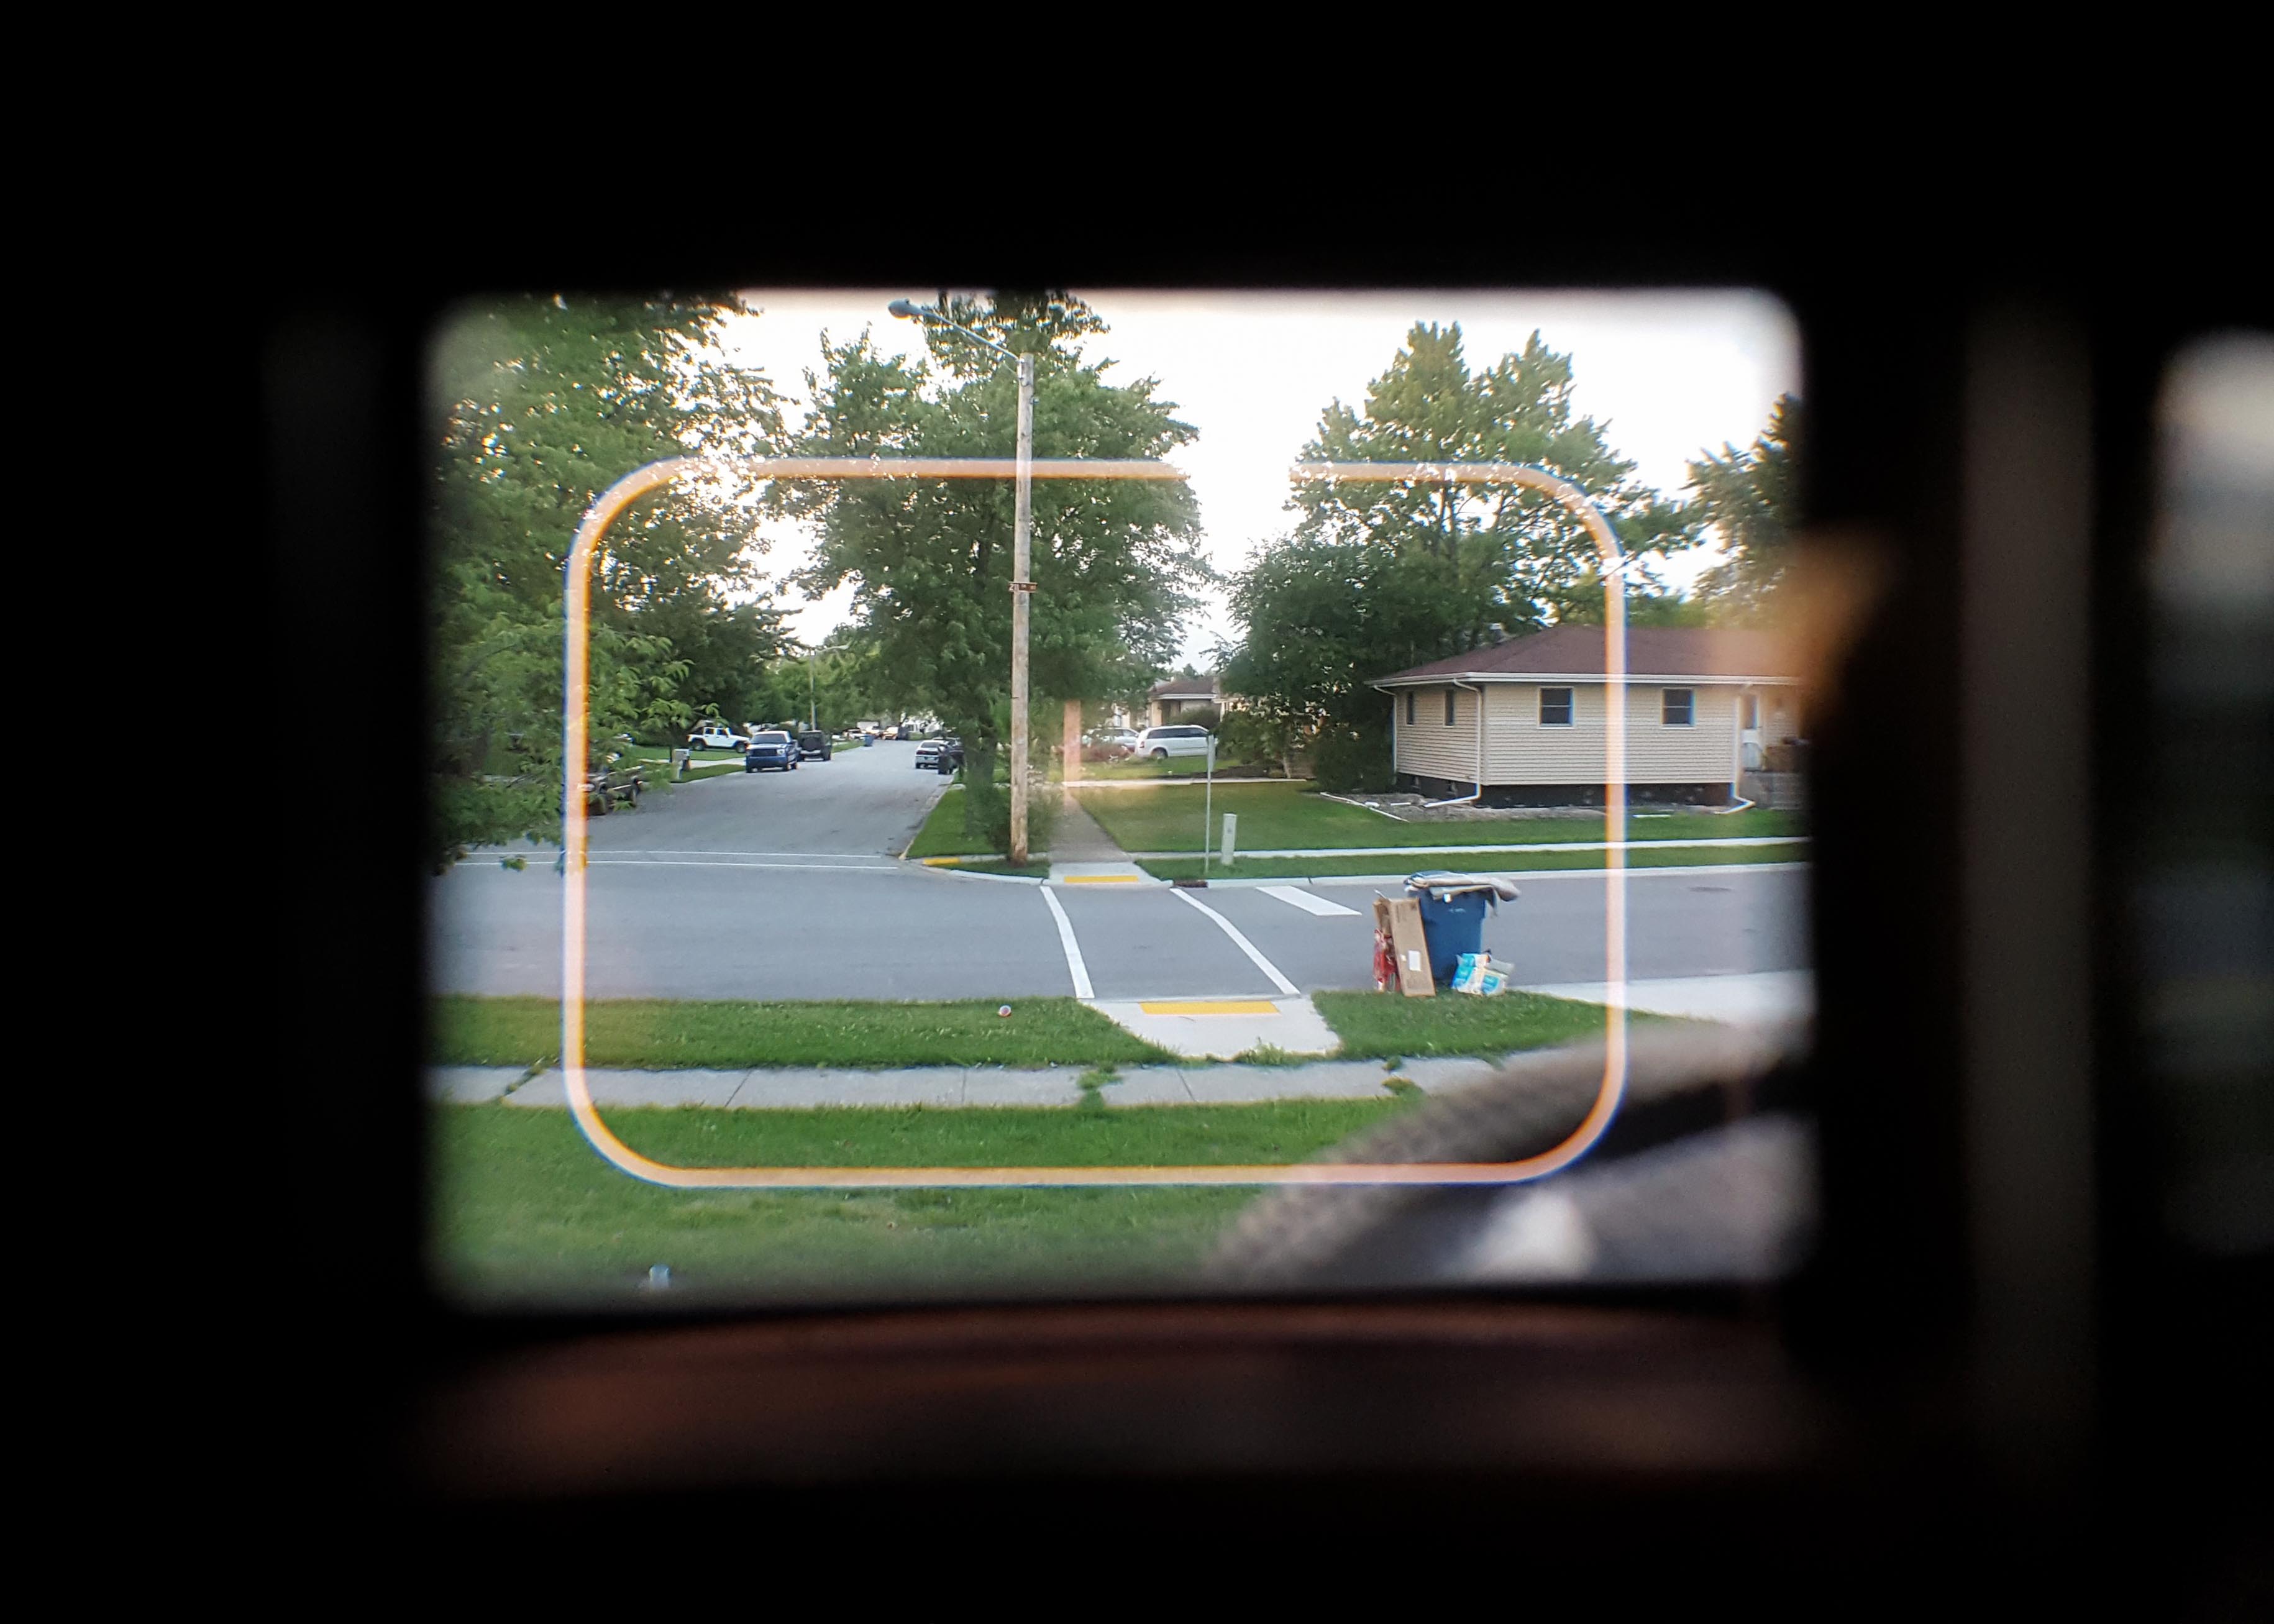
After confirming the camera was in good working order, it sat for a short while before I had a chance to shoot a roll of film in it. That first opportunity came when I attended a family reunion in Eau Clare, Wisconsin this past June. I loaded in a roll of Fuji 400 and shot some random candid pictures. I also brought along a Yashica Minister-D which would have been a competitor to the Minolta A5 in the early 1960s. Both were small mid-range rangefinders with fixed 45mm f/2.8 lenses. The Minister-D differs in that it has a CdS light meter and it’s top shutter speed is only 1/500, but otherwise is very comparable to the A5. Being able to do an apples to apples comparison, I honestly can’t say that I liked one over the other as they were both a pleasure to shoot.
Aside from the light meter and LV scale on the Yashica, shooting with both cameras was nearly the same experience. Both had large and bright viewfinders with parallax correction. Both cameras were nearly the same size and weight and had excellent shooting ergonomics. The Yashica might lose a point or two in the cosmetics department due to the bulbous “eye” from the light meter in the corner, but otherwise both cameras are handsome examples of early 1960s Japanese rangefinder design.
My collection of rangefinders is quite diverse, and it can be hard to pick a reason to shoot with cameras like these over more advanced models like say, the Minolta Hi-Matic 7s, Yashica Lynx 14, Electro GSN, or my interchangeable lens Canon P. All of these models are superior in many ways, yet the biggest appeal to models like the A5 and Minister-D is in their simplicity and value. The fact that both of these cameras still work well, are small, easy to use, and reliable is their greatest asset. But there still has to be a downside to using them. Perhaps the biggest con is the “inferior” lenses on them. Surely, a 4-element f/2.8 lens should render shots with less clarity or sharpness than the more superior 5 and 6-element f/2 and faster lenses, right?


Each of these 6 shots represent how the entire roll through the A5 looked. The images are extremely sharp. These scans were done by Willow Photo Lab in Willow Springs, MO. This roll was done as part of a second batch of film I had sent to them. That first batch returned scans that were very high quality. The images were all 3000 x 2000 and no signs of post processing. For some reason, this second batch returned images that were scanned at 1544 x 1024 and had significant sharpening or edge enhancement. I emailed the lab and asked what the difference was between my two sets of scans and am awaiting a response.
So while I think I should be able to get better results from a better scan of the negatives, I still feel like some meaningful conclusions can be drawn from what we have here. For one, the Minolta A5’s 45mm f/2.8 lens is in no way an inferior lens. The Rokkor reputation is definitely upheld here as color reproduction is good, sharpness is excellent, and exposure is spot on. All of these shots were done using nothing more than Sunny 16 almost entirely in tree cover on a bright sunny day.
I never once needed to use the top 1/1000th shutter speed so for this reason, I see no advantage to owning the A5-1000 model over the A5 with it’s max 1/500 shutter speed. In my mind, the lens, and the overall design of the body are the biggest pluses to this camera.
I am absolutely impressed with these results and feel like the A5 is a camera I’ll use again. It’s relatively compact size and simple operation are definitely an asset, and it’s lens is as good as they come. I am like many photographers out there who is impressed with state of the art cameras with amazing specs on paper, but when it comes down to it, even a simple camera like this is capable of excellent shots. I’m not suggesting that I will abandon my Canon P or Nikon SLRs, but when I can get results like these from such a simple camera, it does make a compelling argument that I’ve already reached the pinnacle of what a mechanical 35mm camera is capable of.
The Minolta A5 will never enjoy the reputation of some of the more prestigious models out there, but it is an excellent performer that offers everything a photographer needs. It’s an incredibly well designed camera with great optics, great ergonomics, and a great viewfinder. Assuming you can get one in good working condition, it is worth way more than what you’d likely pay for it. I thoroughly enjoyed shooting with this camera, and I loved the results I got from it. I cannot wait to shoot with it again!
Additional Resources
http://camerapedia.wikia.com/wiki/Minolta_A5
http://camera-wiki.org/wiki/Minolta_A5
http://www.myoldmap.com/cameras/minolta_a5.html
http://retinarescue.com/minoltaa5.html
http://photo.net/classic-cameras-forum/00Rx76
http://52rangefinders.blogspot.com/2012/07/2652-minolta-a5.html
Hi Mike,
I just read your review of the Minolta A5. I bought one of these cameras in 1964 as a freshman in collage & it launched a lifelong interest in photography for me. I just acquired a very nice A5 and intend to do a little film work just for fun. I’m not sure of the filter ring size of this camera. I measure it at 40mm. Can you help with this? Thanks again for your informative review.
Steve Ownby
Steve, I am happy to hear you are able to revisit one of your early influences and shoot some more film. I checked the A5’s manual and unfortunately, the filter ring size is not listed. A very common size for filters is 40.5mm so it’s possible thats what it uses. I have my A5 packed away at the moment, so I dont have easy access to it myself. Good luck and if you ever find out for sure, be sure to reply back here, in case someone else has the same question!
Hi Mike, always lovely to read your blog. Specially the DIY repairs. I got an A3 recently and was impressed by its built. Everything works except the rangefinder. And so I did what a self-respecting DIYer must do..tackle it myself. I did managed to make it up to the point where I can see the patch aligned vertically. But not horizontally. I’m trying to figure out where the horizontal adjustment should be. The A5 is similar to the A3. With your vast experience hoping u can help on this? Thanks in advance mate.
Most rangefinder adjustment screws have some type of black shellac (looks like paint) on the screw head. This is there to prevent the screw from turning on it’s own. This shellac is your clue that you have the correct screw. With the camera set to infinity and the top plate off. Point it out your window at a vertical object more than 100 ft away. It could be a tree, utility pole, or the side of a building. Then while looking through the rangefinder, use your screwdriver to turn this screw and see if it changes the rangefinder. I’ve found that horizontal changes can sometimes change the vertial alignment too, so you might need to adjust that. Its all trial and error. Make sure you go slow and be patient, but Im confident you’ll get it. Once you have the rangefinder proper aligned, get some nail polish and apply a drop to the screw head. It doesnt have to be black nail polish, any color will do. Once you put the top plate back on, you’ll never see it. Good luck!
Hi there Mike,
I recently got an A5 off of a bartering app, but it didn’t come with a lens cap! Any idea what size / kind of lens cap I can get for this guy? It’s in great condition, and I don’t want to ding anything!
Mithila, you have a really nice camera on the way. I am sure you’ll enjoy it! The A5 uses a 40.5mm threaded filter ring, so any “squeeze type” lens cap will work just fine. You can order them online at Amazon and pretty much any place that sells camera accessories.
Hey Mike,
Thanks very much! Will grab one online!
Thanks for this inspiring article. I have just bought two A5 both in need of cleaning and adjustment. Do you have any idea where I can find a service manual for the Optiper Citizen MLT shutter? It would make me feel a bit more secure when starting to work on the camera. Thanks again and I hope you have had lots of fun with your A5!
Great article. Have 2 A5’s with meter, and one without. I bought them about 7 years ago along with about 10 other cameras from a teacher who had used several as teaching aids. I also just received a “Phochron XA shutter tester” last week. Both the early A5’s and the newer have accurate slow speeds but accuracy drops off quite a bit as speeds increase. Early A5’s came with cases, and all three are in beautiful cosmetic condition. THE PROBLEM… how might I bring the faster speeds up to speed so I can use them? Any suggestions?
I don’t think the A5 had a meter. But the AL had. As far as I know only way to deal with faulty shutter speed is to disassemble the shutter completely, clean it and carefully lubricate it. That’s what I did on my A5. If fast speeds still are to slow I believe the only way is to exchange the main spring. Good luck! These cameras are very well built and a joy to use.
Olaf is correct, the A5 is a meterless camera, there were other similar Minolta rangefinders though that did have one. In regards to getting the speeds fixed, your best bet is to find someone to do a CLA on them. I don’t know of anyone specifically though that works on that model, so you’ll need to do some research.
Hi! Nice article. I have a nice clean A5 with the f/2.0 Rokkor-PF lens… I can wait to film test it. My problem is with the shutter catch mechanism. When it is focused to infinity it winds on normally 90+% of the time, but if I move the focus ring and try to cock the shutter, it fires the the shutter mid stroke regardless of the speed setting, including bulb. I guess I have to get into the lens to see what’s up with that catch mechanism. Got any tips?
Hi Donald, sadly, I have no experience repairing that camera, but I can’t imagine it’s much different from other Japanese leaf shutter cameras. Most likely there is a catch that has some dried lube on it causing it not to work correctly. A flush of the shutter should take care of it, but you’ll need to get in there to do that.
Have you tried simply trying to cock the shutter with the lens at infinity, and then after it’s cocked, change focus to whatever distance you need?
After seeing some images in a Facebook group made with this camera and reading your review I bid on a mint copy of the A5 on eBay and walked away with one with the original mint leather case and box and manual for $50. Once I got it I looked through the finder and the entire outer perimeter of the image was translucent. I took of the top like you described and the frame line mask had come unglued and was flopping around. I glued it in place and the finder and rangefinder patch are immaculate. The shutter speed all work and so does the self timer. The only issue I found is there is a ring of black foam surrounding the lens from the inside that was rotted out. I removed it as it seems to serve no purpose at all. Now I am putting the first roll through it. Thanks for the great review and tips.
Very cool story, Mike! Glad you not only got such a nice example, but that my repair tips helped. It is strange that yours had the exact same problem as mine, but was otherwise in very good shape. As I am sure you know, Minolta made very good cameras and lenses, so I have no doubt you’ll get great images from yours!
Very good and clear information on all the questions and answers just purchased A5 from a antique shop for £10 pounds which has got a jammed film winding lever so has given me good ideas where to start so fingers crossed Alan June Boston Lincs UK
“I see no advantage to owning the A5-1000 over the A5 with 1/500 shutter speed.” I’m afraid I learned there’s quite a big difference (for me) the hard way. I bought the 500 and it doesn’t have automatic parallax correction.
I also noticed the 500 lens is “Rokkor” while the 1000 is “Rokkor-TD”. I believe it means “Tessar Design”, but I’m not sure. In any case, I think it’s safe to assume there’s also a lens design difference between the 2.8 500 and 1000.
By the way, what fixed lens rangefinder equivalents of the A5 (no meter, auto parallax) would you recommend, which equal/surpass the A5’s lens performance? I’m only aware of the Konica IIIA.
Thanks for the great reviews.