


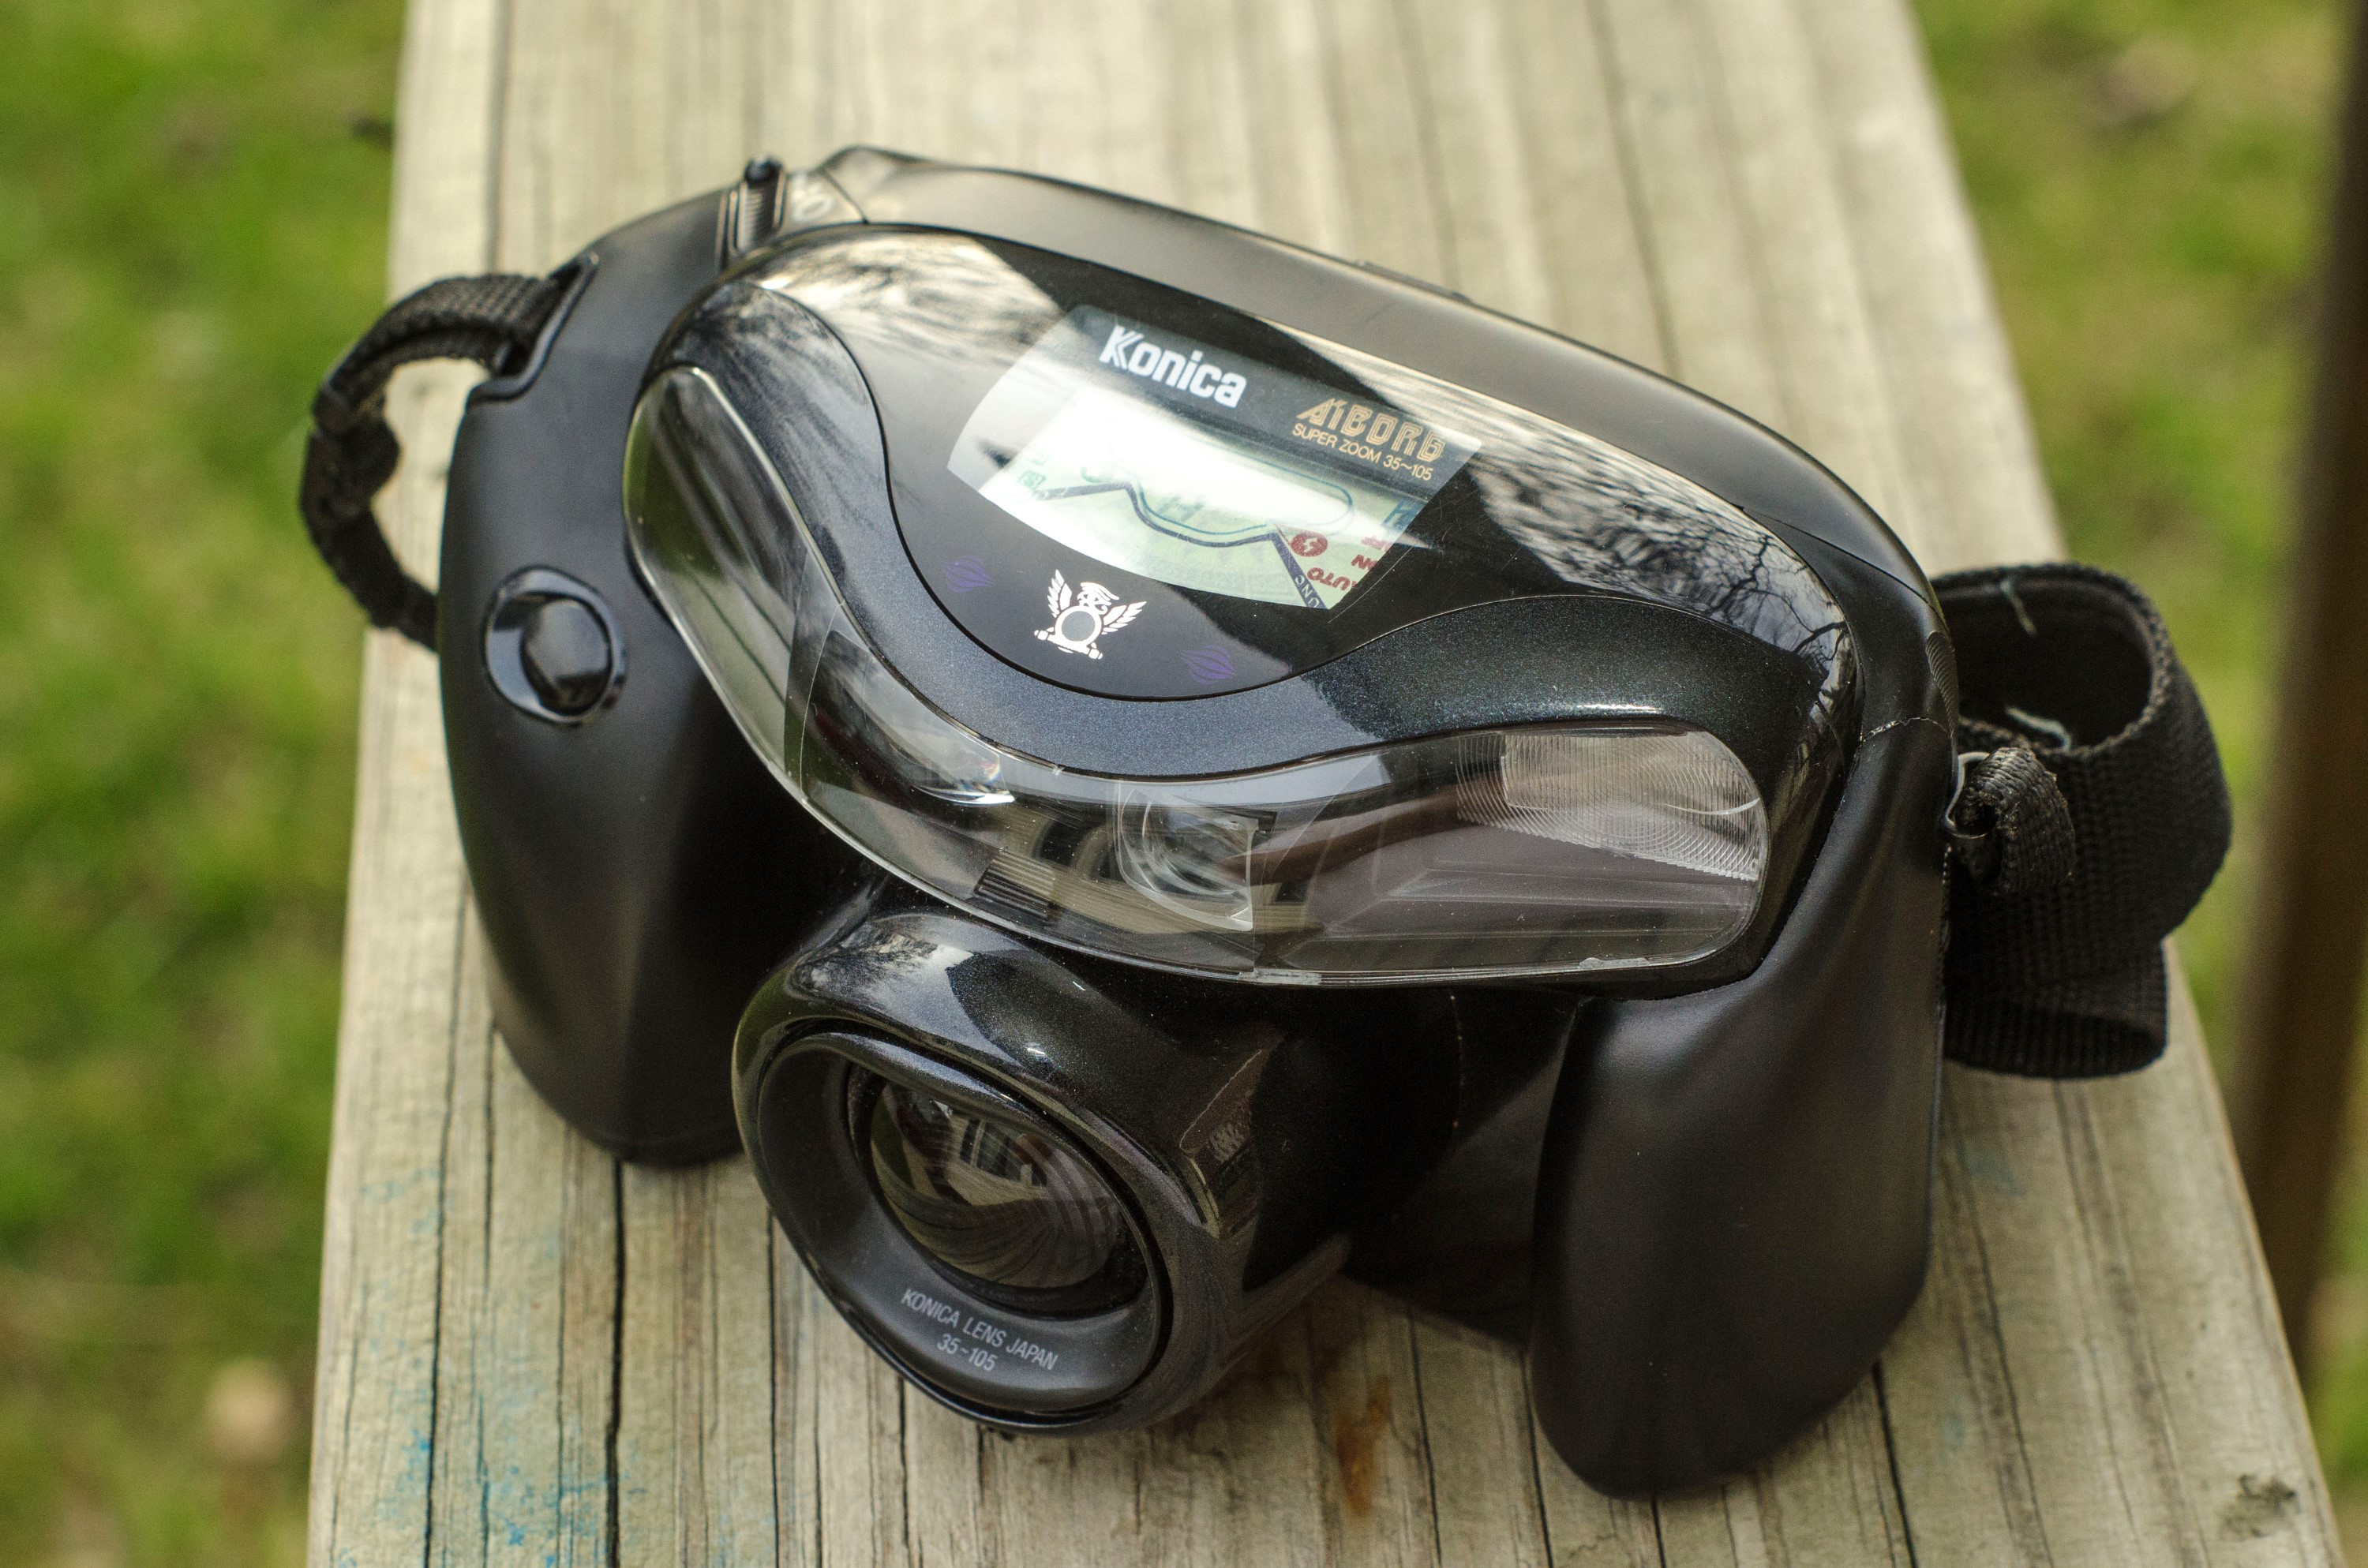
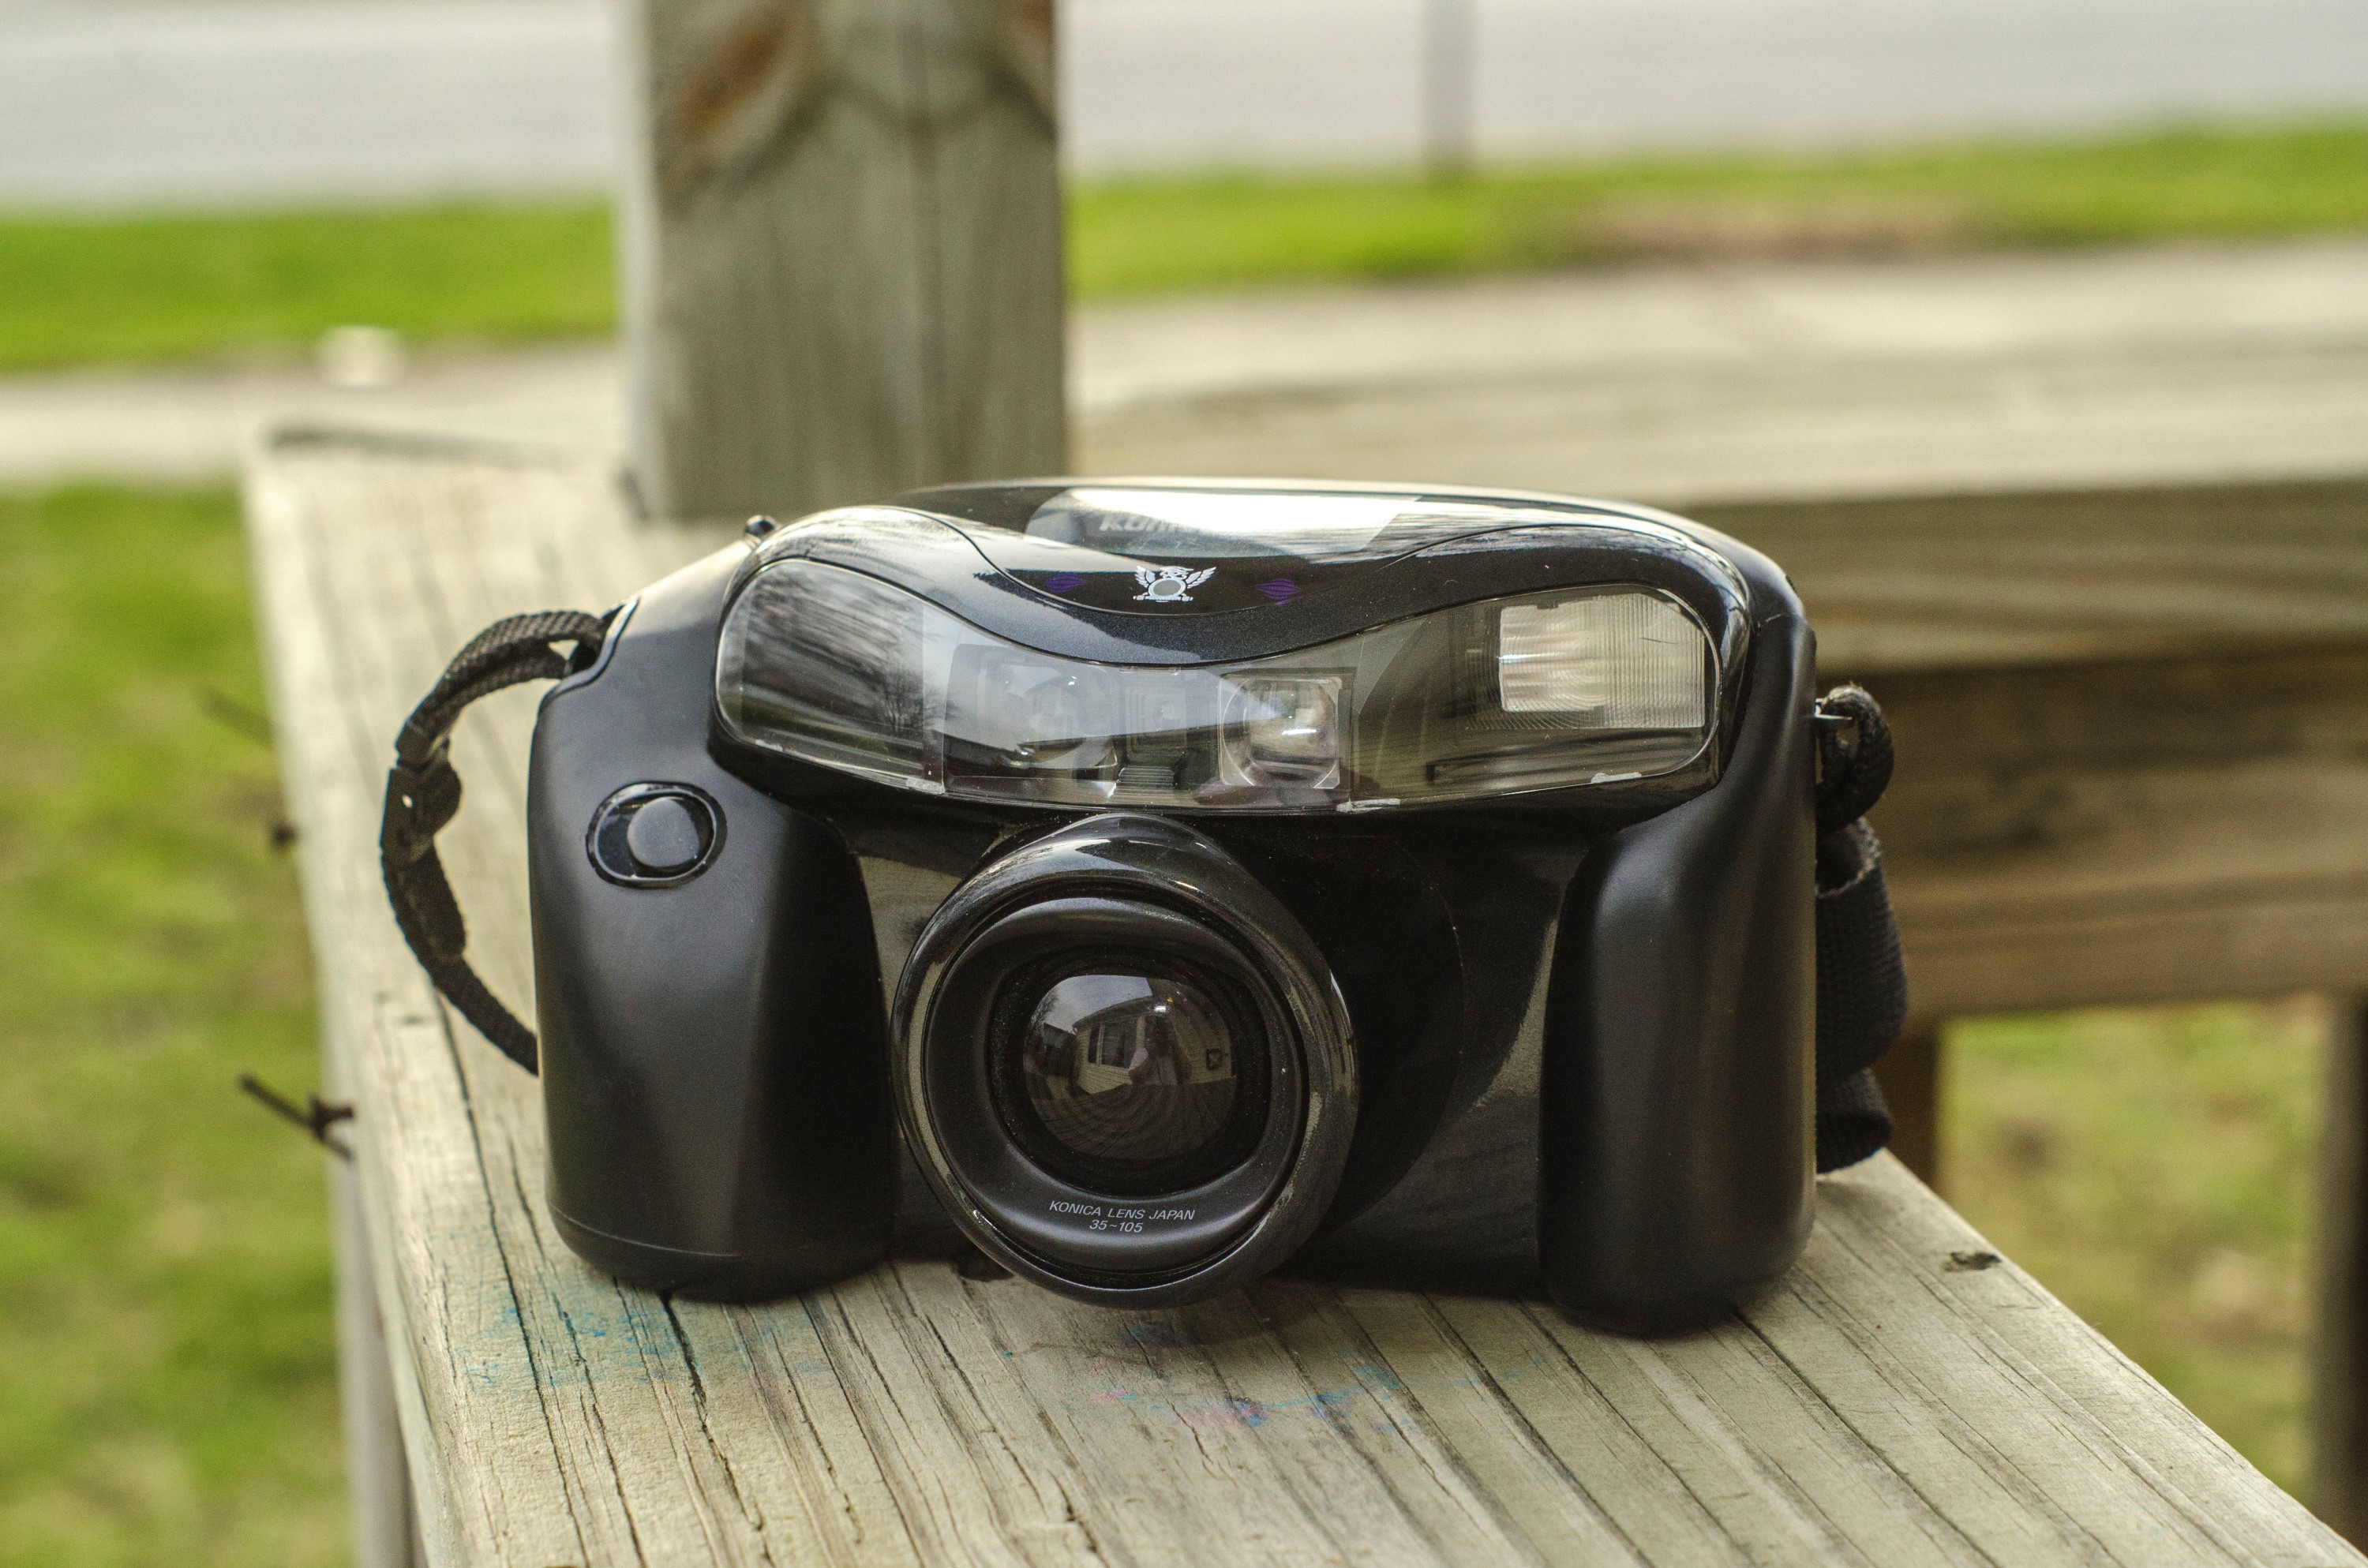
This is the Konica AiBORG super-zoom point and shoot camera. It was introduced in September 1991 as the world’s first moving frame auto focus camera. Loaded with many buttons, a large LCD screen, and a joystick, it was a very ambitious camera boasting a wide array of features and shooting modes in a body that quickly earned it’s reputation as the “Darth Vader” camera. This was not an inexpensive camera, costing $510 when new, it had a controversial style that along with it’s high price, kept sales to a minimum. It has earned a reputation as one of the ugliest cameras ever made, but despite it’s negative reputation, Konica wisely paired it with an excellent 13-element lens and a state of the art auto focus and auto exposure system making it a very capable camera.
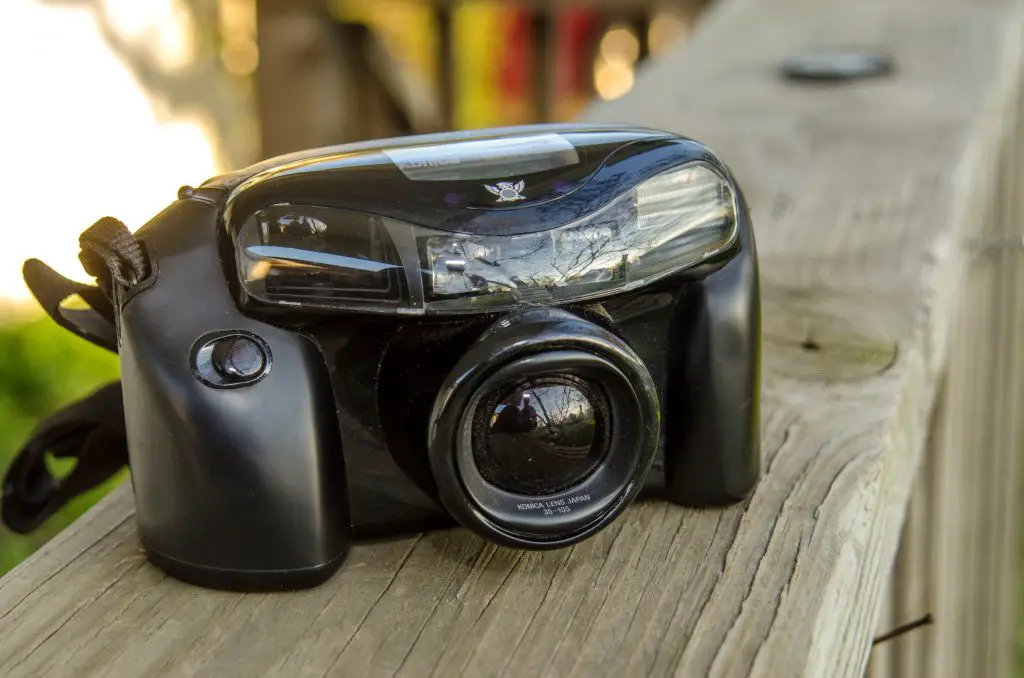
Film Type: 135 (35mm)
Lens: 35 – 105mm f/3.5-8.5 coated Konica Zoom Lens 13-elements
Focus: CPU Controlled Autofocus 0.8m to Infinity
Shutter: Electronic Leaf
Speeds: 6.4 – 1/500 seconds
Exposure Meter: Yes
Battery: 2CR5 Lithium Battery
Flash Mount: None – Built in Flash
Manual: http://www.cameramanuals.org/konica/konica_aiborg.pdf
How these ratings work |
This camera is ugly, has poor ergonomics, has one of the worst viewfinders in a modern camera I’ve seen, has a confusing and illogical arrangement of buttons, and is loaded with modes that are completely useless. It struggled with focus and exposure in my first roll, and turned out a roll of 36 photos ranging from passable, to downright miserable. This camera was a sales failure when it first came out, and if it’s not obvious by this point why, it’s because this is a terrible camera. I said earlier that this is the worst camera I’ve ever used in my life and justifyingly so, gets the worst score of any camera I’ve reviewed on this site. | ||||||
| Images | Handling | Features | Viewfinder | Feel & Beauty | History | Age | |
| 0 | 0 | 2 | 0 | 0 | 0 | 0% | |
| Bonus | none | ||||||
| Final Score | 2.0 | ||||||
History
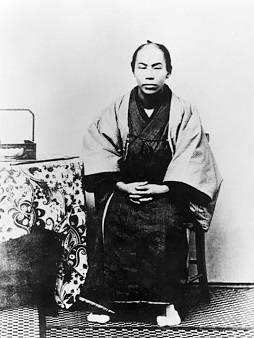
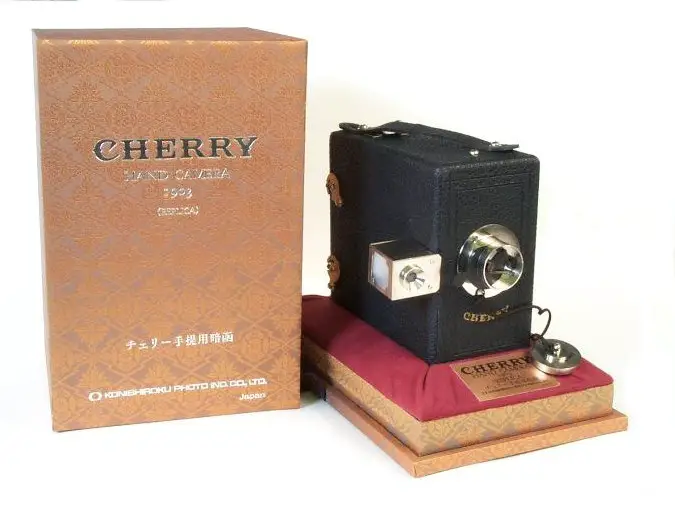
The company that exists today with the name Konica is not the same one that was at one time one of the most highly respected Japanese camera makers. The company that made this AiBORG could trace its roots all the way back to a man named Sugiura Rokusaburo who in 1873 sold pharmacy supplies in Tokyo, Japan. Sugiura launched his own pharmacy company, named Konishi Honten in 1878. In 1882, the company began producing its own photographic materials and selling them to other Japanese companies. 20 years later, Konishi sold the Cherry Hand Camera, which was the very first Japanese made consumer camera.
Over the next 2 decades, Konishi Honten did very well, and in 1921 the company was renamed G.K. Konishiroku Honten. The company continued to be successful throughout the 20s, releasing several other lines of cameras and even founded the Konishi College of Photography in 1923. In 1931, the company released the first ever commercially available Japanese camera lens, known as the Hexar.
Between the years of 1936 and 1943, as Japan became increasingly involved in World War II, the company’s business became reorganized and the name changed several times. At one point their entire retail and wholesale business was stopped.
After the war, the Japanese company hoped to expand their sales outside of Japan, so their name was changed once again to incorporate English, and now they were known as Konishiroku Photo Industry Co., Ltd. In 1947, the company released a clone of the German Leica camera and gave it the name “Konica”.
Shortly after the war, most Japanese companies struggled to succeed outside of their home country as the world was not ready to trust in Japanese made products. In the years that followed, Konishiroku’s strict attention to quality control and positive reputation eventually pushed them into the forefront of the photographic world.
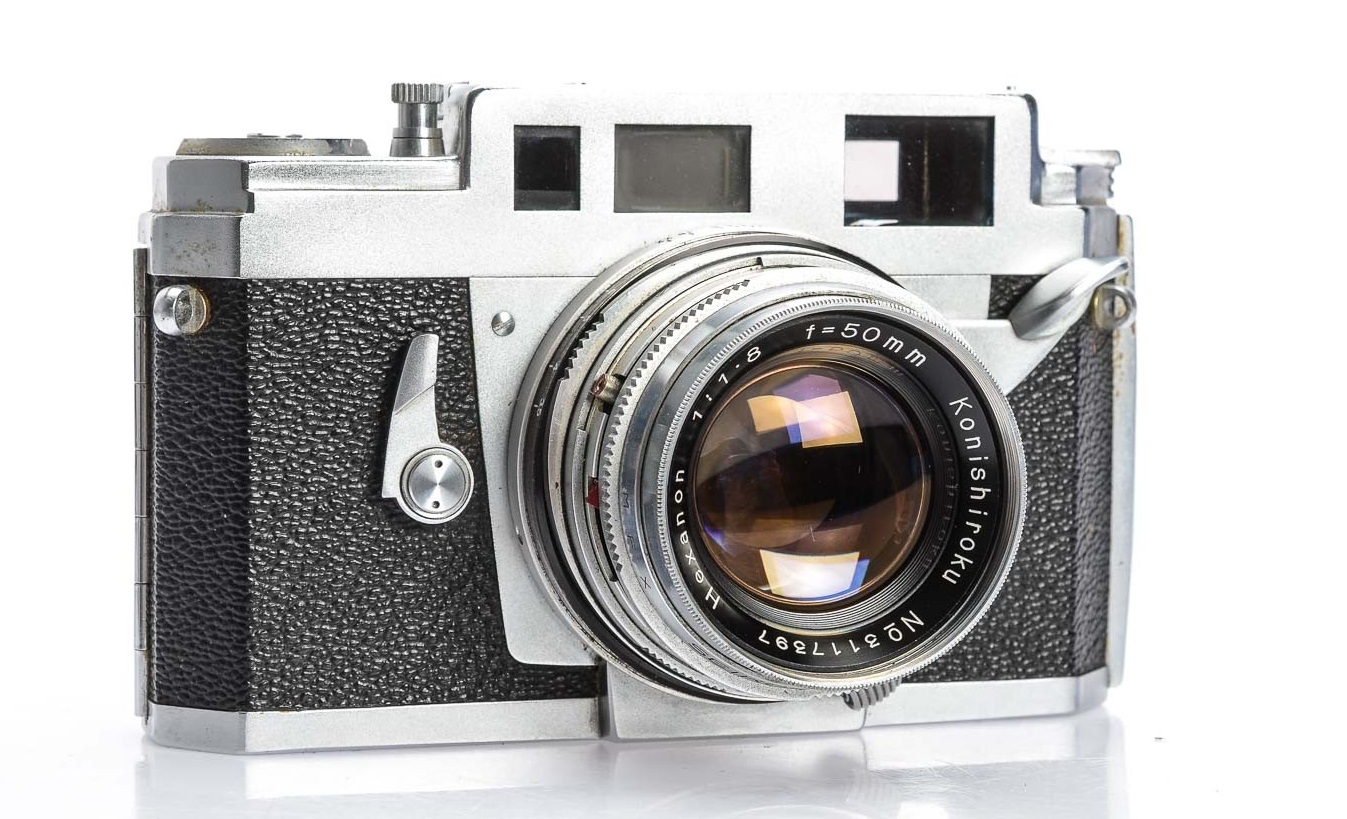
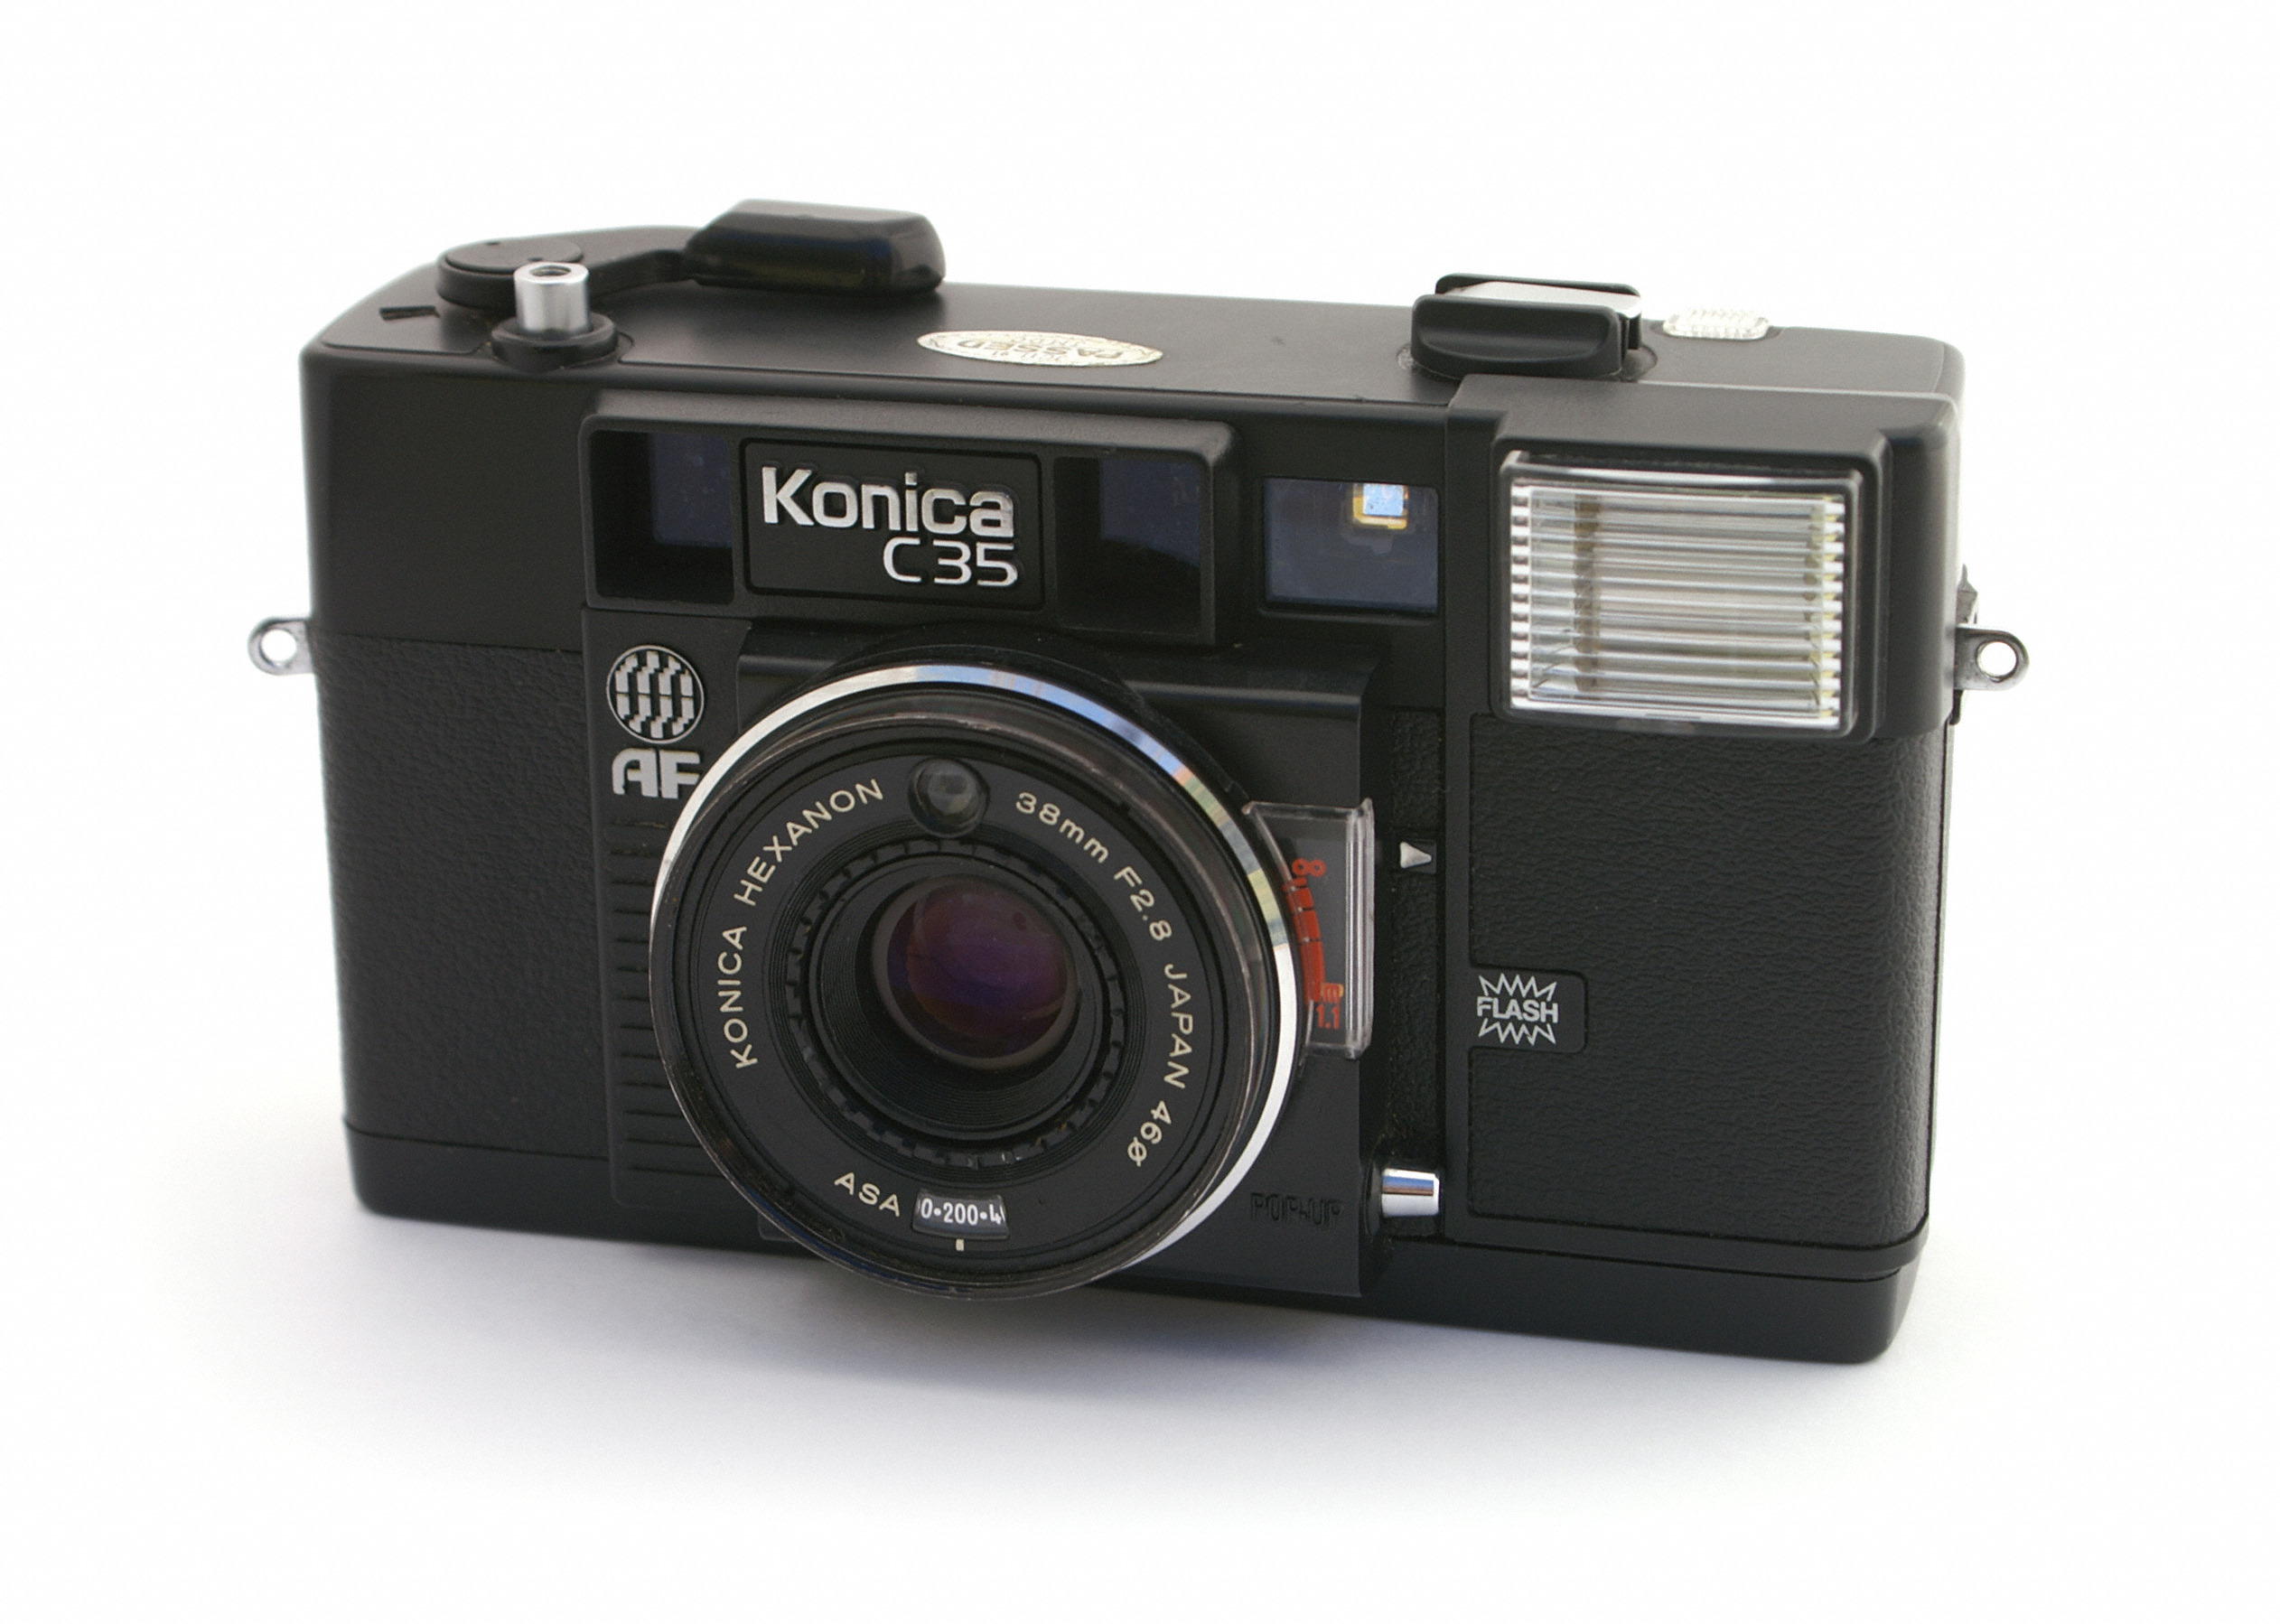
Over the course of the next few decades, Konishiroku would change it’s name once again, to Konica, the name of it’s most popular and well known brand. The Konica II and III rangefinders were two of the best 35mm rangefinders in the 1950s, and still are highly valued by collectors today. Their line of Hexar lenses enjoyed a very positive reputation among photographers all over the world. The Konica C35 AF was the world’s first auto focus camera when it was released in 1977 and featured a design that was copied by many other manufacturers over the next decade. Konica was a very popular makers of cameras and would release many different lines of rangefinder and SLR cameras, many of which sold very well through the 1970s and into the 1980s.
Sadly, due to extreme competition from other Japanese camera makers, Konica would struggle to remain profitable with professional and advanced amateur level cameras. Instead, the company would turn to the entry level point and shoot market, selling less expensive and simpler plastic cameras. It seems as though the Konica AiBORG from 1991 was one of the company’s last efforts to make a high end camera with advanced features. It did not sell well for reasons I’ll discuss later, and as best as I can tell, was Konica’s last foray into cutting edge camera technology.
In the late 1990s, Konica’s financial struggles would continue to worsen and by 2003, would cause the company to merge with Minolta, another Japanese camera maker who was also struggling. The thought was that by joining forces and forming the Konica-Minolta corporation, the combined assets and expertise from both companies would return each to profitability. Sadly, this merger could not have come at a worse time, as by 2003, the rise of digital photography was already underway, and the newly formed Konica-Minolta corporation was not prepared to compete in this new market.
By 2006, Konica-Minolta would exit the photography business altogether, selling its patents and technology to Sony. The remainder of the company would continue on making printers, copiers, and other office equipment.
Today, Konica is one of the many casualties of the death of the film industry. The one saving grace for older Konica SLRs is that Sony continued to use the same lens mount for their alpha line of SLRs, so there is a small amount of demand for Konica lenses because of their excellent optics and compatibility with Sony cameras. A few other Konica models like the Auto S3, Konica III, and Konica Pearl can still fetch high prices in the collector market, but many models like the AiBORG and the very underrated Auto S2 often sell for dirt cheap prices.
My Thoughts
 Until now, no review on this site has been for a camera newer than the early 80s, and other than the Canon T50, they all had manual film advances and were manual focus. This isn’t due to some snobbish elitism where I turn my nose to any kind of automatic camera, in fact, a majority of photos I shoot are digital on my Nikon D7000, using auto focus, auto exposure, auto everything. The reason I haven’t paid much attention to newer auto focus cameras is that they generally didn’t interest me.
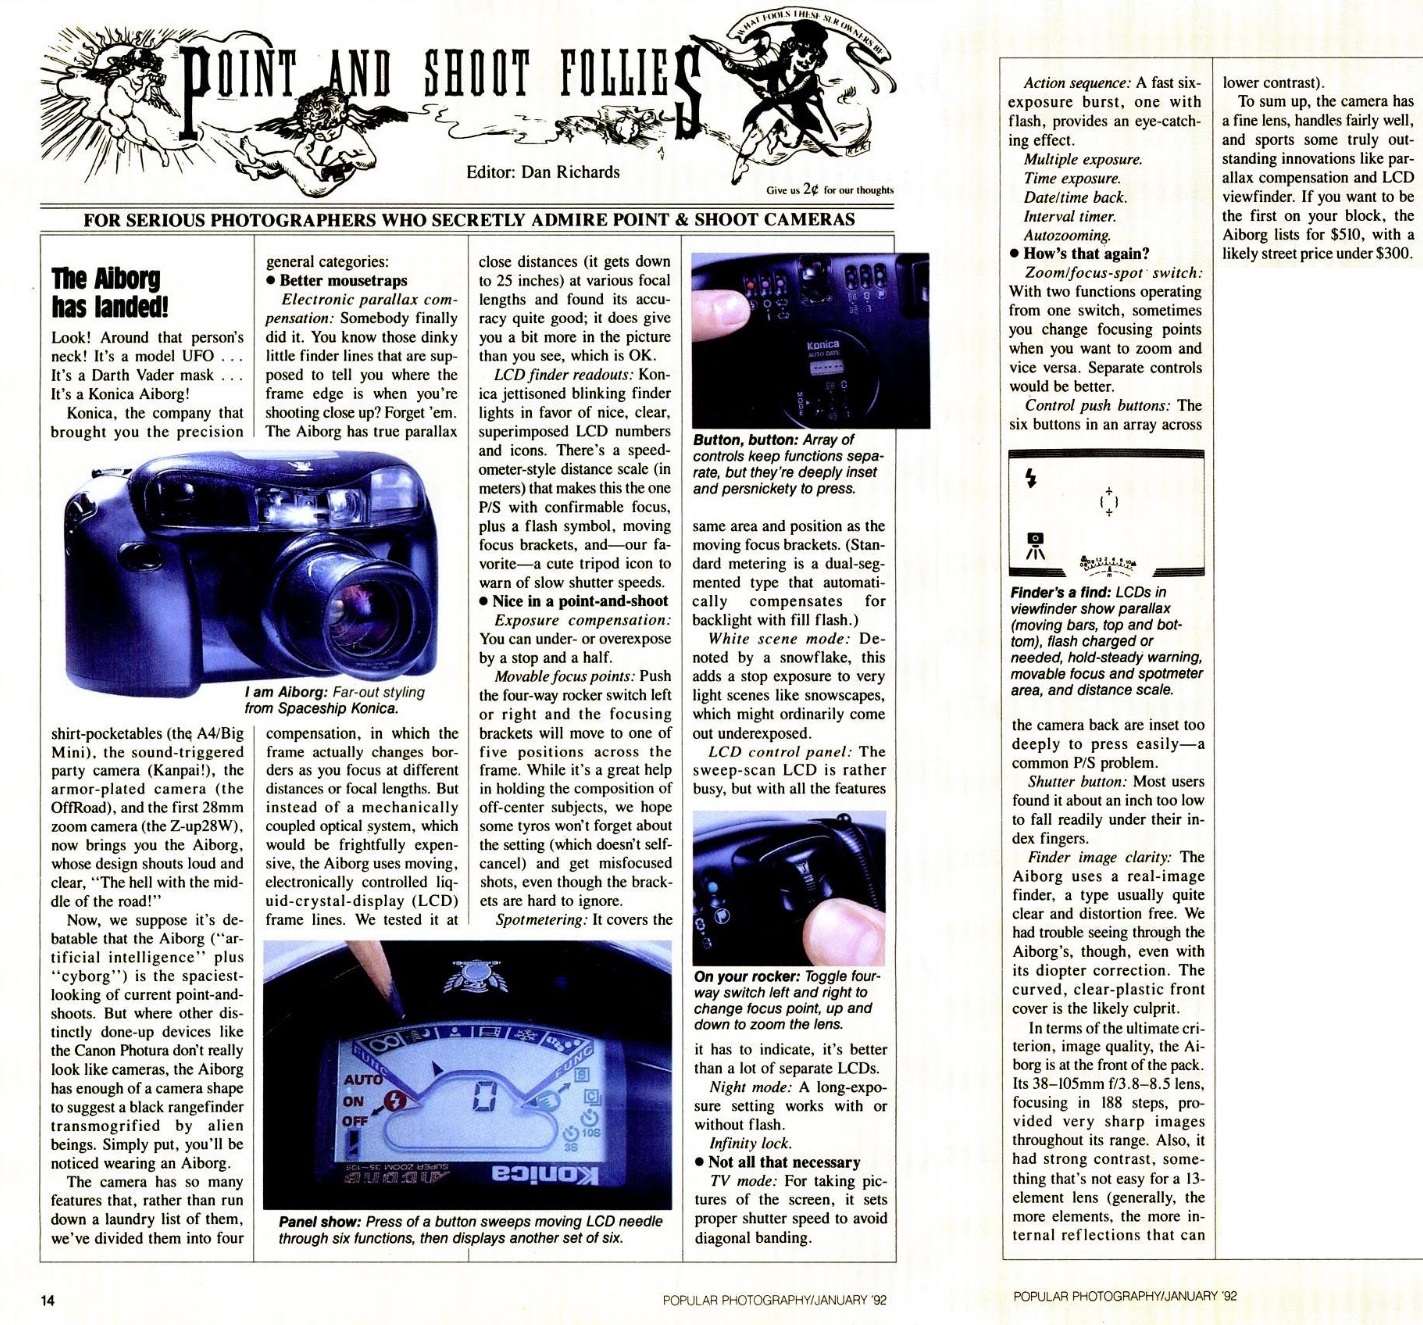
That all changed when I saw the Konica AiBORG. This was an interesting looking camera, it had a unique shape, a crazy looking lens, and a plethora of bells and whistles. I was still on the fence about getting one, but that all changed when I read this review by Hamish Gill on 35mmc.com. The majority of Mr. Gill’s review was pretty much what I expected to read, but once I saw how good his sample shots were, I had to try one out.
As I usually do, I set my sights on the low end of the price spectrum. I looked on eBay and searched for what I could get for under $30. There were a few, but most had initial prices or Buy it Nows for quite a bit higher than that. I guess people saw the original list price of $510 and thought it should still have some value. It took some patience, but I eventually found one with a starting bid of $15, I put in a bid, and I won it for $15 as the only bidder.
I was elated that when the camera arrived, not only was it in great condition, but it had a fully charged and working battery installed. Amazon sells the 2CR5 lithium battery for about $7 or $8, so that’s kind of like getting the camera for half price. I inspected basic operations of the camera and everything seemed to work OK. Even the door seals were in perfect shape, so I loaded in some film and…..wait a minute.
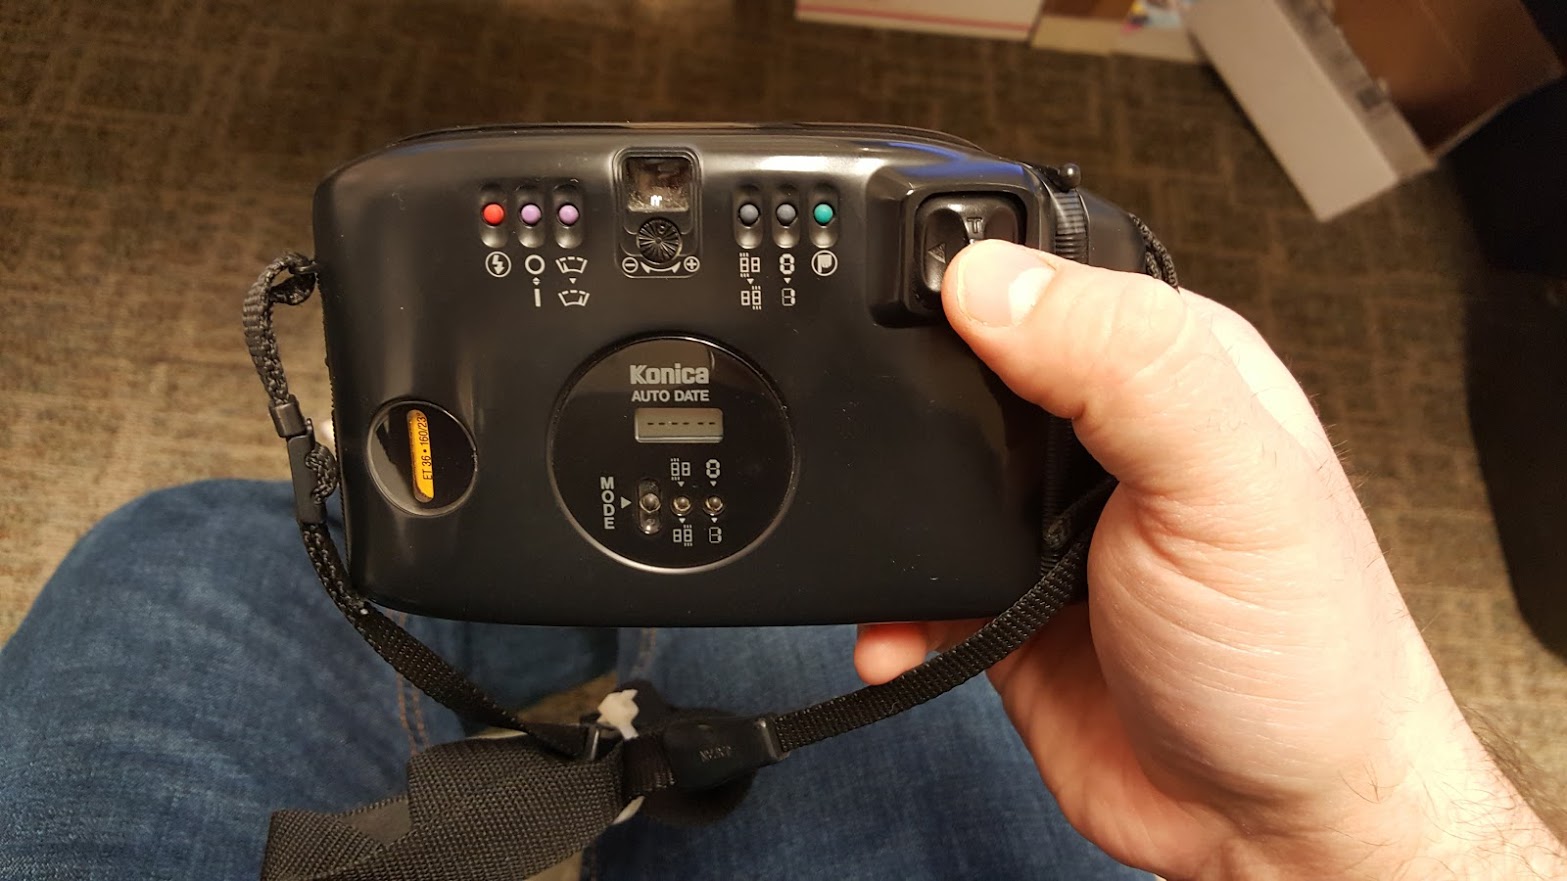
The first thing you should know about shooting with the AiBORG is that it has a lot of buttons and even more features. Many of the most basic settings are not obvious at all. There is a button on the back of the camera that literally looks like it activates windshield wipers, and another that is an icon of a hand pointing downward. The camera also has a date back with a separate LCD that was telling me that the year was 1987 and of course dedicated buttons for that as well.
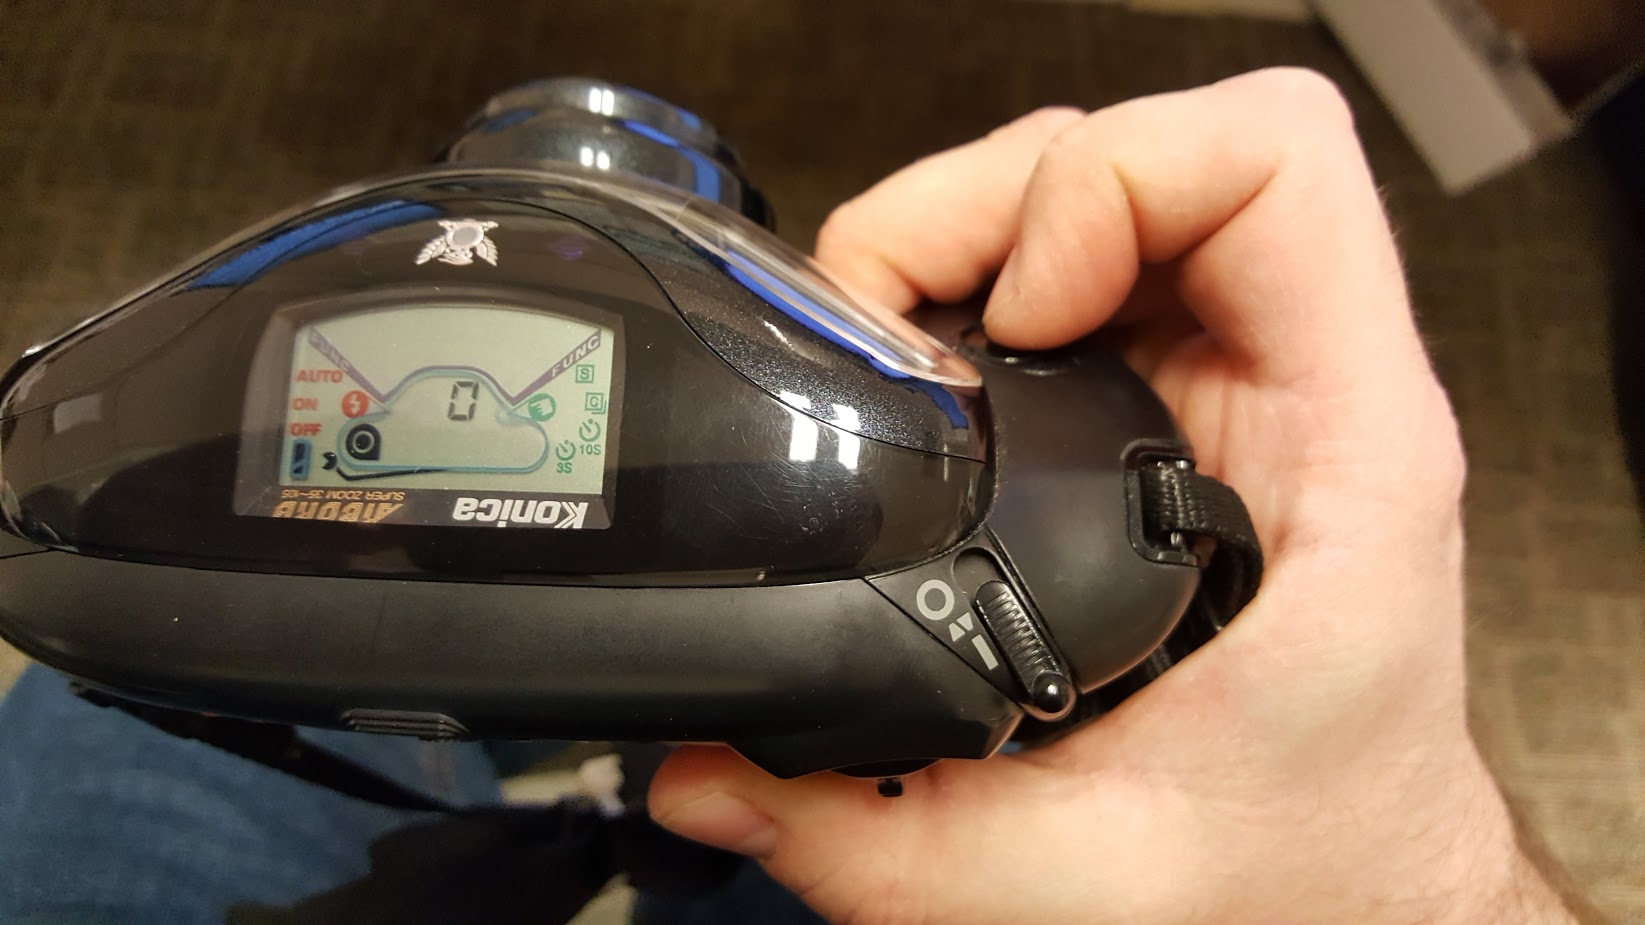
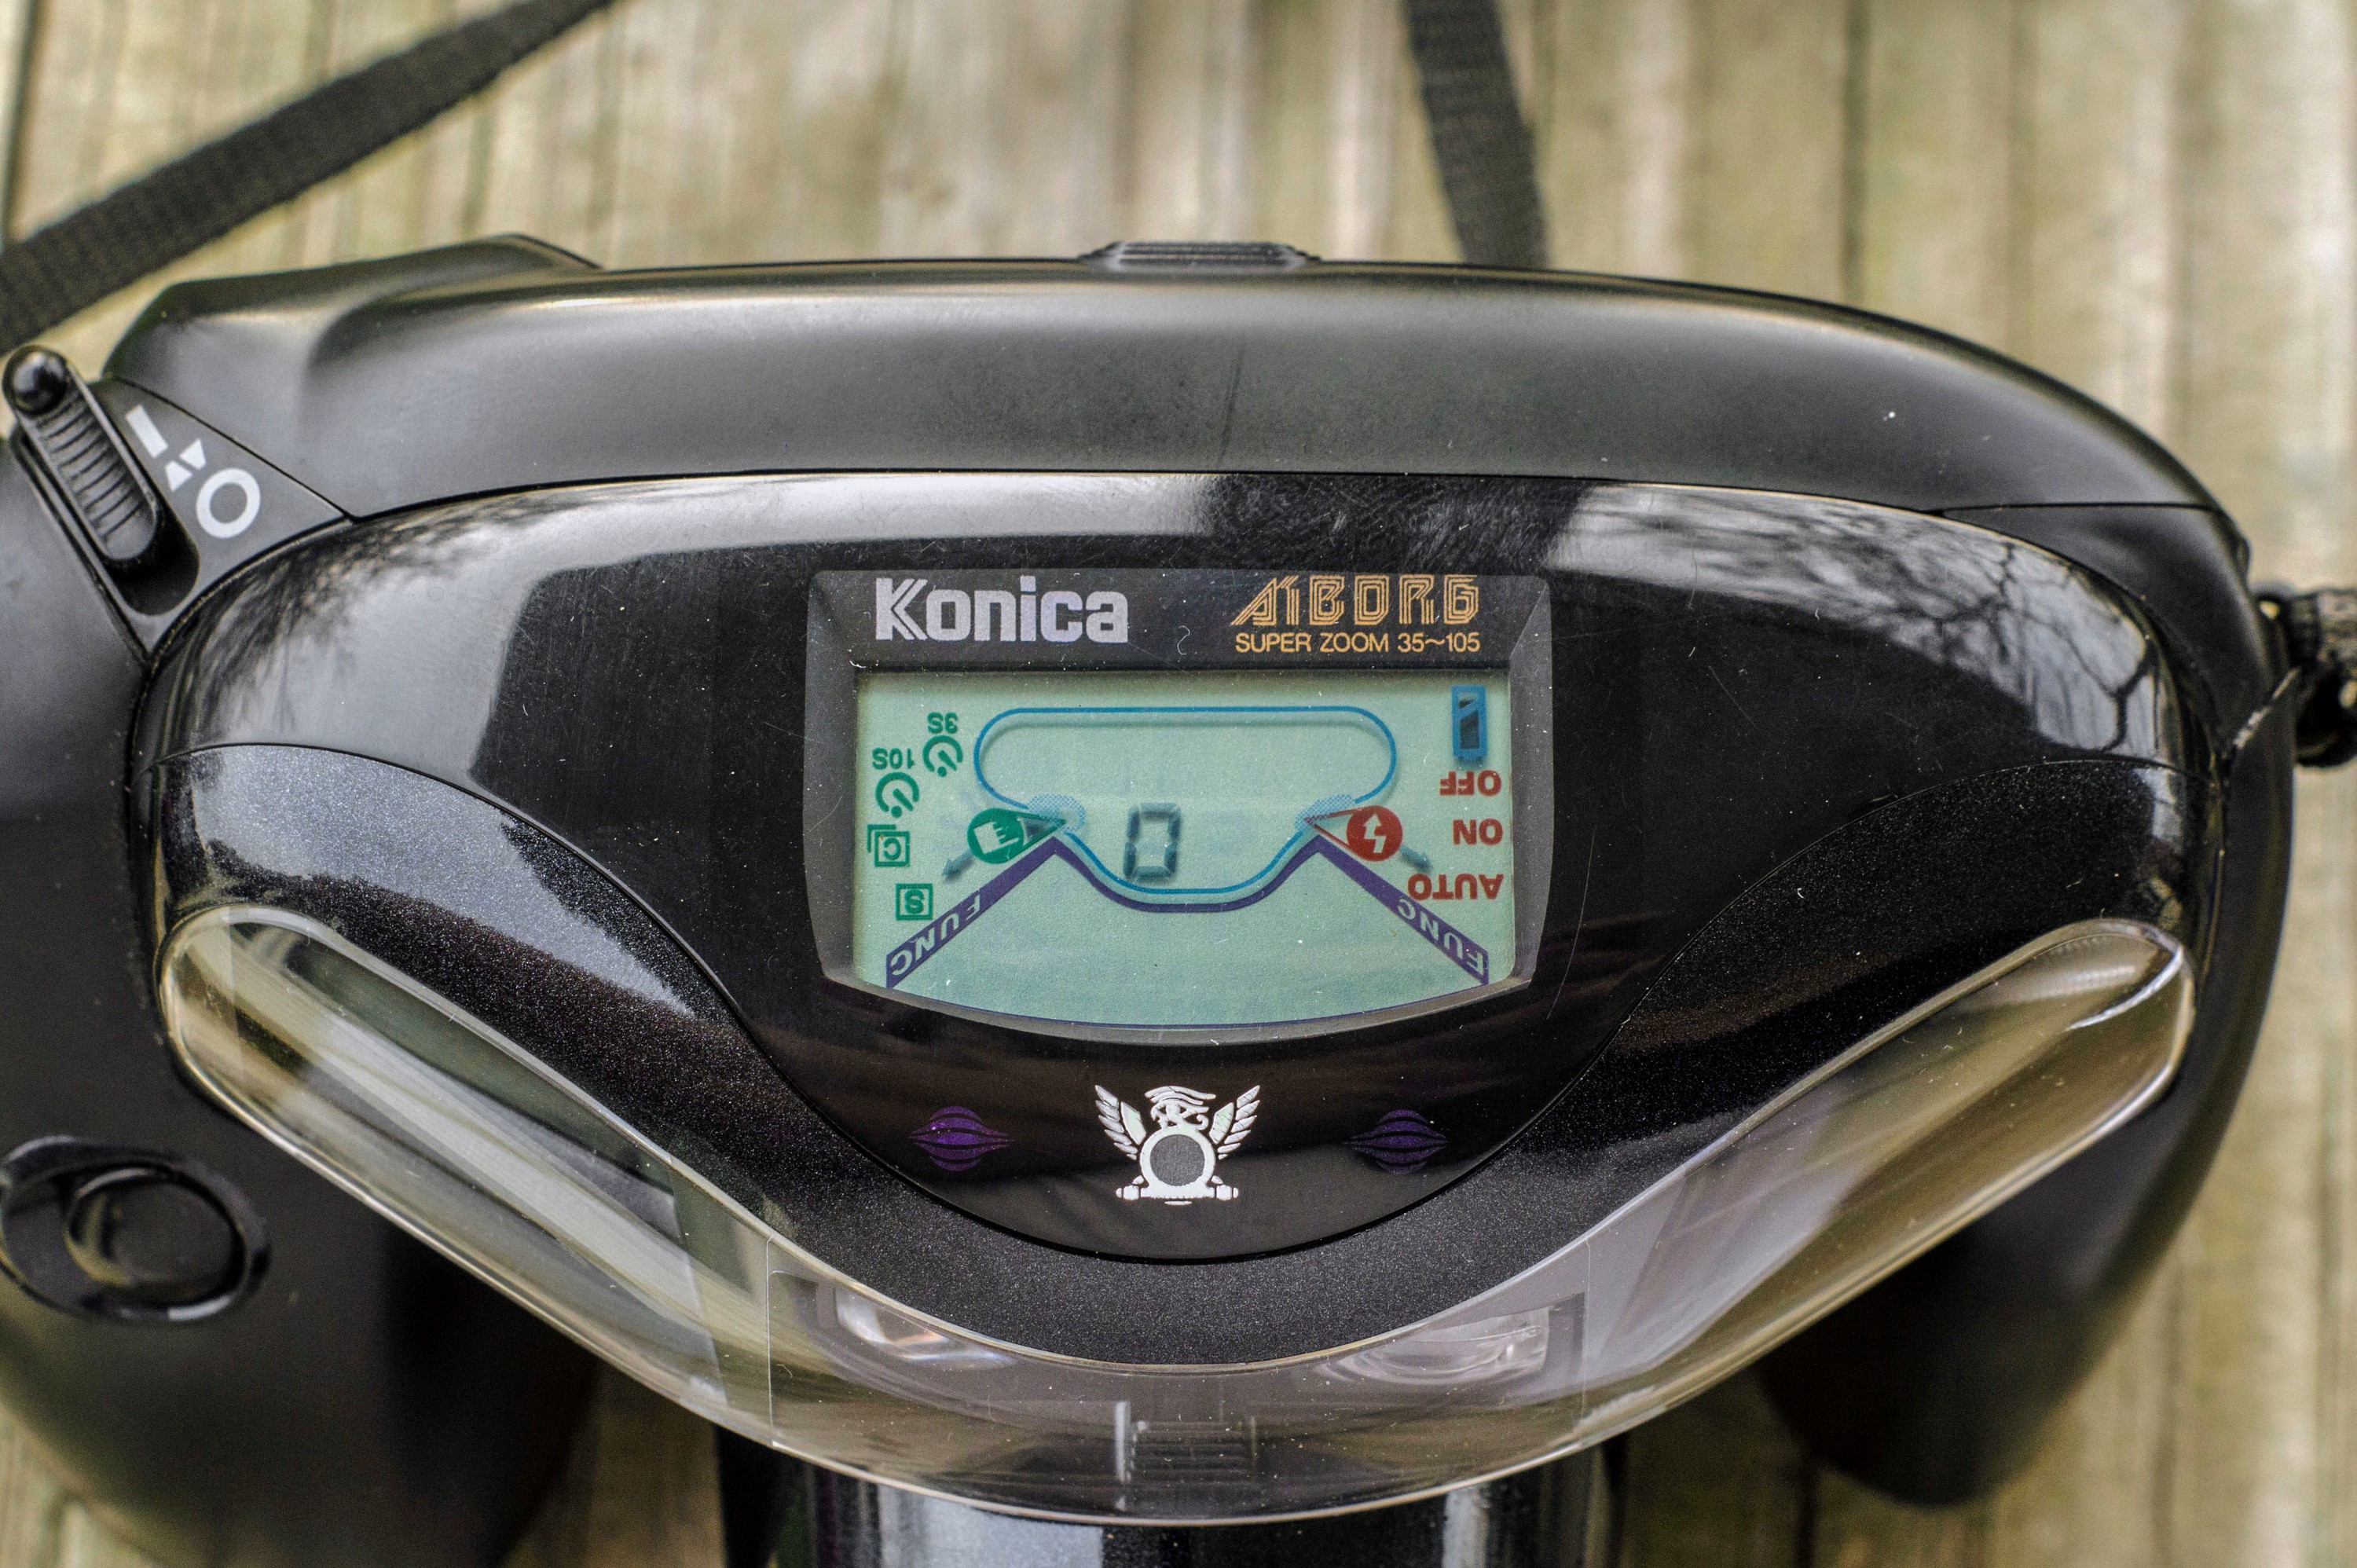
Figuring out how to turn the camera on was not all that straightforward either. To turn the camera on, you pull out a sliding plastic lever on the right side of the top plate, above the “joystick”. Its not hard to do, but at first glance when looking at this camera, its not the most obvious location for the power switch.
If you’re starting to guess that I have a lot of complaints about the location of things on this camera, you are correct. The entire ergonomics of this camera, including all of the controls, is extremely poorly thought out. From a design standpoint, this camera gets almost nothing right. I would go as far as to say that this camera is quite possibly the worst laid out piece of consumer electronics I have ever used in my life.
Sure, there are some pluses. The dual front grips make the camera easy to hold in your left or right hand. Its worth noting that the left hand grip is much smaller than the right one and not quite as useful. I guess if you didn’t have a neck strap on this camera and got tired of holding it in your right hand on a long family trip to the zoo, you could comfortably hold the camera in your left hand, giving your right hand a rest.
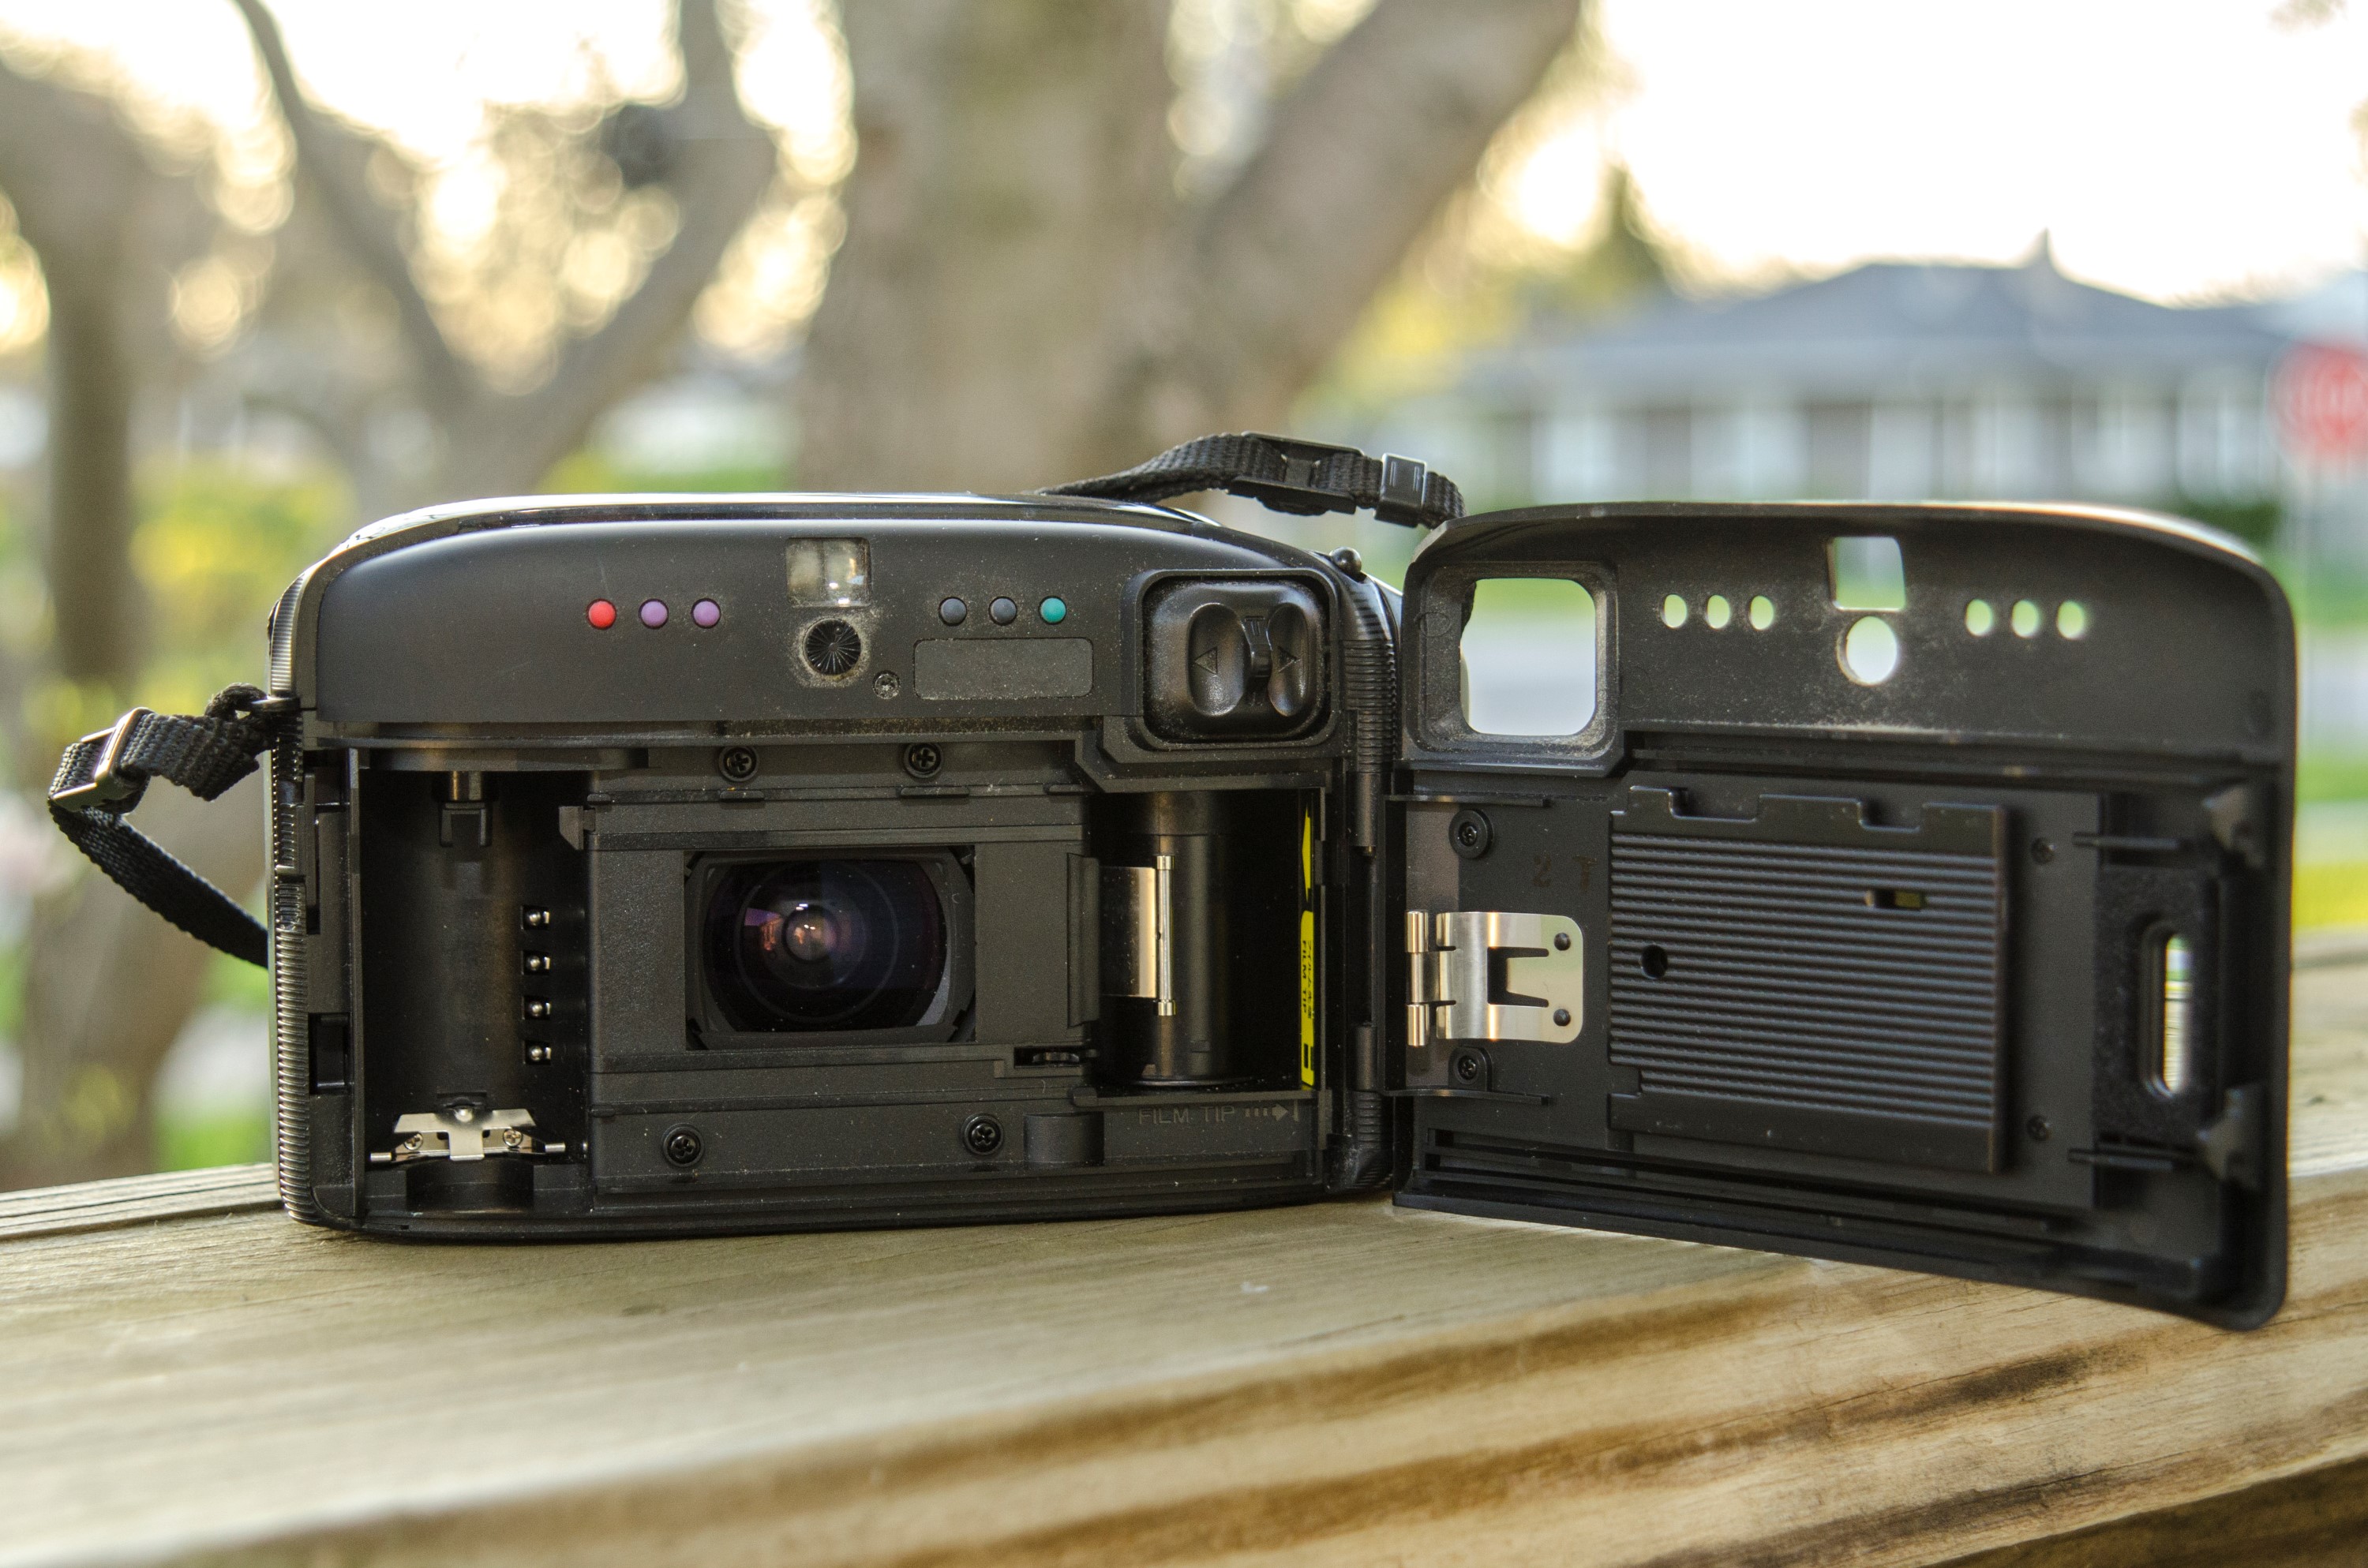
Loading film into the camera is a snap as the AiBORG employs a quick load system where you extend the film leader up to a line and then close the door and the camera handles the rest. There is no need to thread it onto a spool and line up sprocket holes. Once the door is closed, the camera automatically takes the film to the first frame and you’re ready to go.
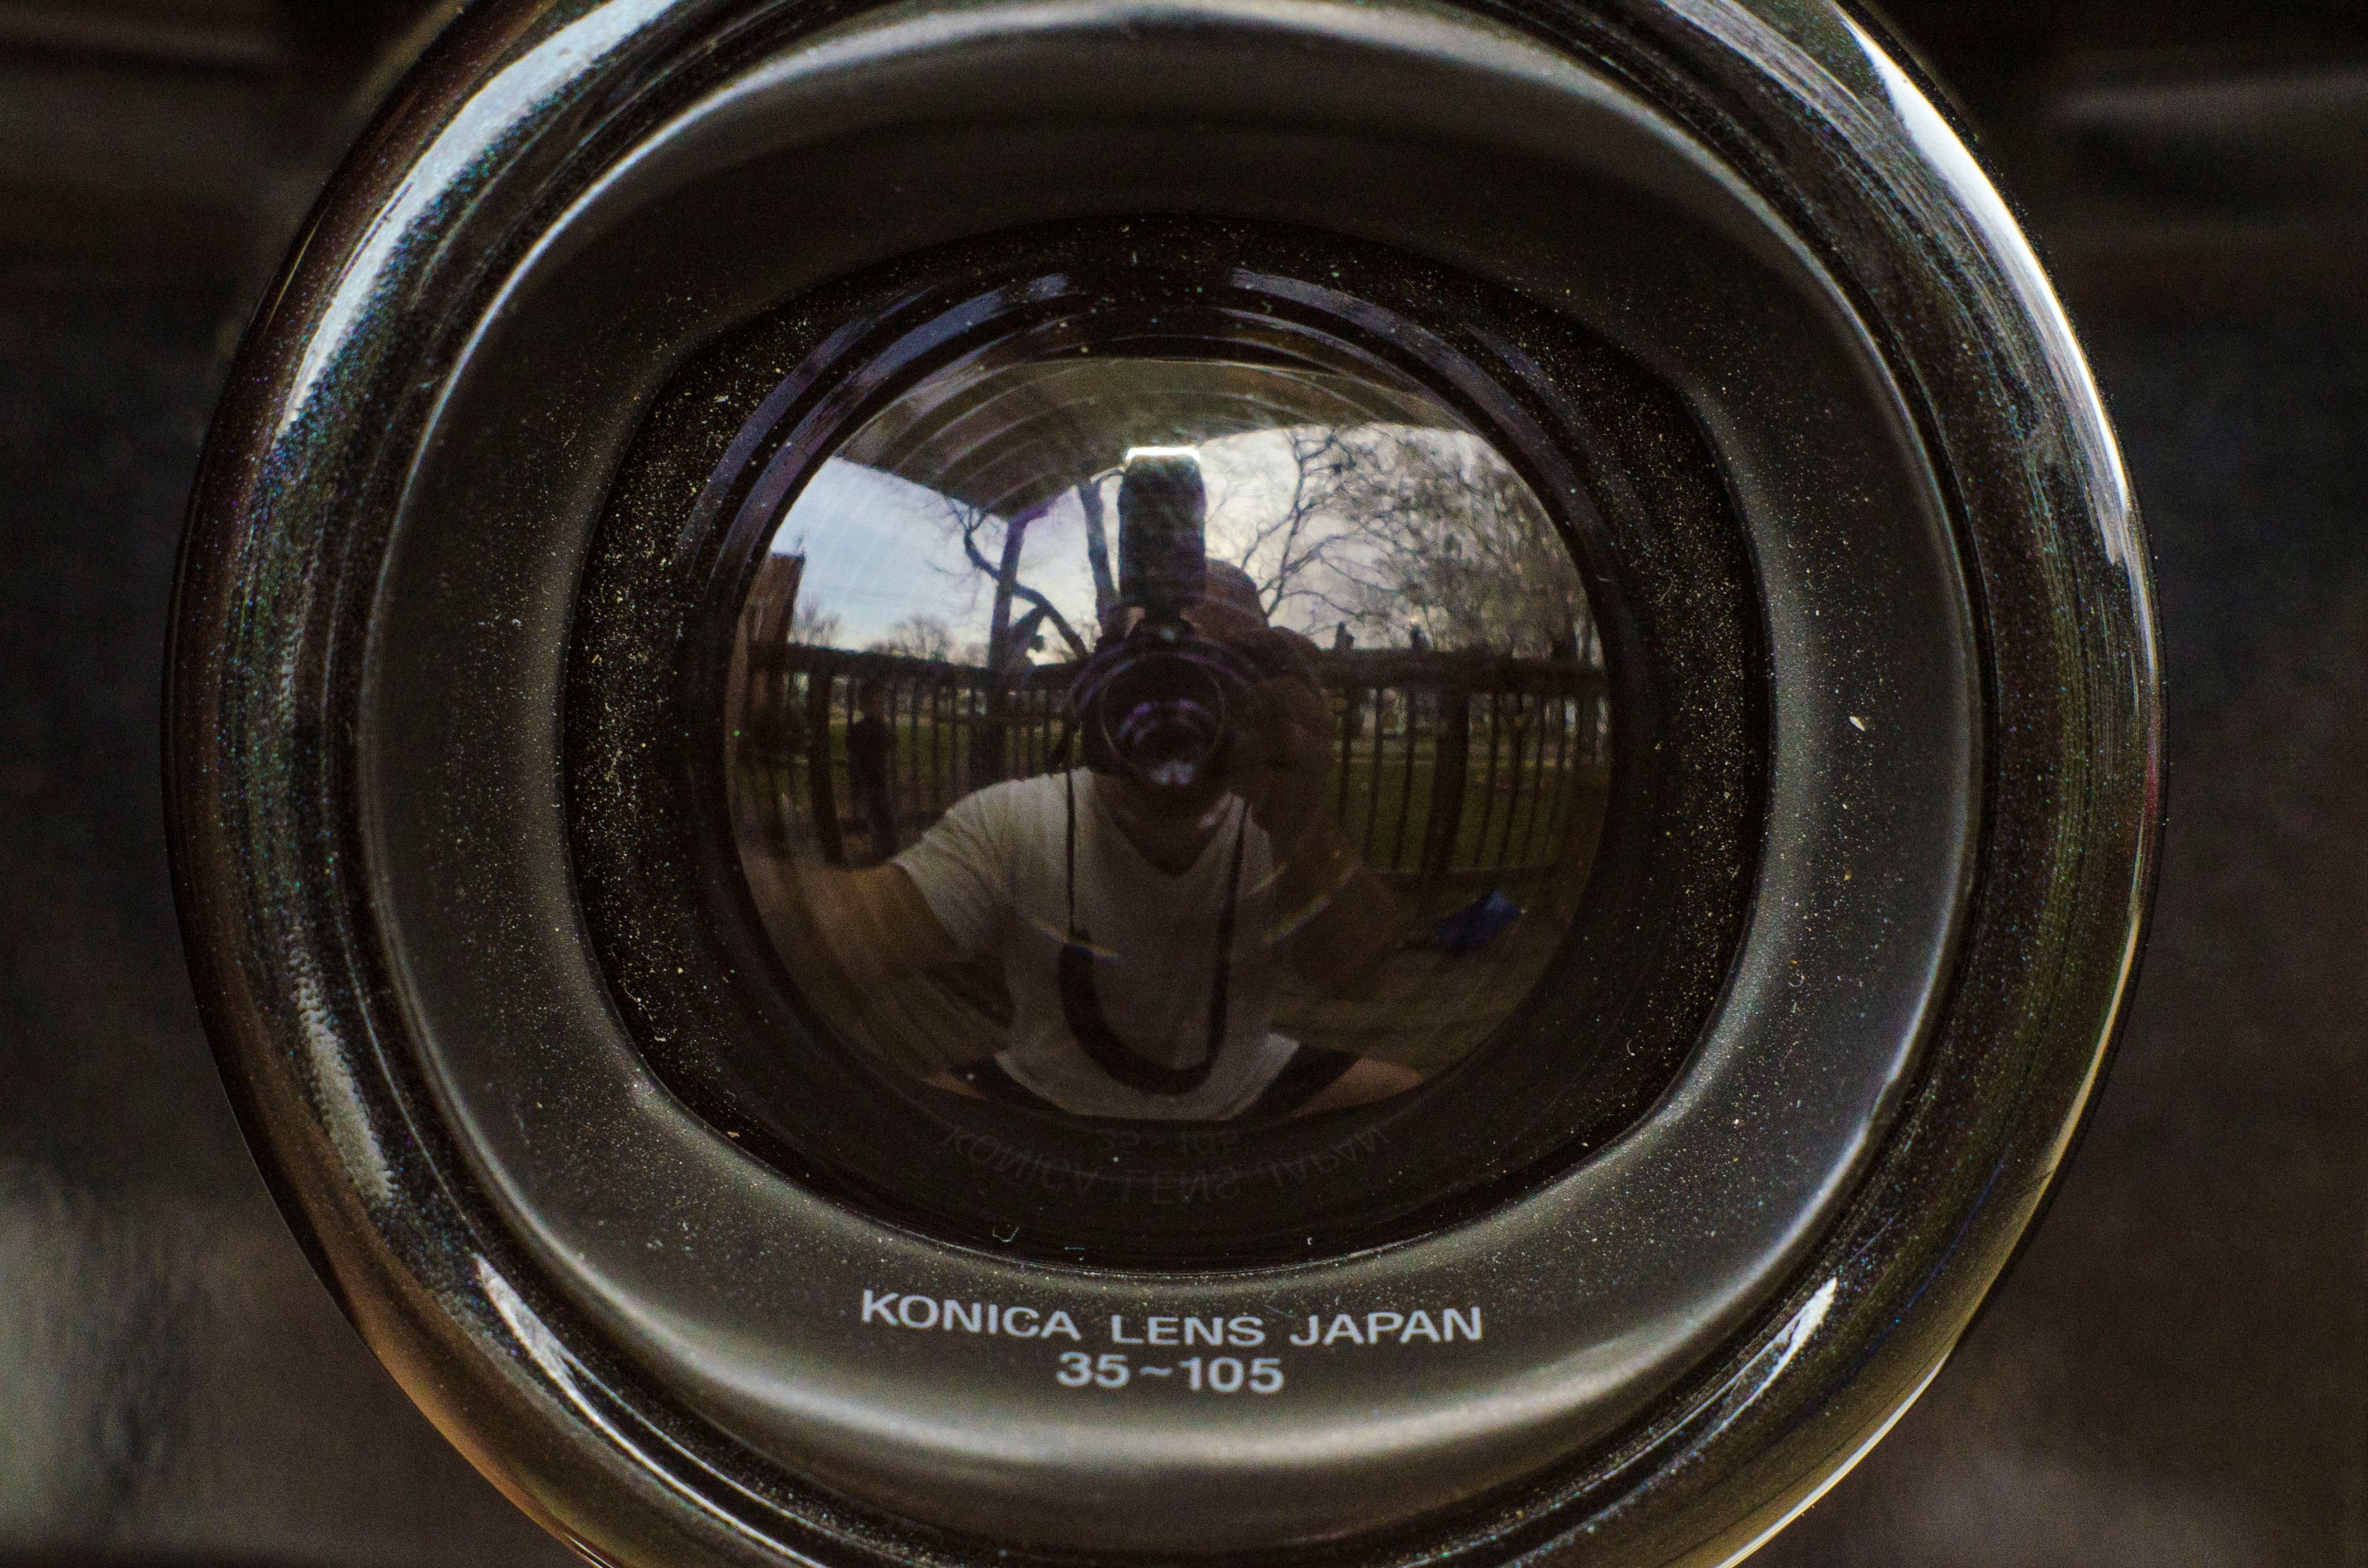
I’ll even declare that the all plastic body seems to be pretty sturdy. It has a slick internal lens cover that rotates back into the camera when the camera turns on. When off, the lens cover has a semi-transparent circular pattern that looks pretty neat. The camera does not creak in your hands, and the gaps between plastic panels are very small. When opening the film door, the hinge seems strong enough to not allow any flex in the door, letting light in. I’ll say that Konica’s quality control was pretty good, especially considering this thing was a pretty high end camera when it was first introduced.
Now back to the complaints. I mention the easy to hold grips on both sides of the camera, and while yes, they make the camera easy to hold, they negate any possibility of pocketing this camera. This will not slip into even normal sized coat pockets or a small purse. You’d need a fairly large handbag or camera case to hold this thing. In most cases, you’ll either be depending on the neck strap or holding the camera for extended periods of time.
When it comes time to actually shoot, some additional ergonomic anomalies present themselves. For one, the right hand grip also has the shutter release on it. While that would at first seem like a logical place to put it, once you realize where your fingers are while naturally holding the camera, you’ll quickly find that the shutter release is not in an ideal location. I would describe my hands as average sized male hands and I found the shutter release to be both too far forward and too far inward for my tastes. Take a look at the image to the left. I have to contort my index finger into an uncomfortable position to touch the shutter release using the very tip of my finger rather than the pad like on most other cameras. Alternatively, I could reposition my entire hand so that my finger is more comfortable on the shutter release, however then the rest of my hand is not securely holding the camera.
One of the camera’s signature features is the so called “joystick” which controls both the focus zone and zoom. I will refer to this thing as a “joystick” in quotation marks, because its not so much of a joystick, but a square rocker switch that goes up, down, left, and right. It shares more in common with a video came controller’s directional pad, but not nearly as smooth. There is a lot of play in the joystick before anything happens. Not only is the joystick sloppy and not well designed, but like the shutter release button, it too is in an awkward position. While it would seem logical to use your right thumb to control the joystick, it is located too high and inward on the back of the camera to use comfortably while looking through the viewfinder. I found that while trying to activate the zoom, I would have to stretch my thumb from it’s natural resting position to reach it.
If all of this seems pretty bad, I haven’t even gotten to the camera’s single worst feature, which is the viewfinder. This viewfinder is pathetically small, especially for something released in 1991. The viewfinder on the Konica Auto S2 from the mid 1960s is larger and brighter than the one on the AiBORG. I cannot imagine how anyone in the early 90s who would have considered spending $510 on a camera (adjusted for inflation, thats $887 in 2016) would accept such a tiny viewfinder. I do not understand why Konica would make such an advanced camera with such a minuscule viewfinder. The body of the AiBORG is certainly large enough to support a larger viewfinder. The only possible explanation could be some technical limitation with the internal LCD screen inside of the viewfinder. If that was the case, I honestly think that losing out on all of the info displayed inside of the viewfinder would be an acceptable compromise if it meant a larger viewfinder.
My complaints with the viewfinder are not solely limited to it’s size, it is also poorly designed. The viewfinder is coupled to the focal length of the lens so you can always get a visual of what the lens sees. With the lens in it’s widest position, things are crisp and easy to see inside of the viewfinder, but upon activating the zoom, the viewfinder image gets blurry. This makes absolutely no sense because it’s an optical viewfinder, you’re just looking through the clear plastic front of the camera. The AiBORG actually does have an adjustable diopter, which I thought could be the problem, but upon rotating the diopter through every possible setting, the zoomed in image remained blurry. Thankfully, this doesn’t have any impact on the photographed image, but it is definitely an issue. I will at least acknowledge the possibility that something is defective with my particular AiBORG which is causing this issue. Even though a 1991 camera is practically brand new for this blog, it still is 25 years old so perhaps other examples aren’t like this.
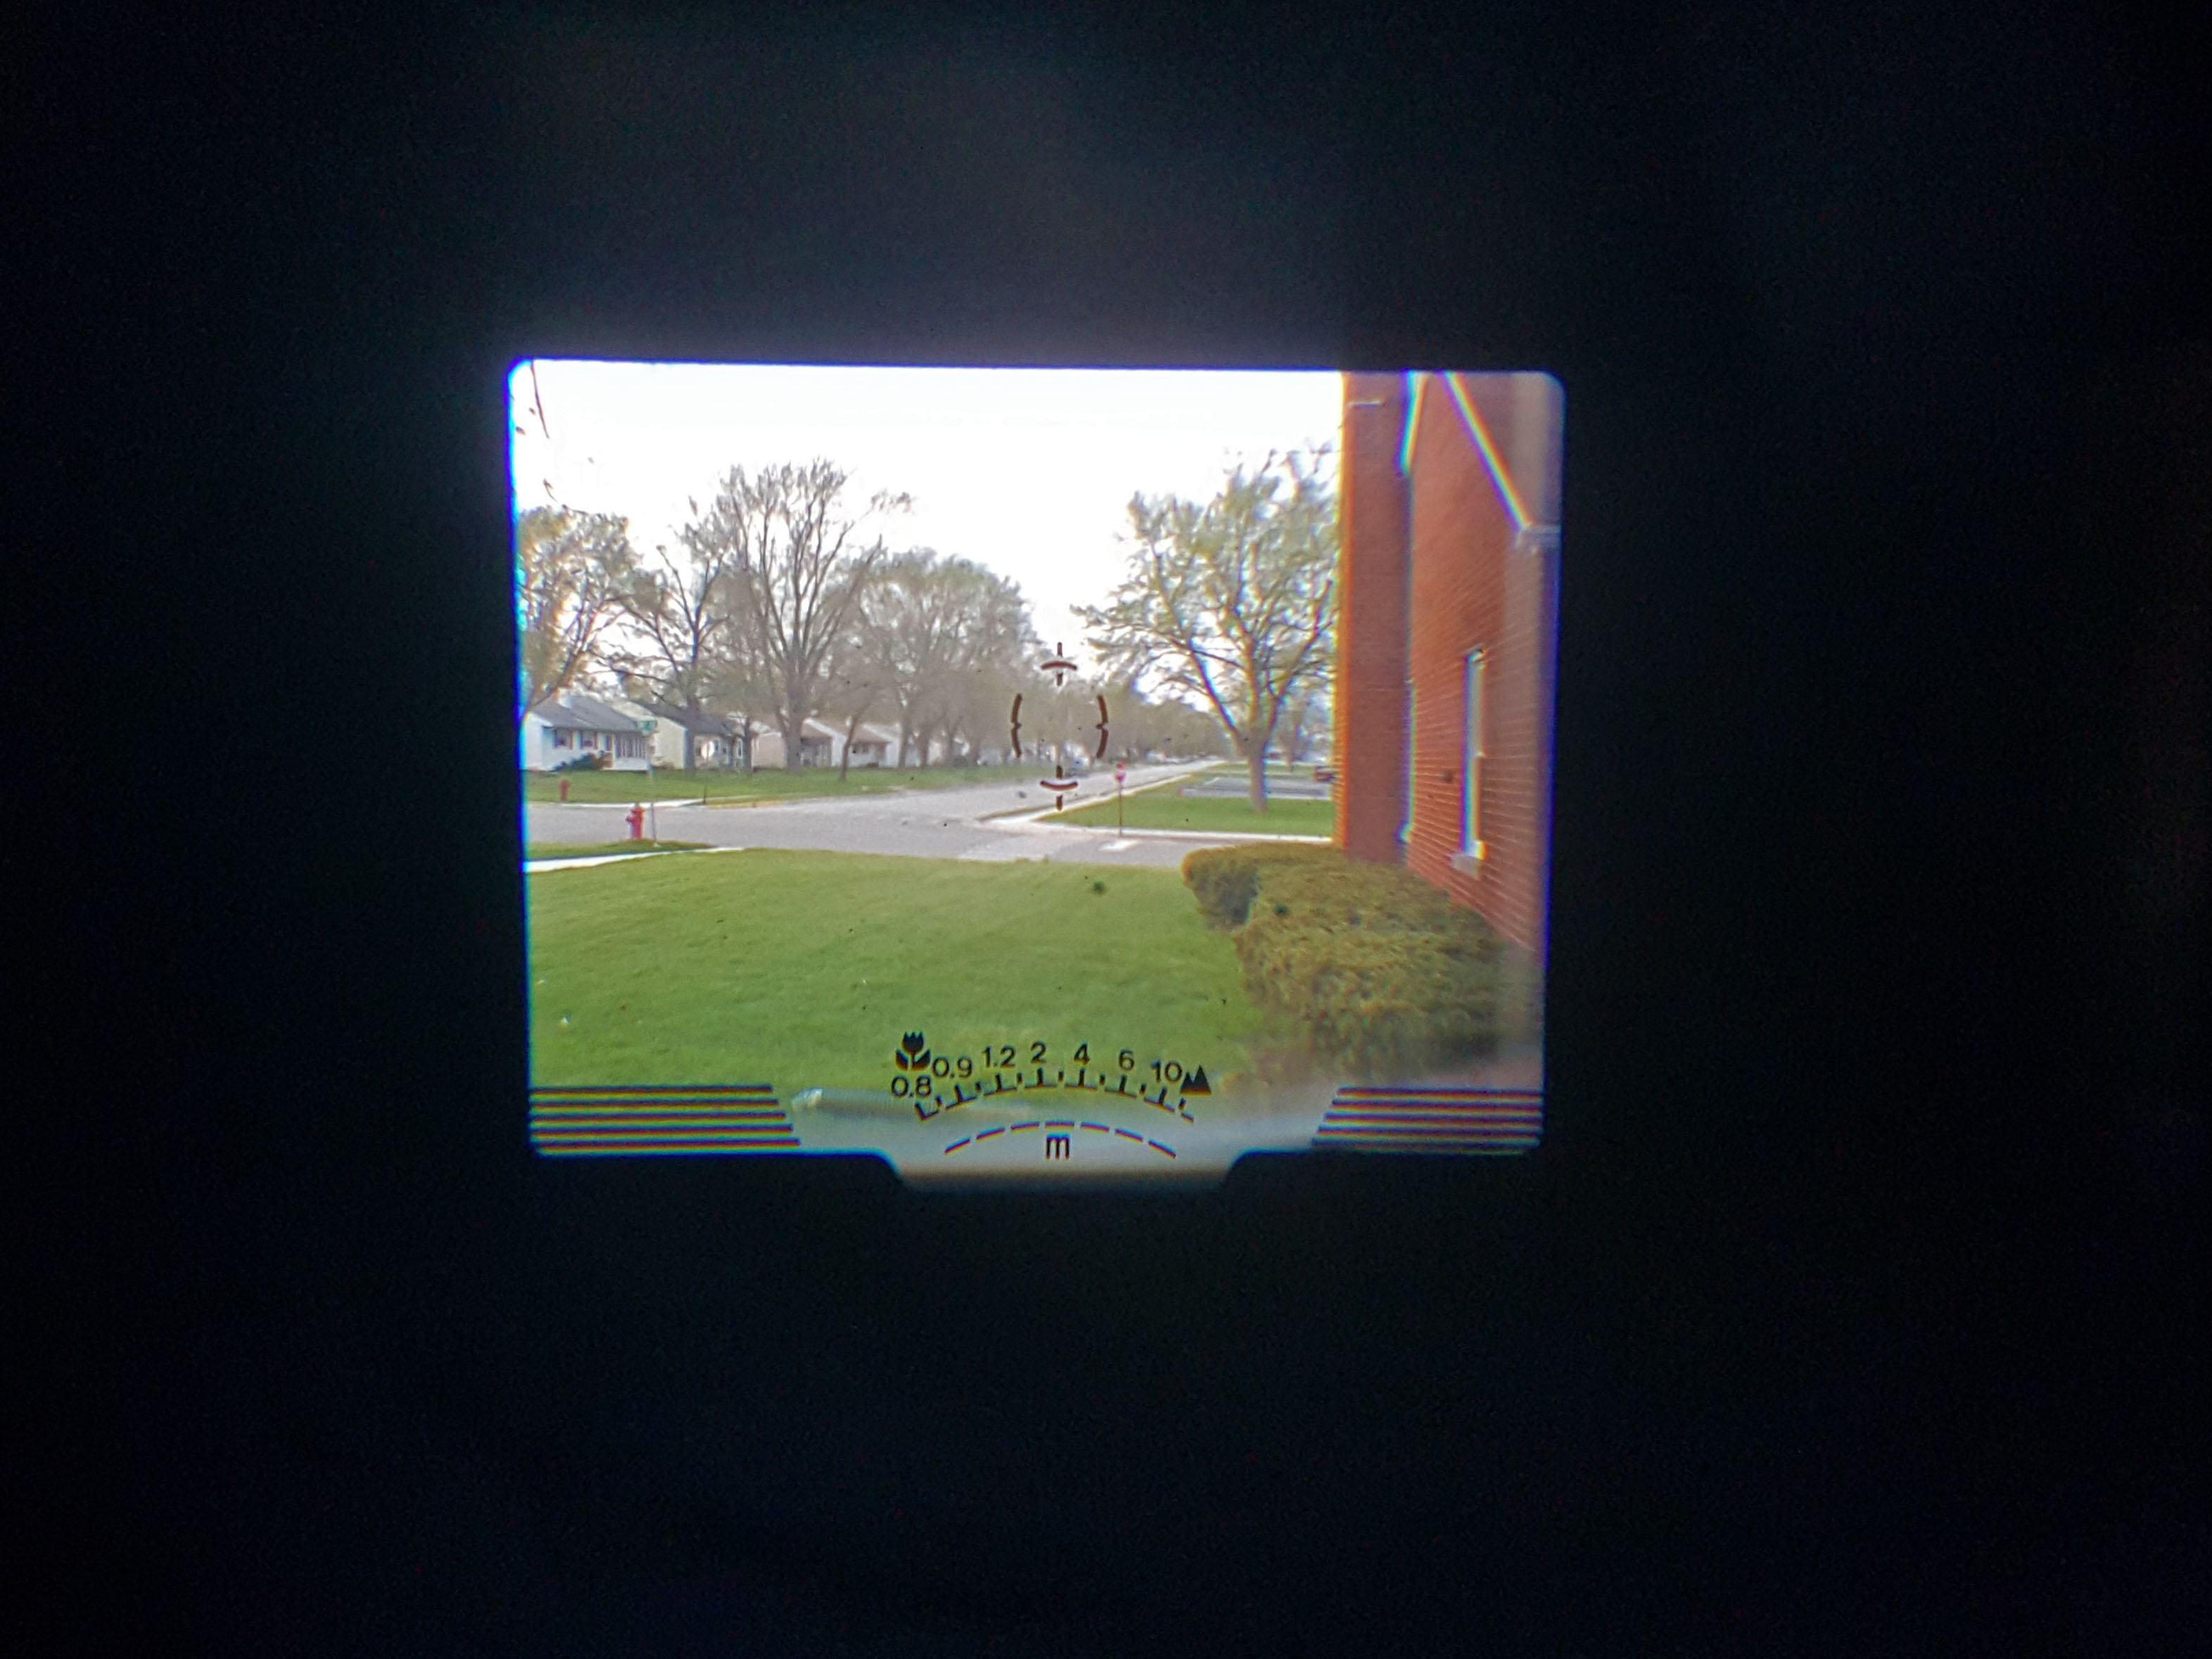
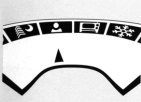
When looking through the viewfinder, you see some type of focus scale from 0.8 – 10 m at the bottom with a tulip logo above the 0.8 number and a mountain to the right of the 10 number. A tulip symbol on most cameras usually indicates macro mode, but the AiBORG isn’t what I would call a macro camera. 0.8 meters is the same as 2.6 ft which is hardly macro. The mountain symbol seems to indicate infinity, but there is no visible infinity symbol. Since the viewfinder is optical, it does not show whether or not the image is in focus, you just have to trust it. When half pressing the shutter, a black arrow will point to the approximate distance that the lens has detected. I find it interesting that this camera only shows distances in meters. This would indicate that it was not for sale in the US. Since I bought mine on eBay, I have no idea where it was originally sold. My particular example may have come from Japan or Europe, so maybe there are AiBORGs out there with this scale in feet, but I doubt it. It seems consistent with the illogical design of this camera that Konica would only make it available using the metric system.
Another thing in the viewfinder is the 5 position focus indicator. You can select left, center, or right focus using the joystick, and a mark will indicate which is selected. Finally, if the camera detects that flash will be needed, a lightning bolt will appear in the upper left corner. If you have the flash disabled and the camera detects that a slow shutter speed will need to be used to properly expose the shot, the lightning bolt will flash to warn you to stabilize the camera. Lastly, there is another icon of what looks like a camera sitting on a tripod that lights up in certain modes where stabilization is required, such as the Night Time and TV modes.
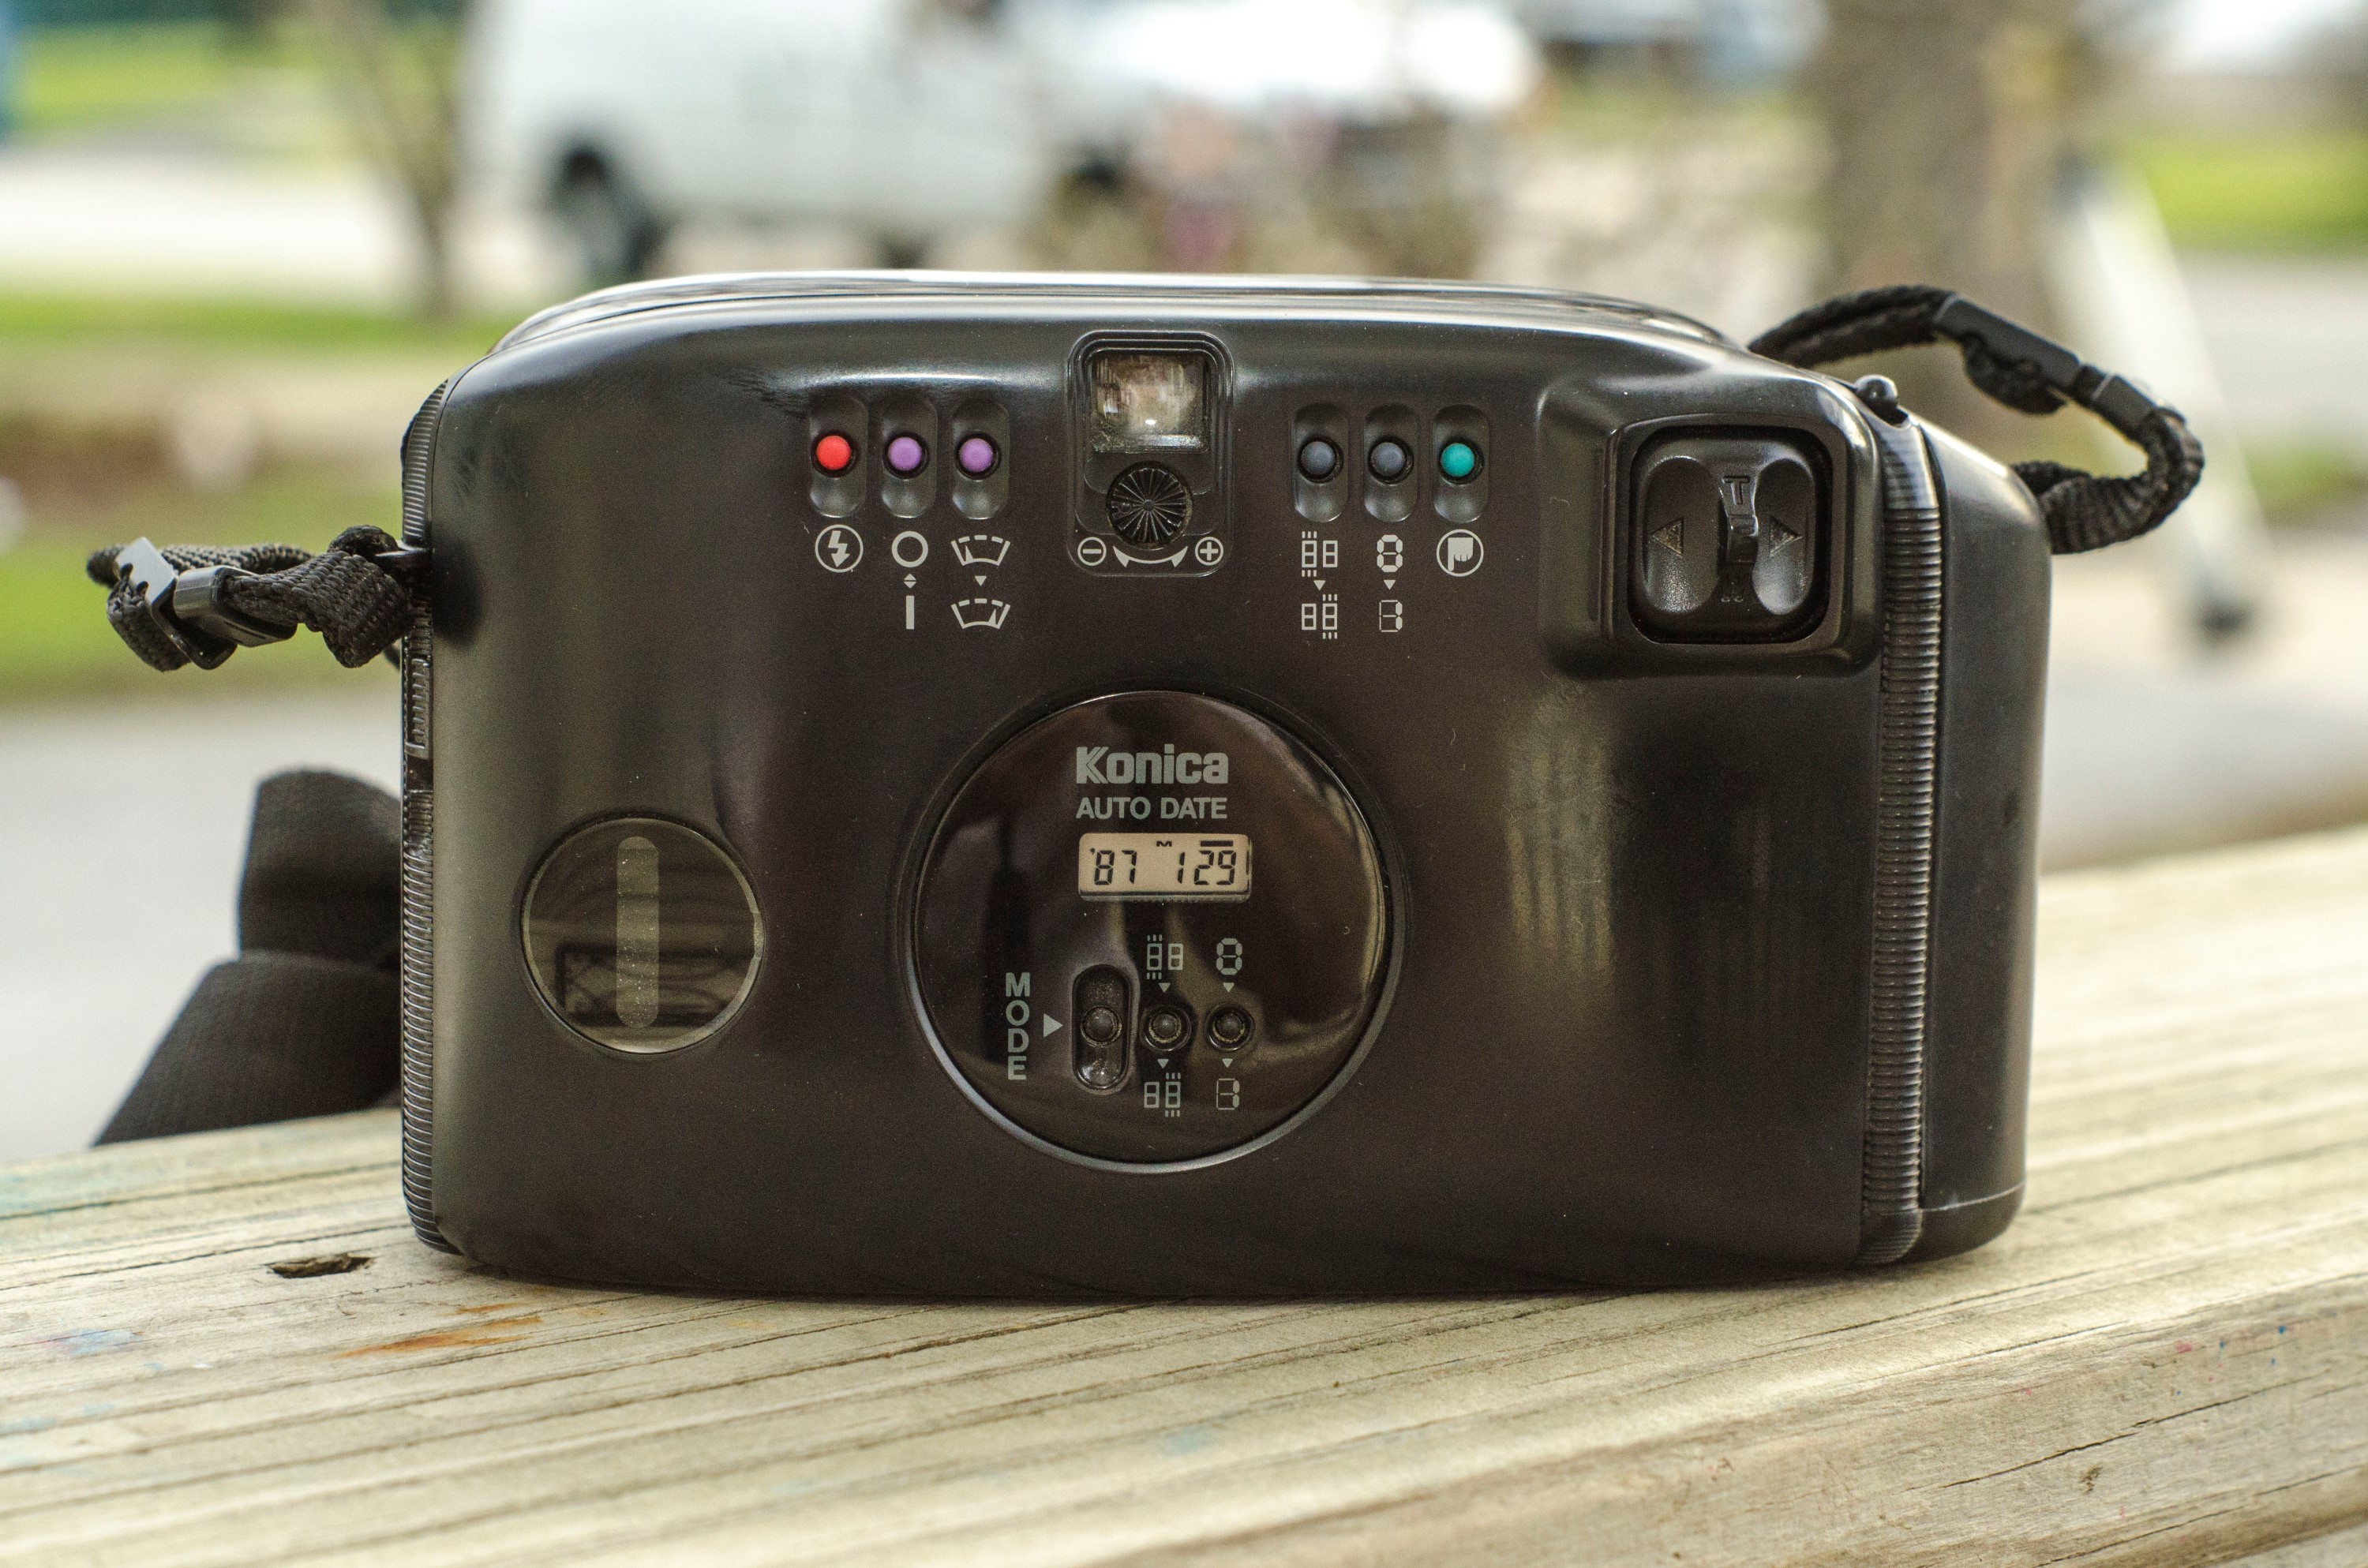
Speaking of the modes, these are all controlled using the 6 buttons on the back of the camera. From left to right, there is a red button that predictably cycles the flash from On, Off, and Auto. Next to it are two purple buttons, the first of which toggles Scene mode selection on and off. The second button which has an icon that literally looks like you are turning on windshield wipers, is actually the selector for each of the camera’s 12 Scene modes, which I’ll explain in a bit. Next are two black buttons that strangely both perform the same function, which is to set a number in one of the Multi-Exposure, Timed-Exposure, or Interval Exposure modes which I’ll also explain later. Finally, the last button is green and it cycles through 4 different shooting modes, Single-Shot, Continuous, 10-second Self-Timer, and 3-second Self-Timer.
Edit 4/12/17: When I originally wrote this article, I scoured the Internet and was unable to find any kind of English language manual for the Konica AiBORG. My only option was a Japanese language version which prompted me to write the entire section below.
Then in April 2017, I received an email from none other than Mike Butkus himself letting me know he had just added a manual for the AiBORG to his site. Mike Butkus contacted ME to tell me that he updated his site with a manual I was looking for. How cool is that? Since I went through the effort to type the whole next section, I’ll leave it here, even though you can now just read the manual yourself.
During my research for this review, I attempted to locate an electronic copy of the AiBORG’s user manual. My usual resource is Mike Butkus’ excellent camera manuals site, but even he does not have one for this camera. I scoured the internet and managed to locate a Japanese language version of the manual. I don’t speak or read Japanese, so I couldn’t read any of the text, but many of the pages have visual representations of many of the features of the camera that help you get the gist of what they do. What follows is my best attempt at explaining what the 12 scene modes are for.

Infinity Mode
Deactivates auto focus and forces the camera to stay fixed at infinity. This is useful for landscape or far away shots in which a closer object might confuse the auto focus sensor. Anything in the image that is closer than infinity will be out of focus.
 Night Mode
When shooting night time scenes, this mode forces the camera into a long exposure mode to compensate for low light. This mode requires the camera to be stabilized to avoid motion blur. Interestingly, this mode can optionally be used with the flash. I’ve never tried it, but I imagine the flash fires in a limited power mode or possibly as a rear curtain flash to capture more background detail, rather than overpower the focal point of the image.
 Portrait Mode
This is an interesting mode as it automatically uses the camera’s zoom to detect the presence of a person and it changes the focal length of the lens to properly frame the person’s head and shoulders for an actual portrait. Modern digital cameras have face detection technology that can isolate a person’s face in an image, but this technology did not exist in 1991, so I am curious to see how this actually works. In the AiBORG manual, there are 3 images of a girl all at different focal lengths and in each of the 3 images, her position remains consistent in all 3. The “Ai” in “AiBORG” hints at some level of artificial intelligence, so perhaps this is one of the early CPU controlled modes.
 TV Mode
This is one of the more gimmicky modes of the camera that is used to capture images on a television screen. Back in 1991, HDTV was still more than a decade away from widespread adoption. Televisions at the time used one of two international standards called either NTSC or PAL. In both of the standards, a single frame of a TV image used interlaced scan-lines that would draw every other line of an image, and then go back and draw the rest of the image on the second pass. Each pass happened at either 1/60th or 1/50th of a second depending on which system your country used. To the human eye, this happened fast enough that we couldn’t detect this interlacing, but if you attempted to make a photograph of your television screen, the camera would often shoot an image faster than the TV could draw the frame, which meant that portions of the screen would look black or very fuzzy. While I don’t know that many people in 1991 were taking pictures of their TV, Konica must have figured that there would be enough people wanting to photograph high scores on a video game, or the final score on a popular sporting event, that they introduced this mode. This feature is completely useless today because most people don’t have access to NTSC or PAL TVs anymore, so there is no way to be sure how this mode works. If I had to guess, the camera most likely forces itself to use a shutter speed slower than 1/50 (probably 1/25) to make sure that both scan lines would be captured in the same shot. As this is a slow shutter speed, stabilization of the camera would have been required.
 Bright Scene or Snow Mode
The snowflake logo in this mode indicates that it should be used when the subject is in a very bright scene like a snowscape. I assume the camera would be forced into either a very fast shutter speed or very small aperture, but I can’t really understand why the auto exposure sensor wouldn’t just know this. It would seem that the AiBORG has a pretty accurate auto exposure sensor, so why it would need a dedicated mode to tell it that you are shooting a very bright scene is a mystery to me. Even more confusing is that the camera also has a -1.5EV mode that can be used to manually underexpose a very bright scene. It is plausible that this mode uses some other function of the camera to make bright pictures look better, but since I don’t read Japanese, I cannot be sure.
 Bouncy Ball Mode
Like TV mode, this is another very gimmicky mode that allows you to shoot 6 exposures in quick succession on the same frame of film. Unlike a typical multi-exposure mode, the camera takes a metering of the scene and shoots each image at 1/6th the exposure value of the image so that once all 6 frames are exposed on the same piece of film, the image is not overexposed. In the Konica manual, this mode shows a sample of a girl who has just released a helium filled balloon and you see her standing there and the balloon 6 times as it floats away. In Hamish Gill’s review of the Konica AiBORG, he shoots an image of a little girl on a playground swing. It’s kinda of cool, but not anything you would use very often. I actually attempted to shoot a couple of shots in this mode and the most difficult aspect of getting this to work correctly is that the camera has to auto focus and auto expose the scene before firing the 6 shots. As a result, there is a slight delay between when the shutter release is pressed and the first of six frames is captured. This means that getting the timing of a moving object can be very difficult. The whole sequence of 6 shots takes about a full second to complete, so the camera should be stabilized when using this mode so as not to induce motion over the entire frame. You can also pair this feature with the flash, but when the flash is on, it will only fire on the 6th frame, and not the first 5.
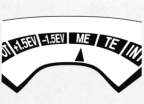
 Spot Metering Mode
This mode does exactly what it sounds like. Rather than use the camera’s default metering mode where it averages overall exposure over a portion of the frame, it detects exposure from a small spot in the center of which of the 5 focus areas you have selected. This would be useful if you are trying to shoot something off center that is either brighter or darker than the rest of the image.
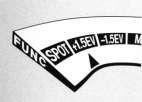
 +1.5 EV and -1.5 EV Modes
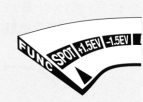
These two modes are pretty standard plus or minus 1.5 EV exposure modes to either over or under exposure a shot. These are useful for when a subject is standing in front of a window or lamp that is brighter than the subject. You can use these modes to either expose for the darker foreground object (over expose), or the brighter background object (under expose). My only comment about these two modes is that they are buried 8 and 9 presses of the “windshield wiper” button to activate. In my experience, it can be hard to predict when someone is going to walk in front of a backlit object like a window, so using these modes is somewhat of a compulsory need. Having to cycle through so many modes just to activate this feature takes too much time to be useful.
Multi-Exposure Mode
I have never been a fan of multi-exposure images. Most of the time, I feel the shots don’t make any sense, but there are those that can do this with great effect. In this mode, both of the black buttons on the back of the camera can be used to change how many multiple exposures you want on the same frame. While most people are satisfied with double exposure, the camera lets you select anywhere between 2 and 39 multiple exposures on the same frame. I cannot tell if this mode can be paired with the flash, but if it’s anything like the bouncy-ball mode, it probably only fires the flash on the very last exposure.
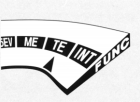
Timed-Exposure Mode
Under normal operation, the longest shutter speed this camera can automatically choose is 6.4 seconds. Why is it 6.4 and not just 6? Or 7? I have no idea, but from all of the literature I’ve read on this camera, 6.4 seconds is the longest the AiBORG can choose on it’s own. If you want to force a longer exposure time for very dark scenes, or shots of the night sky, you can use Timed-Exposure mode and choose an exposure as long as 99 hours, 59 minutes, and 59 seconds. What would a 100 hour exposure look like? Who knows. Would the battery even last that long to allow the shutter to stay open for that long? Who knows. Interestingly, on the page of the manual that explains this mode, there is an image of what looks to be a cable release socket on the side of the camera near the right strap loop. On my camera, there is a round plastic cover over a hole that when pulled out, reveals a shaft that is not threaded for any type of remote cable release. I would assume that when selecting a timed exposure, you don’t actually have to hold the shutter release down this whole time, and that the camera would just control the shutter electronically, so I am not sure what purpose this hole is for. Maybe there was some future upgrade planned for an accessory intervalometer. Speaking of an intervalometer…
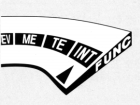
Interval Exposure or Time Lapse Mode
A combination of sorts of the previous two modes, this mode allows you to shoot multiple consecutive single exposure photos over a period of time. The maximum number of exposures is maxed out at 39 frames, or the end of the roll, whichever comes first, and the intervals between each frame can be as little as 1 second to as long as 99 hours, 59 minutes, and 59 seconds. This could be useful for time lapse photos of a flower opening in the morning sun, a child performing some type of gymnastic act, or even the motion of the moon across the night sky. In Hamish Gill’s review, he creatively used this feature to make an animated GIF of his daughter playing using several frames shot in this mode. While I doubt animated GIFs even existed when this camera was being designed, it’s a neat modern use for this feature.
My Results
It should be no surprise that I have a lot of criticisms of the Konica AiBORG, but this is a camera, and cameras are designed to make photographs. Putting aside the poor ergonomics, the gimmicky features, and the poorly thought out order of the shooting modes, how does it perform? Certainly, sharp and colorful, perfectly exposed shots would outweigh the other design and ergonomic criticisms I have with this camera, right?


The results from my first roll through the AiBORG were disappointing to say the least. Of the 36 exposures, very few were acceptable. The auto focus system had issues focusing on a goose sitting on her nest in broad daylight and other interior shots of people were off as well. I had many shots beyond these here that were badly out of focus. Although the camera has a flash, and you’d think that it might work as a fill flash in contrasty sunlight scenes, the one of the gargoyle is miserable. The details in the statue were completely blown out by the flash, and the background looks like a muddy mess even though that shot was taken in bright sunlight. There were many shots where the exposure was off as well. In the case of the child resting his head, it was way off. This camera is supposedly capable of automatic shots up to 6.4 seconds long, and that’s clearly nowhere near 6.4 seconds.
If I have one defense of the AiBORG, its that I used expired slide film, so that accounts for the extreme graininess and the “off” colors. I won’t fault the camera for those, but even with expired film, that shouldn’t have any impact on the cameras ability to focus or measure exposure. Of the first roll, there were so few shots sharply in focus, I don’t even know that I can draw any conclusions about the sharpness of the lens.
I guess this camera might do better with a different type of film in more forgiving light situations, but this is not only the newest camera I’ve reviewed on this site, its also the most advanced. It’s loaded with modern features that are supposed to help you make better photos, but that didn’t happen here. If this were an older and more interesting model, I would give it another try with some different film and see if I could get better shots, but simply, I hate this camera and probably will never touch it again. I probably should sell it to some poor sap on eBay, but I think I might keep it as a reminder of why I should stay away from plastic point and shoot cameras.
I really wanted to like this camera, I really did. I’ve seen some other reviews where people managed to get decent results from theirs. Hamish Gil’s samples in his review are quite nice. I really thought I would be ending this review saying that despite the small viewfinder, poorly thought out ergonomics, and confusing button and menu structure, that the camera was redeemed with quality shots, but that isn’t what I am saying. I am saying that this is the worst camera I have ever used in my life.
Related Posts You Might Enjoy
External Links
http://camerapedia.wikia.com/wiki/Konica_AiBORG
http://www.35mmc.com/07/08/2015/the-konica-aiborg/
http://www.nytimes.com/1991/11/24/news/camera.html
http://photo.net/modern-film-cameras-forum/00coWW
http://www.collection-appareils.fr/x/html/page_standard.php?id_appareil=10042
Has that camera had a knock at the top right? There appears to be a crack in the plastic…..Every camera manufacturer was allowed one extraordinarily ugly camera, usually coinciding with the release of a Batman movie. It is almost as complicated as a digital compact with ‘menus’ all packed with ‘features’ most of us will never use even if we can find them. It should have been slaughtered in the market place by the Pentax Zoom 105 Super which was much cheaper.
It has to be how the light reflects off the clear plastic window on the AiBORG. This particular example I reviewed was in excellent physical condition with no cracks. I still hated using it, and to this day, remains one of the few cameras I’ve ever shot that I truly hated to use!
The electronics in that monstrosity are more advanced and geeky than any film camera has any right to, at least in a sane world, but I guess this was the early nineties, and digital cameras still weren’t quite a thing yet.
I’m just trying to imagine what was going through the heads of the designers and engineers. Perhaps they were simply given carte blanche to go wild in their design, and this is what they came up with? A completely unfiltered uber-tech geek’s fever-dream camera.
I wouldn’t mind a broken one for cheap, just so I can gut the thing and maybe install some kind of Raspberry Pi type cam in the shell instead. Really go wild with a load of retrofitted cyberpunk-esque components. Make something truly unique, with a touchscreen Linux terminal on the back and a set of lo-fi cctv lenses that could be mounted behind the creepy transparent lens cover/eye thing.
But no, I have a stack of barely started projects like that already, and unless one falls into my lap for free…
A Raspberry Pi powered AiBORG might be the ONLY way to make this camera cool. Seriously, I would have given mine to you for that project if I hadn’t already pawned it off on some poor sucker a couple of years ago!
Hi! Everyone know who is the creator of this camera?
I mean… It’s in the title…