

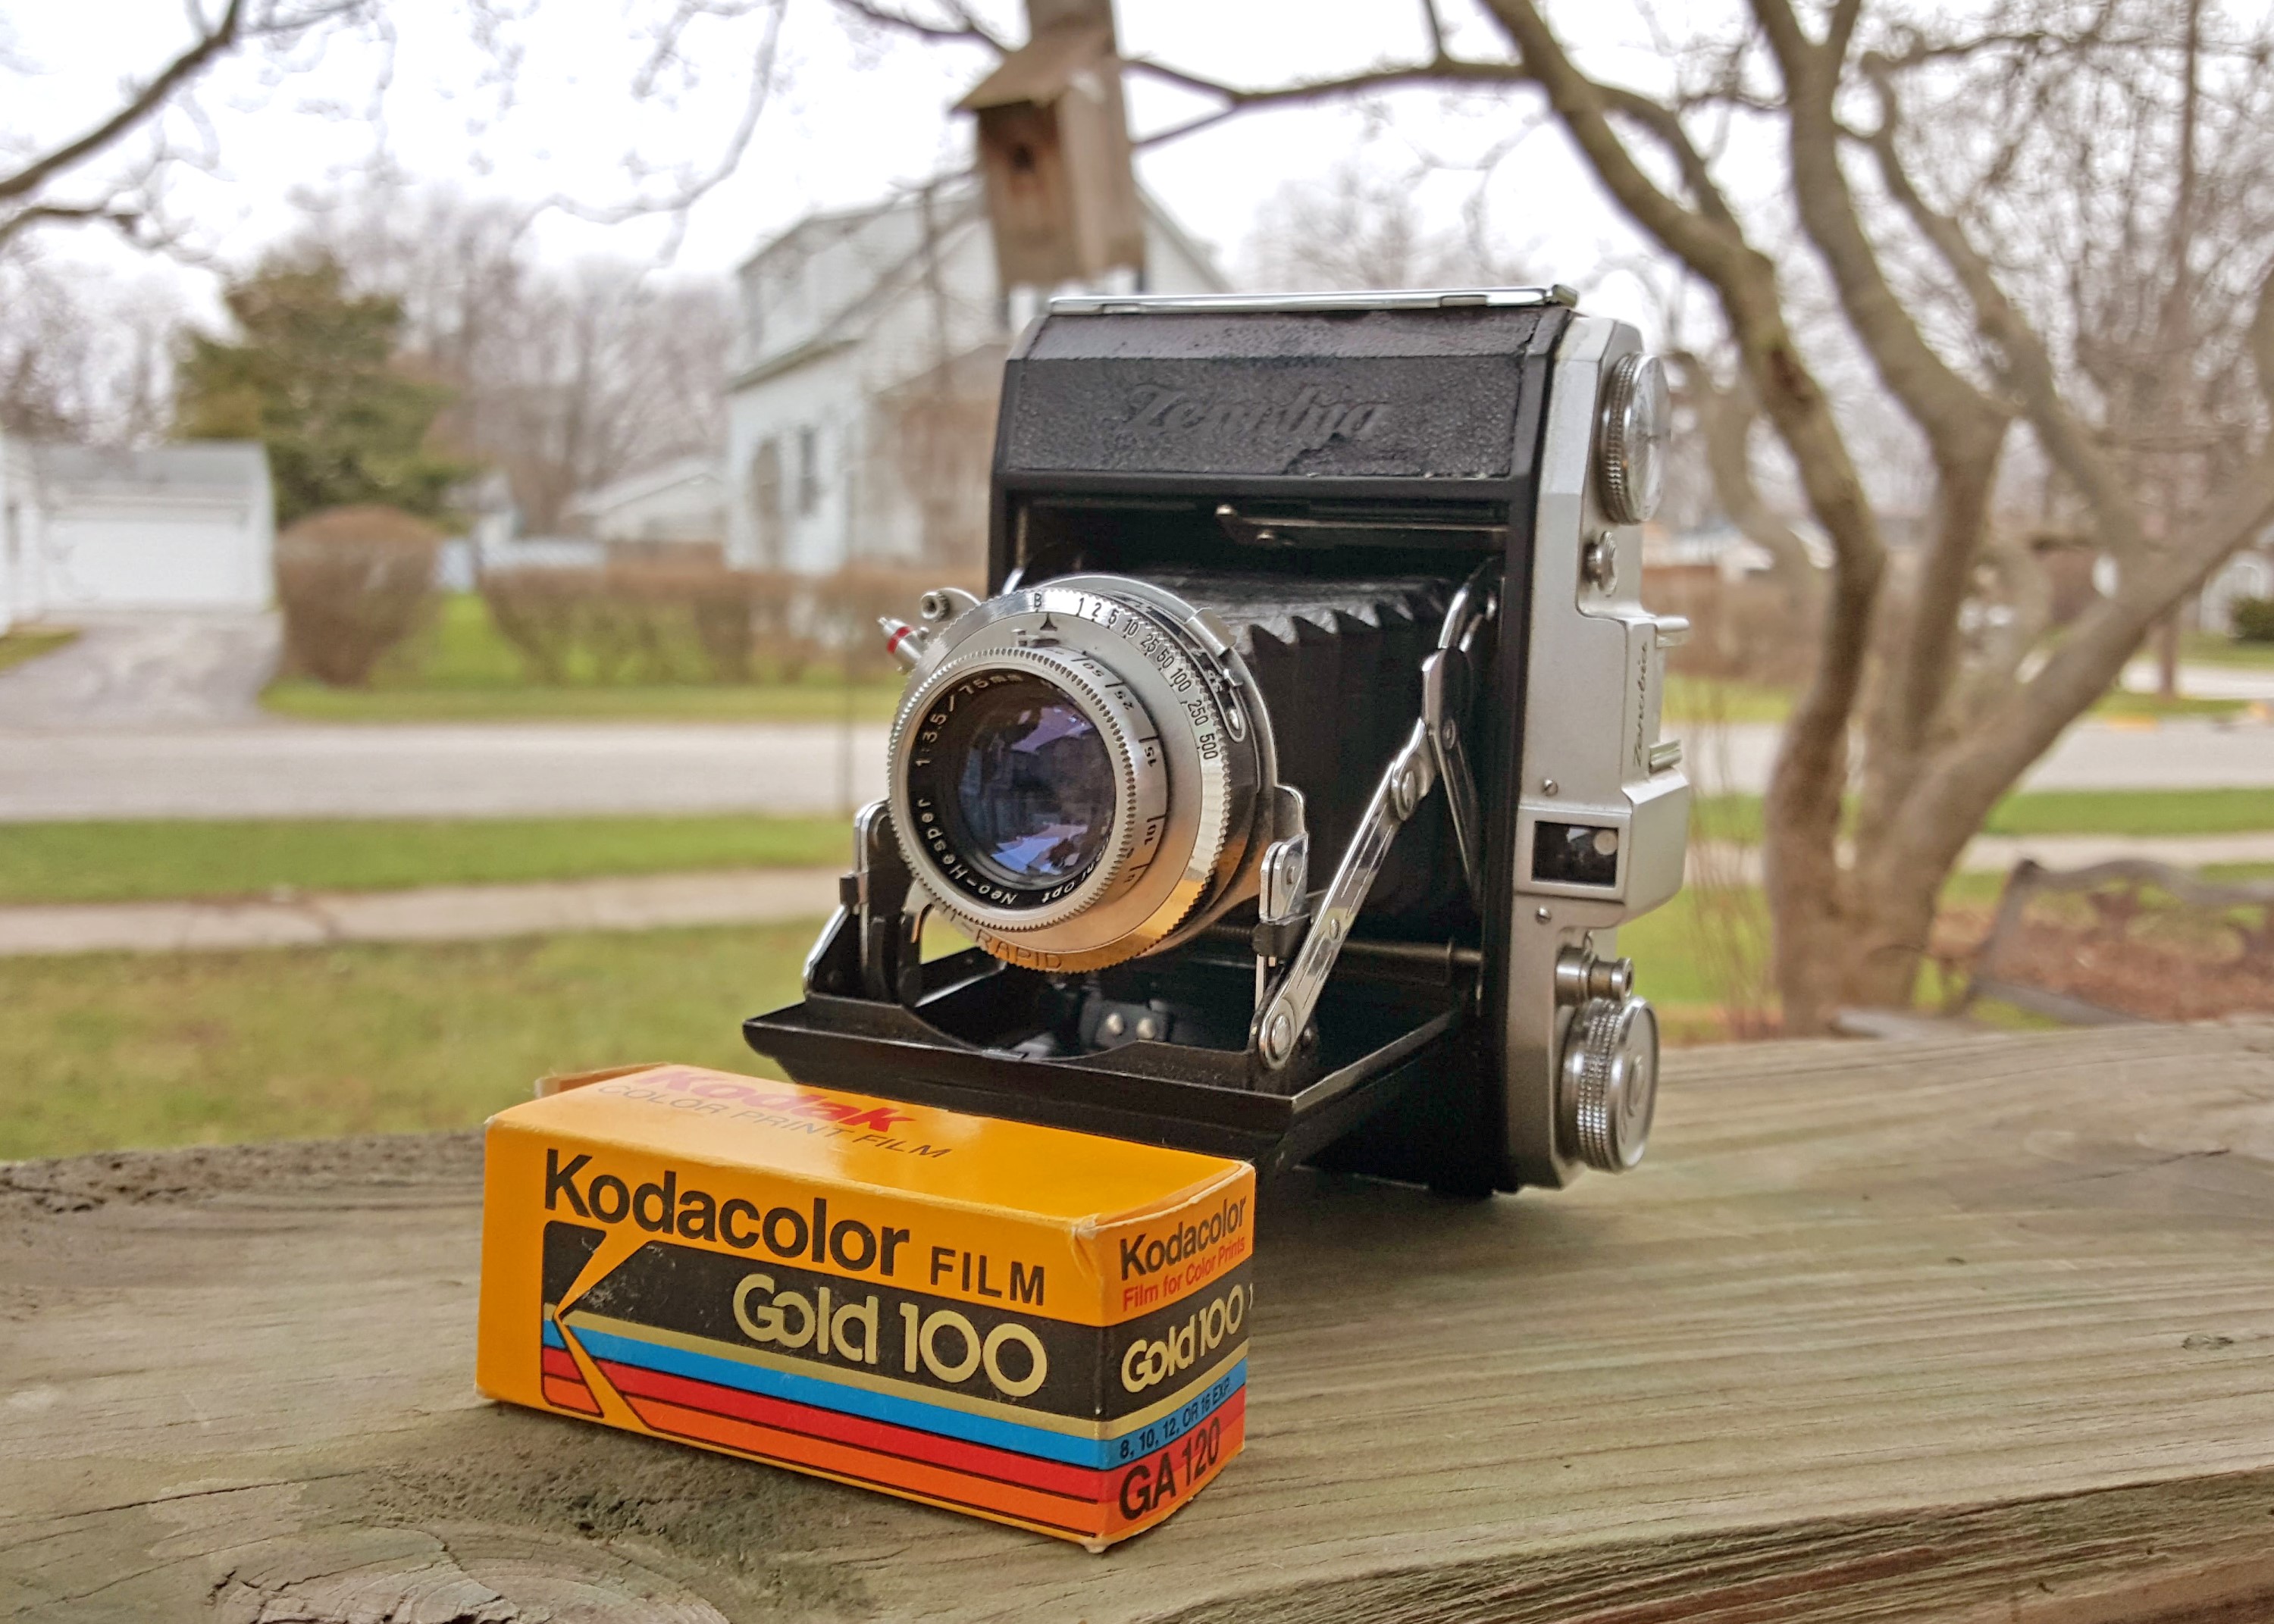
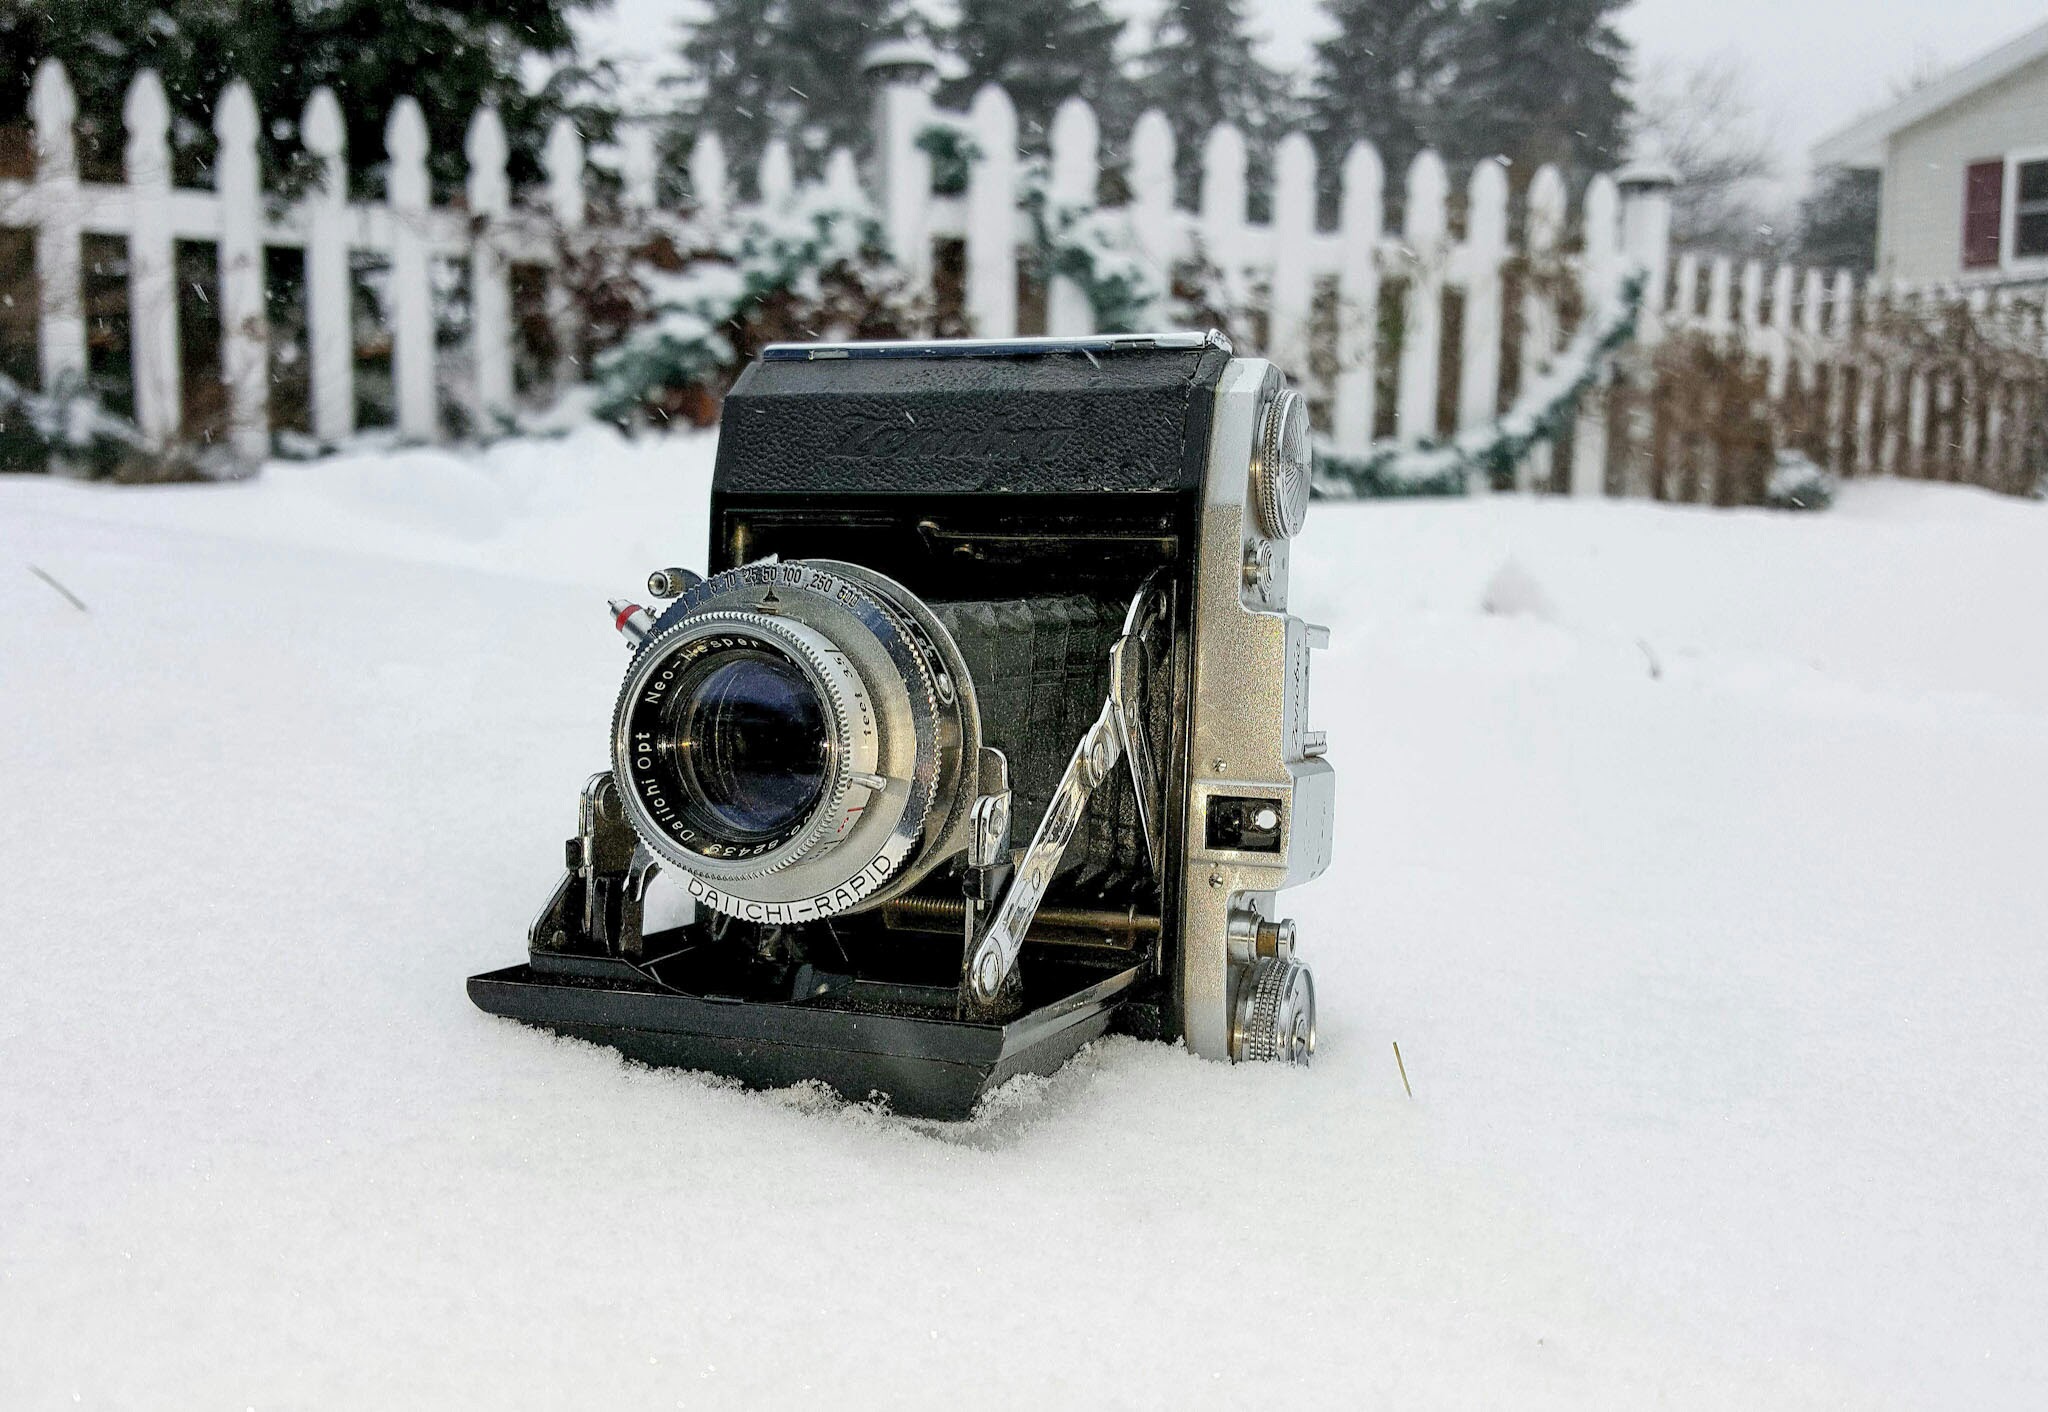
This is a Zenobia C a compact folding camera made by Daiichi Kōgaku in Tokyo, Japan around 1954. It is a compact folding camera that uses 120 roll film and makes 4.5cm x 6cm exposures. The history of Daiichi Kōgaku and the Zenobia is a bit confusing, but what is known is that the Zenobia was the successor to the Waltax made by Okada Kōgaku Seiki K.K. from 1940 to around 1952. The Waltax was also a compact folding 4.5cm x 6cm camera, but it’s design was a direct copy of the pre-war Zeiss-Ikon Ikonta A. Although several design changes were made along the way, the Zenobia C still shares several cosmetic similarities to the Ikonta A which predates it by 20 years.
 Film Type: 120 roll film (sixteen 4.5cm x 6cm images per roll)
Lens: 75mm f/3.5 Daiichi Opt. Neo-Hesper coated 4 elements
Focus: 3 feet to Infinity
Type: Scale Focus
Shutter: Daiichi-Rapid (Compur-Rapid clone)
Speeds: B, 1 – 1/500 seconds
Exposure Meter: None
Battery: None
Flash Mount: ASA Bayonet Sync and Cold Shoe
Weight: 516 grams
Manual: http://www.cameramanuals.org/pdf_files/zenobia.pdf
How these ratings work |
The Zenobia is a compact, lightweight, and easy to use Japanese folding camera that shoots medium format film in an aspect ratio that I am more comfortable with (compared to 6×6). The images it produces are excellent through the Neo-Hesper lens. This is a camera you can easily keep in your pocket or in your car and take out for quick snapshots if you wish. It doesn’t have a huge reputation as a desirable camera, but that’s OK because it means you can probably pick one up for a couple of dollars. Although mine did require some cleaning to return to proper operation, it wasn’t hard to do. 6×4.5 is one of my favorite formats and because this camera shoots it so well, it is definitely a model I will come back to. The Zenobia is a winner in my book. | ||||||
| Images | Handling | Features | Viewfinder | Feel & Beauty | History | Age | |
| 2 | 1 | 0 | 1 | 2 | 0 | 30% | |
| Bonus | +1 for inexplicable “cool” factor, I thoroughly enjoyed using this camera and the results that I got for it make me excited to use it again | ||||||
| Final Score | 8.8 | ||||||
History
The company that would eventually make the Zenobia originally operated under the name Okada Kōgaku Seiki K.K. from the mid 1930s to around 1951. The early history of the company is very thin and hard to follow. I have not been successful at finding anything more than the same word for word write-up at both Camerapedia and Camera-Wiki.
Japanese camera makers from the early parts of the 20th century were not very well organized. Part of this reason was that at the time, Japan was not known as a very reputable exporter of Japanese made goods. I’ll admit, I don’t know a whole lot about early 20th century Japanese commerce, but my guess is that there were a lot of really small companies that would share resources, or change names on a regular basis, making a historical chronology very difficult.
From around 1910 to the 1930s, it was common practice in Japan for camera makers to manufacture and distribute cameras under a “Camera Works” name. Wikipedia has a really good article that gives at least a partial explanation of this along with some examples. Rather than repeat that information here, I recommend you read that from their site if you want to know more.
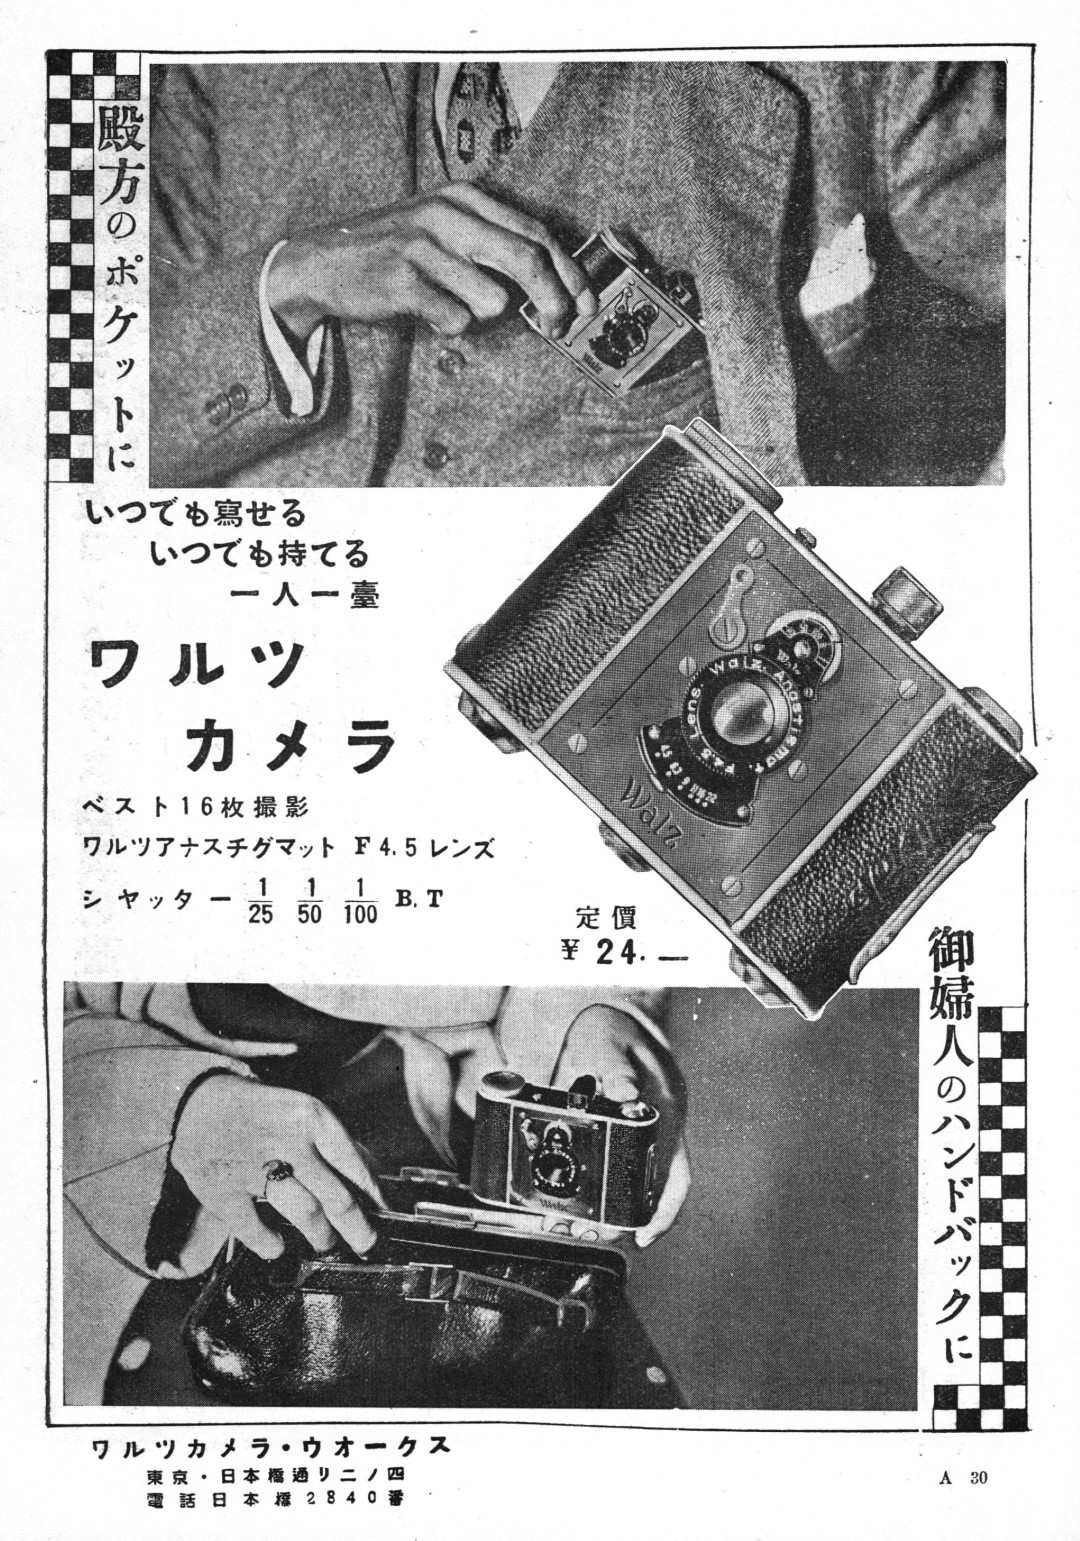
The earliest evidence of Okada Kōgaku was around 1936 when the Walz camera was first produced. The Walz was a Japanese strut folder taking 3x4cm pictures on 127 film. The Walz was based off the Foth Derby, a German made strut folding camera that took 3×4 pictures on 127 film. The Walz was advertised as being made by the Walz Camera Works, which according to the Camera Works Wikipedia article mentioned above was most likely a fake name given to hide the original manufacturer of the camera. Page 745 of the McKeown’s Price Guide to Antique and Classic Cameras references a Japanese book named ‘Kokusan kamera no rekishi’ which states that the Walz was in fact, made by Okada Kōgaku.
The Walz was in production only one year. It disappeared from the market in 1937. Little is known of what the company was doing for the next several years, perhaps functioning as a distributor or maker of camera parts like some of the other “Camera Works” companies.
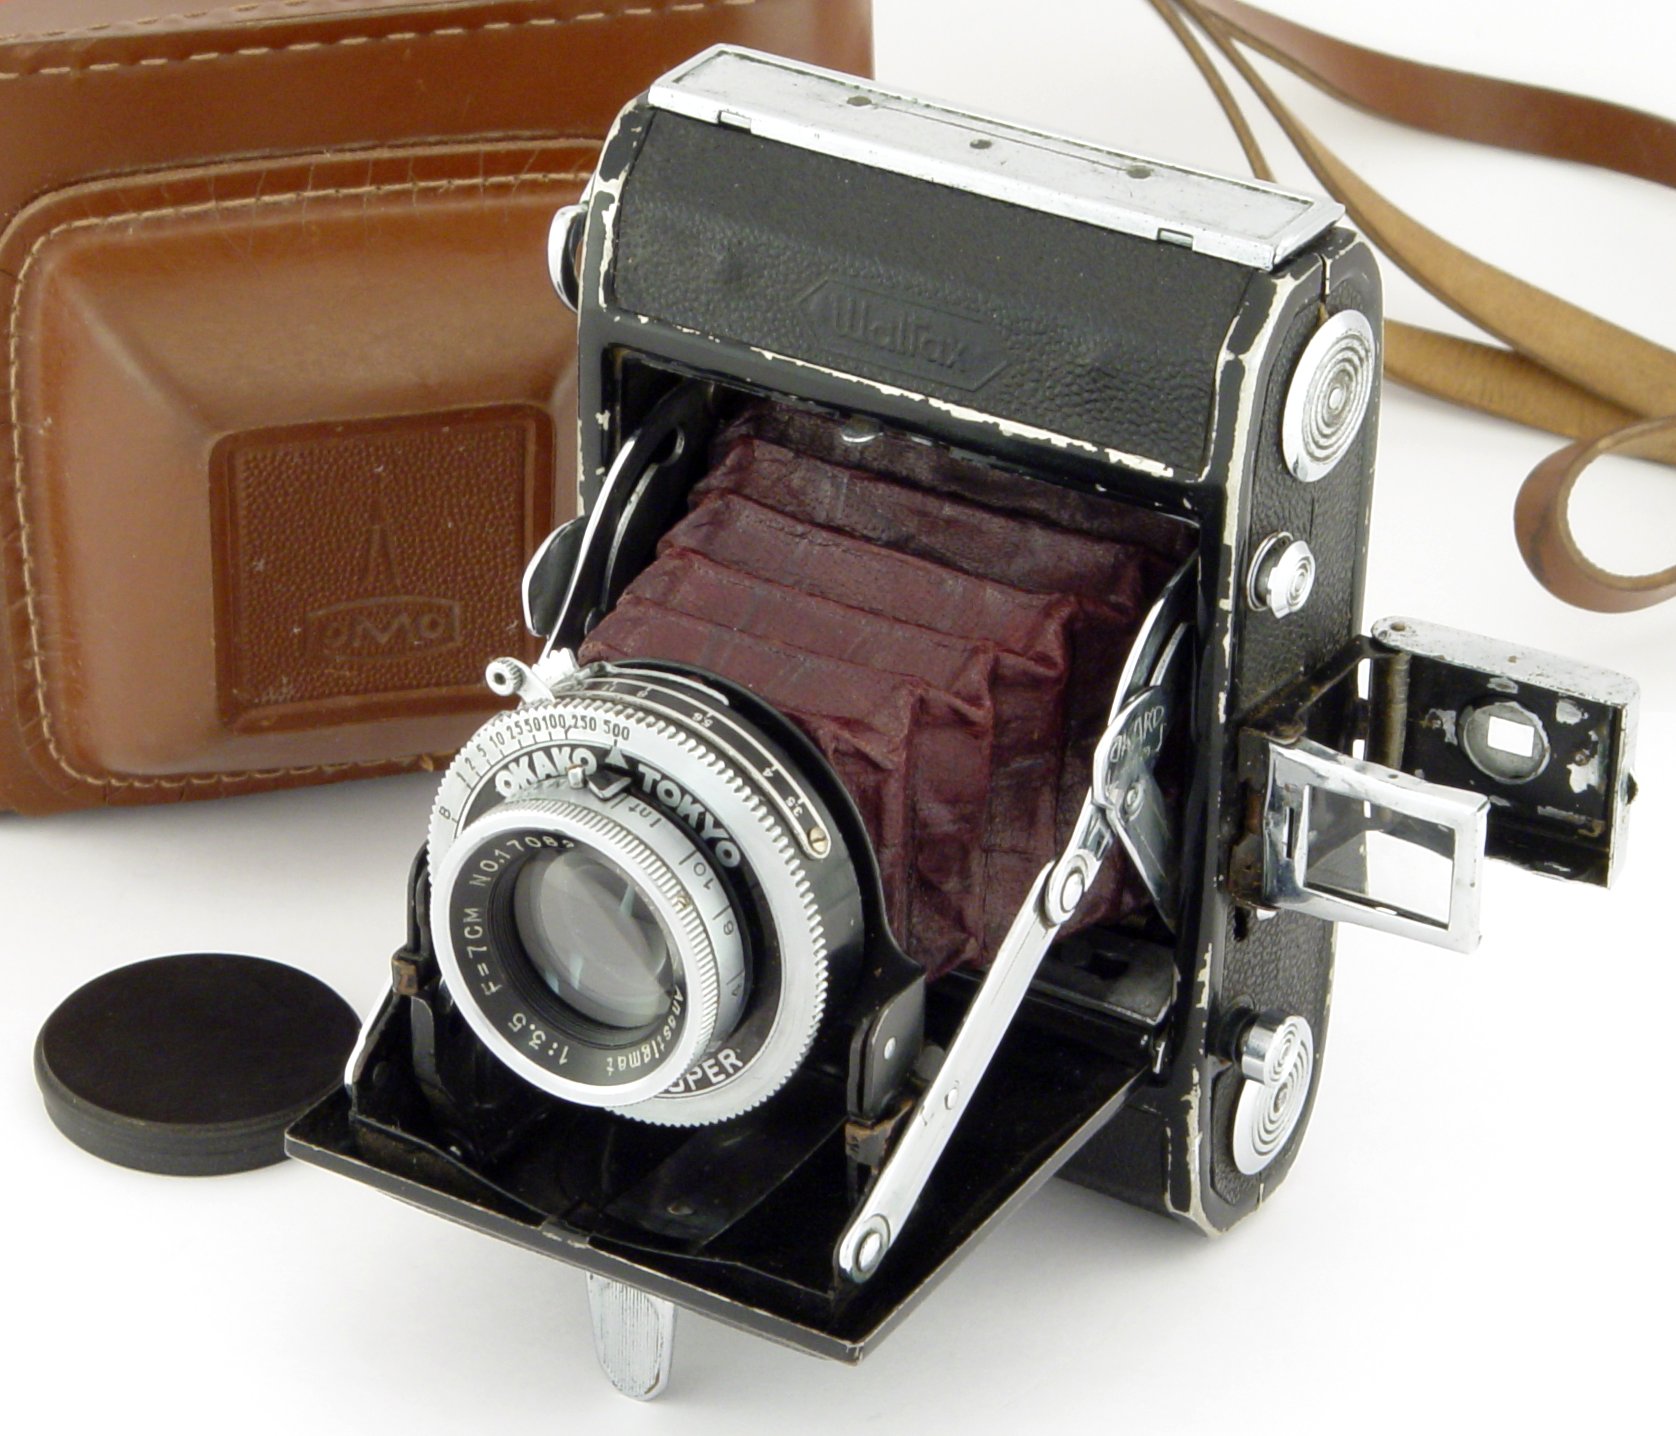
In 1940, Okada Kōgaku would release a medium format 6×4.5 folding camera based off the German made Zeiss-Ikon Ikonta A, known as the Waltax and the Okaco. The name “Okaco” was an abbreviation of the company name Okada Kōgaku, and only appeared on the earlier models. The Waltax would become the company’s first successful camera, and would be made before and after World War II.
After the war, the Waltax would continue production, but in December 1947, a revised model, the Waltax II was introduced which added support for 620 film in addition to 120 film, a new top plate with a fixed and offset viewfinder, and double exposure prevention. Then again in mid 1949, the Waltax III would debut which had all of the features of the Waltax II but added flash synchronization. According to information on Camera-wiki.com, the Waltax II and III did not appear in many Japanese publications and may have been for export only to western countries.
In 1951, two new models called the Waltax Senior and Waltax Deluxe were introduced and heavily advertised in Japanese publications. The Senior was nearly identical to the Waltax III and may have been just a renamed model. The Deluxe was the same as the Senior, except it had a self timer.
A prototype model called the Waltax Acme was announced late in 1951 in several Japanese publications with a rangefinder in top, but none were ever offered for commercial sale. Only one is known to exist, which was most likely the prototype. There is no information about why this model was never actually put into production, but it’s announcement coincided with Okada’s name change to Daiichi Kōgaku in late 1951. In my research, I could not find any reason for Okada’s sudden name change.
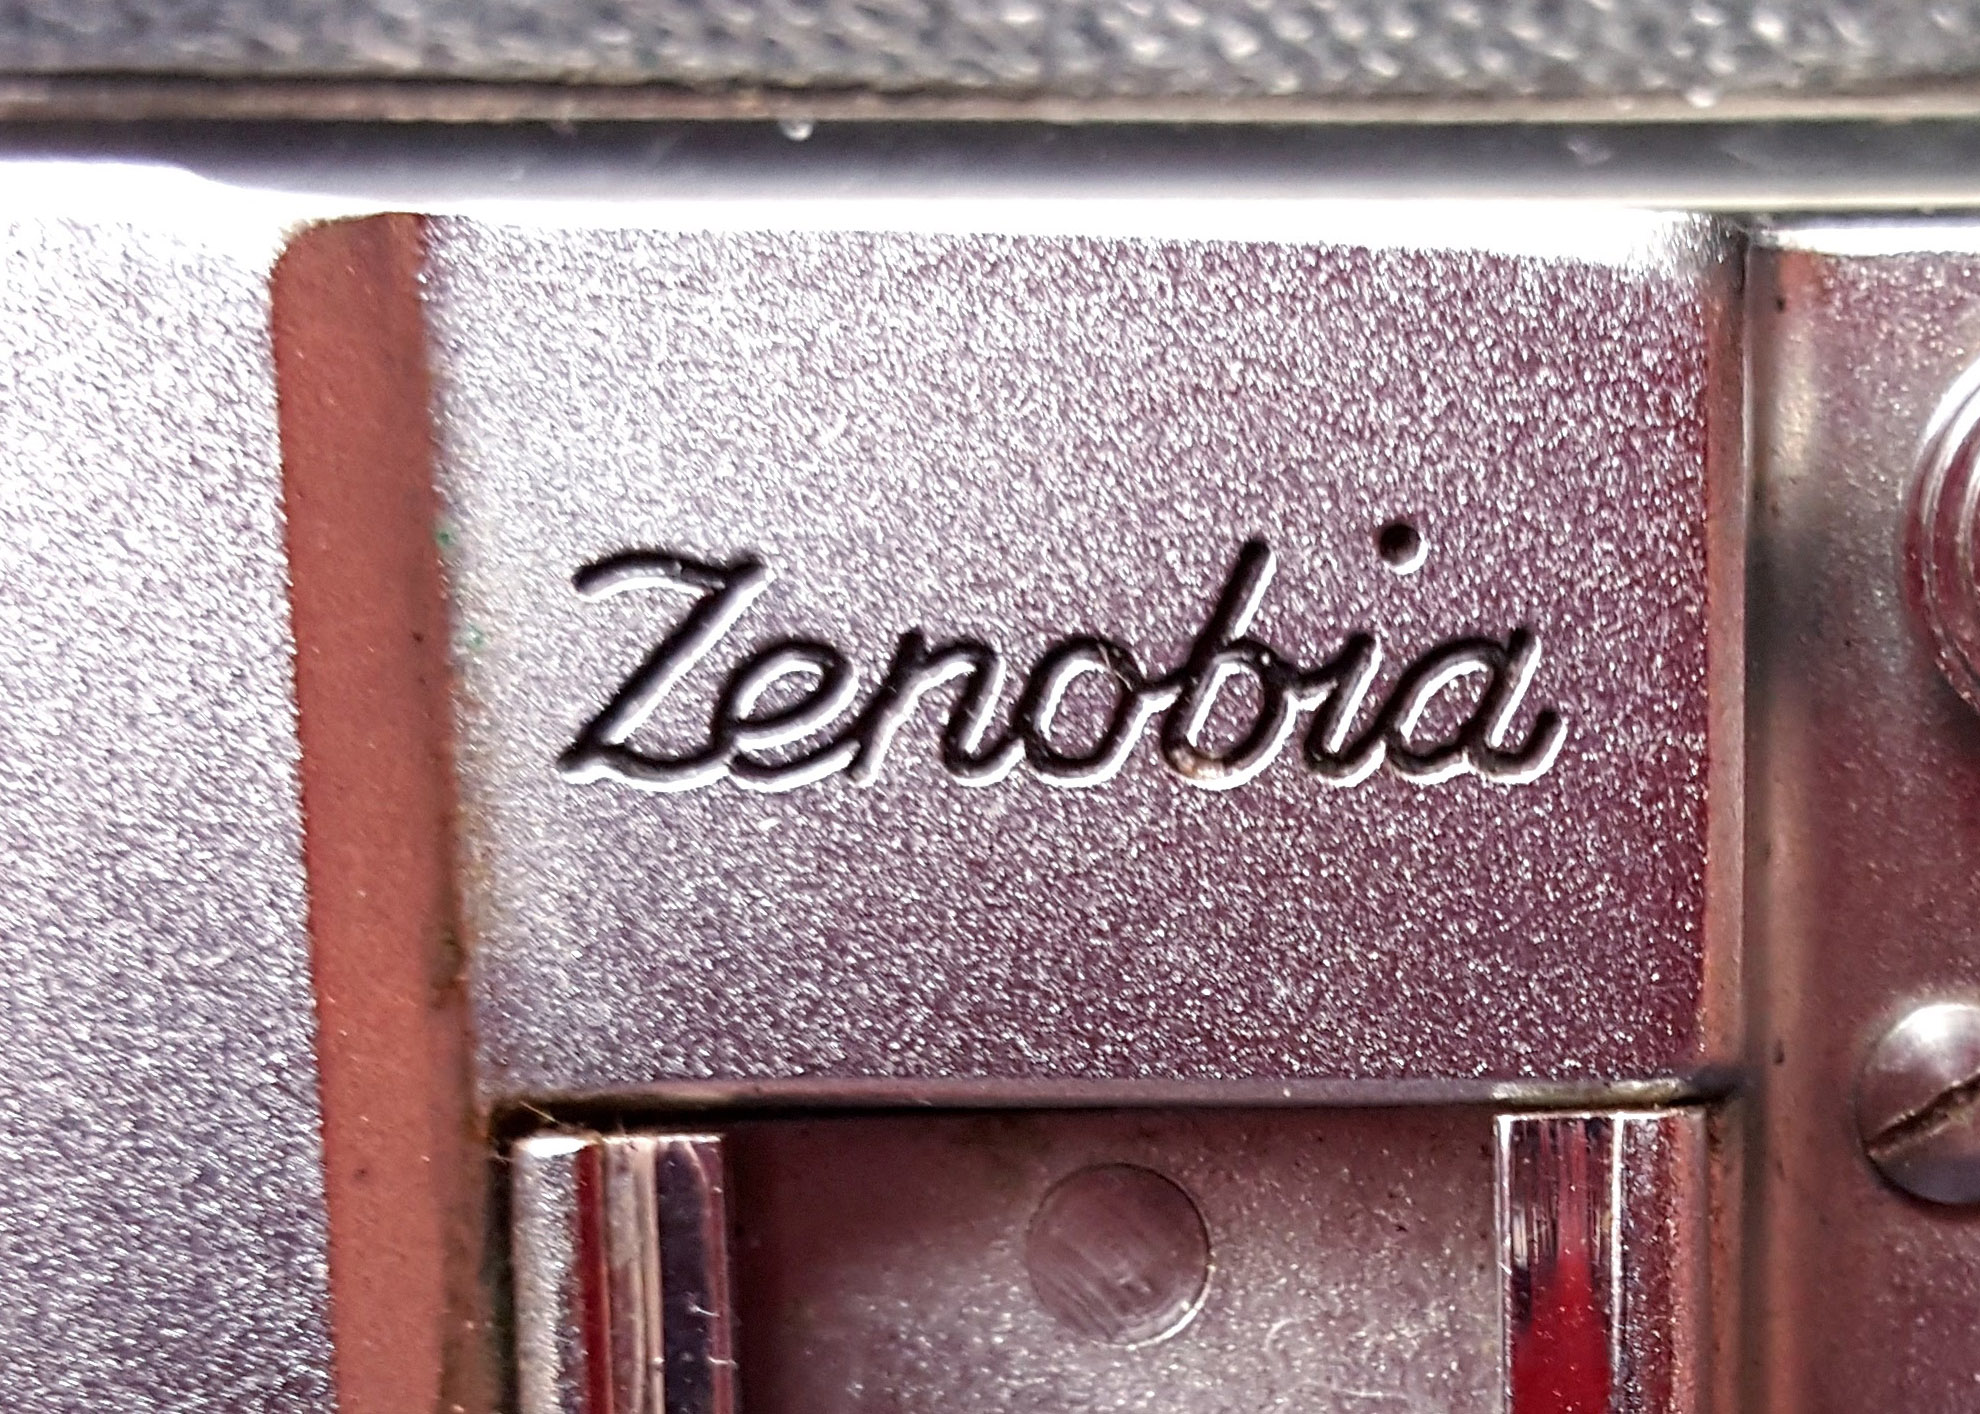
In 1952 all models of the Waltax were renamed to the Zenobia and continued to be sold until 1957. The Zenobia’s design was a continuation of the Waltax family and would receive incremental updates throughout it’s life. The Zenobia C was the basic model, most closely resembling the Waltax Senior with all of it’s features. The Zenobia C has a shutter that is a copy of the German Compur shutter. There was another model called the Zenobia P which was the same as the Zenobia C except it had a shutter that was based off the German Prontor shutter. It is assumed that “C” and “P” are short for Compur and Prontor, but this was never officially confirmed by any company literature. In late 1952, a new model called the Zenobia R was introduced that had an uncoupled rangefinder on the top plate of the camera.
Finally, in 1956 a model called either the Super Zenobia SR or just the Zenobia SR (both names were used and referred to the same model) featured a coupled rangefinder and a Daiichi-Rapid shutter with a top speed of 1/500 seconds. It was this same year that the company’s name changed once again from Daiichi Kōgaku to Zenobia Kōgaku. Models released during this period had a lens with an engraving that said Zenobia Opt. instead of Daiichi Opt.
Unlike the company’s first name change, this time the name change was due to problems the company had with a union over a labor strike in 1954. Okada/Daiichi/Zenobia dedicated most of its development to the Waltax/Zenobia folding camera, and it is believed that the company did not expect 35mm film to take off as quickly as it did in the 1950s. Sales of the folding models was starting to drop rapidly and the company attempted to lay off about a third of its labor force.
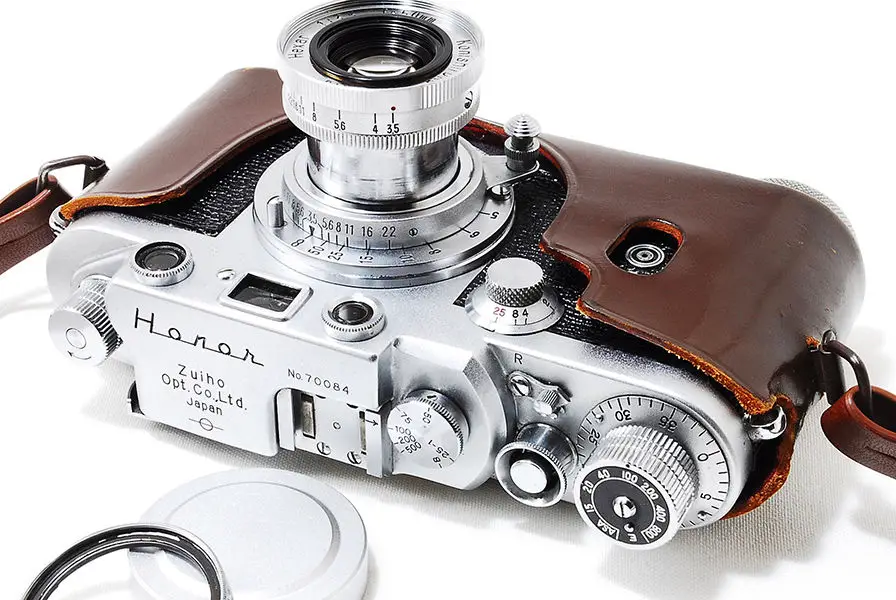
In 1954, Daiichi would start work on a Japanese Leica copy which would be called the Ichicon-35 but this model would never be sold under the Zenobia name. Instead, it’s development would be transferred to a separate company called Mejiro Kōgaku. By the time of it’s release, it would be renamed the Honor S1 and it would remain in production until 1959. Zenobia Kōgaku would not have a 35mm camera of it’s own until 1957 which was a fixed lens rangefinder called the Zenobia 35. By this time, the damage was already done and the company was already spiraling towards bankruptcy. The company would close its doors one year later, in 1958.
Today, the Zenobia has a generally good reputation among collectors of Japanese folding cameras. It’s basic design was taken from the Ikonta A which was designed by Zeiss-Ikon in Germany. The Zenobia had shutters which were copies of excellent German shutters, and the lenses available on most models was a 4 element Tessar design which was generally highly regarded. There isn’t a huge demand for these cameras, most likely because not many people talk about them, and they don’t show up for sale often, but when they do, it can fetch medium to high prices depending on their condition.
Repairs
The Zenobia was my second 6×4.5 Japanese folder and it had similar problems to the Kuribayashi Karoron in that the shutter was covered in oil and the speeds were off. The Karoron was one of the easiest shutters to open and clean, so I assumed the Zenobia would be just as easy to clean.
I was mostly right, but there were some differences, especially in how the front lens element was mounted. The Karoron merely had set screws around the outer ring that needed to be loosened, but the Zenobia had a post that stopped the lens at infinity that had to be removed first, before the outer element could be unscrewed. Unlike some cameras, this post had no notch for a screwdriver, so I had to use needle nose pliers to get it off. This was harder than it sounded because I was fearful I would scratch something. I ended up putting some very minor scratches into the post itself, but it did come off, and frankly, no one will ever notice those scratches unless you look really closely.
The Daiichi-Rapid shutter is a clone of the Compur-Rapid shutter which is a somewhat easier shutter to clean. This being a folding camera, the easiest way to clean the shutter involves removing it entirely from the camera. Like most folding cameras, there is a ring around the inner lens element within the film compartment holding the entire shutter and lens assembly to the frame of the camera.
Using a spanner tool with the camera in a closed position, I was able to easily remove this ring which is the only thing holding the shutter in place. Be very careful to not let your spanner tool slip out of your hand while unscrewing it as you don’t want to scratch the inner lens element or nick the bellows. Also, once you have this ring out, the shutter is going to be loose inside of the camera, so be careful when opening it as you don’t want something to fall out. There will be paper or metal spacers in between the shutter and the frame, so pay attention to those and don’t lose them.
Once the shutter is out of the camera, you can resume disassembling it. The inner lens element unscrews with the use of a lens spanner and the front and middle elements should just unscrew easily (assuming you removed the post on the outer ring that stops the lens from rotating past infinity). On the Zenobia, the inner lens element does not have notches or holes for a spanner, so if you cannot unscrew it by hand, you may need to use a grippy tool to get it out.
After removing all 3 groupings of lenses, the shutter is ready to be cleaned. I won’t go into too much detail for how to clean the shutter other than telling you to set it in a small dish and douse it with lighter fluid or naphtha oil. I use the brand name Ronsonol lighter fluid which works fine. Daniel Mitchell has an excellent guide to completely disassembling a Compur-Rapid shutter which this Daiichi-Rapid shutter is based upon. You do not need to go as in depth into the shutter as Dan has in his guide, but its still worth reading his guide and looking at the pictures to get a better understanding of what it looks like.
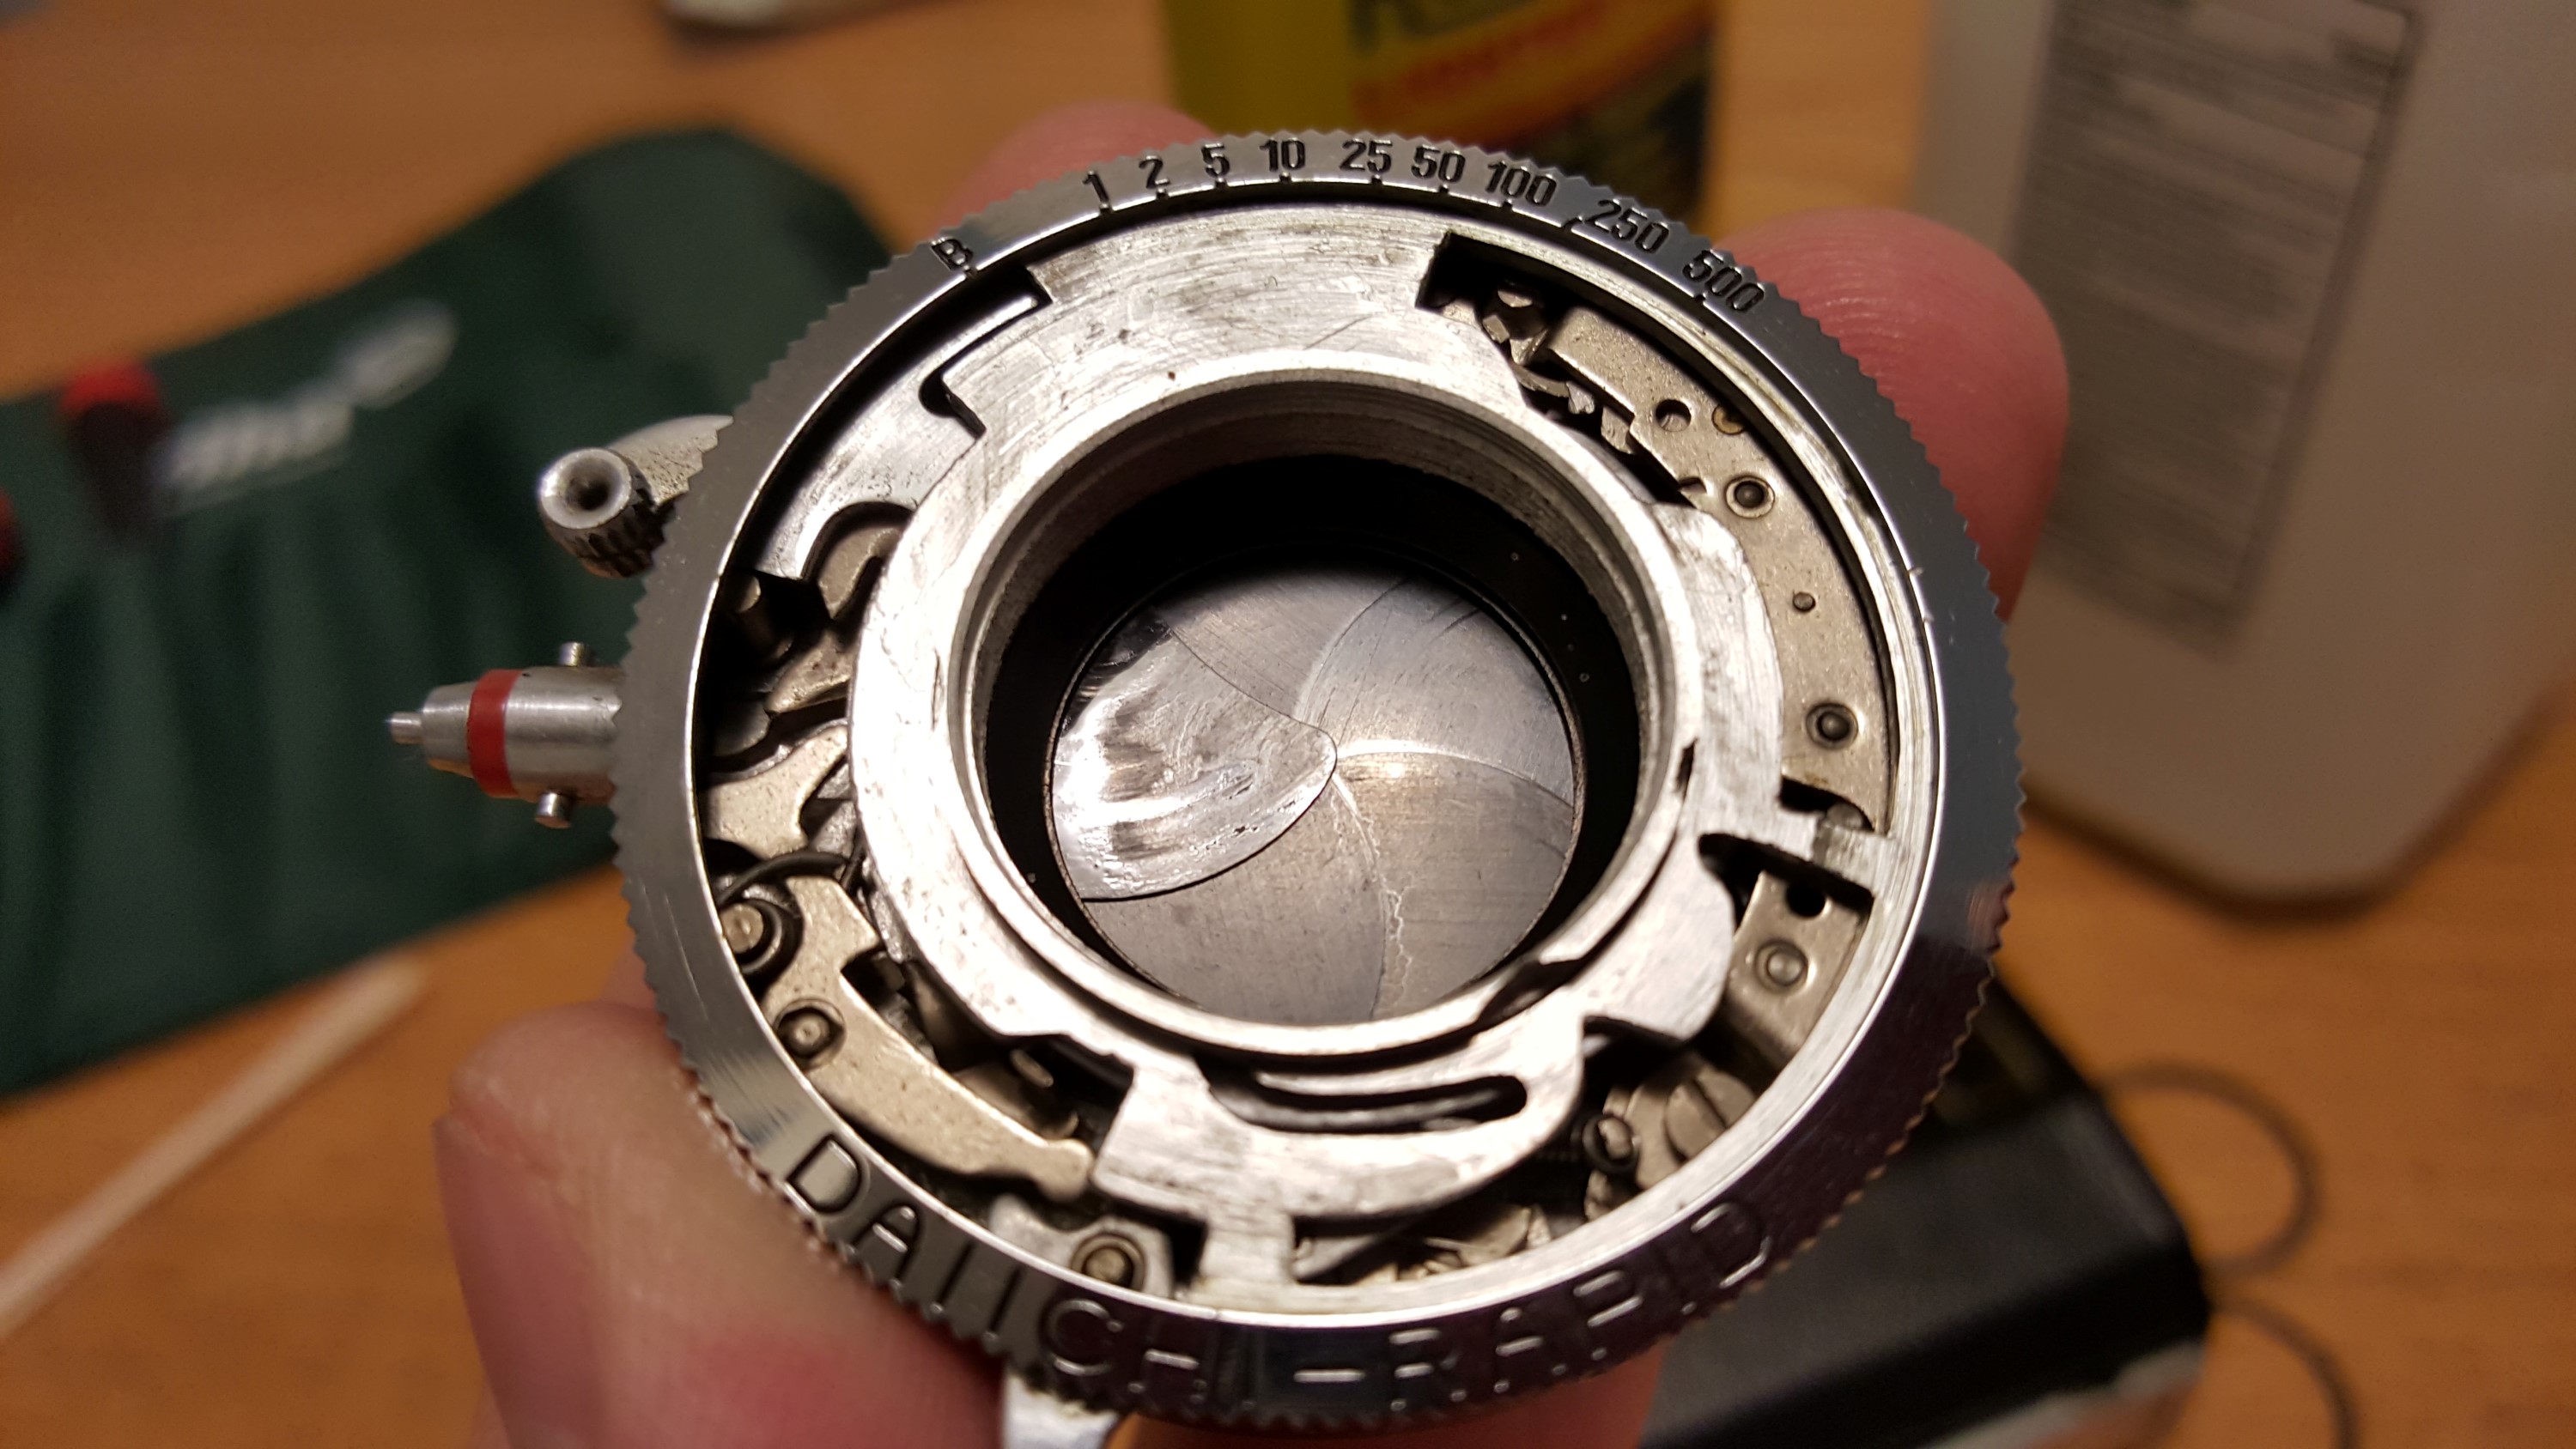
As always when working on a camera, you should take your time and take many pictures with a digital camera or smartphone to help you get things back into place if you run into trouble. While I didn’t take many pictures of the Zenobia, I did take quite a few of an actual Compur shutter while disassembling my Certo Super Sport Dolly. I have several pictures in that review which show the Compur shutter as I am taking it apart, but to the right is a shot for you to compare to the Daiichi-Rapid.
As with the Compur, you may need to lift the speed selector ring off the shutter to clean underneath it, but this ring is required to be in position for the shutter to operate correctly, so do not try to cock or fire the shutter without this ring in place. In terms of cleaning the shutter, you can submerge it directly into the lighter fluid and swish it around to make sure the fluid can absorb any dried or sticky goo that has gotten in the shutter. You will also need to very gently wipe any residue off the shutter and aperture blades. When using a Q-tip on shutter or aperture blades, make sure that you are moving your Q-tip in the direction that the blades lay on top of one another. Never go against the blades as you may damage them or get fibers from the Q-tip stuck.
If the shutter is just dirty, this is as far as you want to go in terms of taking it apart. Dan Mitchell’s walk through shows how to go deeper into the shutter, but any further than this and it gets exponentially more difficult to put back together. If this is your first (or even second or third) time taking apart a Compur based shutter, I strongly advise against going much farther into the shutter than this.
Once you are satisfied that all speeds are working correctly and everything is clean, you will want to let the shutter dry for at least 24 hours on a dry paper towel. After 24 hours, fire the shutter a dozen or so times at each speed to make sure it still works correctly and that no new debris has settled in the camera and if not, then just put everything back together in the opposite of how you took it apart. Remember to install both of the spacers that came out when you removed the shutter into their corresponding positions.
One last minor repair I had to make to the Zenobia was reattaching some of the leatherette (its more like a very thin paper) to the body of the camera. There was a small tear, and a few places where it was detaching. Since the covering was very thin, I decided against removing it all the way and gluing it back in place. Instead, I used some contact cement and very carefully applied it under where it was peeling and pressed it back into position. I used low-tack green painters tape to hold the leatherette in position while the contact cement dried. After 24 hours, I carefully peeled off the green tape to make sure everything stayed where it should and I used a wooden toothpick to scrape off any excess cement that had leaked out.
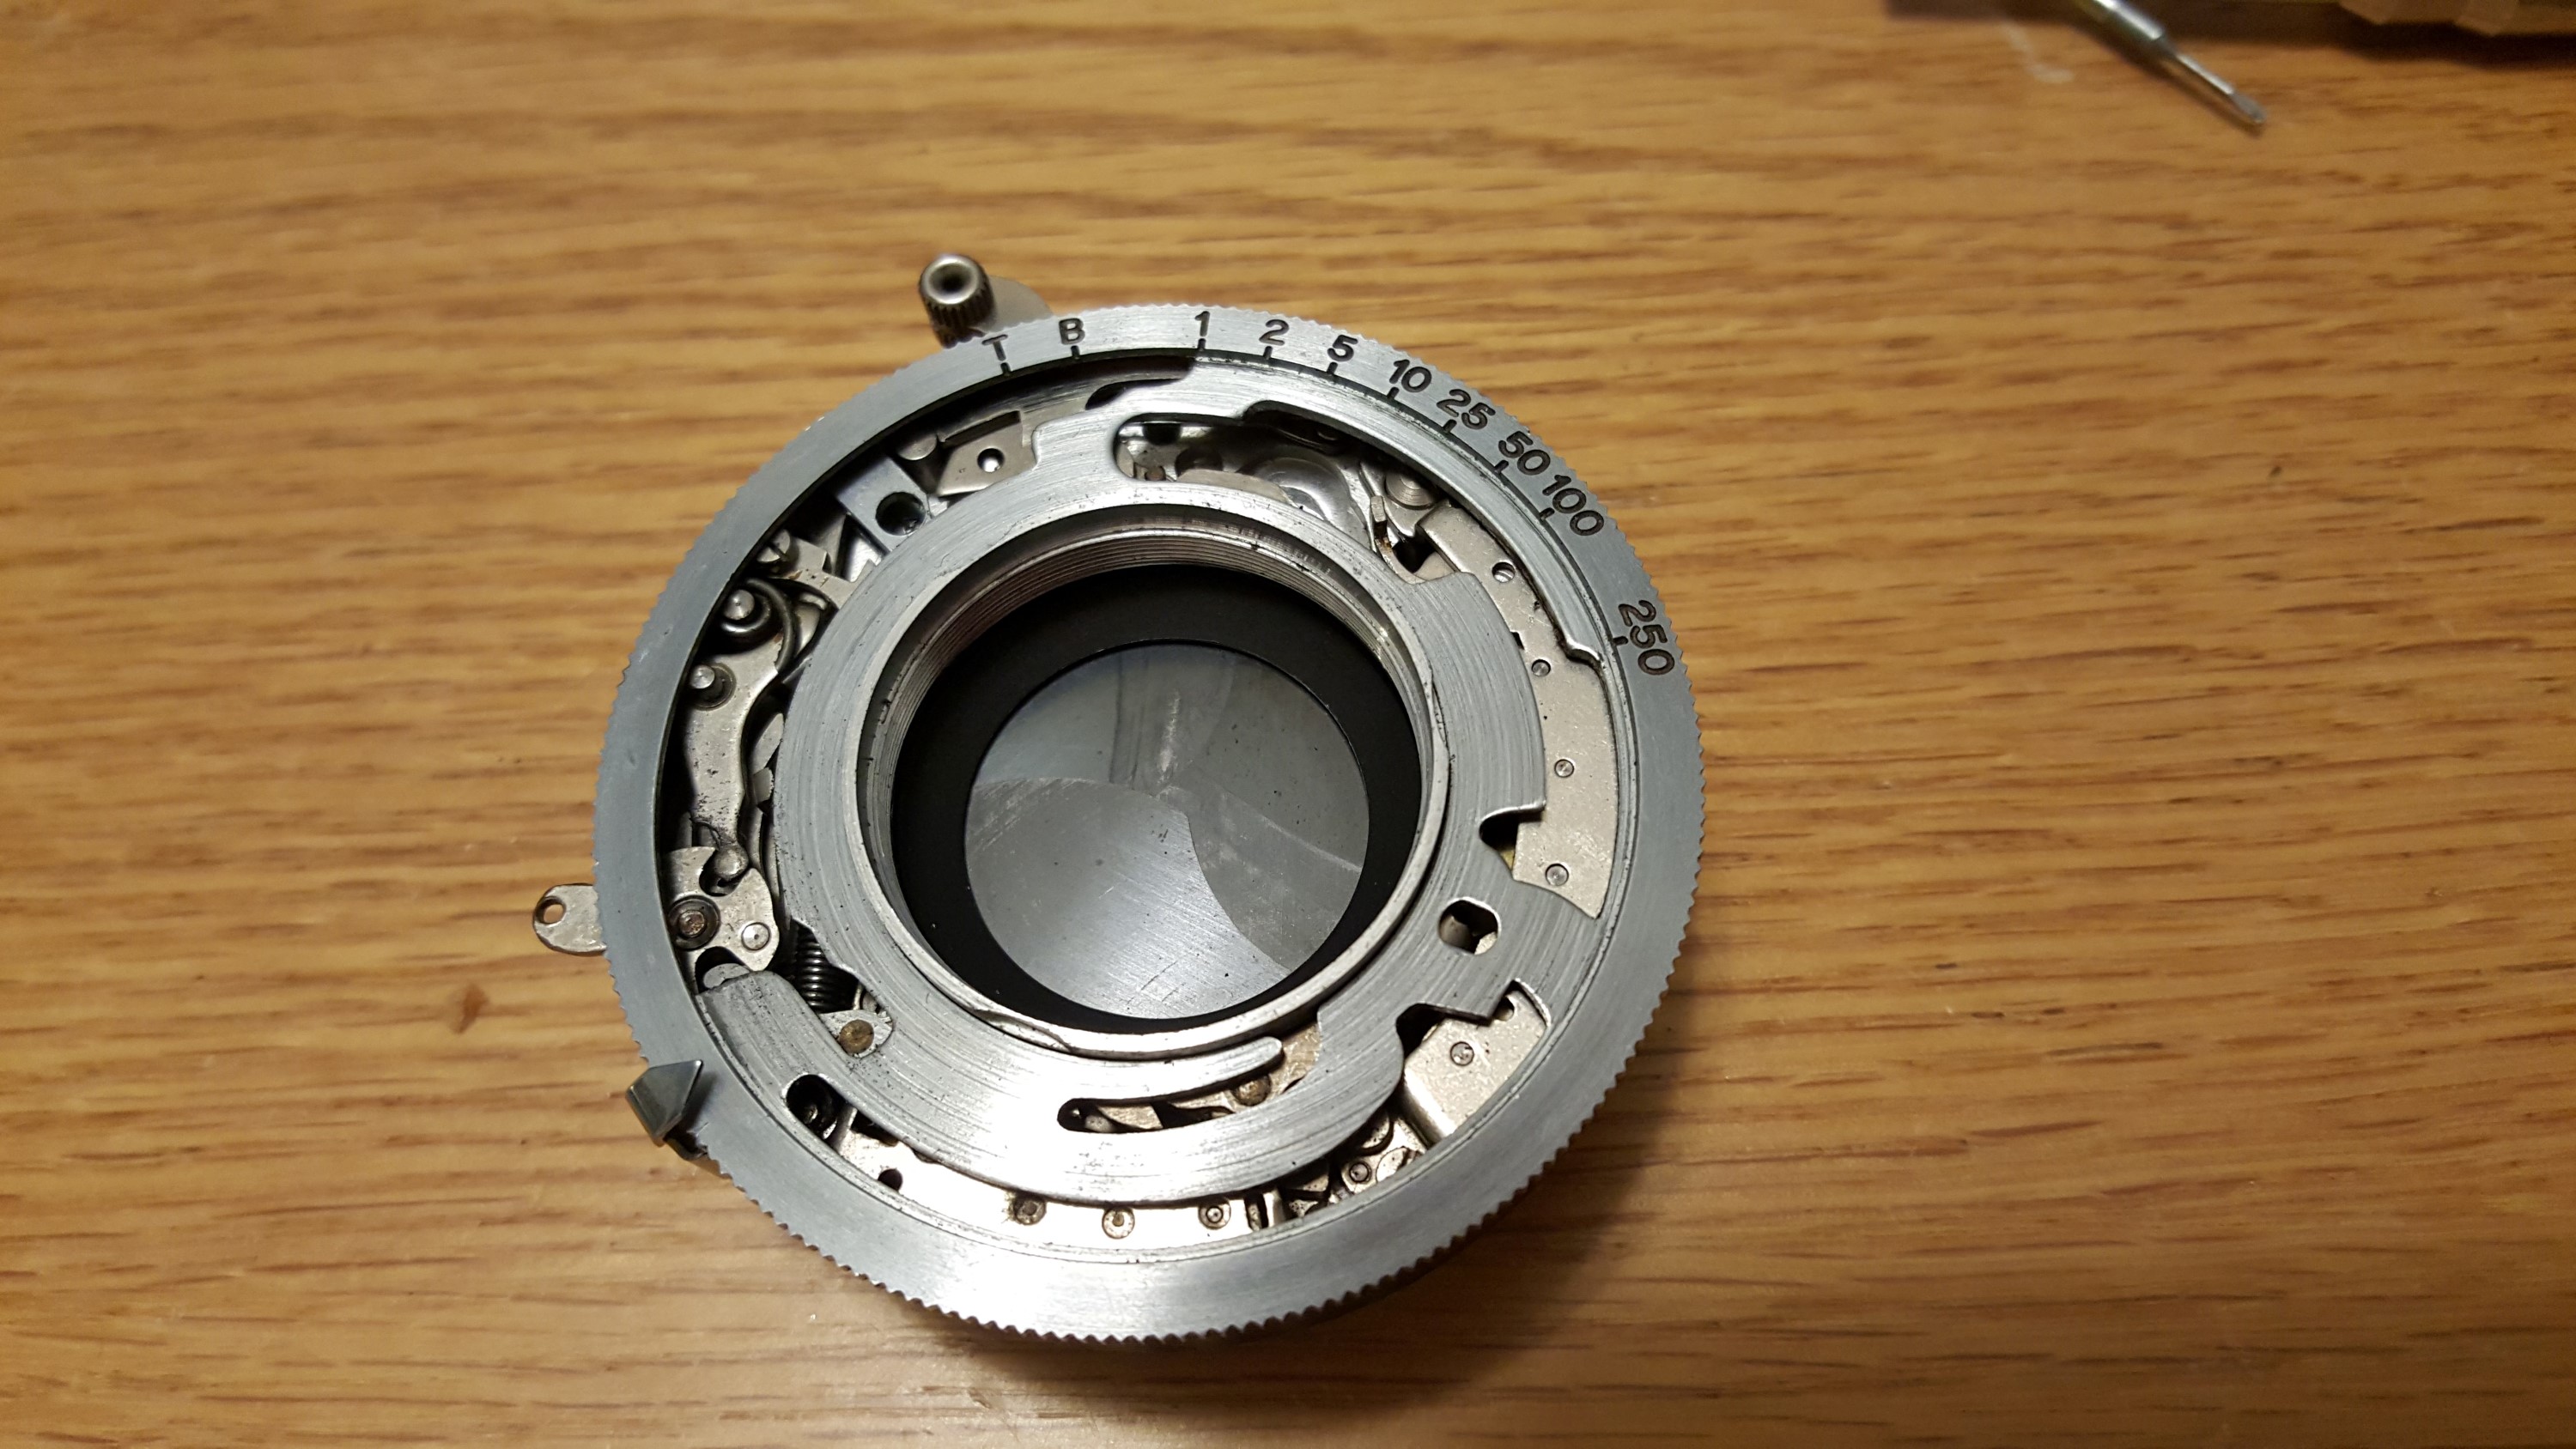
Below are 3 shots showing the Zenobia in various states of repair. The first shows one of the spots where the leatherette was torn and peeling, and also with the shutter removed. The second shows the shutter removed from the camera along with all 3 glass element groups, and the two spacer rings that were in between the shutter and the frame. The third picture shows the camera after I had glued the leatherette back down and used the green painter’s tape to hold it in place.


Once the camera was back together, I collimated the lens to make sure that focus was correctly. Amazingly it was, and I did not have to adjust something. I do not know if that’s a result of dumb luck or if there is something about the Zenobia that won’t allow you to put it back together incorrectly. In either case, I would always recommend collimating focus anytime you take the lenses apart to be absolutely sure.
After everything was back together, I loaded in a roll of expired Kodacolor Gold 100 and went shooting.
My Thoughts
I had never even heard of the Zenobia before seeing one for sale for $10 on eBay. It had no bids and the auction was about to close, and I couldn’t in good conscience let a nice camera go unsold for $10, so I put in a single bid and since no one else bid on it, I got it for $10.
When I got it, it was in pretty rough shape. As mentioned above, the leatherette was peeling and I could visibly see oil on the shutter blade and of course the shutter was very slow. I knew this camera would need some work, so I put it on a shelf for several months until I got around to it.
It wasn’t until after I cleaned and started using my Kuribayashi Karoron, which is another Japanese folding 6×4.5 camera, that I had any interest in coming back to the Zenobia. The two Japanese folders are very similar and cleaning them both involved about the same amount of work.
The Zenobia is definitely a camera that grew on me the more I handled it. I began to appreciate it’s design. Although everything about this camera is a copy of a German design, the Japanese did a very good job of recreating the quality and feel of the original. Similar to the initial attempts by the Soviet Union to copy German designs, these 1950s Japanese folding cameras are very well built and have really great optics.
Using the Zenobia compared to the Karoron is nearly identical. Each camera is the same size, has the same “portrait” aspect ratio, and has the shutter release on the left side of the camera. I’d say the only difference that you notice while shooting is that the Zenobia doesn’t have the frame counter like the Karoron has. This means you have to peer through the red window on the back of the camera in between each exposure. There is a spring loaded door that hides the red window when not advancing the film which helps to eliminate any stray light from hitting the back of the film.
I am a huge fan of the 6×4.5 image format. I actually prefer it to the more popular 6×6 format because I find it easier to frame in a rectangular space. Perhaps years of preferring widescreen movies and TV shows to earlier “Pan & Scan” formats has turned me off to square images. I find that when I do shoot with 6×6 cameras, many of my images have a lot of wasted space at the top and bottom of the frame. One other great advantage of 6×4.5 is that on a single roll of film, you can get 16 images, instead of 12, and who doesn’t like 4 more images?!
So, combine a very well built and compact Japanese folding camera with a flexible and accurate shutter, an excellent lens, a very useful 6×4.5 format on 120 film, and you have yourself a really great and fun to use camera. I am definitely a fan. The Zenobia, along with my Karoron will definitely see more usage in the future, and who knows, maybe my collection of Japanese 6×4.5 folders will continue to grow!
My Results
I took the Zenobia on a trip to upper Michigan for Christmas 2015. As is typical of that area of the country, there was snow everywhere which isn’t the most ideal type of scenery to test expired color film on a 60+ year old camera, but hey, it’s all part of the fun, right?
My film of choice for this camera was a roll of Kodacolor Gold 100 which you can actually see in the featured image at the very top of this post. The film expired in 1986, so using the “1 stop per decade past expiration” rule. If I were shooting Sunny 16, I would over expose each shot at least 2 full stops. Further complicating things was shooting in snow which can sometimes require f/22 in bright sun, but the day I took the camera out shooting it was overcast and near dusk. So +2 for expired film, -1 for snow, but then +1 for less than ideal lighting. It was all pretty confusing, so I just decided to wing it and shot whatever seemed right, after all, my first roll of expired Kodacolor II from 1983 was shot in upper Michigan using my Kodak Medalist this past summer, so maybe northern Michigan is just lucky ground for me.


Either I am getting better at compensating for expired film from the 1980s, or I’ve been very lucky because most of the shots came out looking pretty good although there was the usual lack of contrast and vibrance which was easily correctable in Photoshop. So as to keep the “purity” of the expired film, I have every shot above in both the tweaked and original versions side by side. With so much snow, many of these images could have been grayscaled and they would have looked fine, but I think the color versions have merit too.
What I see in these images is a heck of a lot of resolution and clarity. Not really knowing what shutter speeds was appropriate, I think its quite satisfying that every image came out pretty well exposed. There were a few shots I am not sharing that were a little blurry due to camera shake, or a few I didn’t nail the focus on, but still the gallery above represents 6 of the 16 shots from this first roll. On 20 year old expired film in a 60 year camera I had never used before, I think that is pretty impressive.
These results encourage me to take this camera out again once spring arrives and more color returns to the world. With the excellent results I also got from my Kuribayashi Karoron, I may even do an A/B comparison between the two cameras. After all, they are both Japanese folding cameras from the late 40s/early 50s that shoot 6×4.5 frames on 120 film. I honestly don’t expect to see much difference in the images though as both cameras delivered excellent results.
Comparing the Zenobia to the Karoron, I still prefer the Karoron’s frame counter system, as opposed to having to open the sliding door covering the red window each time I advanced the film. I am very pleased that opening this window did not introduce any detectable light leaks through the red window as is common with modern films on older cameras. Heck, there weren’t any light leaks anywhere on the roll. That tells me the paper bellows and door seals are still light tight which I haven’t been able to say about some of my other mid-century folding cameras.
Edit 8/4/2016:
It took me a while, but I finally had a chance to take out the Zenobia for a second roll, this time with less expired Kodak Portra 160. I had a bundle of this film that I had shot in other cameras, and although it was expired by about 10 years, I knew that it shot close enough to box speed that I didn’t need to compensate any. The shots came out wonderfully. The Neo-Hespar lens compares very favorably to other German lenses found on medium format folders.


Related Posts You Might Enjoy
External Links
http://camerapedia.wikia.com/wiki/Zenobia
http://camera-wiki.org/wiki/Zenobia
http://photo.net/classic-cameras-forum/00Bsz0?start=20
https://www.flickr.com/photos/7699588@N07/sets/72157652155388101/
https://www.rangefinderforum.com/forums/showthread.php?t=148708
For enthusiasts of folding cameras such as the Japanese Zenobia or the German Zeiss and quite a few other German-made cameras, here in Great Britain we have two chaps who generally have a good selection, accurately described and, very reasonably priced. They are Peter Loy in London and Simon Chesterman at Collectable Cameras based in the North East Riding of Humberside. I have dealt with both chaps for over 15 years and they are excellent people to deal with. Both post pictures on their websites of the equipment on offer, Peter, sometimes 5 or 6 pix. Avoid M W Classic Cameras in London, they are utterly incompetent , I tried to buy a roll film back from them this summer for a Zeiss Ikon Ideal 225 camera (1929-1938) it was shown on their website. First call, chap was vague about whether he still had it, “can’t you go and look? I wish to buy this!” ‘No no, I am too busy, I will ring you back’. He did not. I rang next day, same performance and same next day and the day after that. I gave up and looked on ebayuk. Found one, ordered Thursday, postman knocked at my door Saturday 10am.
Just got one off of EBAY great, great, shape. Model is the exact same as yours. Except my lens is a “Diichi Opt. Neo-Hesper”. Must be an early model. I’ve loaded it with Kodak porta 160 can hardly wait to use. Oh by the I live just north of you in Jackson, Michigan. Love your reviews of cameras. Dave