

 What is it?
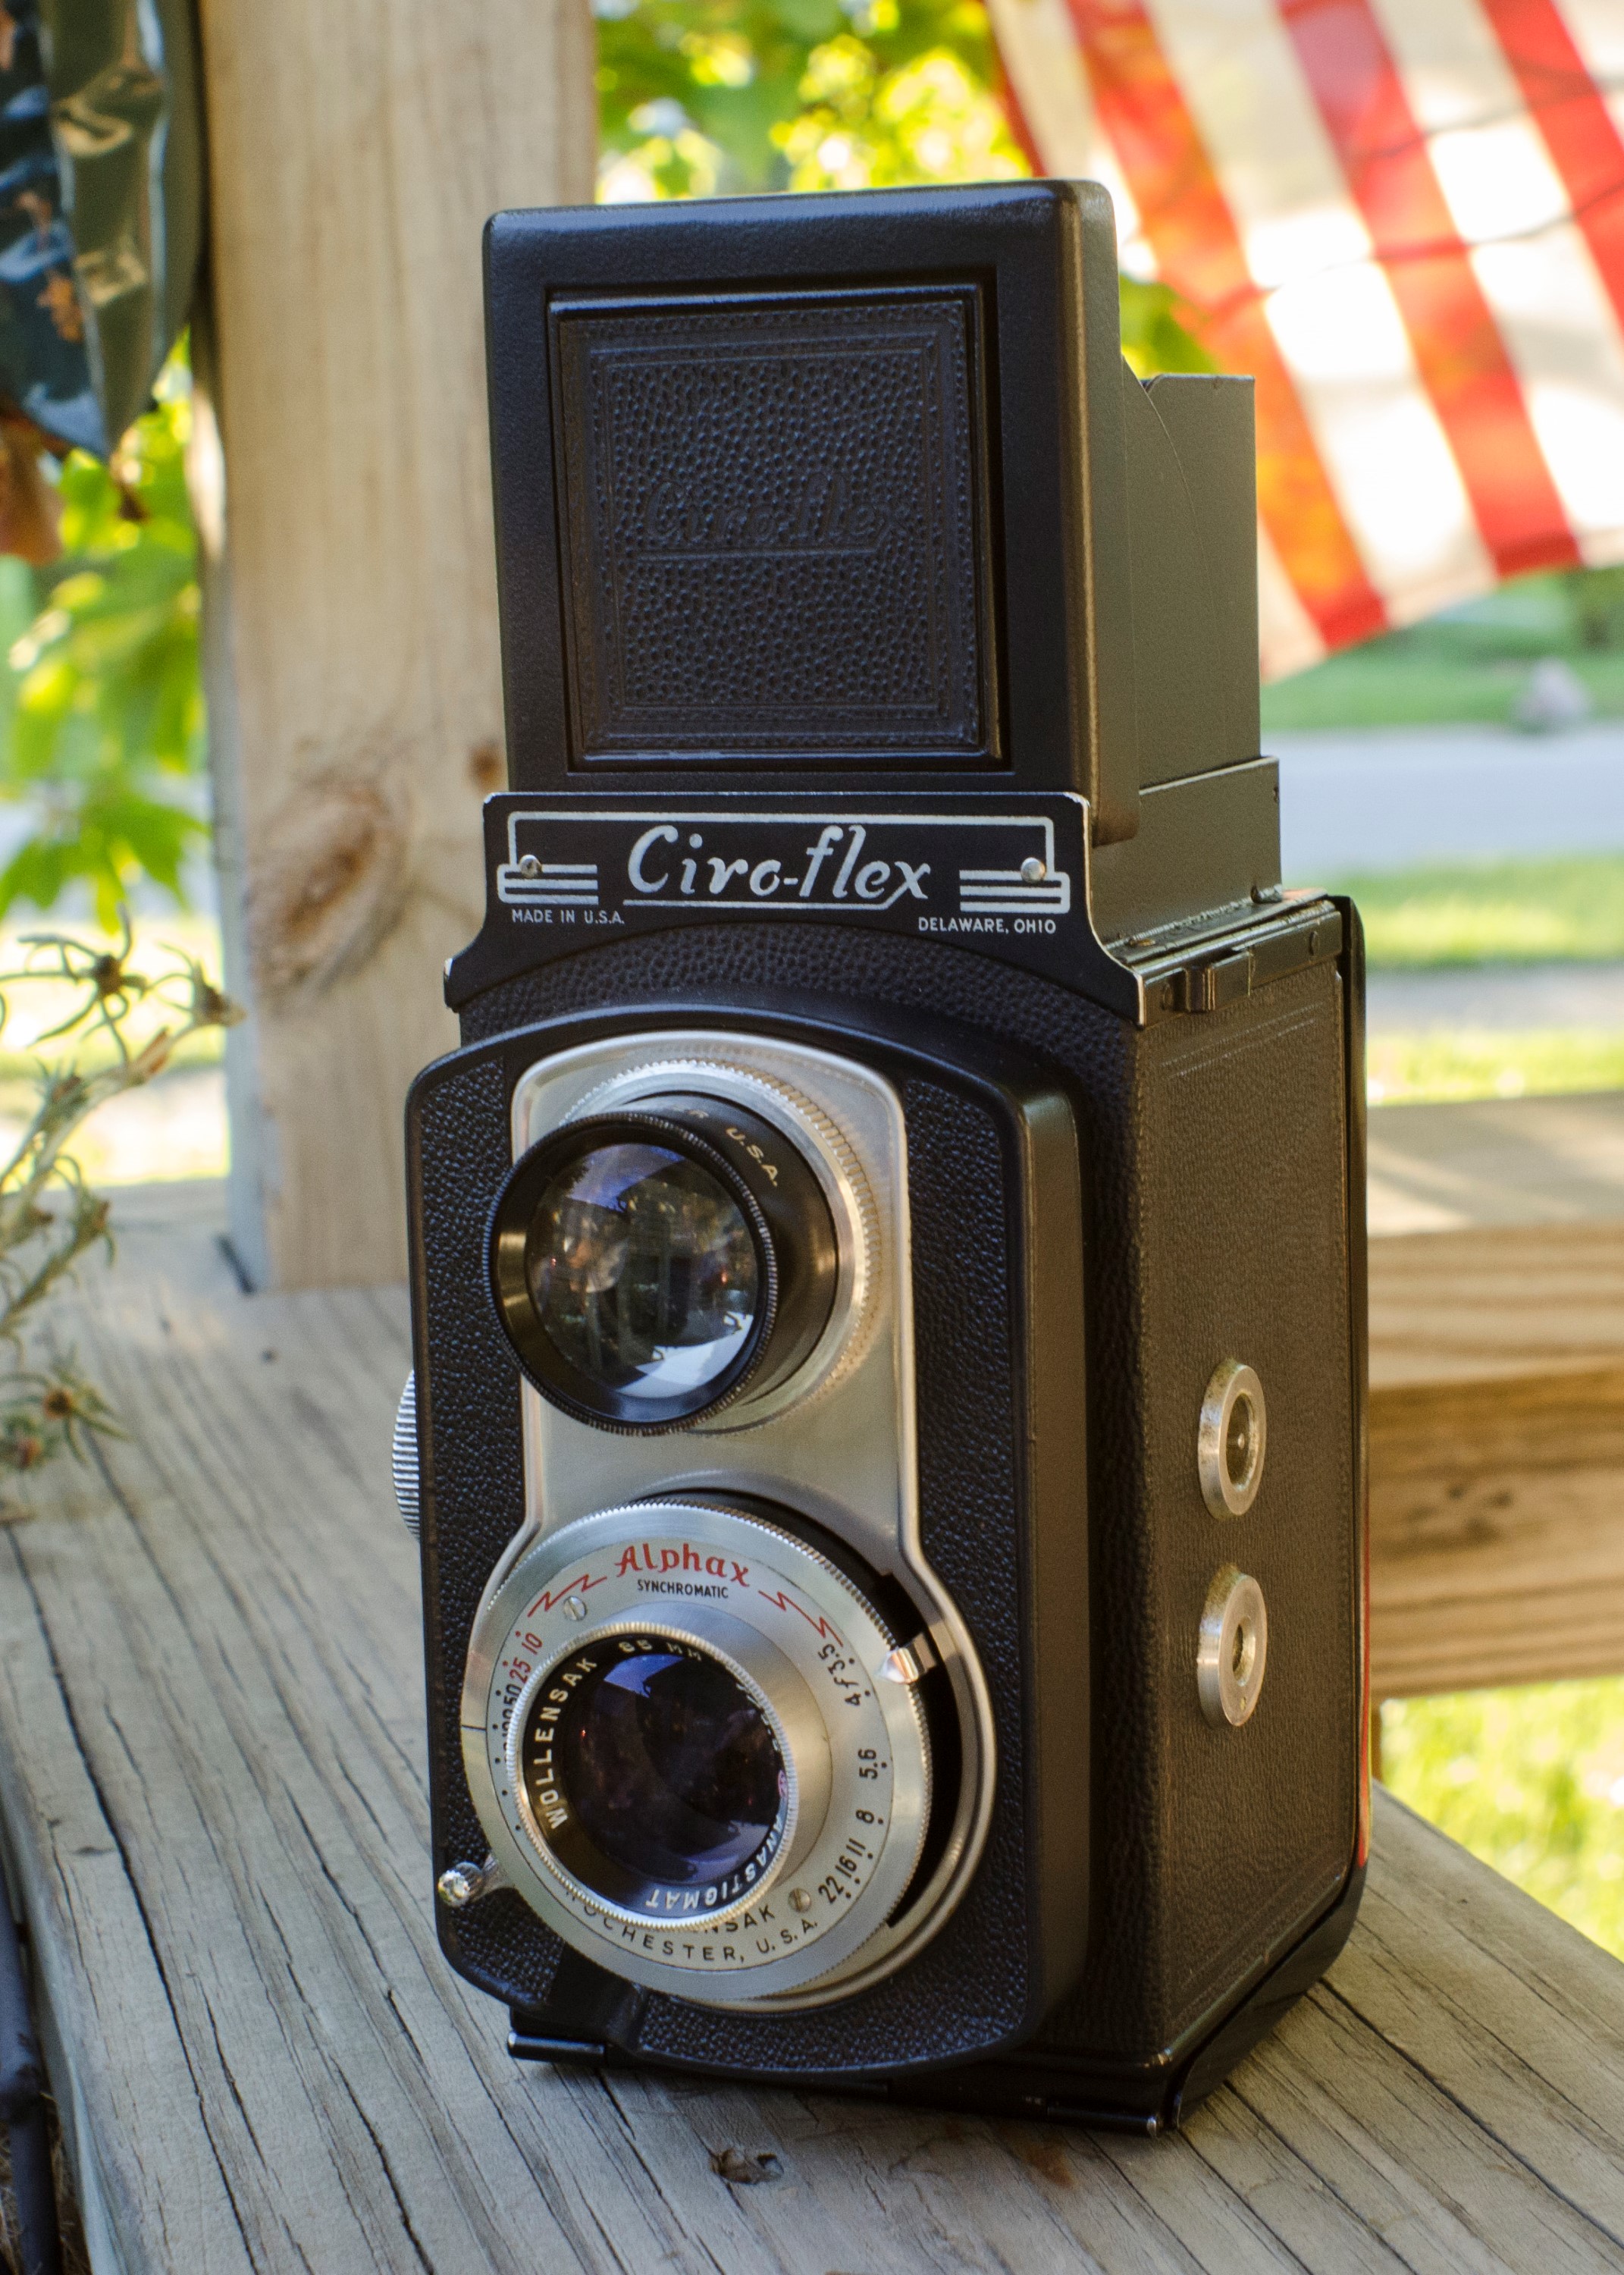
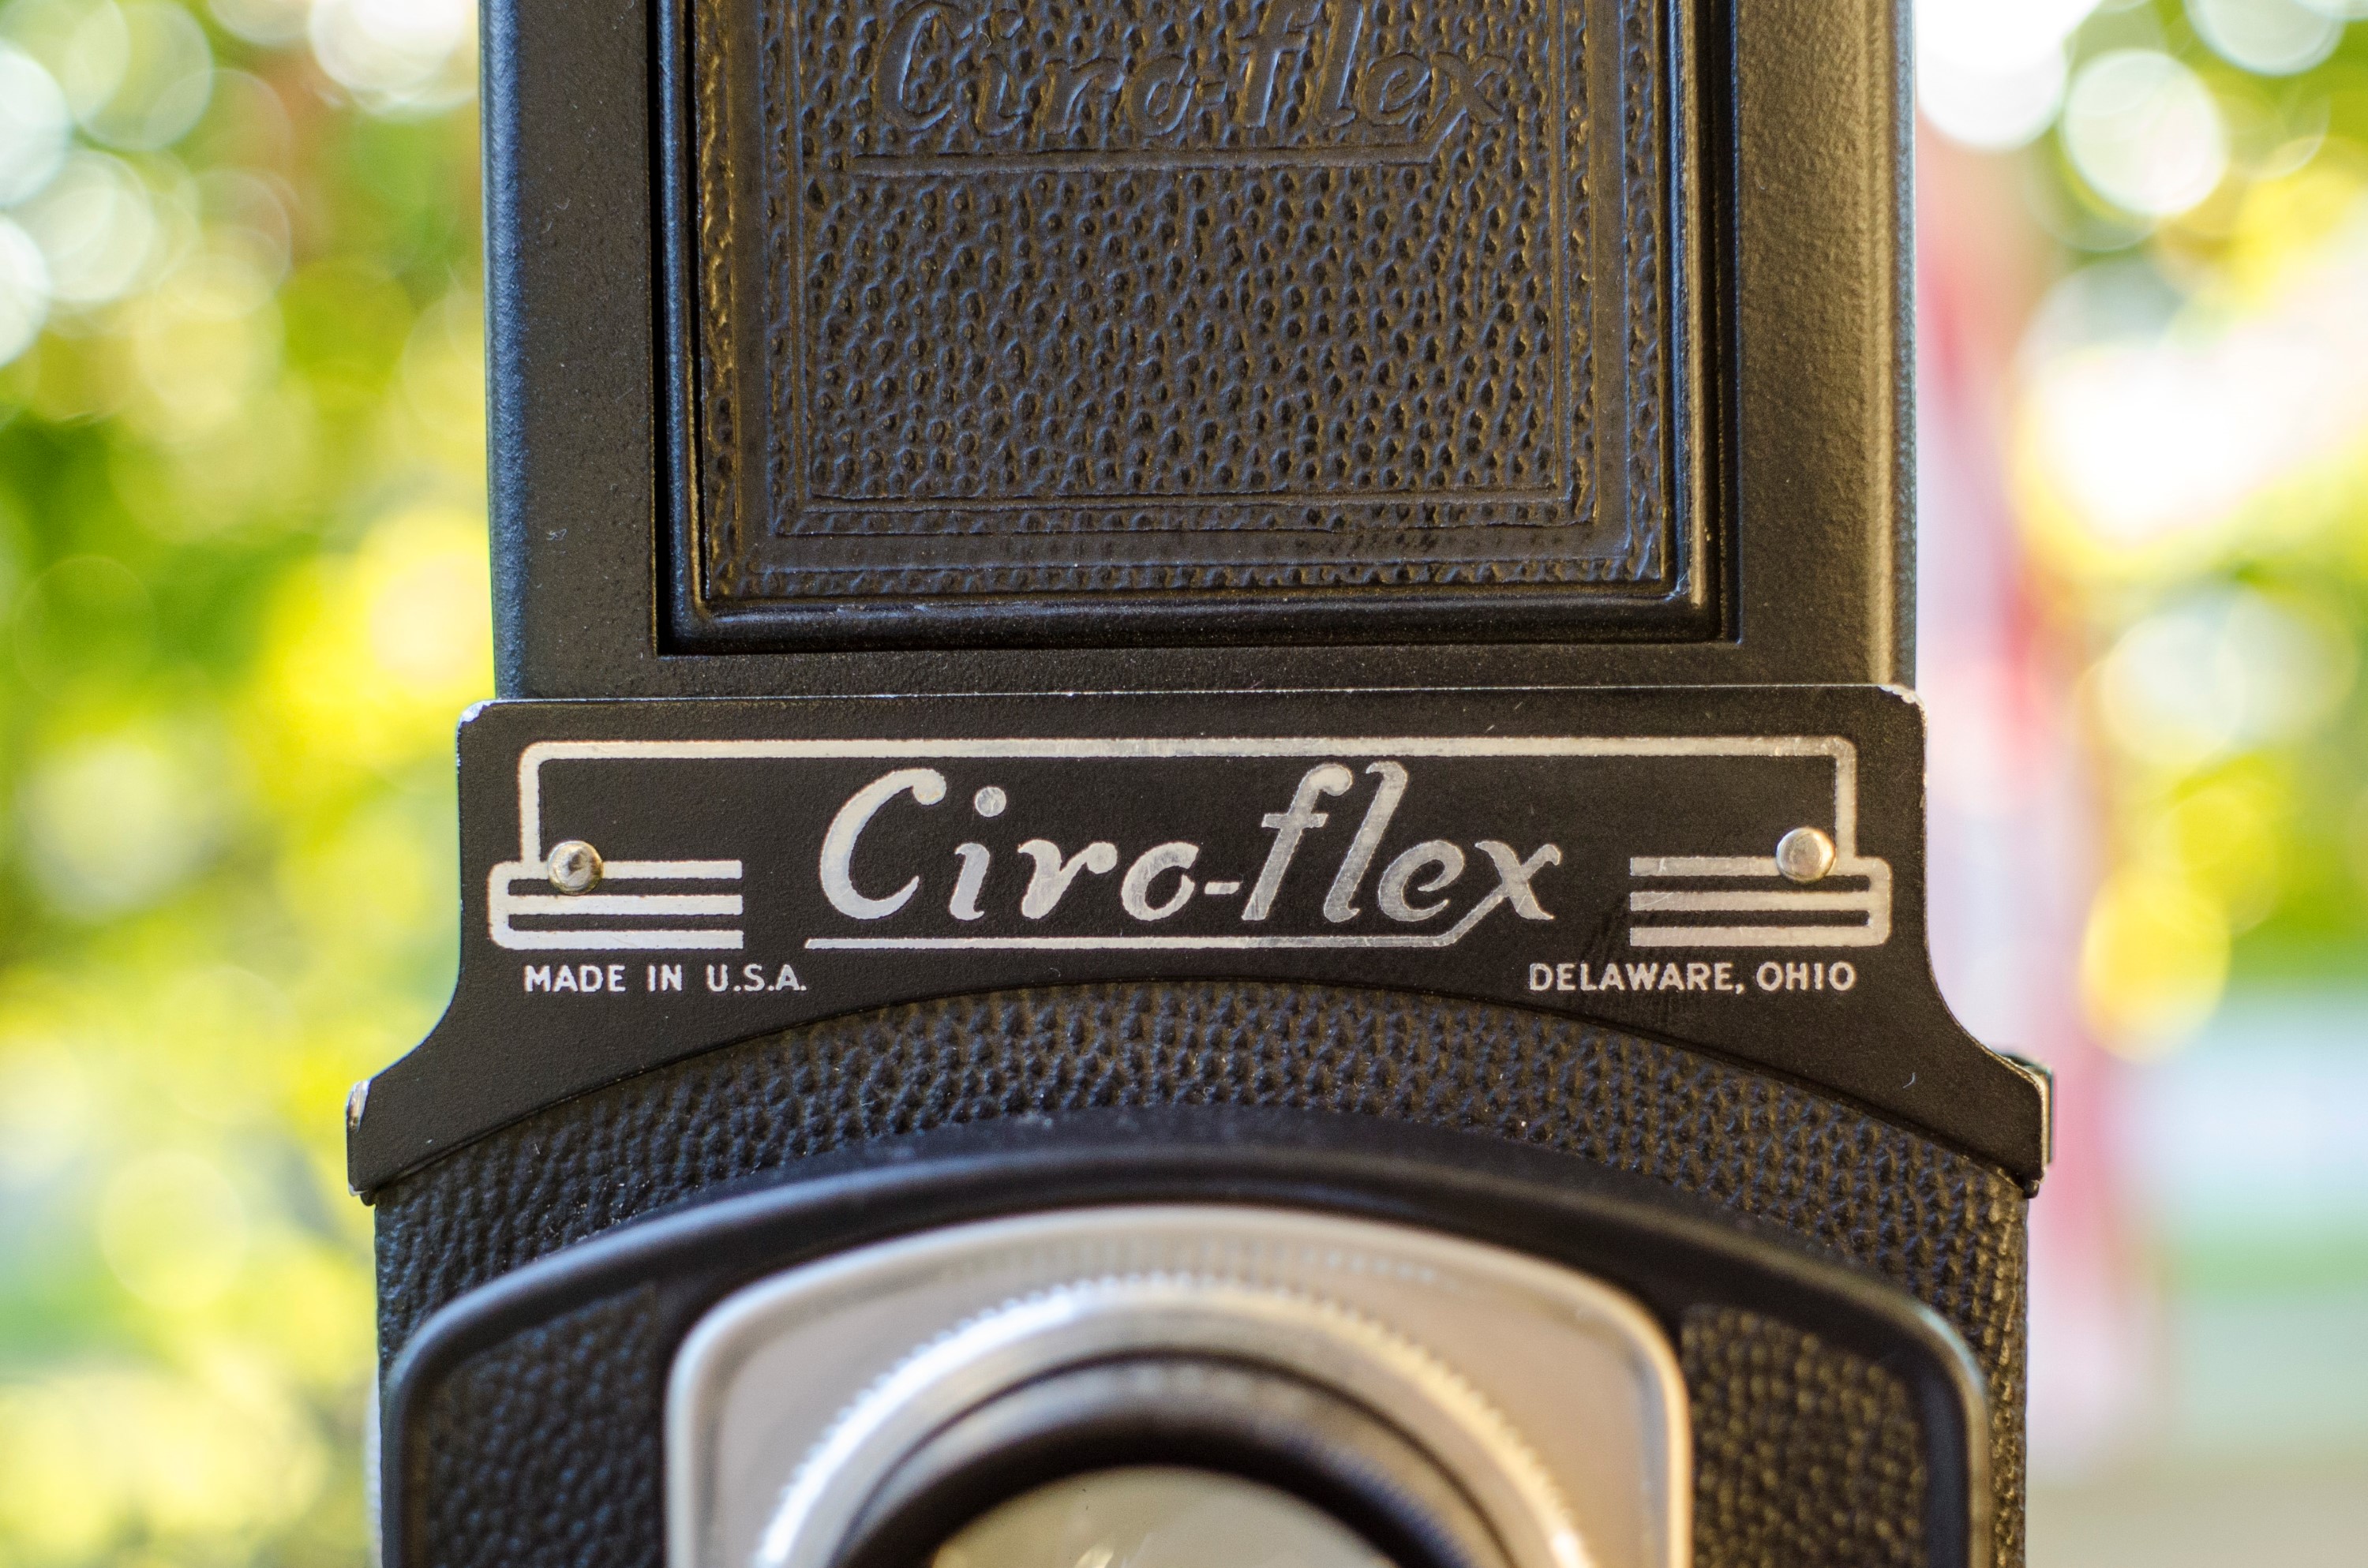
This is a Ciro-Flex Model D TLR made by the Ciro Corporation in Delaware, Ohio in the late 1940s. Originally based out of Detroit, MI, Ciro was a maker of low to mid level American made cameras that offered basic cameras at prices within reach of the average person. The camera was made out of steel and was pretty bare bones, but had decent Wollensak lenses and shutters, and was simple enough in design that they were extremely reliable. Although copies are often found these days in poor physical shape and rusty, many of them still work with a tiny bit of cleaning and restoration.
Film Type: 120 roll film
Lens: Wollensak 85mm f/3.5 coated 3 elements
Focus: 3′ to Infinity
Type: Coupled Reflex Viewfinder
Shutter: Wollensak Alphax Leaf Shutter
Speeds: T, B, 1/20 – 1/200 seconds
Exposure Meter: None
Manual: http://www.butkus.org/chinon/ciro-flex/ciro-flex.htm
History
Ciro Cameras was founded in 1941 by a former Ford engineer and French immigrant, Rodolphe Stahl, in Detroit, Michigan. The new company was approached by Sears and Roebuck to create a TLR camera for sale in their stores. Stahl produced the Marvel-Flex for Sears and simultaneously released the nearly identical Ciro-Flex through his own company.
Although Ciro would later release some other lines of cameras, their most popular line was the Ciro-Flex. The entire Ciro-Flex line had a total of 6 models, named sequentially the Ciro-Flex Models A, B, C, D, E, and F.
One unique aspect of the Ciro-Flex which allowed it to stand apart from other American camera makers of the time is that Ciro chose to go with the 120 roll film format instead of the 620 format that Kodak and other American makers were using. This allowed users of the Ciro-Flex to interchange film stock with a larger variety of imported medium format cameras. As a collector, this is appealing because 120 film is still produced today whereas 620 was discontinued in the 1980s and often requires modification in order to accept 120 film.
Only the Model A was available before World War II, and is quite rare today. The Model A is easily spotted because it is the only Ciro-Flex in which the logo is arched above the lenses. Every other Ciro-Flex had a logo that was straight across. The Model A was also the only Ciro-Flex with an uncoated lens.
In 1946, production resumed of the Model A, along with two new models, the Model B, and C. Both of the new models had coated lenses which was better suited for color photography and a primitive version of parallax correction in the viewfinder. The Model B had an Alphax shutter with speeds from 1/20 – 1/200 sec, and the Model C had a Rapax shutter with speeds from 1 – 1/400 sec. Although the Rapax shutter was advertised as the more advanced of the two shutters, the Alphax shutter had an auto-cocking design which didn’t require the photographer to remember to cock the shutter before taking a picture. It also was a simpler design that had very accurate shutter speeds and was less likely to jam over time.
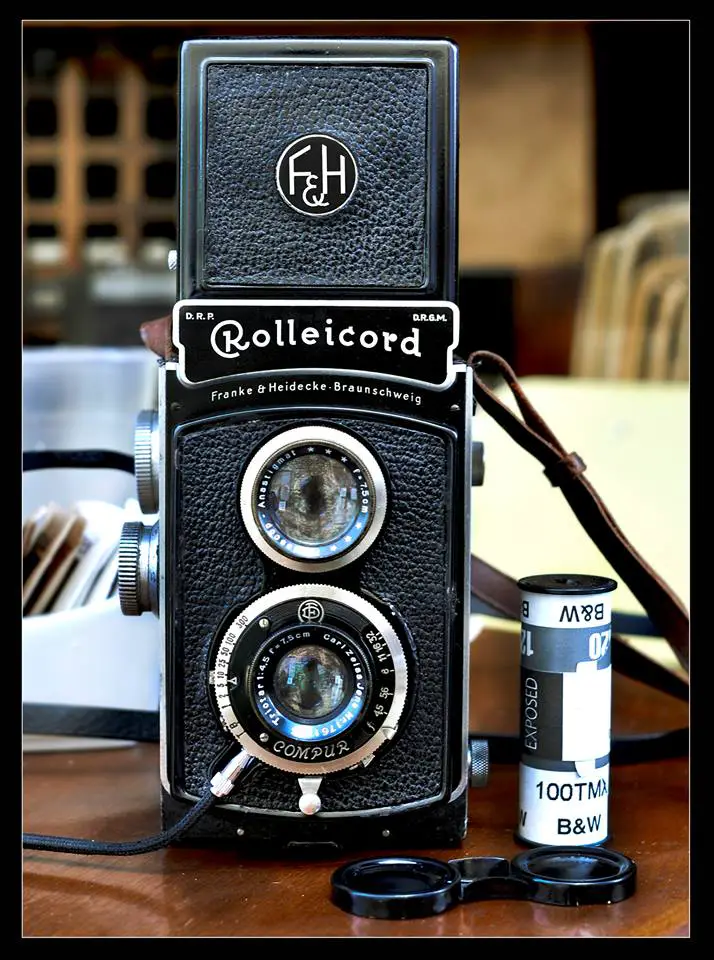
During this time, TLR cameras were extremely popular with the public, and the best models were all from Germany. Because of the war however, getting a German Rollei was not only difficult, but extremely expensive, so there was a huge demand for an American made TLR. The Ciro filled that demand quite well. All 3 Ciro models used shutters and lenses made by Wollensak, and the demand was so high that almost all of Wollensak’s production capability was committed to making parts for Ciro.
Although the company was doing very well, in 1947 Rodolphe Stahl decided that the urban life of Detroit wasn’t for him and he relocated the entire company into a former chicken processing warehouse in Delaware, Ohio which was a smaller town and had a nearby college that was more suited for his lifestyle. The Ciro-Flex name plate on the front of the camera changed from Detroit, Michigan to Delaware, Ohio.
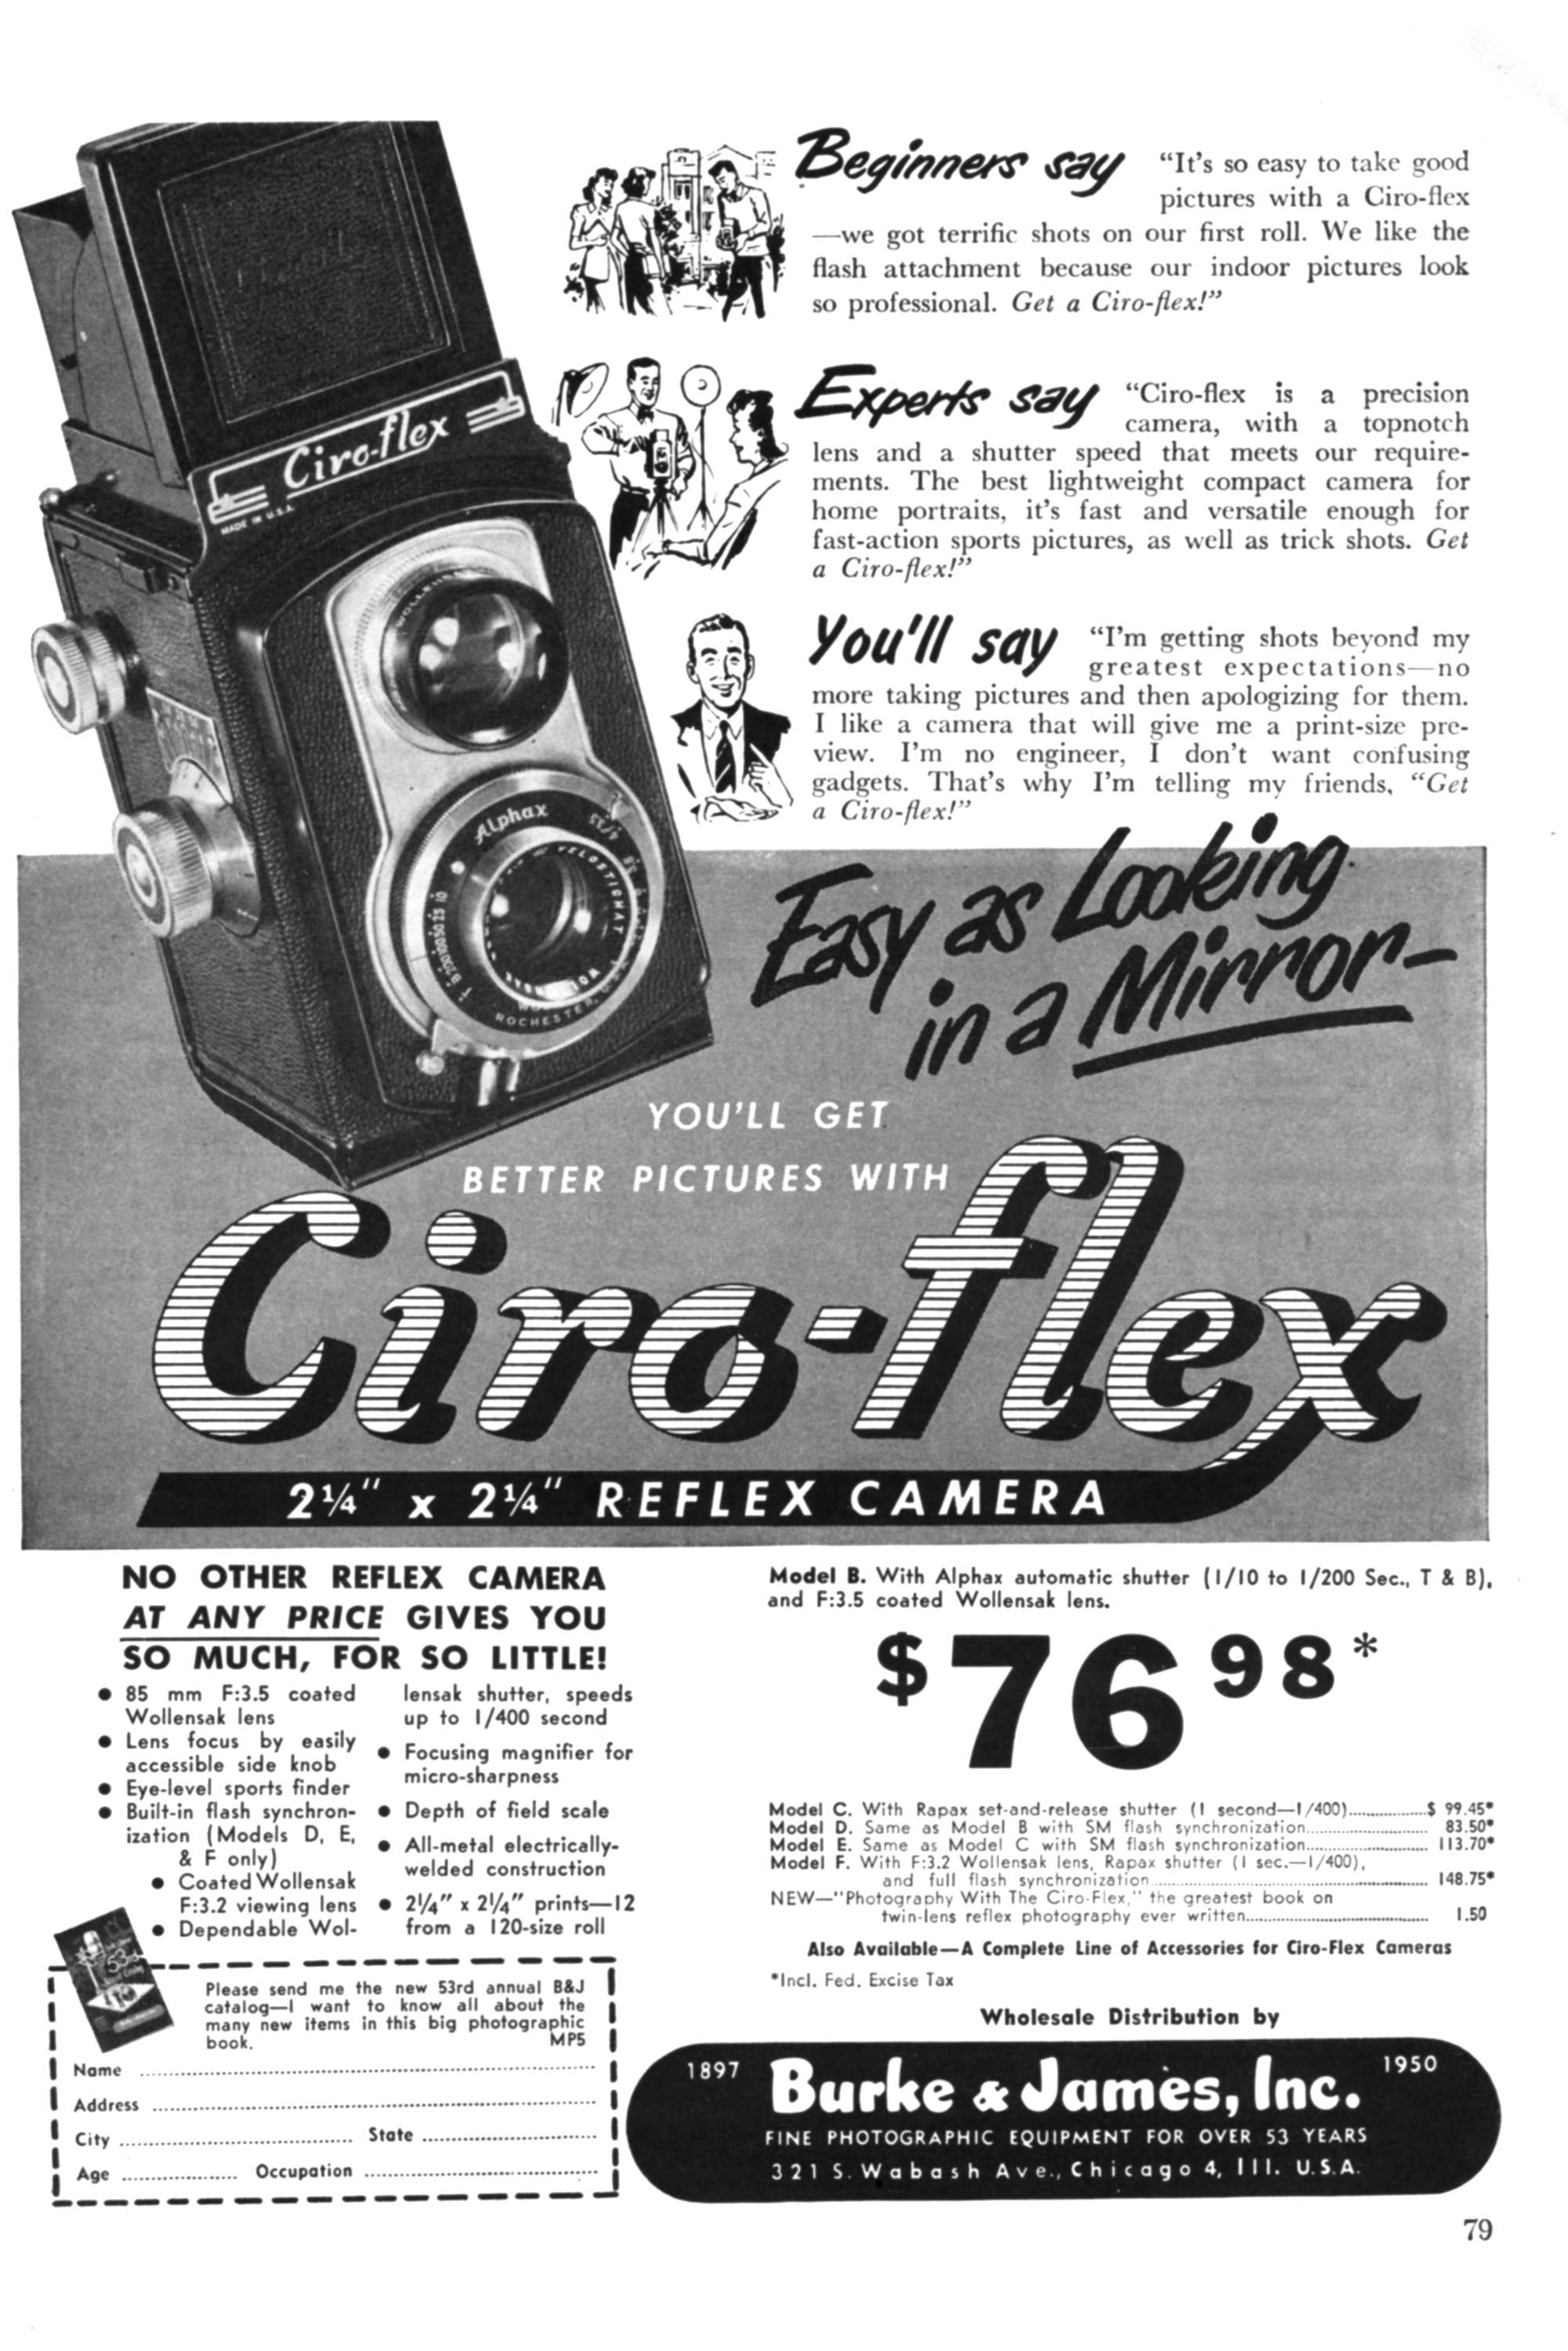
In 1948, both the models B and C were replaced by models D and E respectively. Each of the new models were basically the same as the previous models except both added flash synchronization and an accessory cold shoe on the left side of the camera. Otherwise the D and E had the same Alphax and Rapax shutters are their predecessors. According to the 1952 advertisement to the right, prices for the Ciro-Flex line ranged from $76.98 for the Model B to $148.75 for the Model F. The Model D reviewed in this article would have had a retail price of $83.50, which when adjusted for inflation is $767 today which might seem high, but was still a value compared to imported TLRs from Germany.
The Ciro-Flex cameras were very successful, and at the peak of their popularity, Ciro was producing over 100 models per day. Despite their success, the Ciro-Flex was still considered to be a basic camera and lacked some of the more advanced features of their German competitors. As a result, sometime in late 1949 or early 1950 the Model F was introduced which had a faster f/3.2 4-element Tessar type Raptar lens. The Rapax shutter was also upgraded with variable flash sync and stronger internal components that were said to improve reliability.
Around the same time that the Model F was introduced, a Fresnel lens replaced the ground glass lens inside of the viewfinder of Models D and E but the parallax correction feature was removed since there was not enough space in the viewfinder for both features. According to Rick Oleson, a very small number of Model Fs were made before the change to the Fresnel lens. Another subtle change that happened at this same time is a small “Model D, E, or F” designation was added to the top of the Depth of Field scale of all 3 models. If you have one of these 3 models with the Fresnel lens and the model type above the DOF scale, then your camera was most likely built after 1950.
In October 1951, Graflex, which was another American camera company, purchased Ciro, but kept producing the Ciro-Flex Models D, E, and F. The only change at this time was the name plate indicated the cameras were made in Rochester, NY instead of Delaware, Ohio.
Graflex would continue to make the Ciro-Flex models for about another year and a half until early 1953 when they were replaced by the Graflex 22-200, 22-400, and 22-400F. Each of these three models were basically the same as the Ciro-Flex D, E, and F, only with cosmetic changes.
Also in early 1953, Graflex produced the Graflex 22-200 for another DeJur which was yet another American camera company and sold it as the DeJur Reflex DR-10. There were plans for a DR-20, and DR-40, but they never made it into production. Graflex would continue to make this line of TLR cameras until 1955 at which time, the Ciro designed cameras were discontinued.
Today, Ciro-Flex TLRs have a pretty loyal following. They’re not especially valuable, but as one of the few good American made TLRs, they play an important role in photographic history. Add to the fact that they were pretty basic cameras that often can be found in good working condition, and they accept 120 format roll film which is still made today, they are an economical choice for photographers looking to get into medium format film.
Below is a fascinating article from a 1952 issue of Modern Photography about the entire Ciro-Flex line of TLRs, including some technical information and their thoughts on the camera at that time.


Repairs
Normally, I put my “Repairs” section lower in the article, but for this camera, I’ll start right here since this is the first camera that I’ve ever acquired that was in so much need right off the bat.
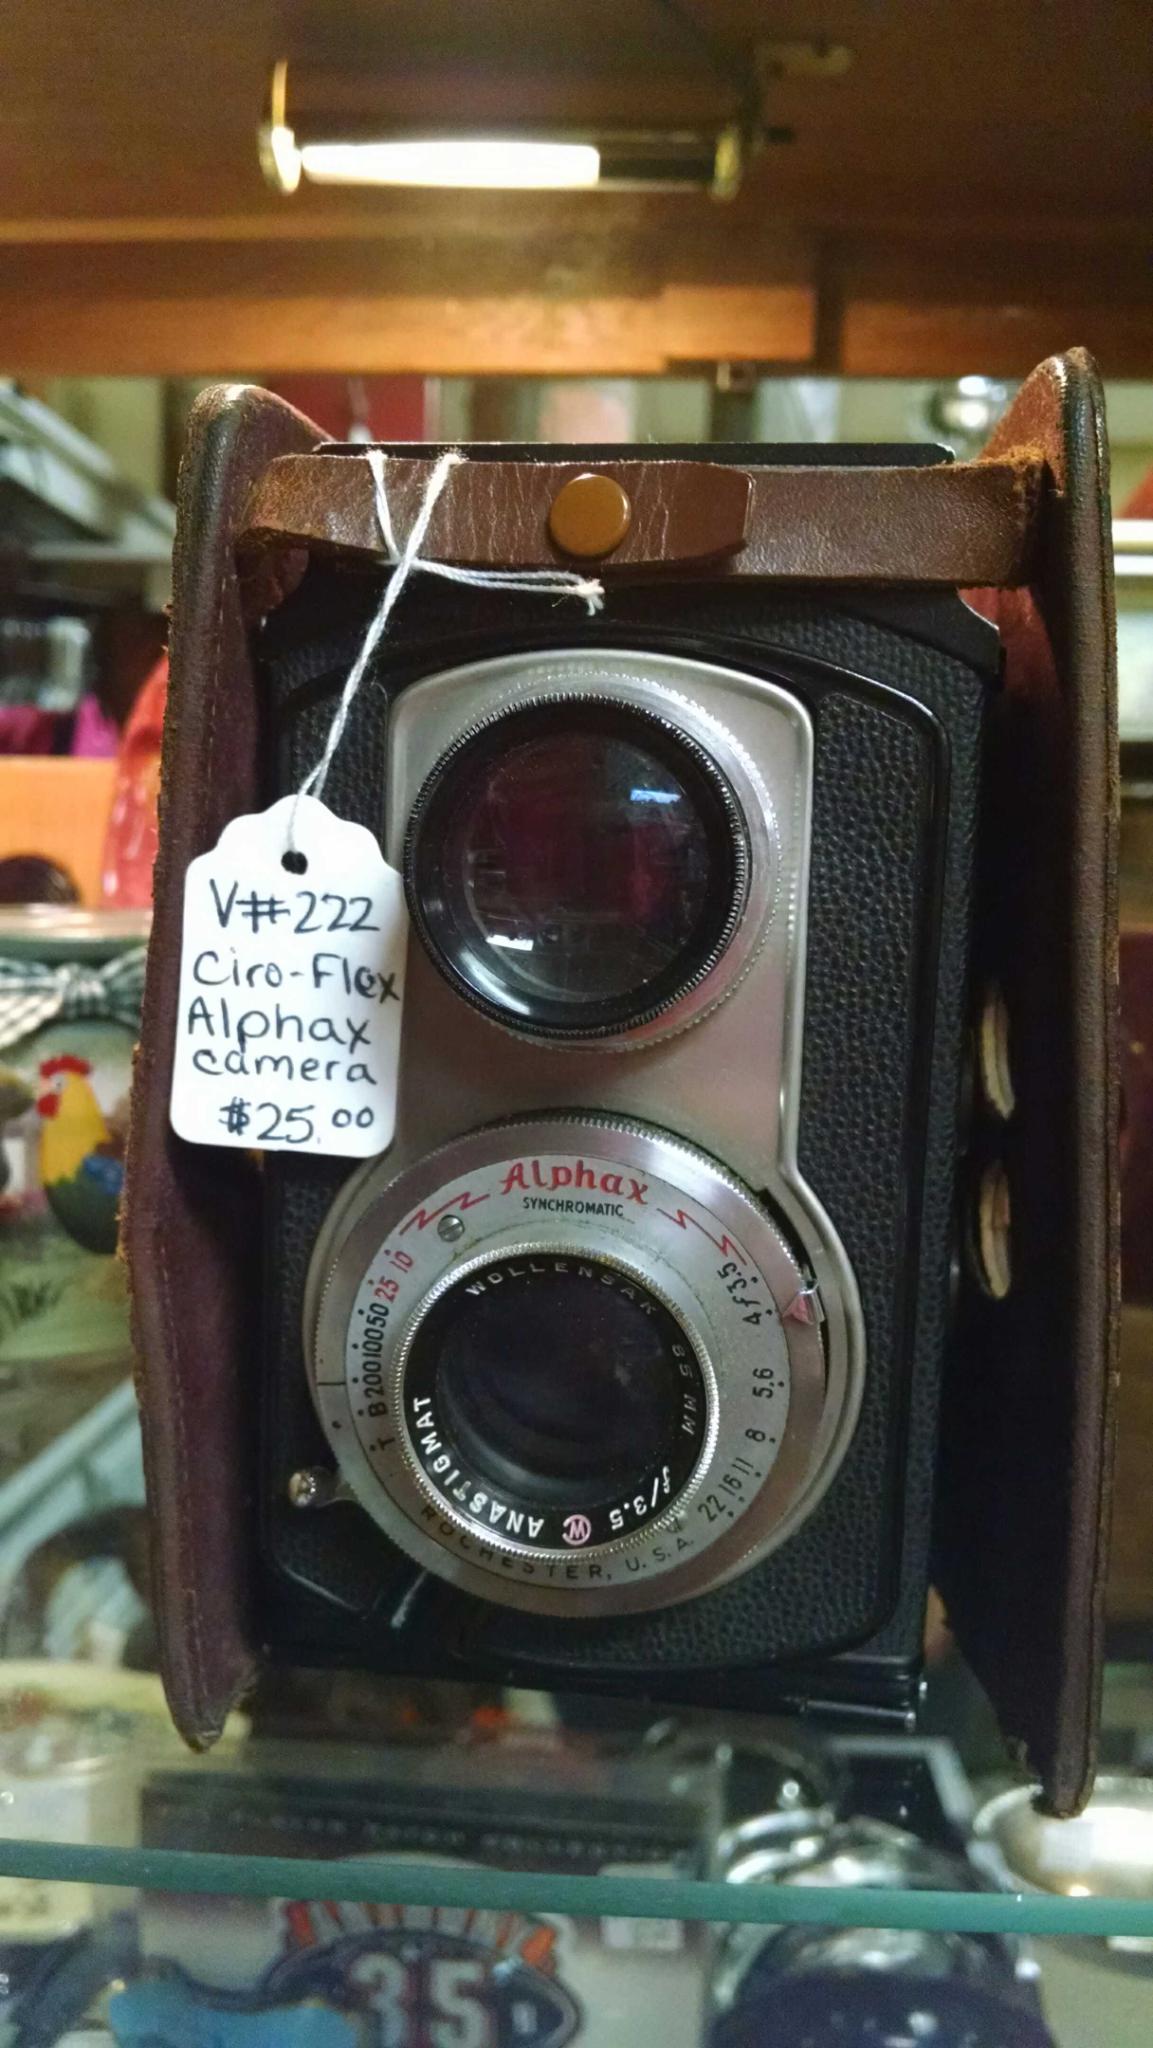
The story of how I got this camera was that out of the blue, I receive a text message from my mom saying that her, my aunt, and my grandma were antique shopping and they found an old camera.
She sent me the image to the left, and I immediately recognized it as a Ciro Flex (yeah, I know the price tag also says the same thing, but I would have known anyway). My mom knows nothing about old cameras, so I knew I would have limited information about it’s condition. I asked her to look through the viewfinder and see if she could turn all of the knobs. She said it was really hard to look through the viewfinder because of how dirty it was, and she said the large knob would turn, but it was very stiff. Figuring this camera had the usual dirt, grime, and stiffness of any 60+ year old camera, and that these things are generally easy to repair, I told her that if she can get them to budge on the price, to buy it for me.
It took a couple of days for me to meet up with my mom to get the camera, but when I did, I saw that I would have my work cut out for me. While the viewfinder was pretty dirty, I quickly realized that it was not dirt making the viewfinder dim, the reflex mirror had significantly de-silvered. Very little of the reflective layer was in tact, and no amount of cleaning would correct it.
The focus wasn’t just stiff, it was actually jammed. As it turns out, this is a fairly simple repair on a Ciro-Flex. Instead of a helicoid like on other cameras, the Ciro Flex uses a spiral shaped cam attached to the focus knob, that pushes and pulls a shaft connected to the front of the camera. It’s a pretty simple design, but is prone to jamming if the shaft slips off of the spiral cam. All of this is easily accessible from inside the film compartment, so I was able to easily fix this and determine that focusing this camera shouldn’t be a problem (or so I thought, but more on this later).
The camera had a variety of cosmetic issues as well. For one, there were many scratches, and even some gouges in the metal near the top of the viewfinder housing. Two of the four screws that hold the viewfinder to the top of the camera were missing. These scratches and missing screws tell me that someone had taken this camera apart in the past, probably more than once, and that’s never a good thing. Often when an unqualified person tries to “repair” a camera, the results are often not good. The leatherette on the back door of the camera was badly peeling. The red window that covered the film counter was completely loose and no longer attached to anything. Finally, most of the knobs and metal pieces had notable oxidation. Despite all of these condition issues, all of them could be corrected with some TLC.
Next, I directed my attention to the shutter, and sadly, that wasn’t working either. I’ve never used an Alphax shutter before, so I was expecting to see some type of lever to cock the shutter, but as I learned, the Alphax is a self-cocking shutter which means that moving the lever on the side of the shutter cocks and releases the shutter in one motion. This lever was actually bent, which means someone had probably tried to force it in the past. I bent the lever back into it’s correct position and attempted each of the speeds, and none of them, except “T” worked. At this point, I had actually hoped none of them worked, which would have meant that the shutter probably just needed a good cleaning. Since “T” actually worked correctly, that told me that my issue wasn’t just a sticky shutter. Something else had to be wrong.
At this point, I realized that no amount of restoration would be worth my effort if I could not correct the shutter problem. Before I attempted to open the Alphax shutter, I did a Google search and amazingly found an excellent set of instructions on disassembling and lubricating Alphax shutters on Daniel Mitchell’s Camera Collecting and Restoration site. This wasn’t the first time I found useful information on Daniel’s website. He also provided help in repairing and cleaning my Aires 35-III Rangefinder.
Edit 4/29/2017: Recently, another article was posted on Simon Hawkett’s blog with very detailed instructions on how to disassemble and clean a Ciro-Flex shutter. Although Simon uses a Rapax shutter, instead of the Alphax like mine, it is very similar, and the instructions for getting it off the camera are the same.
Daniel’s instructions gave me confidence that taking apart this shutter was simple enough and worth trying. Compared to other, more advanced shutters like the Compur, the Alphax is pretty basic.
I’ll skip to the part where I tell you that I was able to resolve the shutter issue by re-positioning one of the small pieces of metal which moves the shutter. I did not take any pictures of my work here, simply because I really didn’t know what I was doing. Essentially, I took one of my smallest screwdrivers and used it to gently move around all of the parts to see what each one did. I was able to figure out how the “T” and “B” levers did, and how the cocking arm would put tension on the speed governor, which in turn would open and close the shutter.
Surprisingly, everything was pretty clean inside of the shutter. The blades were free of oil, and the speed governor was working correctly. Still, I used my Ronsonol and cleaned everything and put a small dab of white lithium grease on all of the points recommended in Daniel’s instructions.
There were two minor (or so I thought) issues I identified while working on the shutter. One was that whenever I put things back together, “T” mode would sometimes not work. If I backed off the screws holding the top plate of the shutter by a quarter of a turn, it would work again. For some reason, when you tighten the top plate of the shutter, there is just enough pressure on the “T” lever that causes it to not move. This only affects “T” mode, and not “B” or any of the other speeds, so I just left it alone as I won’t ever use it.
The other issue was that it seemed whenever I would move the aperture lever all the way to f/22, it would bind up and not move freely back to the other settings. If I jiggled it just a little, it would become free and move easily to the other settings. I figured this was just a quirk of the camera, and as long as I never shot anything at f/22, I would be OK.
So, satisfied that the shutter was working correctly at all speeds, and the focus was working, I decided to invest some time and a little bit more money to restore the camera the rest of the way. My mom was pretty intrigued by the camera and was excited to see if I could get it working again. I promised her that when I got it back together, I would teach her how to use it. Her excitement gave me the motivation to do as good of a job as I could with this camera.

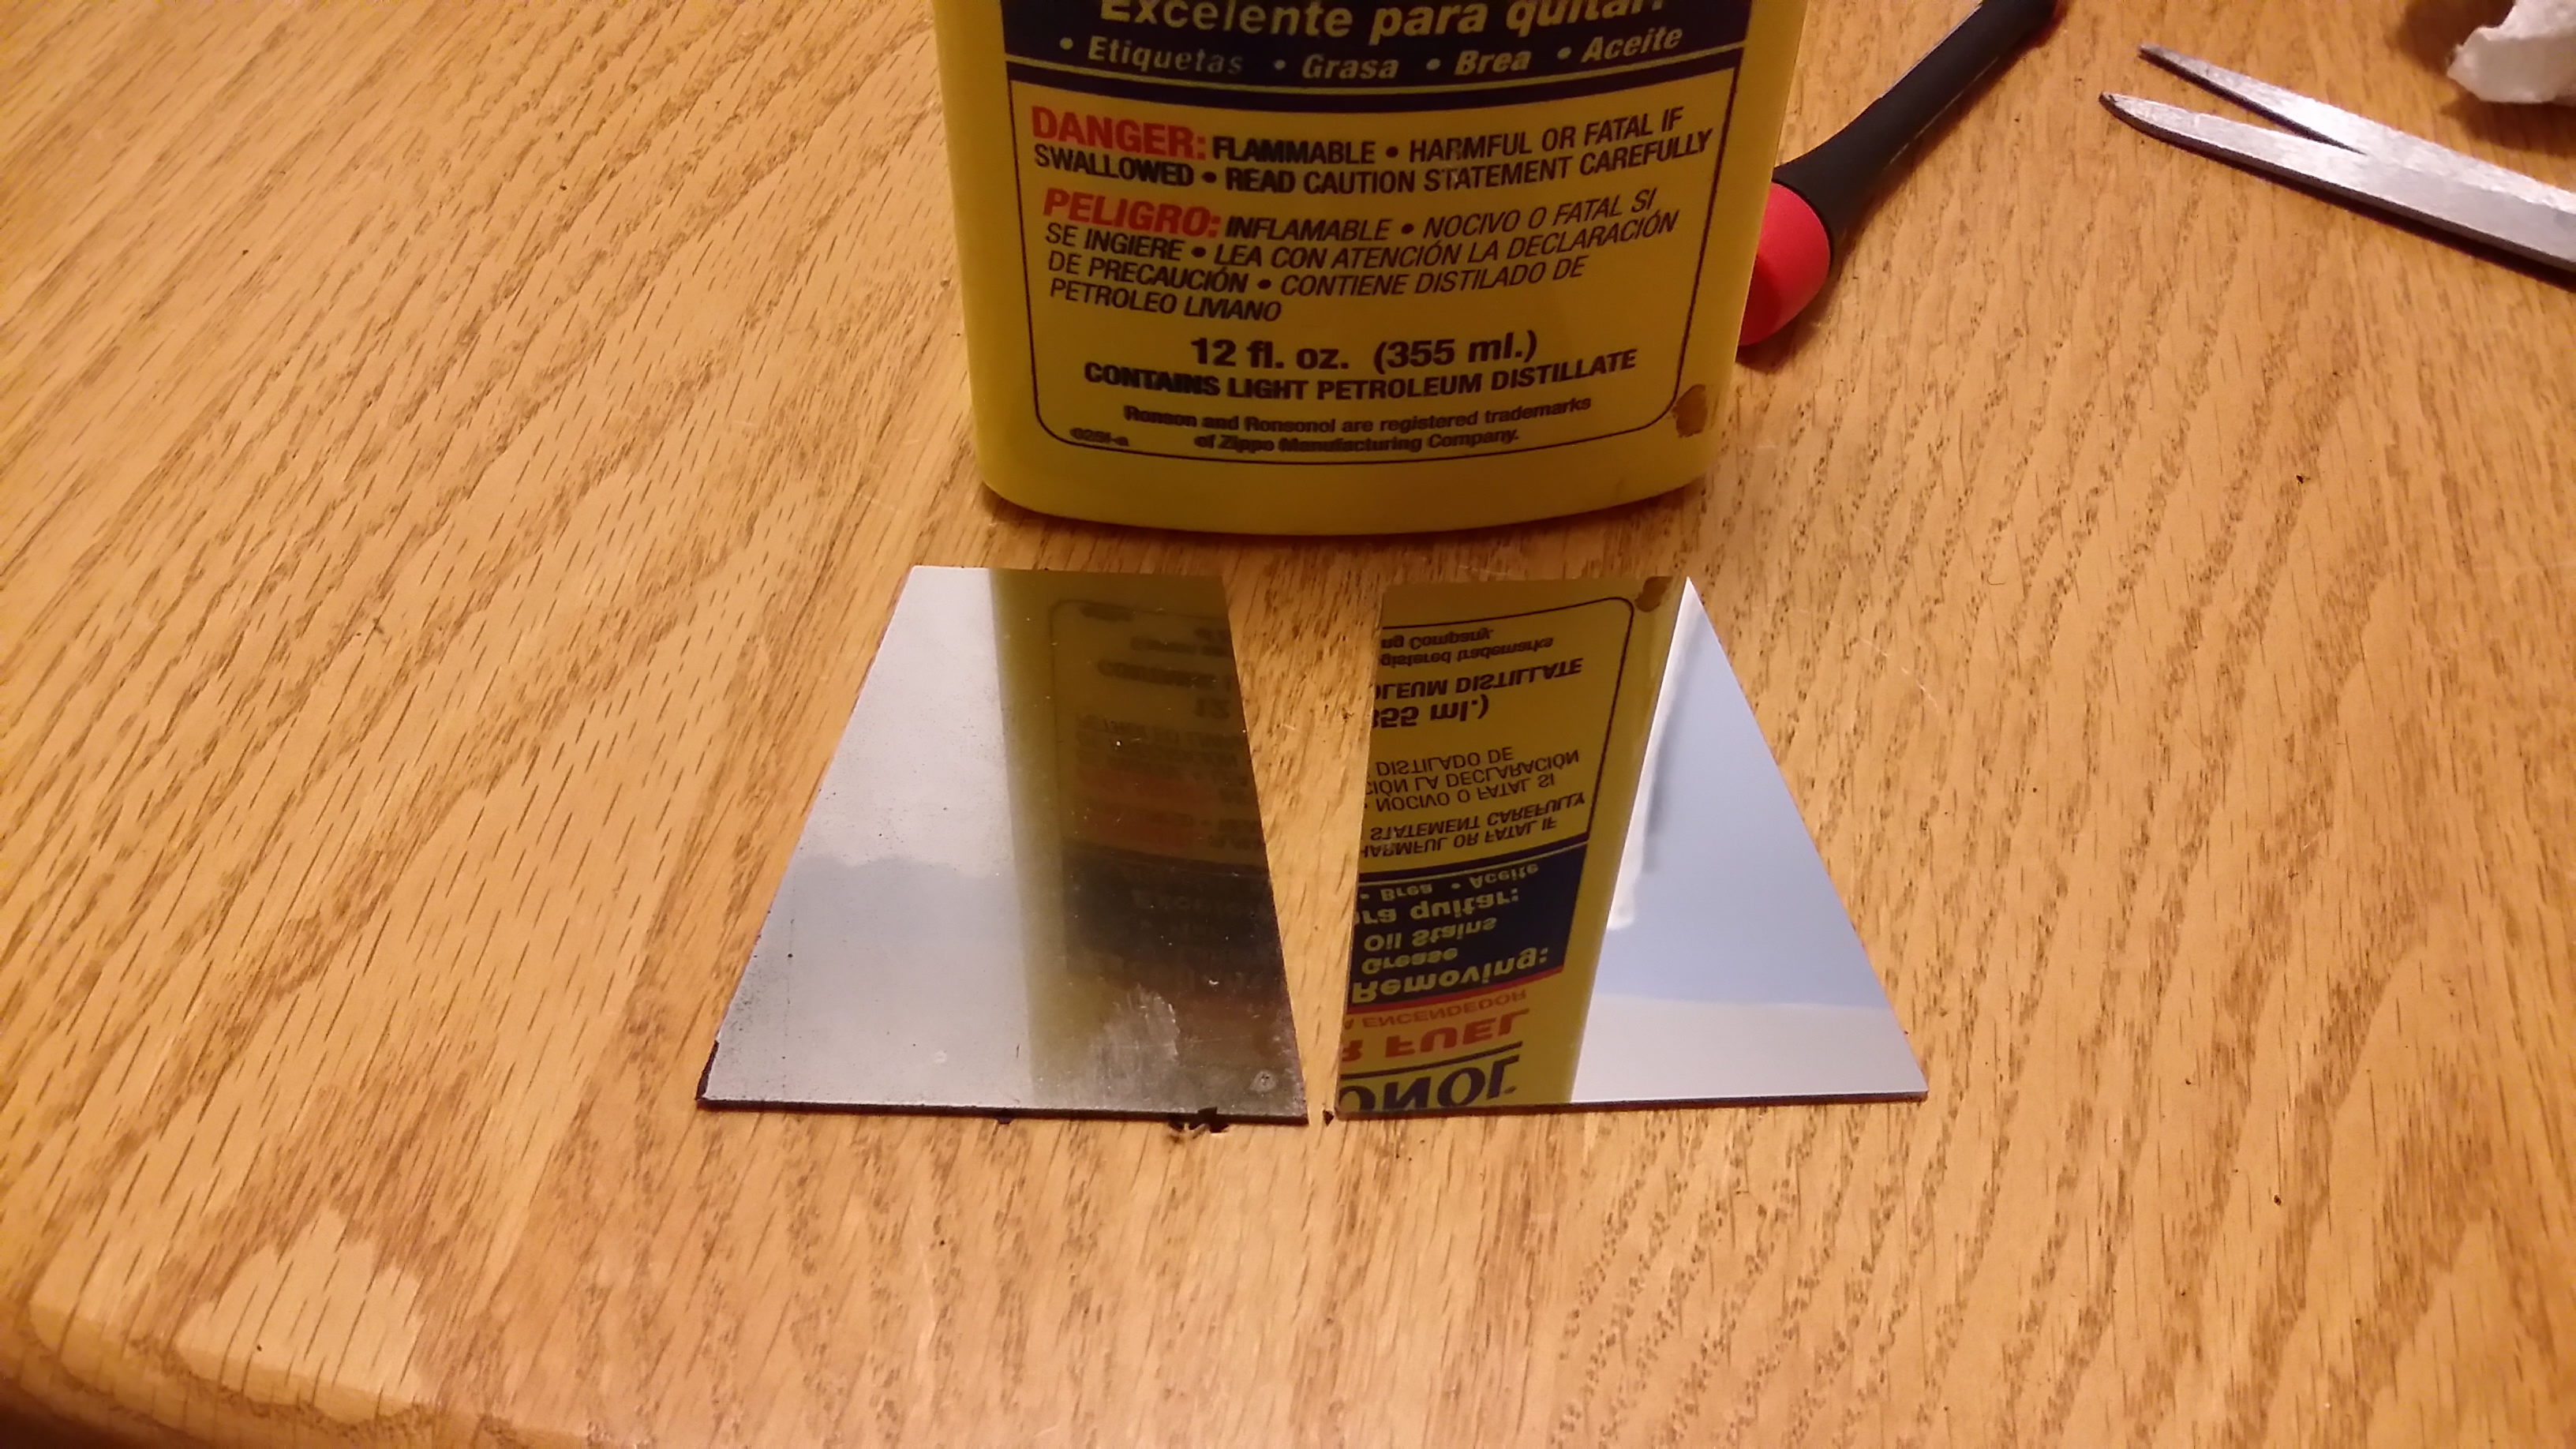
The first thing I had to do was replace that horrible mirror. At first, I wondered whether I’d be able to find a replacement for a Ciro Flex. If this was a Rollei or a Yashica-Mat, I would think there would be someone out there selling them, but something like the Ciro Flex would be difficult, right? Turns out the answer is nope! There is an eBay seller named Martin Sellig (eBay seller id marty1107) who makes custom cut TLR mirrors for any model. I contacted him about making one for my Ciro Flex and he said absolutely! While I was talking to him, I decided to order a mirror for my Yashica-Mat since it’s mirror had some spots that had desilvered. He combined shipping and sent me both mirrors, including shipping for $16. What a deal!
When the mirrors arrived, I confirmed that not only was the replacement mirror the same exact dimensions, but it also had an adhesive backing like the original which was glued into place. Even before getting the camera back together, I could already see that this new mirror would make a significant improvement in the usability of the camera.
Next was the cosmetics. For the leather, I decided to get a skin from www.cameraleather.com. I’ve used these guys before when I re-skinned my Argus C3, so I knew their products were of high quality. I decided to not get too fancy, and I just went with their basic black vinyl.
For the scratches and gouges in the metal, I decided that some rattle can spray paint would suffice. I wasn’t going for a factory original restoration, but I thought a fresh coating of some paint on the worn pieces would help improve the look of the camera. I used my Dremel to smoothen some of the really bad areas.
Although my original plan was to replace all of the leatherette, and paint everything, as I disassembled the camera, I started to realize that replacing the leatherette on the main part of the body would be extremely difficult. It turns out that the front and both sides of the camera have one solid piece. Not to mention there are several things that are held on by rivets. I have no skill or ability to replace rivets, so I made the decision to not replace the main part of the skin. Sure, it wouldn’t match, but that would be OK. Its not like this camera would be a rare collector’s piece anyway. It also helped that this main piece of leatherette was in excellent condition. I also decided to keep the piece on top of the viewfinder lid as it was also in good shape, but that it also had an embossed Ciro-Flex logo that I would have lost.
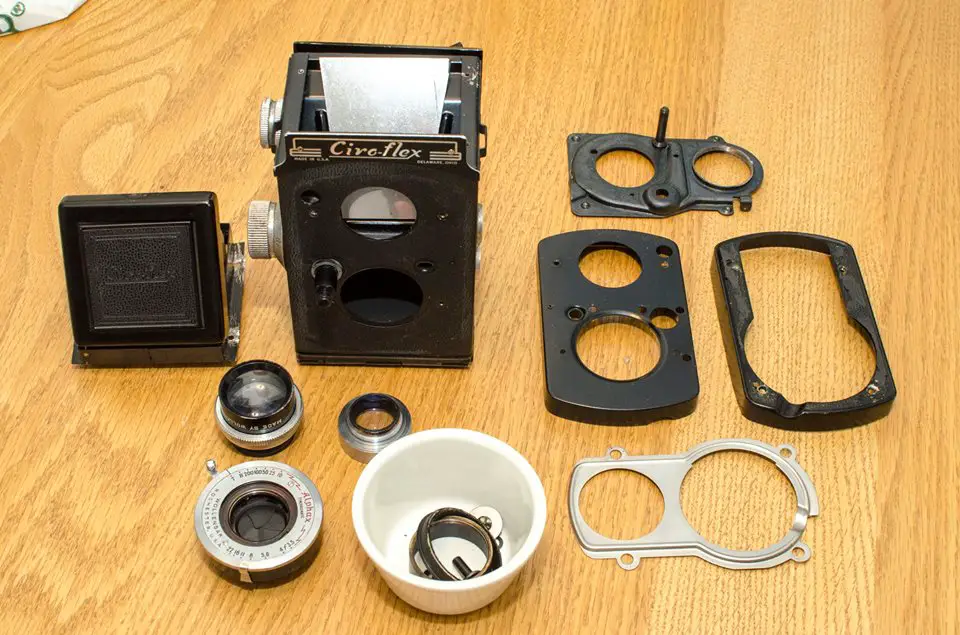
Following Daniel Mitchell’s instructions, I had the Ciro Flex completely disassembled. I removed all of the leatherette on the back and bottom of the camera, and also used some Acetone to remove the old adhesive on the door and where the original mirror was.
Over the course of the next few days, I applied several coats of black paint to the lid and two front pieces of the camera. Once done, I also sprayed a satin layer of clear coat to protect the paint. I chose satin as I thought that would cover blemishes a little more. I am far from a professional spray painter, but I figured anything would be an improvement from how it was.
On the last day of painting, I went over to where the camera parts were being stored, and I picked up the shutter which I had previously applied and test fired it a couple of times to confirm that it was still working. While I was pleased that the shutter itself was still working fine, I made a disturbing discovery.
Remember that “minor” issue I noticed earlier where the aperture would get stuck around f/22? Well it turns out that one of the aperture blades had become loose and popped out of its position inside of the lens and was floating around loose behind the shutter. Worse, there is no way to access the aperture through the back of the shutter, you need to do it from the front. This would be a COMPLETE disassembly of the shutter.
At this point, I had already invested quite a bit of time into this camera, and if I didn’t address this issue, photos taken with this camera would have a loose aperture blade floating in the middle of the image, so I knew I had to take it apart.
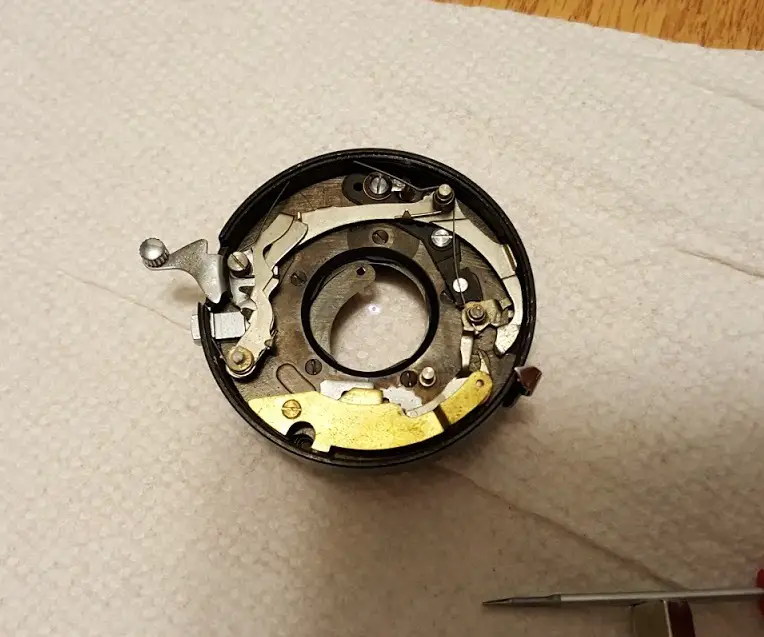
Using Daniel Mitchell’s guide one more time, I took apart the entire shutter. Although Daniel’s instructions are good, his Alphax did not identically match mine. I took several pictures of the process so that I could see how things would go back together.
Getting the shutter down to the aperture blades was rather uneventful. A flat head screwdriver was the only tool needed. The aperture iris has a cover that keeps the blades into position and once you remove that, the blades can freely move. This part was very scary as I knew that if I bumped it, or in some way disturbed the orientation of the aperture blades, I may never get it back together. Looking at the loose blade, I could clearly see that one of the holes had been torn as there were small jagged pieces of metal on it. Based on what I could see, I made the determination that I would most likely do more damage to the shutter by trying to fix the loose blade, than remove it altogether.
After removing the loose blade, I temporarily put the aperture cover back into position and tested movement of the aperture, and even with one blade missing, it moved from wide open to f/22 smoothly. So you must be thinking, what good is an aperture with one blade missing. To be perfectly honest, you can barely tell its missing. I noticed that between f/16 and f/22, there is a very small gap where the missing blade is obvious, but at anything less than f/16, you can barely notice one of the blades is missing. Since I mostly use f/5.6 – f/11 during outdoor photography, I doubt I’ll ever run into a situation where the missing blade would make a difference.
So, with the aperture sorted out, I began the process of putting everything back together. I cannot stress enough how helpful it is to have detailed pictures of something when putting it back together. Patience is definitely a virtue in circumstances like this and it pays to take your time. It also helps to have a tablet or some other device with a large screen that you can use to display pictures of things where you are working. I can honestly say I ran into no issues putting the shutter back together. Once it was together, I tested operation of everything and both the shutter and aperture still work like they should. Plus, the aperture no longer hangs at f/22!
With the shutter sorted out, I brought my painted pieces in from the garage and took care of some minor imperfections with some 1000 grit wet sandpaper and started putting things back together.
First was the viewfinder. Of all of the parts of this camera, getting the ground class and Fresnel screen back in was the part I struggled with the most. I was aware that if I broke the glass, I would not easily find a replacement, but also, getting things lined up and the springs that hold them in place was a huge pain in the butt. I really don’t have any tips for anyone reading this who might try this themselves, other than have patience. You will get it back together.
As I mentioned before, I chickened out in replacing the large piece of leatherette on the body, but I did replace the piece on the film door. There were a couple of rivets that the new skin did not account for, but that was no big deal. Also, that little dial that opens and closes the metal flap which covers the red window is held in place by a large rivet behind the film pressure plate. I didn’t have any way of getting that piece off, so I had to cut 4 small notches out of the circular hole that was in the new skin, so that I could push it over the dial and then tuck it all back in using a small screwdriver.
As always whenever applying a large piece of adhesive material, it helps to squirt a fine layer of water with a couple of drops of dish detergent. The moisture acts like a barrier that prevents the adhesion from taking hold right away. This allows you to move the skin around to get it into position. I got a shallow Tupperware bowl and filled it up with warm tap water and 2-3 drops of dish detergent mixed in for this purpose.
When applying the rear skin, I took care to position the red window exactly where it should be, and then when the skin went over it, the skin would hold the red window in position and never move. This actually works really well because the red disc is considerably larger than the hole in the skin so there is plenty of material that you’ll never see that holds it in position.
After looking at the camera with the new rear skin, I can honestly say that it doesn’t look overly weird matched up with the original leatherette. Although the new material is clearly blacker, the grain is actually very similar. I don’t think that two different types of body covering would be the first thing someone would notice when seeing this camera for the first time.
Also, my spray paint job looked good too. The satin clear coat is definitely less glossy than the original paint, but the amount of scratches and gouges that the new paint covers up is definitely worth it.
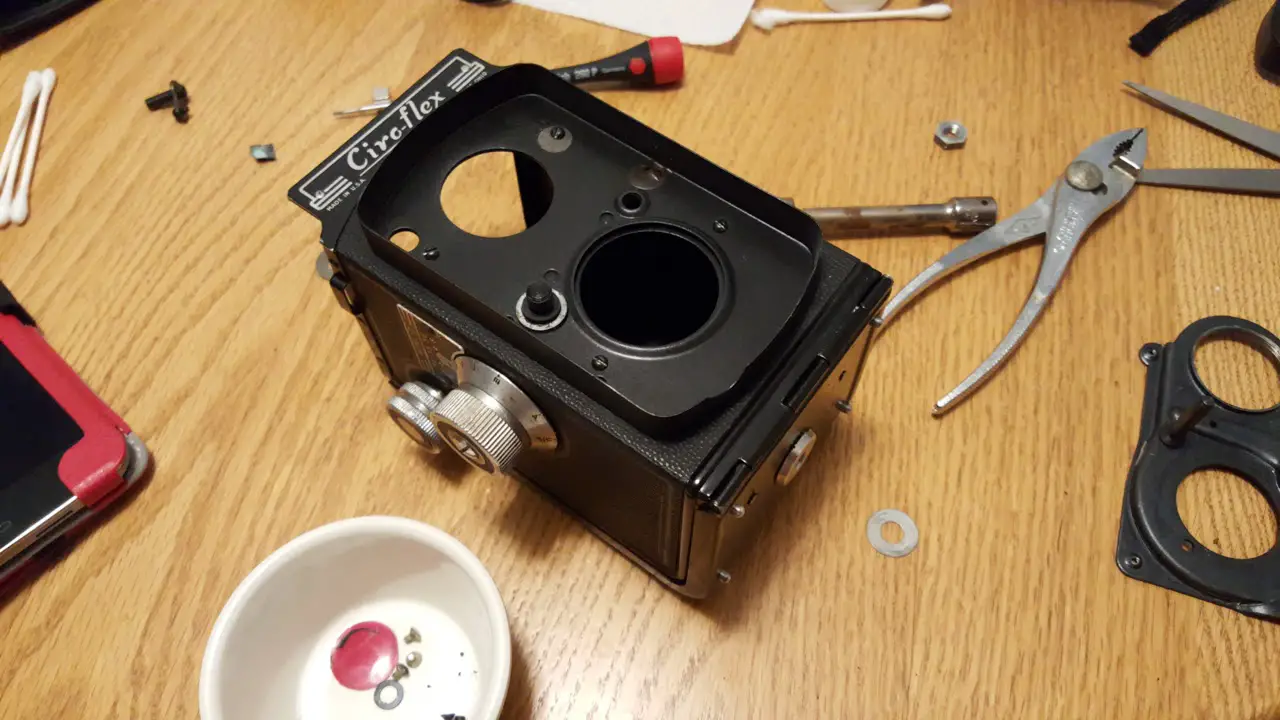
Putting the rest of camera back together wasn’t all that difficult. Even without pictures to go off, most of the parts only go in one way. There were several times where I started putting something together in the wrong order and then I’d be faced with a part that had to go under something else, so I would have to back up and redo something, but in total, it took me a little over an hour to reassemble the camera (not including the ground glass and Fresnel screen).
After everything was together, I sat back and marveled at my work. No, it wasn’t perfect, and it wasn’t especially valuable, but there it was, a fully assembled Ciro Flex Model D that showed every sign of working correctly. I confirmed that everything was in working order and at first, I thought it was, then I started to notice that something seemed off with the focus.
The Ciro Flex has a minimum focus distance of 3 feet. I put something roughly 3 feet in front of me and attempted to focus on it, and I couldn’t. I kept moving back and back and back, and it was not until I got to about 6 feet that the image was in focus even though the depth of field scale still pointed to 3 feet. I focused on a light about 15 feet away, and it was in focus around 6 feet on the scale. I took the camera outside and focused on a street light about 300 feet away and the scale indicated 9 feet. Something was clearly off.
At this point, there were so many things that could have gone wrong. Maybe I did something incorrectly in the shutter and the lens elements were out of position. Maybe I installed the mirror wrong and the focal distance to the ground glass was off. Maybe the ground glass itself was wrong. I was pretty sure I had it installed correctly, but if the ground glass is not exactly in it’s original position, it will show a focused image way off of where it really was.
Rather than bore you with my troubleshooting, I’ll just say that the issue was that the viewing lens was not set to the correct depth as the taking lens. I mentioned earlier that I had suspected someone had disassembled this camera in the past, and I think this is one of the results of a previous owner not knowing what they were doing.
In step 3 of Daniel Mitchell’s guide, he talks about unscrewing a chrome retaining ring around the taking lens. This ring is not just to hold the taking lens in place, it also functions as a stop nut to adjust the depth of this lens. You can adjust how far into the body the taking lens in to adjust its focus in the viewfinder.
In order to determine the proper position of the viewing lens, you must make sure the taking lens is accurately set to focus at infinity. For that, you must do something called “collimating the lens”. I had originally planned to type up how to do that here, but this is something that I’ve had to do with several cameras, so my plan is to make an entire post dedicated to this one topic which I can refer to in multiple reviews.
For now, I’ll just say that once you are sure the taking lens is correct, you unscrew the collar around the viewing lens and look through the viewfinder and match what you see in the viewfinder with what you see while collimating the lens. Once this is done, your focus is accurate.
 My Thoughts
Using the camera is basically the same as any other TLR that I’ve used with two exceptions. The first, and something that initially stumped me is that the Alphax shutter is a self-cocking design. This means that when you move the shutter release, the shutter cocks itself immediately before firing. There is no need to cock the shutter prior to shooting.
This is both good and bad. It’s good because it simplifies shooting the camera. You don’t need to remember to cock the shutter and possibly miss out on a great shot by fumbling around with another lever. The downside however, is that it makes accidentally firing the camera pretty easy. Since the entire cocking and firing process is done by moving one little lever, this increases the chances of accidentally exposing the film while carrying the camera or storing it in a bag.
The other difference is in the precision magnifying lens that is inside of the hood. Every TLR I’ve ever used has one of these, its basically a round magnifying glass that swings out over the center of the viewfinder for precision focusing. The odd thing is that on the Ciro flex, this magnifying glass is on the underside of the top lid. This makes swinging it out quite awkward as you have to reach your hand into the viewfinder and pull it out. Every other TLR I’ve used has this magnifying class on the outer baffle facing the photographer. Perhaps when the original Ciro-Flex was designed in 1940, the position of this lens was not as standardized.
Ciro Flexes are pretty common for a 60+ year old camera, especially in the United States. At any given time theres always at least 20 or more for sale on eBay.
I had seen them come up for sale, but never really had much interest in a basic TLR after I already owned two other, much more advanced TLRs in the Yashica-Mat and Flexaret VII.
I mentioned at the beginning of the Repair section above that my mom and aunt found this camera at a local antique store and asked if I would have any interest in it. I figured for $20 what the heck, I might as well give it a chance.
During the restoration, my mom seemed to take an interest in my progress. She knew I liked old cameras and I remember once when I was little, she took a photography class at a local college, so there was some part of her that probably found this stuff cool too.
As I worked on the camera, I grew to like it more and more. This is not the first time that my interest in an old camera increases after I got it, but by the time I was done, I was really eager to get out and shoot with this camera. I wanted to shoot the first roll with my mom, so it took a couple of weeks for us to coordinate a time, but finally in late September, we went over to their house for dinner and I brought the camera with a roll of Kodak Portra 160.
My Results
I was more nervous to see the results of this camera than any other camera in my collection. Perhaps it was due to the massive amount of work I put into it, but a small part was to make my mom proud. Whatever the case, I was pleased to get my scans back from Dwayne’s Photo and see that most of the pictures came out really nicely.


The Wollensack triplet is very sharp in the center. Frankly, I dont see a huge difference in sharpness compared to other medium format TLRs I own. By the edges, the lens does exhibit some blur and slight chromatic aberration. Its nowhere near as bad as the meniscus lens on my Argus 75, but its definitely more pronounced than on the Yashica-Mat or Flexaret TLRs I own.
Frankly, I feel as though this lens performs exactly how it should. The Ciro Flex was never intended to be a top of the line camera. When Rodolphe Stahl set out to make his new camera, he referred back to German TLRs like the Rollei and tried to bring a similar style of photography to America for a much lower price.
I’d say that his goal was definitely met. The Ciro Flex does not have many advanced features, but what it does, it does well. The camera has a capable shutter and lens and is easy to use. If you want amenities like a smooth helical focus, double exposure prevention, automatic frame counter, or an aluminum body, you are going to have to spend more on something else. But in terms of ‘bang for the buck’ that will still get you very respectable shots, this is definitely it.
Its a shame that more American companies didn’t succeed in making quality cameras throughout the rest of the 20th century. While sure, I love many of my German and Japanese cameras, I do feel a bit of patriotic disappointment that most American camera companies gave up by the end of the 1950s.
If you ever have an opportunity to pick up a Ciro-Flex or any of its variants, do it. The Model F is the top of the line model, but based on my experience with the Model D, I feel as though any of them will not disappoint you.
| My Final Word | The Ciro-Flex is a classic example of a mid century American made TLR. Many cameras were made by many companies all over the world with specs similar to these. The body is made of steel, and it lacks many advanced features of higher end TLRs, but that doesn’t mean its still not capable of great shots. Ciro-Flexes are not particularly valuable and are still relatively easy to find making them a great bargain for someone looking to get into medium format film, TLRs, or both. Another plus is that they’re pretty easy to repair, so even if you find one in rough shape, it shouldn’t take much effort to get it working again. | ||||||
| Images | Handling | Features | Viewfinder | Feel & Beauty | History | Age | |
| 1 | 1 | 0 | 1 | 1 | 1 | 40% | |
| Bonus | none | ||||||
| Final Score | 7.0 | ||||||
Additional Resources
http://camera-wiki.org/wiki/Ciro-flex
https://ohiohistory.wordpress.com/2010/01/07/ohios-camera/
http://rick_oleson.tripod.com/index-76.html
http://www.lomography.com/magazine/219235-the-serious-ciro-flex-type-d
http://theartofphotography.tv/episodes/188-ciroflex-tlr/
http://web.archive.org/web/20150513071228/http://pheugo.com/cameras/index.php?page=ciroflex
https://www.flickr.com/photos/photoplastic/albums/72157610643512173
https://simonhawketts.com/2017/04/27/ciro-flex-tlr-shutter-strip-down-and-service/
Wow, what a great review. I am going to try to repair one of these, and this is a big help. And I found it heart warming as well.
I would like to date my father-in-laws Graflex 22 but have not seen any photos of this particular camera. I can send you photos if you have the time to help. On the lens itself it has the word ‘Century’, 85mm, f/3.5, Graftar. Woolensak for Graflex, synchromatic.
Another camera he had was a NO.1A pocket kodak. Not sure when made. Trying also to answer the questions, were either of these used during WWII?
Thanks for any help you can provide.
I love your reviews and blog, but this is one of those rare instances where I feel you may be a tad unfair to the camera in question.
I have a Ciro-Flex Model C, with the same Wollensak triplet but the Rapax nine speed shutter. I also have the Ansco Automatic Reflex, and for me there is absolutely no contest: the Ciro-Flex has been the superior camera for me.
I am curious as to why you gave the Ansco higher marks for image quality? The images from any post-war Ciro-Flex, provided they were shot at a similar shutter speed, should be nearly identical to those on the Ansco. In fact, one might expect them to be ever so slightly sharper in the corners on the Ciro-Flex given the slightly longer focal length (~2 mm).
In terms of actual use, I find my Ciro-Flex much, much easier to use than the Ansco. The film advance issues that plague most of the surviving Anscos have been enough to relegate mine to a shelf. The Ansco is prettier though, and more feature laden…. when they decide to behave.
Hi Ben, thanks for the kind words! Regarding my rating for the Ciro, compared to the ANSCO Reflex, keep in mind that these reviews were published nearly 3 years apart, so my opinions sometimes do change over time. For what it’s worth, I do really like the Ciro Flex and have had the ability to handle others since writing that review. I agree with you that it is a really good camera, and on paper, should compare well with other TLRs of the day. My preference for the ANSCO Automatic Reflex also comes from the fact that the example I shot was in perfect working order, whereas the Ciro, despite my best efforts to get it working again, had some issues. I have shot many cameras with Wollensak shutters and lenses and know they’re capable of great shots. Maybe one day I’ll revisit the Ciro Flex review as my thoughts likely would be a little different today than back in 2015! 🙂