

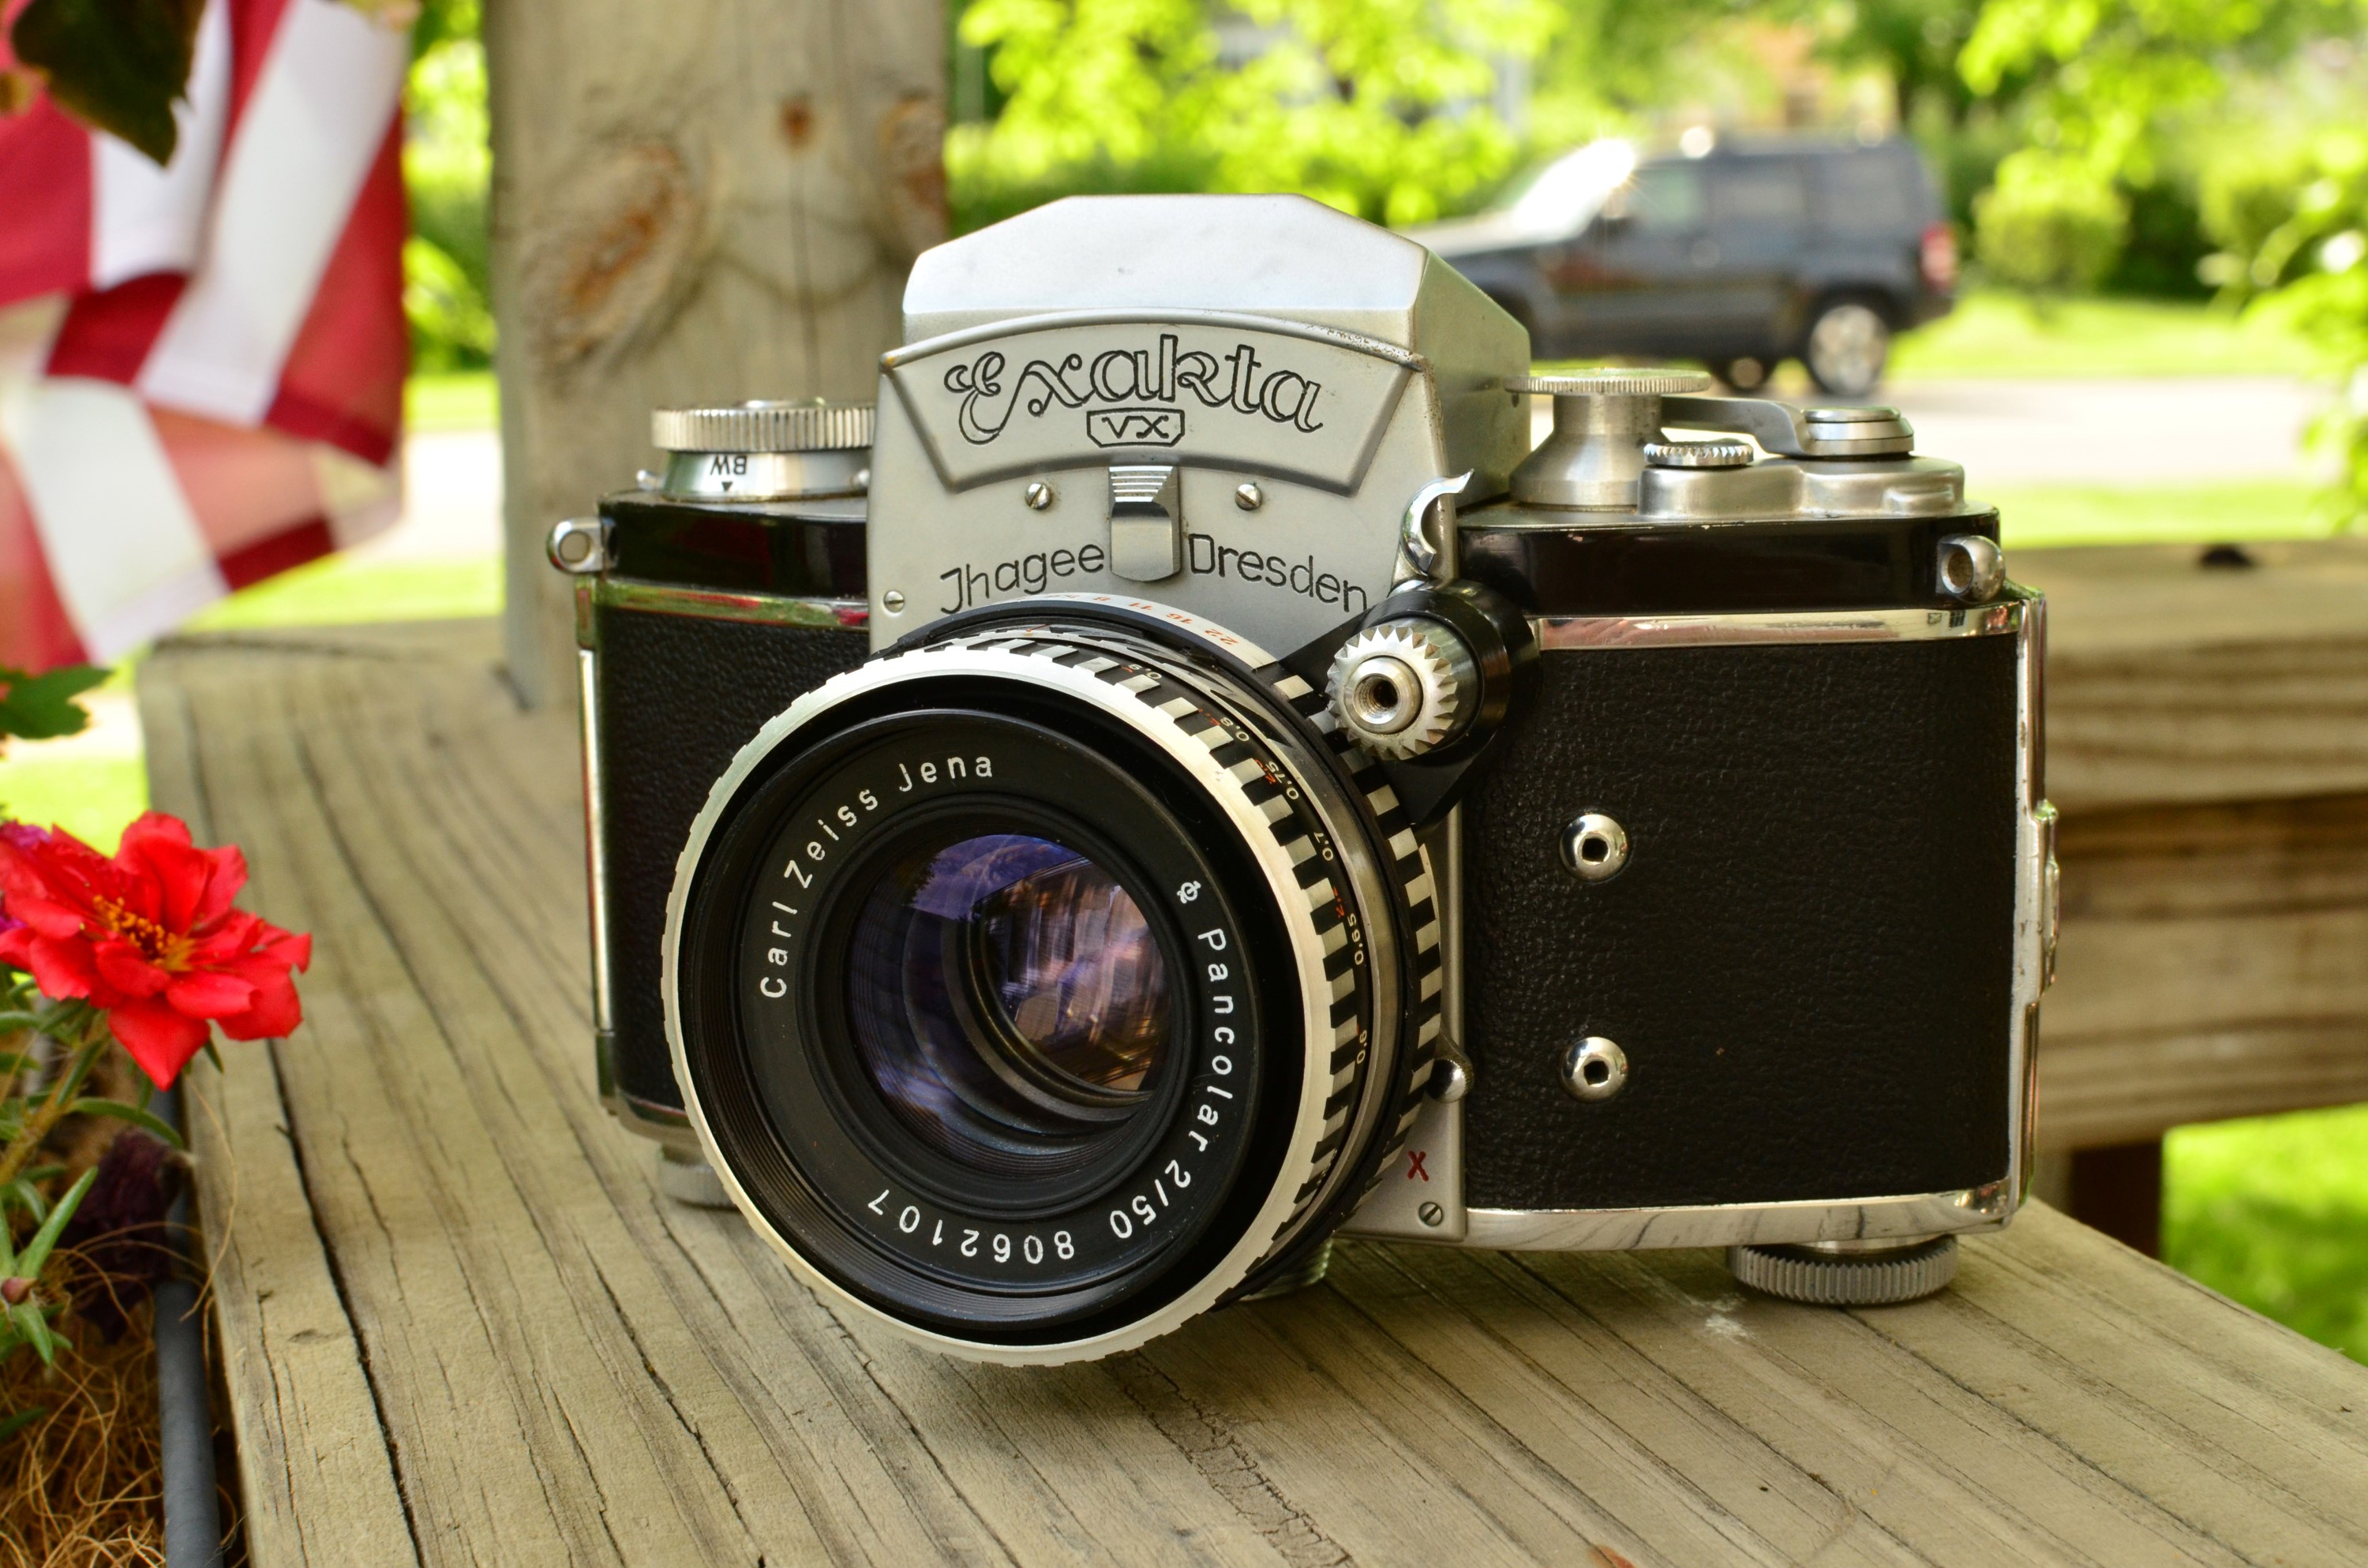
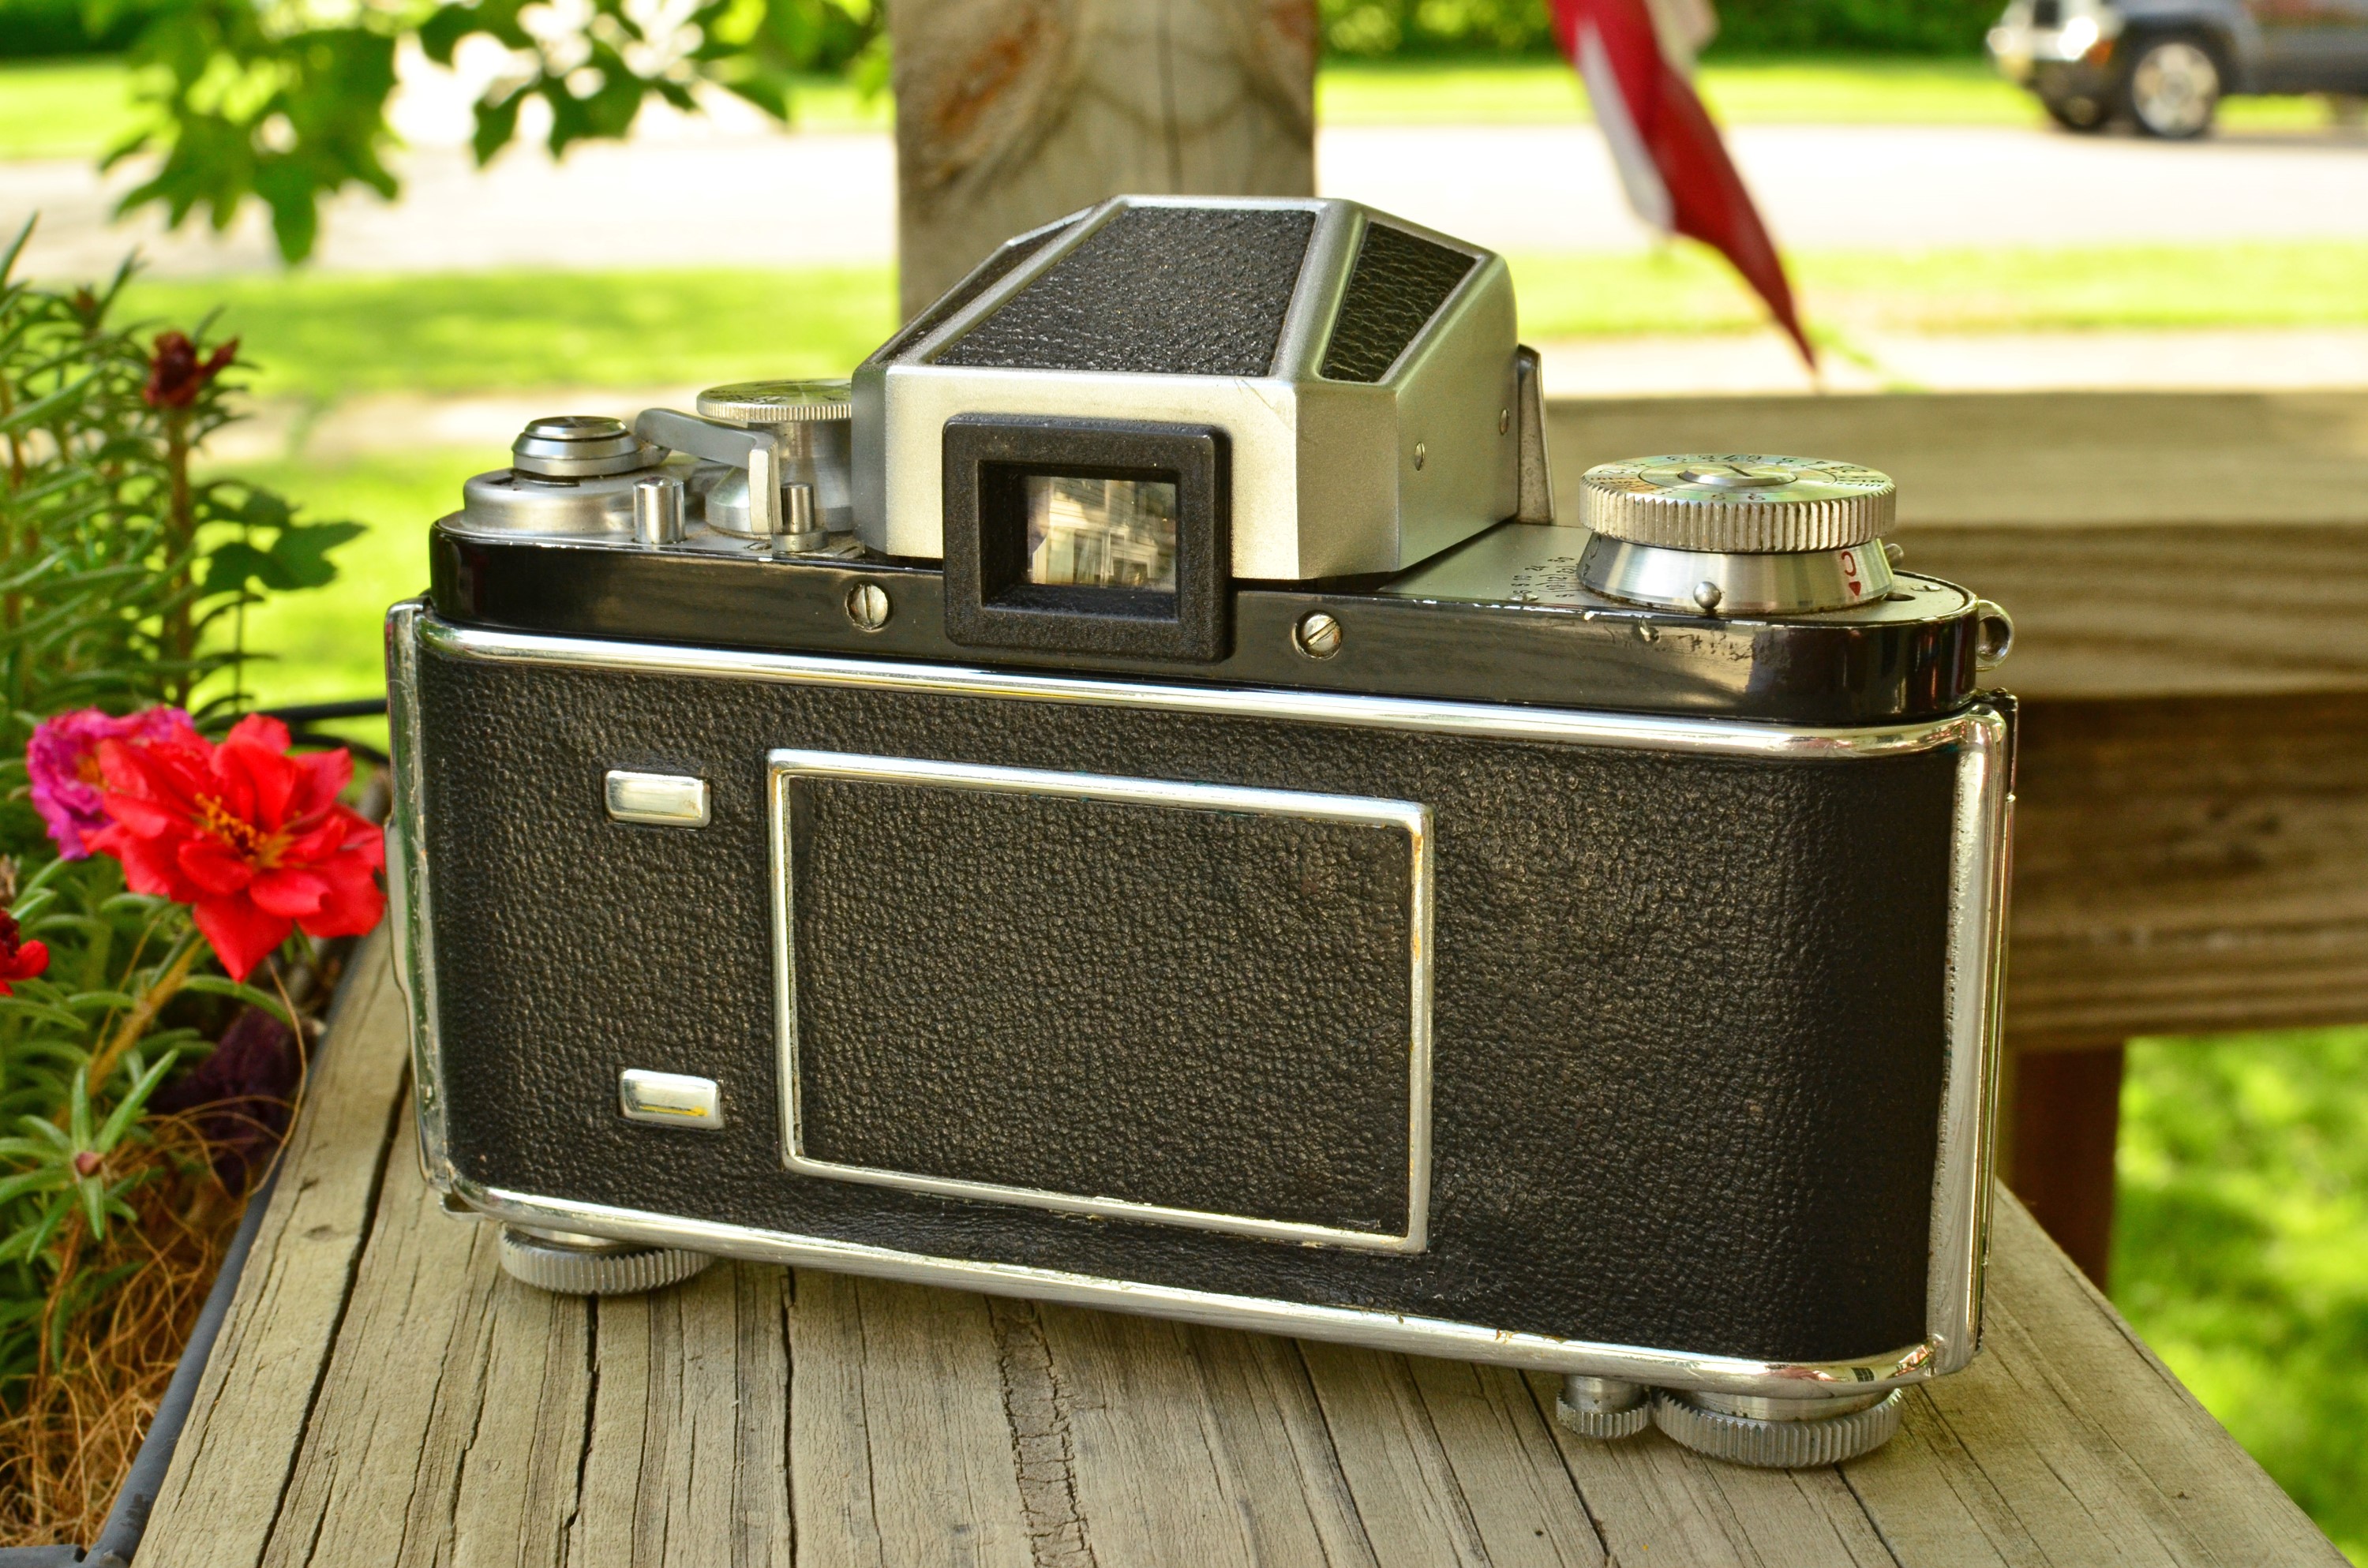
This is an Exakta VX 35mm SLR made in 1954 by Ihagee Kamerawerk based out of Dresden, Germany. The Exakta was in production from 1933 through 1970. The Exakta was notable as being the first ever Single Lens Reflex camera for both 127 roll film (1933), and 135 format 35mm film (1936). It was also the first camera to have a wind on lever (1934), and the first camera to ever have a shutter activated flash socket (1935). At one time, the Exakta line was the most popular line of SLR cameras in the world. It would eventually lose ground to Japanese marques like Nikon and Canon in the early 1960s.
 Film Type: 135 (35mm)
Lens Mount: Exakta Bayonet Mount
Lenses: 50mm f/2 Carl Zeiss Jena Pancolar Coated 6-elements
Focus: Removable SLR Prism
Shutter: Focal Plane Cloth
Speeds: T, B, 12 – 1/1000 seconds
Exposure Meter: None
Battery: None
Flash Mount: M X Flash Sync
Weight: 918 grams, 594 grams (body only)
Manual: http://www.cameramanuals.org/exakta/exakta_vx_3.pdf
History
There have been no less than 21 camera manufacturers based out of Dresden, Germany, and another 4 more if you count nearby Freital. Why are there so many companies all in the same area working on camera manufacturing? Perhaps there is something in the water, or Dresden’s long history as capital city of Saxony. Perhaps Dresdenites just really, really like taking pictures of stuff. I’ve never found a reason why so many different companies were clustered in such a small area, but nevertheless, you cannot even begin to start collecting old cameras without running into at least half a dozen Dresden based cameras right off the bat.
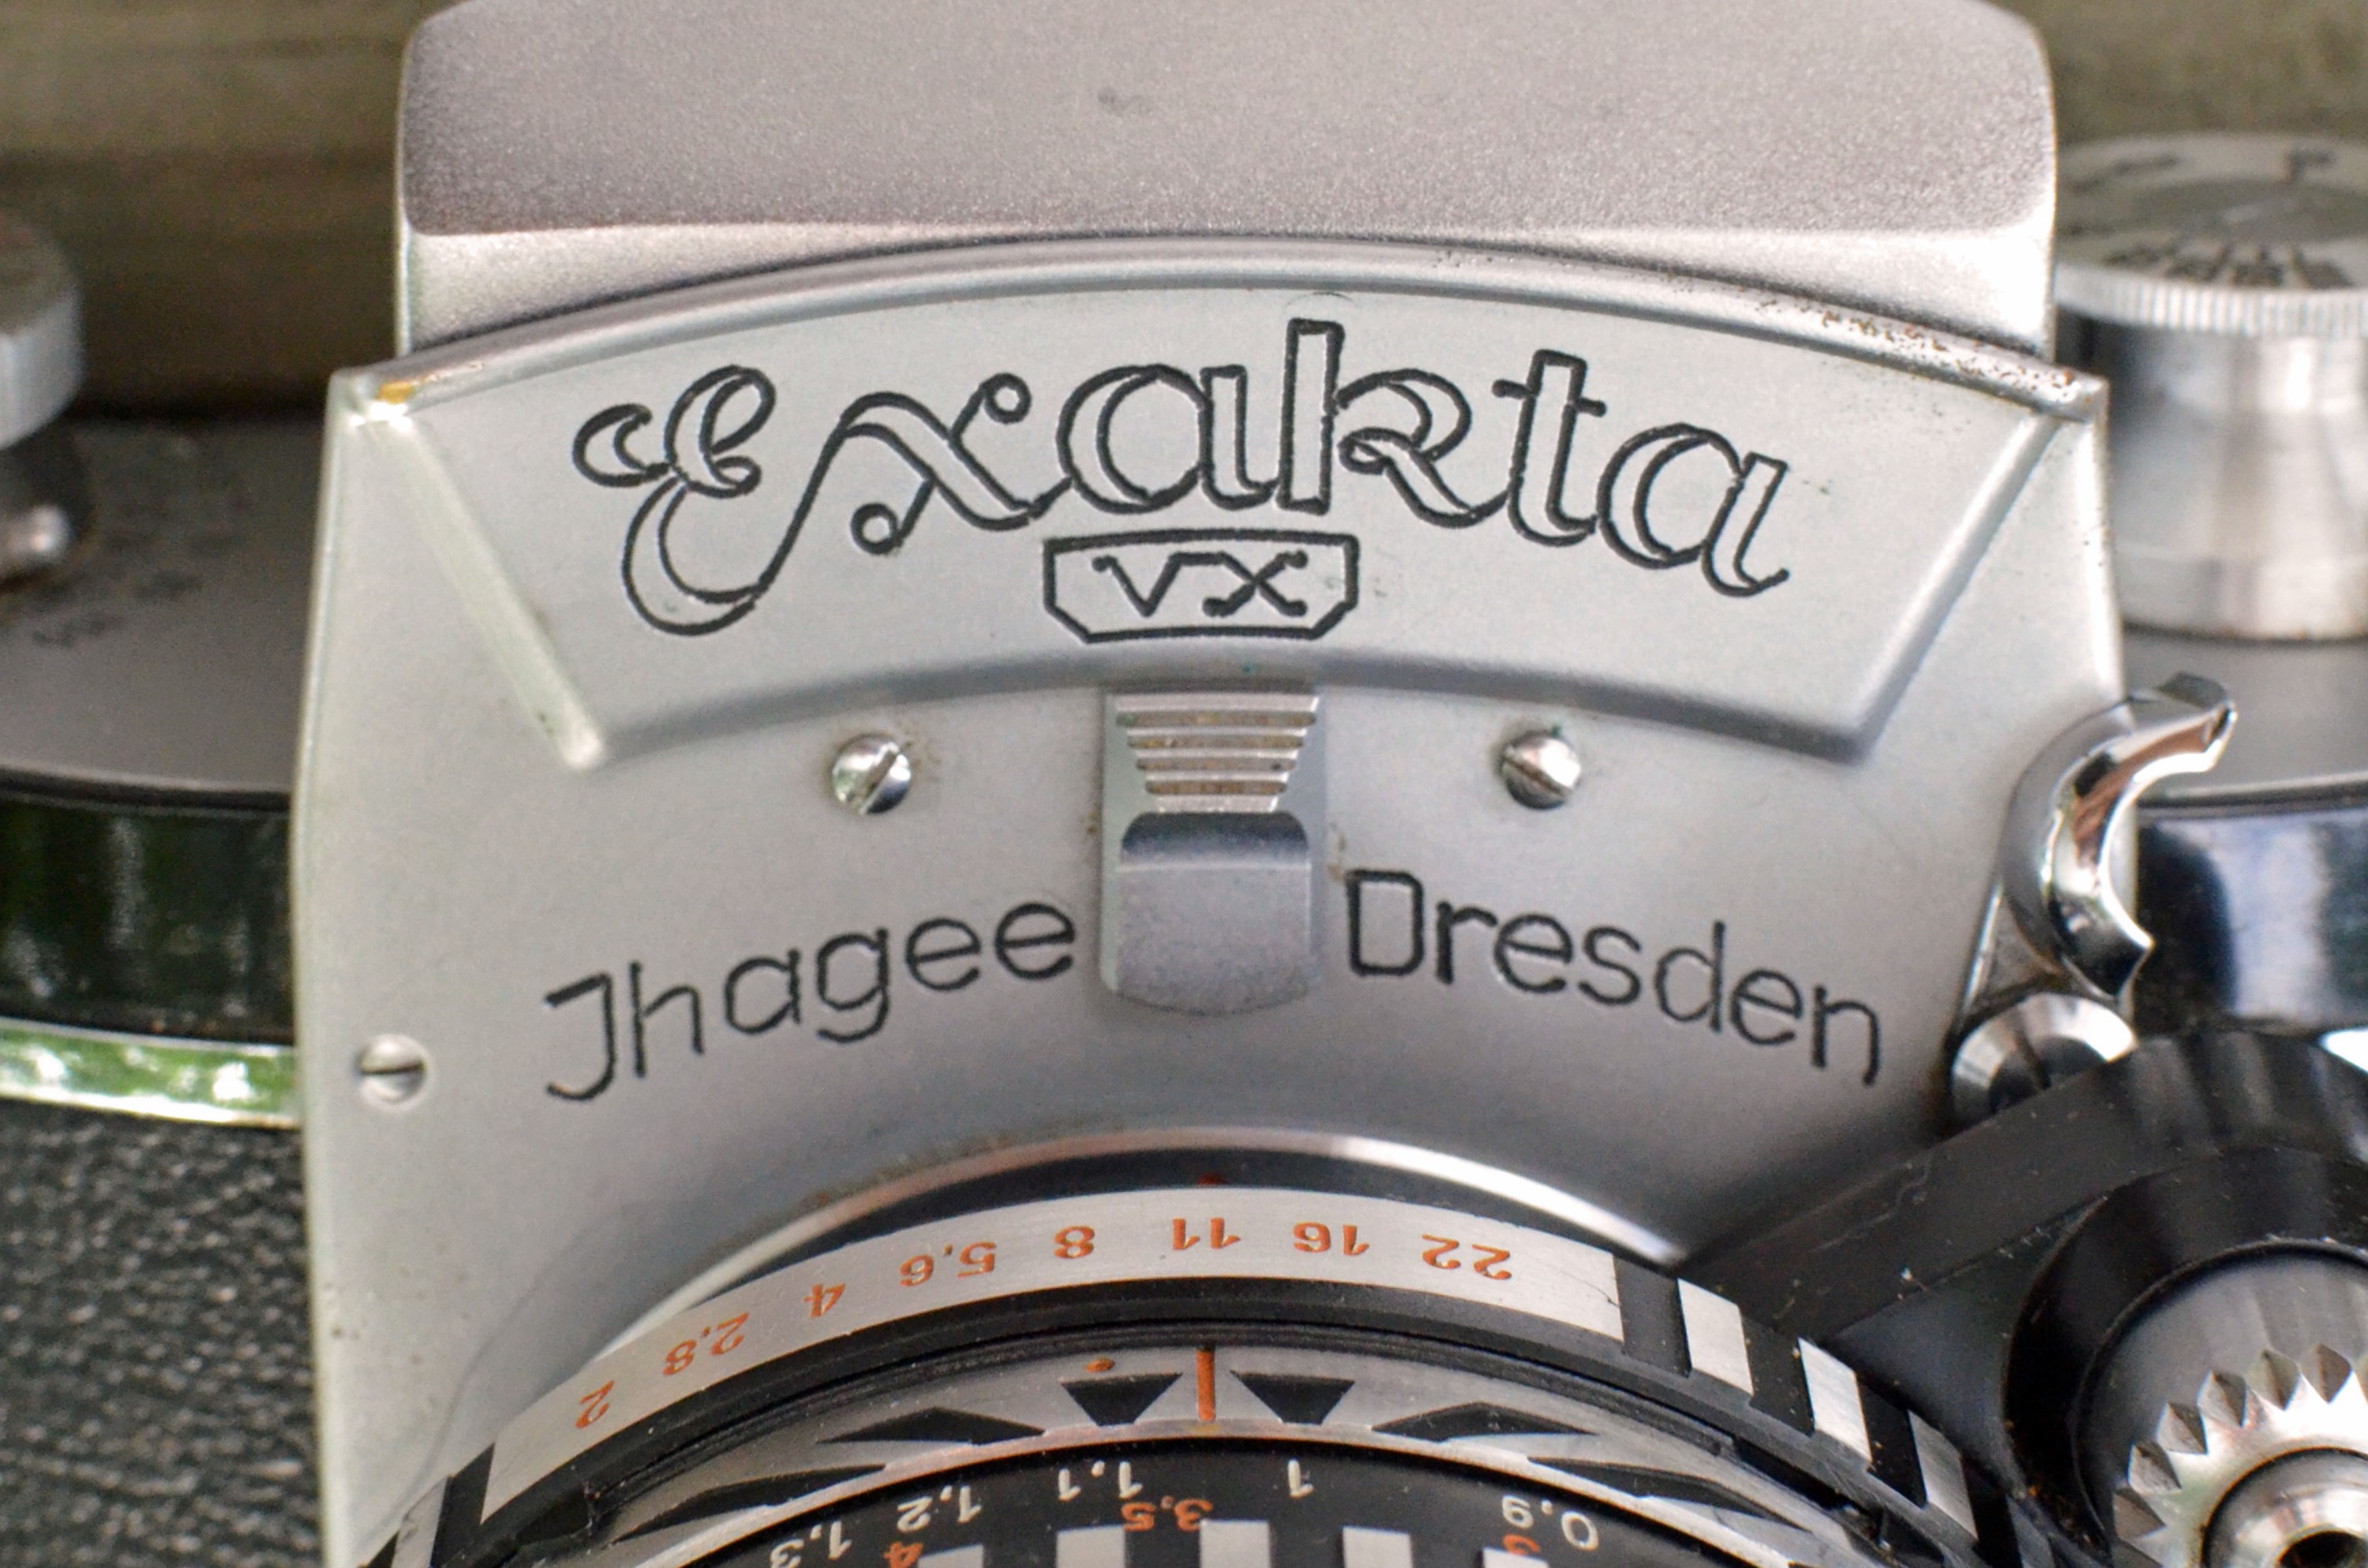
Ihagee was founded in 1912 by a Dutchman named Johan Steenbergen as Industrie-und Handelsgesellschaft which stands for Industry and Trade Society. Often referred to by the nickname IHG, the company name was eventually shortened to Ihagee Kamerawerk since Ihagee is pronounced the same in German as saying “I H G”. I should point out that contrary to how it appears, there is no “J” in Ihagee. Many people incorrectly list this company as Jhagee.
In the early years, Ihagee produced a variety of plate and roll film cameras, but interestingly, I was not able to find a lot of information or any pictures of these early designs. One article mentions models sold under the names Photorex and Coronoa, but then that same article goes on to say that many of these early Ihagee cameras were not labeled with a name. Perhaps the lack of any identifying name is why it is difficult to find any conclusive information about early Ihagee models. Despite this lack of information, the company seemed to be successful as it saw tremendous growth through the 1920s and expanded its factory a couple of times.
In 1933, Ihagee made its first splash in the camera industry releasing its first “miniature” camera which they caled the Exakta. This first Exakta took 4cm x 6.5cm images on 127 roll film and was the world’s first Single Lens Reflex camera. In 1936, Ihagee would release a new camera designed for the new 135 format 35mm film, which was called the Kine Exakta. The word “Kine” was short for the word “cine” or “cinema”, and never appeared on the camera itself, but was used in literature to differentiate the 35mm film version from the original 127 roll film Exakta.
Designed by Ihagee’s resident engineer, Karl Nüchterlein, the Kine Exakta contained several advancements that hadn’t been achieved by camera makers of the time such as a magnified ground glass for easier focusing, a lever for advancing film, a shutter activated flash socket, and a quick change bayonet lens mount. Nüchterlein was ambitious and had a design for electric TTL (Through The Lens) metering which he submitted in 1939. World War II would come and get in the way of this patent being a reality, and by the time Ihagee could get back on their feet after the war, the Japanese company Topcon had beat them with the first electric TTL meter.
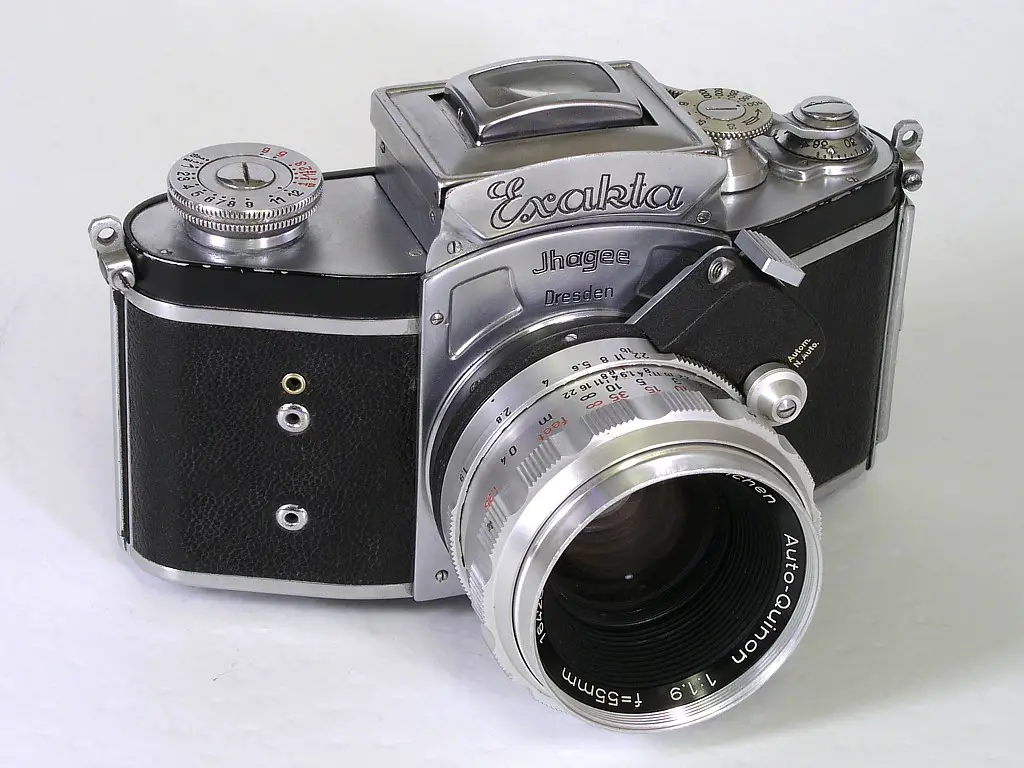
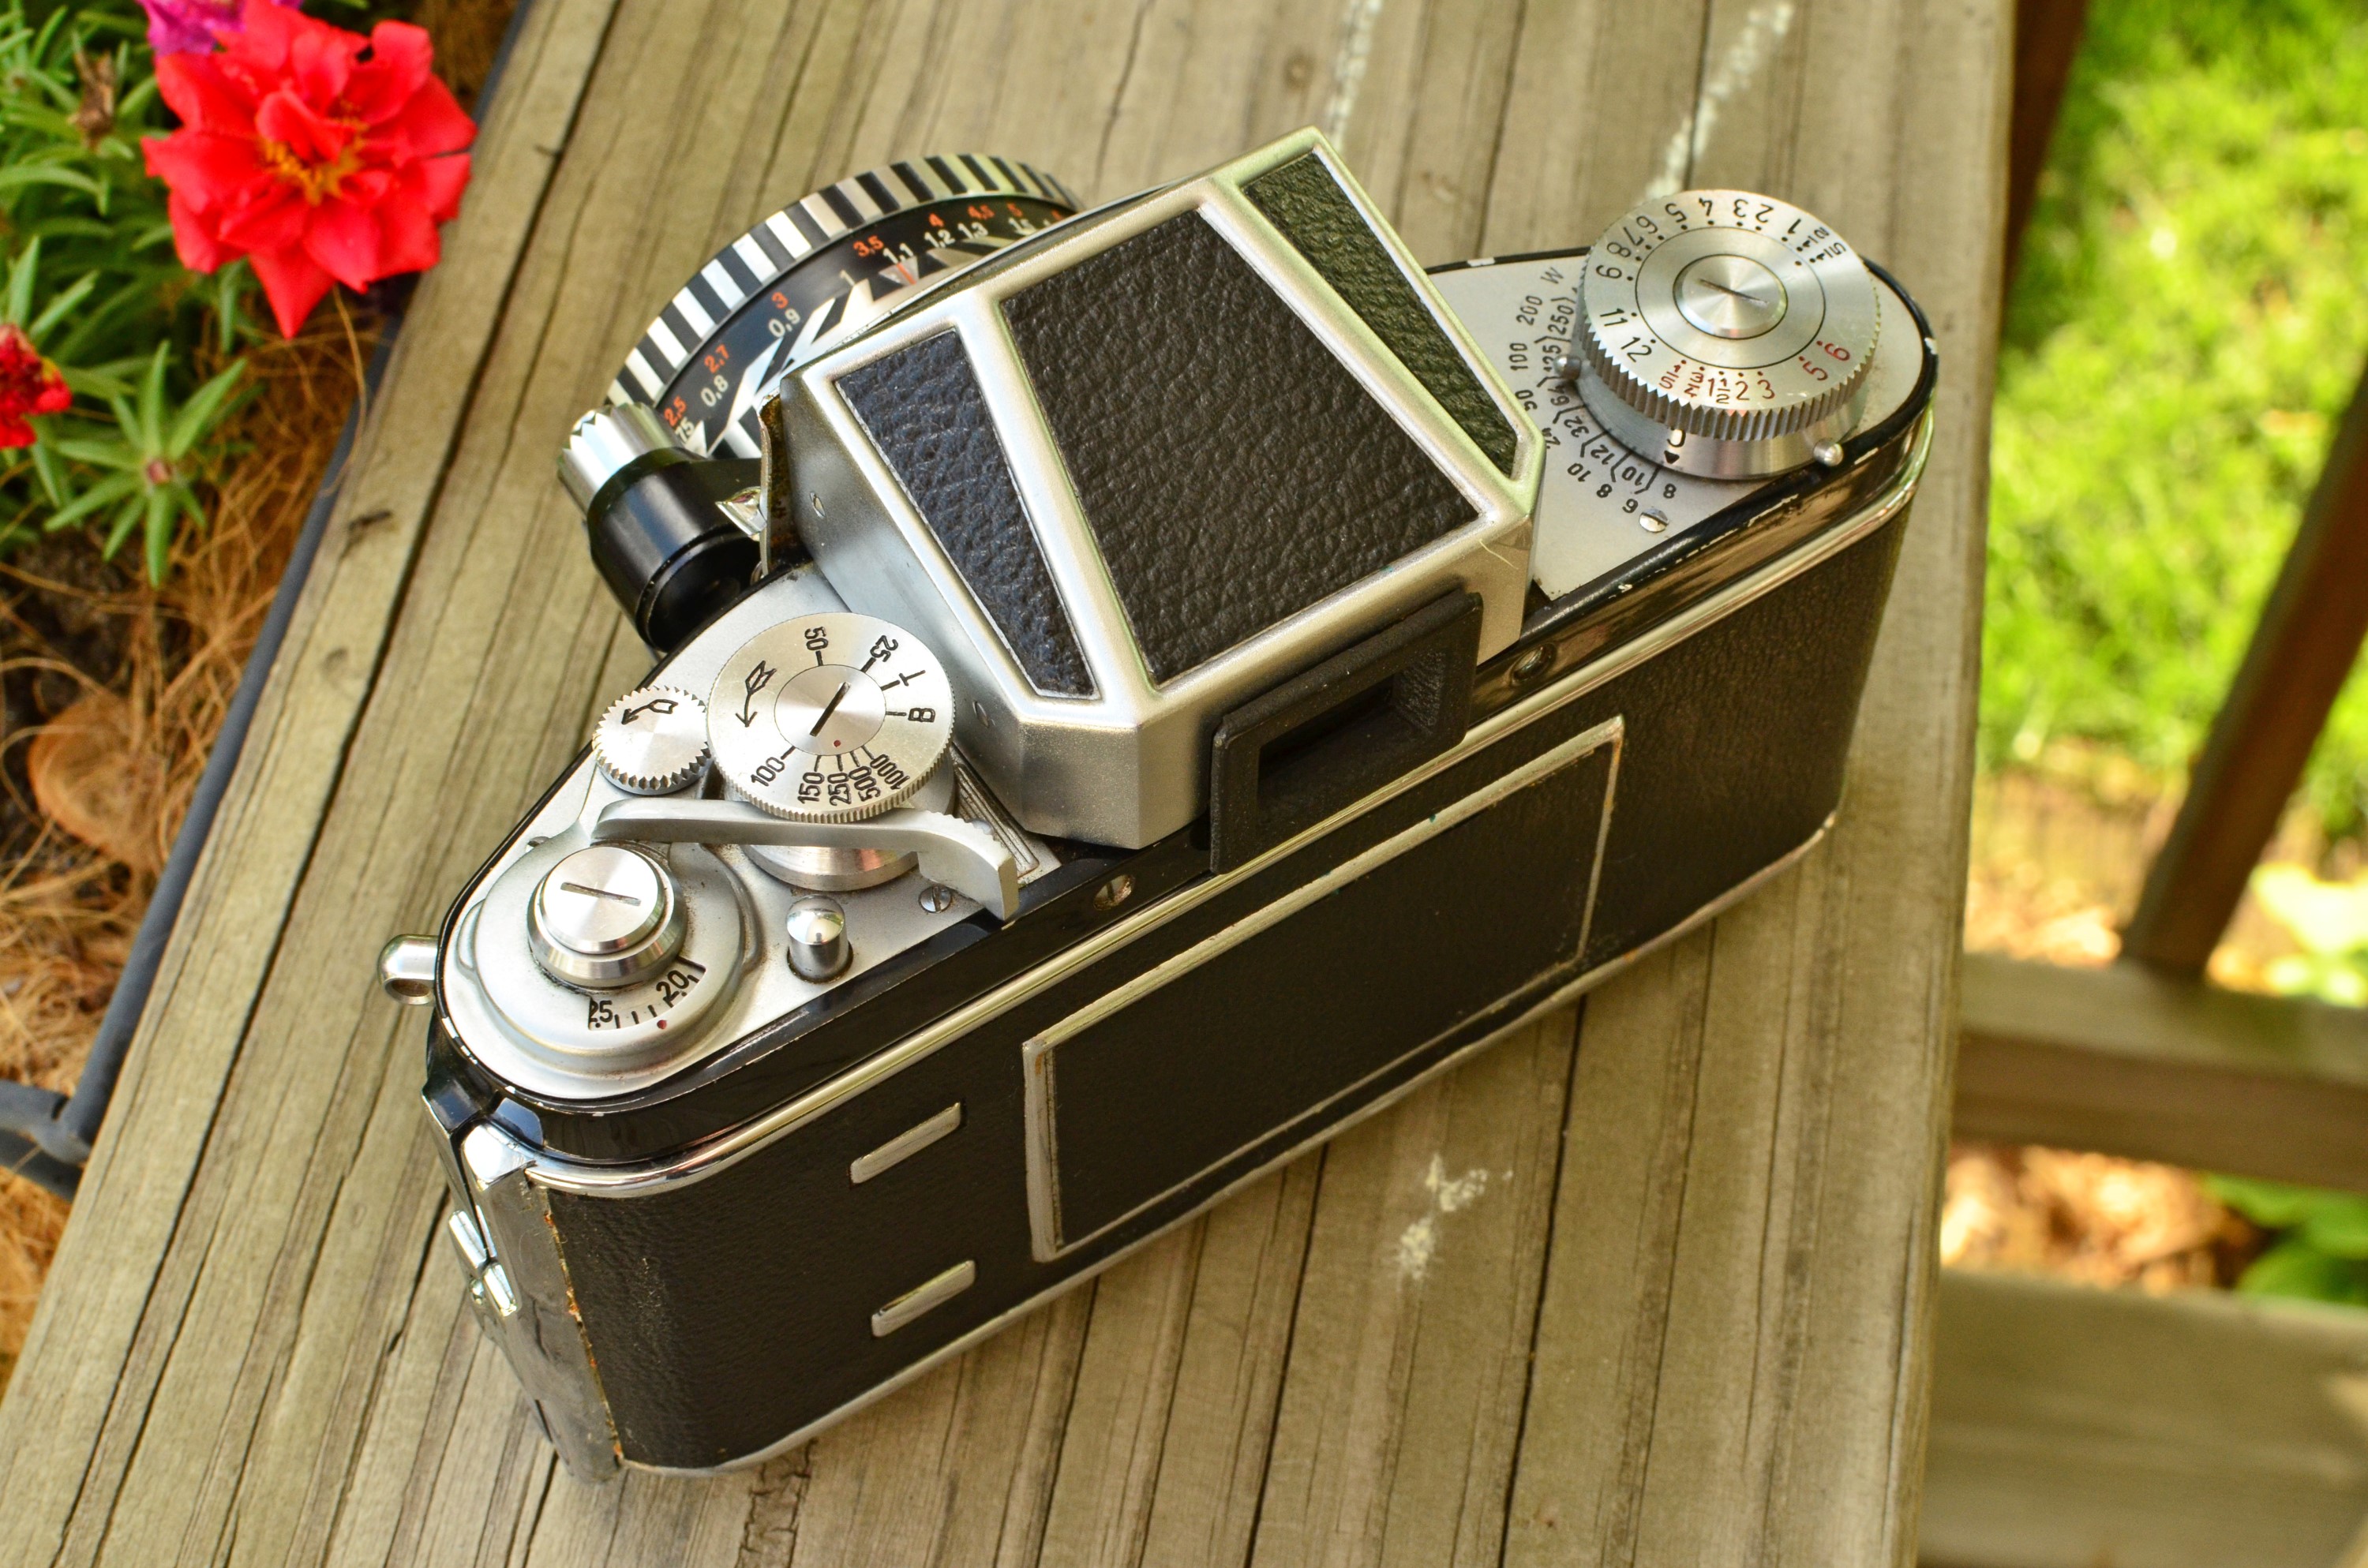
Although the Exakta is an SLR, the design of the camera has many differences from later SLRs that followed it. The most obvious is that almost all of the controls, including the film advance and shutter release, are on the photographer’s left side of the camera. This left hand design was retained throughout the entire production run of Exakta cameras and it’s variants up until the 1970s.
The lever wind on the Exakta has an extremely long travel of about 300 degrees which makes it a bit awkward to use. Although it is possible to wind the camera in one smooth motion, it requires a re-positioning of your hand in order to do it successfully. On the plus side, the movement of the lever not only advances the film, but it also lowers the reflex mirror and cocks the shutter, which was typically a 2 step process on other cameras of the time.
Another interesting feature of the Exakta is that the 13 second self timer also functions as a delay for long shutter speeds. Typically, shutter speeds of 1 second were about as long as could be achieved on most cameras. With the Exakta’s unique self timer / delayed shutter mechanism, the photographer could select shutter speeds as long as 12 seconds without having to use a Bulb or Timed mode.
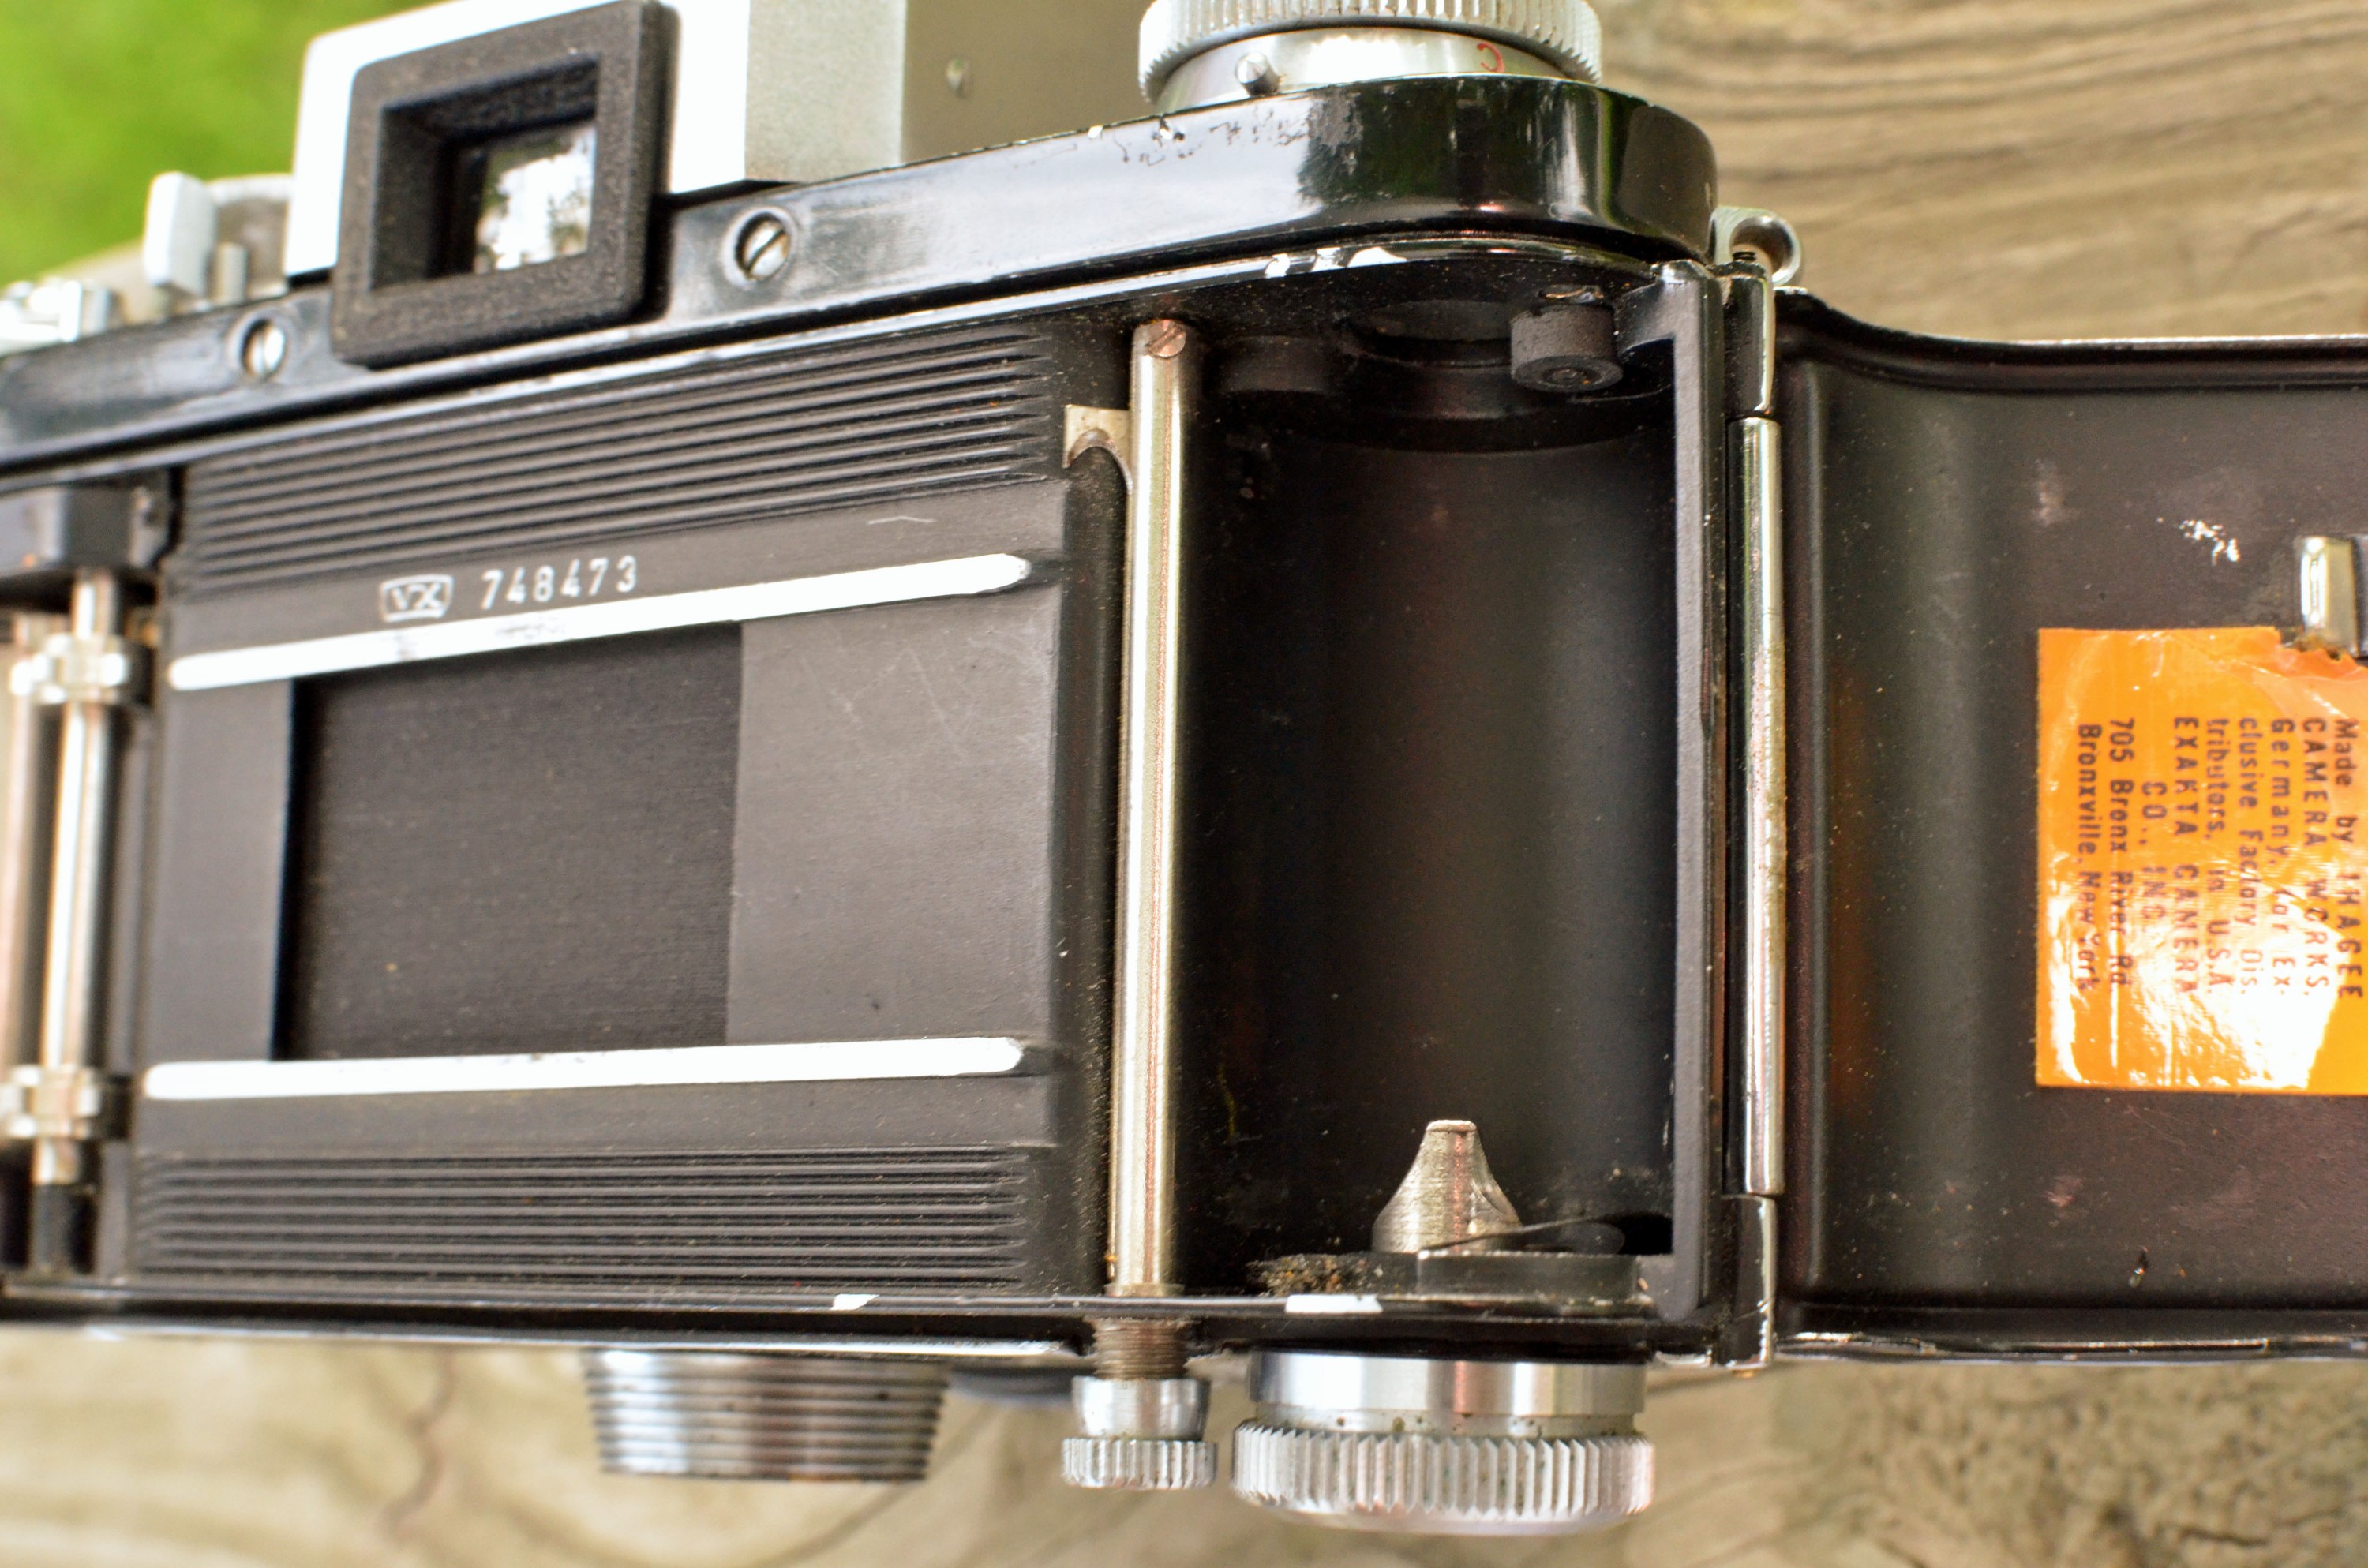
Finally, one last feature that was unique to the Exakta was that the body was designed for a cassette to cassette film transport. Unlike pretty much every other 135 format 35mm SLR ever made, you could optionally install film cassettes on both the film and take-up sides of the camera. When you would finish a roll, the exposed film would already be in a cartridge, so there was no need to rewind. A standard take-up spool could also be installed on the take-up side, but then you’d have to rewind an exposed roll. This cassette to cassette system allowed for another unique feature which was the ability to expose part of a roll, and then using an integrated razor blade that could be activated without opening the camera, slice through the unfinished roll and then remove only the exposed parts of the roll without destroying the unexposed part of the roll. It’s a very cool concept, but I cannot find much evidence that this was a commonly used feature. Still, it showed the level of design and engineering that Nüchterlein had put into this camera.
After production of the Kine Exakta resumed after the war, the design remained very similar to that of the pre-war versions although for some reason, the spelling of the name was changed to Exacta on many examples.
In 1949 the Exakta II was released, and other than a couple very minor body variations, a slightly revised frame counter, and a lever for rewinding film, there didn’t seem to be much of a difference between an original Exakta and the Exakta II.

The real magic didn’t come until 1950 when the Exakta Varex was released. The big deal with the Varex name was that the waist level viewfinder was removable and in its place an optional pentaprism eye-level finder could be installed. You can easily tell a Varex from a non Varex model by the presence of the release lever on the front nameplate of the camera. This was significant as it meant that the Exakta could be used in both waist-level and eye-level configurations. It wouldn’t be until Nikon’s F in 1959 that interchangeable viewfinders would become a popular option.
Over the course of the next decade, the Exakta would receive many incremental upgrades and changes. It wouldn’t be until the Exakta Varex IIb from 1963 – 1967 where more than a year or two would go by without any changes. Like many pioneering cameras of the mid 20th century, there have been many attempts by a variety of people to classify the different variants of a model. Although these were never officially recognized by the factory, they aide collectors in identifying which model they have and how old it is. The model in my collection is a v4.2 model from 1953 – 1955. Exakta was very good about keeping serial numbers in sequential order. My serial number of 748483 is right in the middle of production of v4.2 models, meaning it was most likely made sometime in 1954.
Around 1960, the design of the Exakta changed slightly, and the camera had a newly redesigned name plate with a capitalized bold spelling of EXAKTA. Later in the 60s, the design of the camera continued to change, and some of the older, lesser used features began to disappear.
Finally in 1969, a camera called the Exakta RTL 1000 was sold by Pentacon who now owned Ihagee which retained the Exakta name, but was a completely different model which looked nothing like the original.
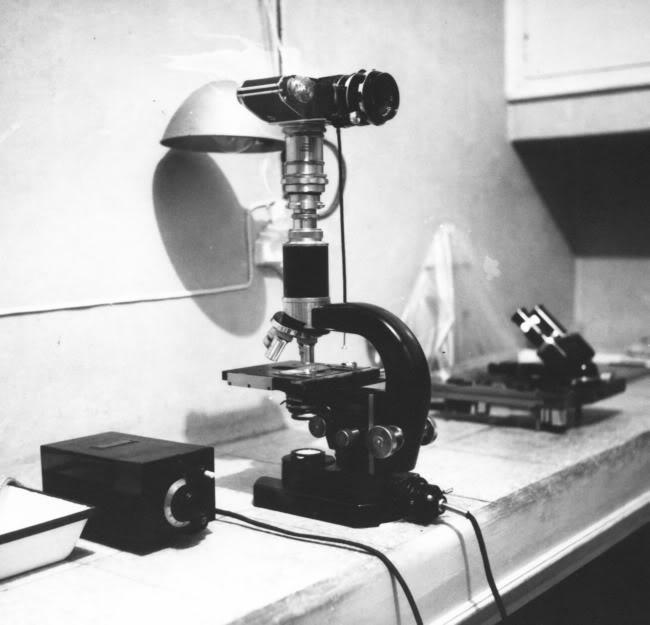
The advanced features and incredible flexibility of the Exakta line made it appealing to a variety of professional and amateur photographers. The camera was used in science, space, and medical applications. Over 800,000 were made between 1936 and 1970 meaning that there are still many available on the used market.
Its worth noting that around 1950, Ihagee released a more simplified version of the Exakta called the Exa which lacked many of the advanced features such as the top 1/1000 shutter speed, self timer/delayed shutter dial, and razor blade. The Exa was in production from 1950 to around 1962, and is not counted in the total production numbers of Exakta cameras.
Today, Exakta cameras are still very popular with collectors, both because of the wide variety of models, interesting looks and ergonomics, and the quality lenses available. Although the Exakta was a hugely successful model, Ihagee never made their own lenses. They often used Carl Zeiss built lenses, but there was a huge selection of all different focal lengths made by many different companies. Even the Exakta bayonet mount was used by on the Japanese Topcon SLR made by Tōkyō Kōgaku.
My Thoughts
As I’ve grown past the initial list of cameras I was interested in when I first started this hobby, I’ve learned about more and more models. The Exakta had a huge role in the history of cameras in the 20th century and its impossible to have a collection without one. Knowing that they are very highly regarded and often came with expensive Zeiss lenses, meant that many of them were out of my reach. It took a while to find one at a suitable price for me to bid on. My particular model was a bit of an ugly duckling in that it was pretty dirty and the back leather was peeling off. Looking through the pictures on eBay, it seemed like everything was repairable, so I set my max bid and was thrilled when I won.
As expected, the camera needed a lot of cleaning. Another problem it had, which is very common with these old German lenses was that the original lube inside of the lens had dried up and the focus adjustment was very tough to move. Too tough to comfortably use while shooting the camera. I knew this was one issue I would need to address. As for the rest of the camera, I cleaned it up with my usual suite of Q-tips, rubbing alcohol, and the occasion dab of nail polish remover.
The back leather was in tact and had some visible Zeiss bumps, which are green mounds of corrosion that form behind leather where a brass rivet is located. Using a flat precision screwdriver, I was able to scrape back the leather enough to clean off the Zeiss bumps. To do this properly, you are supposed to apply a drop of clear nail polish on top of the rivets to prevent this from happening again. Since I wasn’t removing the entire leather, I decided to skip that and just clean it as best as I could and then recover it.
I used generic contact cement which is fine, but many people feel safer with name brand Pliobond. In my mind, its all the same, and I’ve had luck with the generic stuff on other projects, so I used it. I used Q-tips with small dabs of wet contact cement and brushed it on the back of the leather and pressed it into place. I used green painters tape over the back leather of the camera to keep the leather in position while the contact cement dried. I wish I had taken pictures of this process, but I didn’t. Its pretty self explanatory though. When it was all done, I honestly can’t say its prefect, but its considerably better than it was. You can see signs of the leather being distressed at certain angles, but at a passing glance, you would never notice, plus the bumps are gone.
As for the stuff focus, I had to partially disassemble the back of my lens. My Exakta came with a Carl Zeiss Pancolar 50mm lens with an automatic aperture (which means I can focus my lens at maximum aperture, and as soon as I press the shutter release, the lens stops down the aperture to the desired aperture size – this is also called a preset lens). I am told that lenses without the automatic aperture do not require as much disassembly in order to lube them. Since the Exakta was not internally designed to allow for automatic opening of the aperture there is an additional assembly and supplemental shutter button on the lens itself which triggers the aperture when the shutter is fired.
Again, I didn’t take any pictures of this process, but since lubing the lens is particular to my specific lens and there are literally hundreds of choices for the Exakta, its unlikely that many people reading this review with have my same exact lens. All I’ll say is that it was pretty simple. I only needed a precision flat head screwdriver, some flat wood tooth picks, some Ronsonol lighter fluid, and some white lithium grease from the auto parts store. Never ever try to lube a lens with WD40, graphite powder, or any kind of liquid oil because no matter how hard you try, the lube will get into places you didn’t intend it to, and you’ll most likely do more damage than good.
I disassembled the back of the lens until I could see the helicoid. You can’t get to the entire helicoid without completely taking apart the lens, but I saw enough of it to be able to dab it with some Ronsonol soaked Q-tips and repeatedly moving the focus back and forth. I did this 15-20 times until the lens was significantly easier to move. Once I was satisfied that I had soaked up as much of the old lube as I was going to get, I used my wooden toothpicks and put a very small dab (maybe the size of a single piece of Grape Nuts cereal) onto the helicoid itself and worked it in. I tried to get the lube in every area that was accessible and kept moving the focus back and forth until it had suitably spread around.
Once everything was lubed to my satisfaction, I put everything back together, tested operation of the lens, and mounted it to the camera. I will say that my partial disassembly was not as effective as a complete lens tear down, but I am neither qualified or willing to try a total tear down of this lens. Compared to a brand new Nikkor lens on my Nikon D7000, the focus is still stuff, but its definitely improved from where it was and on par with other vintage lenses I own.
So, after completing my usual cleaning of the camera and these minor repairs, I loaded in a roll of Kodak Max 400 and went shooting,
Using the Camera
I will tell you that shooting with this camera is definitely unlike any other camera in my collection. Although I’ve only gone through one roll, I can honestly say that I never got used to the left hand shutter release. The 300 degree wind lever is awkward to use because it can’t easily be done with the camera still to your eye. You need to lower the camera and re-position your fingers to do it effectively. Maybe with some practice I can get better at doing it quickly if needed.
The body of the Exakta is shaped like a trapezoid and is very angular. The front of the camera is not flat like on pretty much every other camera ever, and the angled parts on each side are where your hand grips the camera while shooting. Further adding to the challenge of handling this camera, it is made of all metal and is very heavy. Combine an awkward shape with a lot of weight, and it’s not outside the realm of possibility that you could lose your grip on this camera while shooting and drop it. I would highly recommend the use of some type of strap when using this camera. Like the left shutter release, this certainly isn’t a deal breaker, but it is something to keep in mind, and something that’s not completely obvious when looking at pictures of the camera.
I hesitate to call these complaints, because they’re the quirky qualities that make the camera fun and interesting to use. If I wanted a camera with perfect ergonomics, I have many other options to choose from.
On the plus side, I was really surprised that the viewfinder was bright and easy to use. I’m sure the bright Zeiss lens helped with that, but I have other cameras made much later with dimmer viewfinders. Also present is a split image rangefinder in the center of the focus circle. I much prefer this style of focus aide in an SLR over the microprism circle that was adopted by pretty much every Japanese maker since. Looking at my results, almost every shot was perfectly focused, so the viewfinder definitely did its job very well.
Neither a pro or a con, but this camera does not have an auto return mirror. This means that after firing the shutter, the mirror remains in the upright position, which blocks the viewfinder. You must wind on the lever to get the mirror to move into the “down” position which reflects light back up into the viewfinder. As a side note, if you were considering buying an Exakta from someone, it is plausible they might not realize that this is normal, and could list an otherwise good Exakta as being broken because they cannot see through the viewfinder.
The Exakta has a really wide range of shutter speeds, all the way from 1/1000 sec down to a full 12 seconds. This is pretty amazing considering most cameras of the era were limited to 1 second exposures without relying on a Bulb or Timed mode.
The shutter speed dial on the left side of the camera is used for speeds from 1/1000 sec down to 1/25 sec. If you want to go slower than that, you need to use the shutter delay dial on the right side of the camera.
This two dial system can be a bit confusing for many people. I had to read the manual several times to understand how it works, and even still, I’d probably need to read it again before using the camera.
If you plan on using this feature of the camera, I strongly advise you start reading page 8 of the Exakta manual which I have linked to at the top of this article, but in a nutshell, here is a summary of all its modes.
To set a slow shutter speed from 1/5 sec to 12 seconds:
- In order to use the shutter delay, you first must set the shutter speed on the left dial to either T or B mode.
- Firmly turn the shutter delay knob clockwise as far as it will go. This knob is very tight, so you do need to use a bit of strength to get it to move.
- Once the knob has turned as far clockwise as it will go, lift up the outer ring of the shutter delay knob and turn the outer ring so that any one of the black numbers from 1/5 sec to 12 seconds is lined up with the red dot in the center of the knob, and let it snap back into position. (I find it curious that there is no 1/10 sec setting on this camera. Also, I want to point out that the wording in the manual is confusing for this step. The manual specifically says “turn the outer ring until the speed selected is opposite the the red mark of the middle ring”. When they say “opposite” they really mean “next to”.)
- Once the chosen speed is selected, release the shutter as normal, and the shutter will remain open for as long as the black number you have selected.
To use the 12 second self-timer with a fast (1/1000 sec to 1/25 sec) shutter speed:
- Set the chosen fast shutter speed like normal using the shutter speed selector on the left side of the camera.
- Firmly turn the shutter delay knob clockwise as far as it will go. This knob is very tight, so you do need to use a bit of strength to get it to move.
- Once the knob has turned as far clockwise as it will go, lift up the outer ring of the shutter delay knob and turn the outer ring so that any one of the red numbers from 1/5 sec to 6 seconds is lined up with the red dot in the center of the knob, and let it snap back into position. When using a fast shutter speed, it does not matter which red number you select, as long as you pick a red one, and not a black one.
- Once you have set one of the red numbers, release the shutter as normal, and the camera will begin a 12 second countdown. Upon expiration of the self-timer, the shutter will be fired at whatever speed you have selected on the fast shutter dial.
To use both the 12 second self-timer with a slow shutter speed:
- First, set the shutter speed on the left dial to either T or B mode.
- Firmly turn the shutter delay knob clockwise as far as it will go. This knob is very tight, so you do need to use a bit of strength to get it to move.
- Once the knob has turned as far clockwise as it will go, lift up the outer ring of the shutter delay knob and turn the outer ring so that any one of the red numbers from 1/5 sec to 6 seconds is lined up with the red dot in the center of the knob, and let it snap back into position. Whichever red number you choose will correspond to how long the shutter will remain open after the 12 second self timer has expired. There is no way to use both the self-timer and a shutter speed longer than 6 seconds.
- Once you have set one of the red numbers, release the shutter as normal, and the camera will begin a 12 second countdown. Upon expiration of the self-timer, the shutter will be fired at whatever speed you have selected indicated by the red number on the shutter delay knob.
My Results
I should mention that previous to this Exakta, my last attempt at a pre-1970 SLR turned out to be a double bust. I had shot two rolls in my Miranda Sensorex only to find out that the camera has multiple issues that don’t have an easy fix. From the mirror periodically getting stuck, to the rear curtain capping the front curtain killing almost all of my exposures, plus my cloth focal plane shutter FED 2 from 1958 had also taken a dump on me earlier in the year, I was skeptical to how this camera would hold up. Leaf shutters generally can last forever as long as the springs don’t break, and they don’t get gooed up.
Cloth shutters, on the other hand can tear, rot, have holes, or break altogether. On one hand, this camera has an excellent reputation and appeared to be in great shape, but on the other hand, I’ve had a poor track record for old cloth shutter cameras.


Looking at the results from my first roll, I must say I was impressed. As I mentioned earlier, the bright and easy to use split image viewfinder helped me get almost every shot perfectly in focus. The Pancolar lens renders colors and light very naturally. If you look at the results posted above, the one of my neighbor’s house is almost 50/50 in bright sun and shade, yet the picture has almost perfect contrast. The yellow flowers are brightly colored, but not blown out, and the shadows of the greenery are not muddled in shade. Keep in mind that I was not using a professional film. This was basic Kodak Max 400 that I purchased on clearance from Adorama for $1.99 a roll.
The Exakta is a well regarded camera for good reason. Not only was it an influential design that was in production for over 30 years, but it had a lot of unique features that hadn’t yet appeared on any other camera. It has a distinct look and was well built. I don’t have any statistics of this, but from my limited research online and browsing eBay auctions, it seems as though many of these are still in good operating condition.
Like with any old camera, no amount of build quality can overcome the perils of time. Before considering an Exakta, check for the usual ailments, abuse, lens fungus and haze, torn or damaged shutter curtains, etc. Since there is no battery chamber, you don’t need to worry about any electronics or corrosion. This was a well built camera that is a lot of fun to use and produces great results. I cannot wait to use mine again!
| My Final Word | The Exakta is one of the prettiest cameras in my collection. It’s design is unlike any other camera, and has a unique set of features. Perhaps, its best feature is the Pancolar lens which renders shots with an incredible amount of beauty in history. This was the camera of choice before the Nikon F, and it has a huge amount of lenses, viewfinders, and other accessories available for it. While its ergonomics make shooting with it a challenge, therein lies some of its charm. This won’t be my go to camera often, but when I do use it, I know I’ll have a lot of fun and get great results out of it. | ||||||
| Images | Handling | Features | Viewfinder | Feel & Beauty | History | Age | |
| 2 | 0 | 2 | 1 | 2 | 2 | 30% | |
| Bonus | none | ||||||
| Final Score | 11.7 | ||||||
Additional Resources
https://en.wikipedia.org/wiki/Exakta
http://camerapedia.wikia.com/wiki/Exakta
http://quirkyguywithacamera.blogspot.com/2015/10/beautiful-and-bit-bizarre-exakta-vx.html
http://captjack.exaktaphile.com/
http://www.wrotniak.net/photo/exakta/ – This site is often down, so if you need it, you can access it at the Internet Archive web.archive.org
http://www.thecamerasite.net/01_SLR_Cameras/Pages/exacta.htm
It was the first system 35mm SLR, but the Russian “Sport” 35mm was the first SLR in 35mm. Graflex had, of course, been making l as the format SLRS up to 5×7 for many years
But check out Soviet Cameras here. It is admitted that series production was after the Exakta. Does a prototype qualify as “first” or when the camera is marketed?
http://www.sovietcams.com/index.php?-1201944481
The Sport will be found in the section “Early Soviet”.
Interesting info, David. I was aware of the Graflex SLRs, but not the RUssian “Sport”. I’ll have to look that one up! 🙂
Thanks for the write up. I’m presently working my way through my first few rolls of an Exakta VX and have been very impressed with it so far. Maybe it helps that I’m left handed, but I don’t find the quirks to be much of an issue!
I had an uncle who used an Exakta up until the late 60’s to take Kodachromes. Not sure what model. He probably bought this used some time after WWII. How much to you think he may have payed for a camera like this in the 40’s? Must have been a pretty good chunk of money at the time.
It’s really hard to say what he might have paid as there was a huge selection of different Exakta models, viewfinders, and lenses available. I don’t have any pricing information from the 1940s, but in 1956, an Exakta VX with pentaprism viewfinder and the 58/2 Zeiss Biotar sold new for $392, which when adjusted for inflation, is like $3610 today. Even if he bought it new and with a lesser lens, he likely paid the equivalent of well over $1000 in today’s dollars. These things weren’t cheap! 🙂
I’ve just received my first Exacta VX v1. It is truly a beauty….but takes a while to learn all it’s charms!
I have a VX v2, like yours, on the way, and can’t wait.
Thanks for the thorough review!
Thanks for an excellent review.Glad you figured the self timer out ,it would have taken me a while
Just won one of these on eBay, can’t wait to try it.
The copyright issue with the Varex name in the USA was due to Argus, they had called the triplet lenses on the Argoflex ‘Varex” around 1941 so they had copyright.
Mike, in view of the lengths you go to to compile your excellent reviews, it may sound churlish to pick you up on a comment you made when discussing the aperture setting on your Pancolar. What a lovely lens this is, by the way. (I have 3) You describe it as a “pre-set” lens. This is not strictly correct. It’s an FAD lens.
Aperture control arrangements went through four stages of development. The earliest lenses even for slr cameras were the basic aperture setting ring which closed down to the desired aperture, clearly not very practical with reflex viewing. Stage 2, was the real pre-set diaphragm arrangement where there are two aperture rings, both manual. First, the desired aperture is set as normal on one ring, with the second ring physically controlling the diaphragm which is free to rotate in any direction from wide open to, and this is the pre-set nature of these lenses, the selected aperture. In sales literature of the 1950’s and even into the 1960’s one will find this type of lens with PD marked with the listing.
Stage 3 was very short lived and was referred to as “semi-automatic”. With this lens, a spring is used to close the diaphragm down automatically to the pre-set aperture. In use, the diaphragm was first “cocked” via a lever on the lens and this permitted open aperture viewing, and the diaphragm was triggered via the camera’s shutter release which activated a pin to extend from the camera body to trip the diaphragm just before the shutter fired. Importantly, the diaphragm didn’t open after the shot was taken, hence “semi-auto”.
I have two lenses of this type, a Canon f1.9/50 and a Mamiya f2.8/100. They were both made for the first model Mamiya Prismat, hence the same diaphragm arrangement.
A neater implementation will be found on some Jena f2/58 Biotars. I have a version in M42 screw with a conventional release pin on the rear of the lens. But the aperture setting and spring release haven been combined into the single aperture ring at the front of the lens. The fact that this is a semi-auto lens isn’t discernible simply by looking at it; indeed seeing the pin release made me think at first the lens was broken.
Stage 4 are lenses we are more used to today. These employ fully auto diaphragms (FAD) which both close down and open under spring tension. The combined shutter release and diaphragm trigger fitted to most Exakta lenses is an FAD design, the only difference being the diaphragm and shutter release is activated on the lens instead of an internal pin or lever inside the camera body.
An interesting analysis. Admittedly, when I first wrote this article back in 2015, I had less of an understanding of the different types of lenses. The concept of semi automatic diaphragms and preset lenses confused the hell out of me. Even today, I have to stop and think a bit before using some of these old lenses to remember how to use them. Have you ever used a Super Canomatic lens from the original Canonflex series? That is a preset lens with two different aperture rings, similar to the preset Helios lenses.
Mike, I realised when posting how old the post is, and you will have clearly picked up a lot of knowledge since. Still, I thought it would still be useful for newbies to film and classic cameras as technical information never goes out of fashion for old photographic gear.
No, I’ve not used a Canomatic lens but, funnily enough as a youngster just starting out with the hobby, the new Canonflex cameras were what I lusted after, particularly the R2000, but were way, way out of my reach. I still think that that styling is a statement, even today.
Mike, I hope I’m not too late in posting this, but have only today read your excellent review of the Ihagee Exakta Varex.
My first SLR was an EXA 2a bought in 1962, and retired (broken) this year. It came with a Zeiss Tessar lens which is still working perfectly.
Since then I have added a Varex 2a and a VX1000, plus a couple of lenses, all in regular use.
I mainly take landscape pictures in black & white using mild wide angle lenses. My favourite combination is the Varex 2a body fitted with the waist level viewfinder and a Schacht Travegon R f3.5/35mm lens. The waist level finder is extremely bright, clear, easy to focus and allows the taking of low level photographs without lying prone in the mud, an unavoidable hazard here in Scotland. The Schacht Travegon R has a nifty mechanical depth of field indicator, is made to a very high standard, and is also pretty sharp.
Even after the passage of more than fifty years the Exakta Varex 2a is a work of art with loads of functional beauty. Handling it, you are aware of the engineering quality and attention to detail. Call this over engineering if you like, but I love it, including the built in knife which I have never used.
Hello Mike I just read this article today I wanted to say how great it was. I really liked the carnival pictures. They look like they could have been taken in the 1950s
I lucked into a Varex that had been recently serviced so the shutter curtain looked new and everything worked. I also wound up with a really beat up older example but had a biotar lens and penta prism finder. I found the waist level finder almost impossible to use but but the prism finder really transformed the camera.
Of note about Dresden. It was a massive center for ceramics going back hundreds of years and naturally they moved into glass production, which led to lens production, which led to cameras to use the lenses on. Super interesting city that suffered terribly in World war II unfortunately. But lots of camera makers and lensmakers were in Dresden and the surrounding areas.
Thanks for the feedback, Eugene. This is a rather old article, and looking through it, I definitely would like to update it, or create an all new Exakta article. Stay tuned! 🙂
Mike, you raised many interesting questions. I recently happened upon this great (small) book in PDF form that will answer most, if not all, of these questions and other points. This will provide a deep dive for you and others reading about this storied series of cameras, including the early Ihagee plate and roll film cameras. http://www.exaktacircle.org/Books/ihgmen&cam.pdf
Great resource Doug! This Exakta review is one of my earliest ones on the site and is in need of an update! Perhaps this year I’ll get to a new Exakta review! 🙂
It might interest your readers to know that the Exakta VXiib is largely the same mechanically as this camera and the VX (Varex)iia with the exception that the iib changed to the modern shutter speed table of ⅛, 1/15, 1/30, 1/60, 1/125, 1/250, 1/500, and 1/1000. This makes it more practical to use with smartphone light meter apps which follow that same table. I have a VXiib with a Zeiss Biotar 58mm f2 and I get a huge kick out of shooting with it. The results are razor-sharp with a very pleasing color balance. Again, great review!
Great article. I have the VX-IIA Varex (unmarked as such) #899356 with two notable exceptions. It has a 50mm F2.0 Exaktar lens, which presumably is a manufacturer rebranded lens. It has an interchangeable Travemat light meter eye level finder. I have always been impressed with the mechanical build quality of this camera and its total quirkiness.
Yes, I believe the Exaktar lenses were made by Cosina. The lenses for the Ihagee West Exakta Twin TL and Twin TL 42 were made by Cosina.
In 1955 I was transferred to Germany. I was a photo equipment repairmen. I knew, that at time, German cameras we’re probably the best in the world. I had experimented with 35mm as teenager. Knew that was the way I wanted to go. Set my eye on an Exacta VX. Since was made in Dresden East Germany, they were a little difficult find in West Germany.
Finally sourced one. Bought it. Came with a Guess Jena 2.8. Added some filters and other accessories. Since it had X synchronization I added one of first electronic flashes. Traveled a lot, it was my go to camera. Came home with many boxes of color slides. Used it well into the 1960s . It was a workhorse!