|
Argoflex Forty (Argus 40) Cleaning the Viewfinder
back vintage cameras index home | |
|
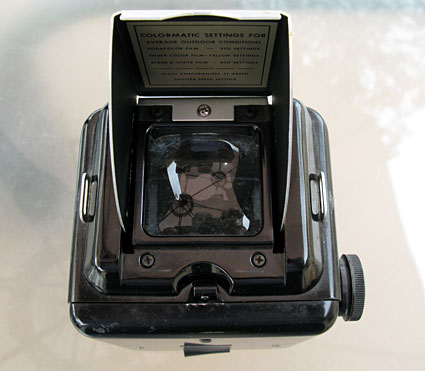
The viewfinder in the Argoflex Forty is easy to service, but it is helpful to have some idea of what things look like before starting disassembly.
Start by opening the hood. Remove the silver screw shown here at the top center of the viewfinder. Then, remove the two corner screws at the bottom. There is no need to remove the two screws in the upper left and right corners; they hold the hood unit together and it will keep things much simpler if you leave them in place. Now, take out the two silver screws on the face plate under the main lens in order to free up face plate and facilitate removal of the hood assembly. Close the hood. Insert a screwdriver blade under the back edge of hood assembly to lift it slightly. Then, gently lift the hood assembly back and up to remove it. Be careful not to manhandle the parts in this process as you don't want to bend the soft sheet metal out of shape. |
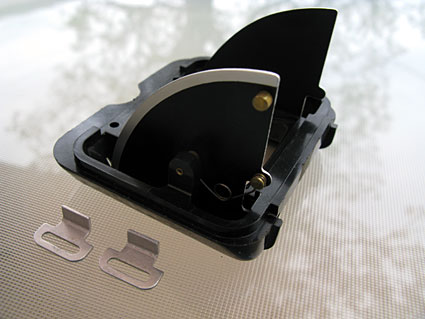
| The hood assembly is out and turned over on its top. When you removed it, the two silver strap brackets will likely have fallen into the spaces at the sides of the mirror from where they are easily retrieved. |
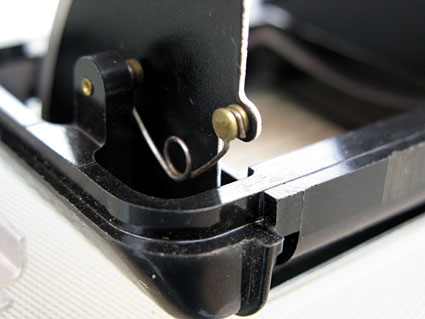
| Note the placement of the spring which snaps the hood into its up and down positions. If the spring should pop off while you are handling the assembly, it is easily replaced by pushing the hooked ends back onto the little brass spool ends. |

| With the hood assembly off, the massive lens is revealed which gives the finder its brilliance. The lens is square and symmetrical, so you do not need to worry about preserving its orientation when you remove it for cleaning. |
|
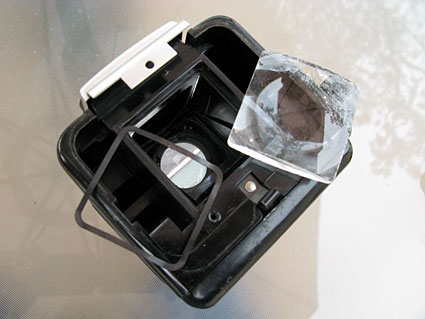
Taking out the big lens and the spring gasket allows access to the inner surfaces of the front viewfinder lens and the mirror surface for cleaning. I use a bent q-tip with some lens cleaning fluid on it to clean the back side of the viewfinder lens surface. You may have to resort to something stronger like lighter fluid if there is fungus or other contaminants on the lens or mirror.
Start reassembly by replacing the spring gasket and the big, square lens. Close the hood and replace it on the top of the camera, sliding the hood frame underneath the silver tab of the front plate. You will need to wiggle things around a bit to get the assembly to move in over the big lens. Before you replace any screws, lift up the back side of the hood assembly and insert the strap brackets on each side. Now, replace the silver screw at the top, the two long black screws at the bottom, and the two screws you took out of the lower front of the face plate. That's all there is to it. |
|
back vintage cameras index home | |