

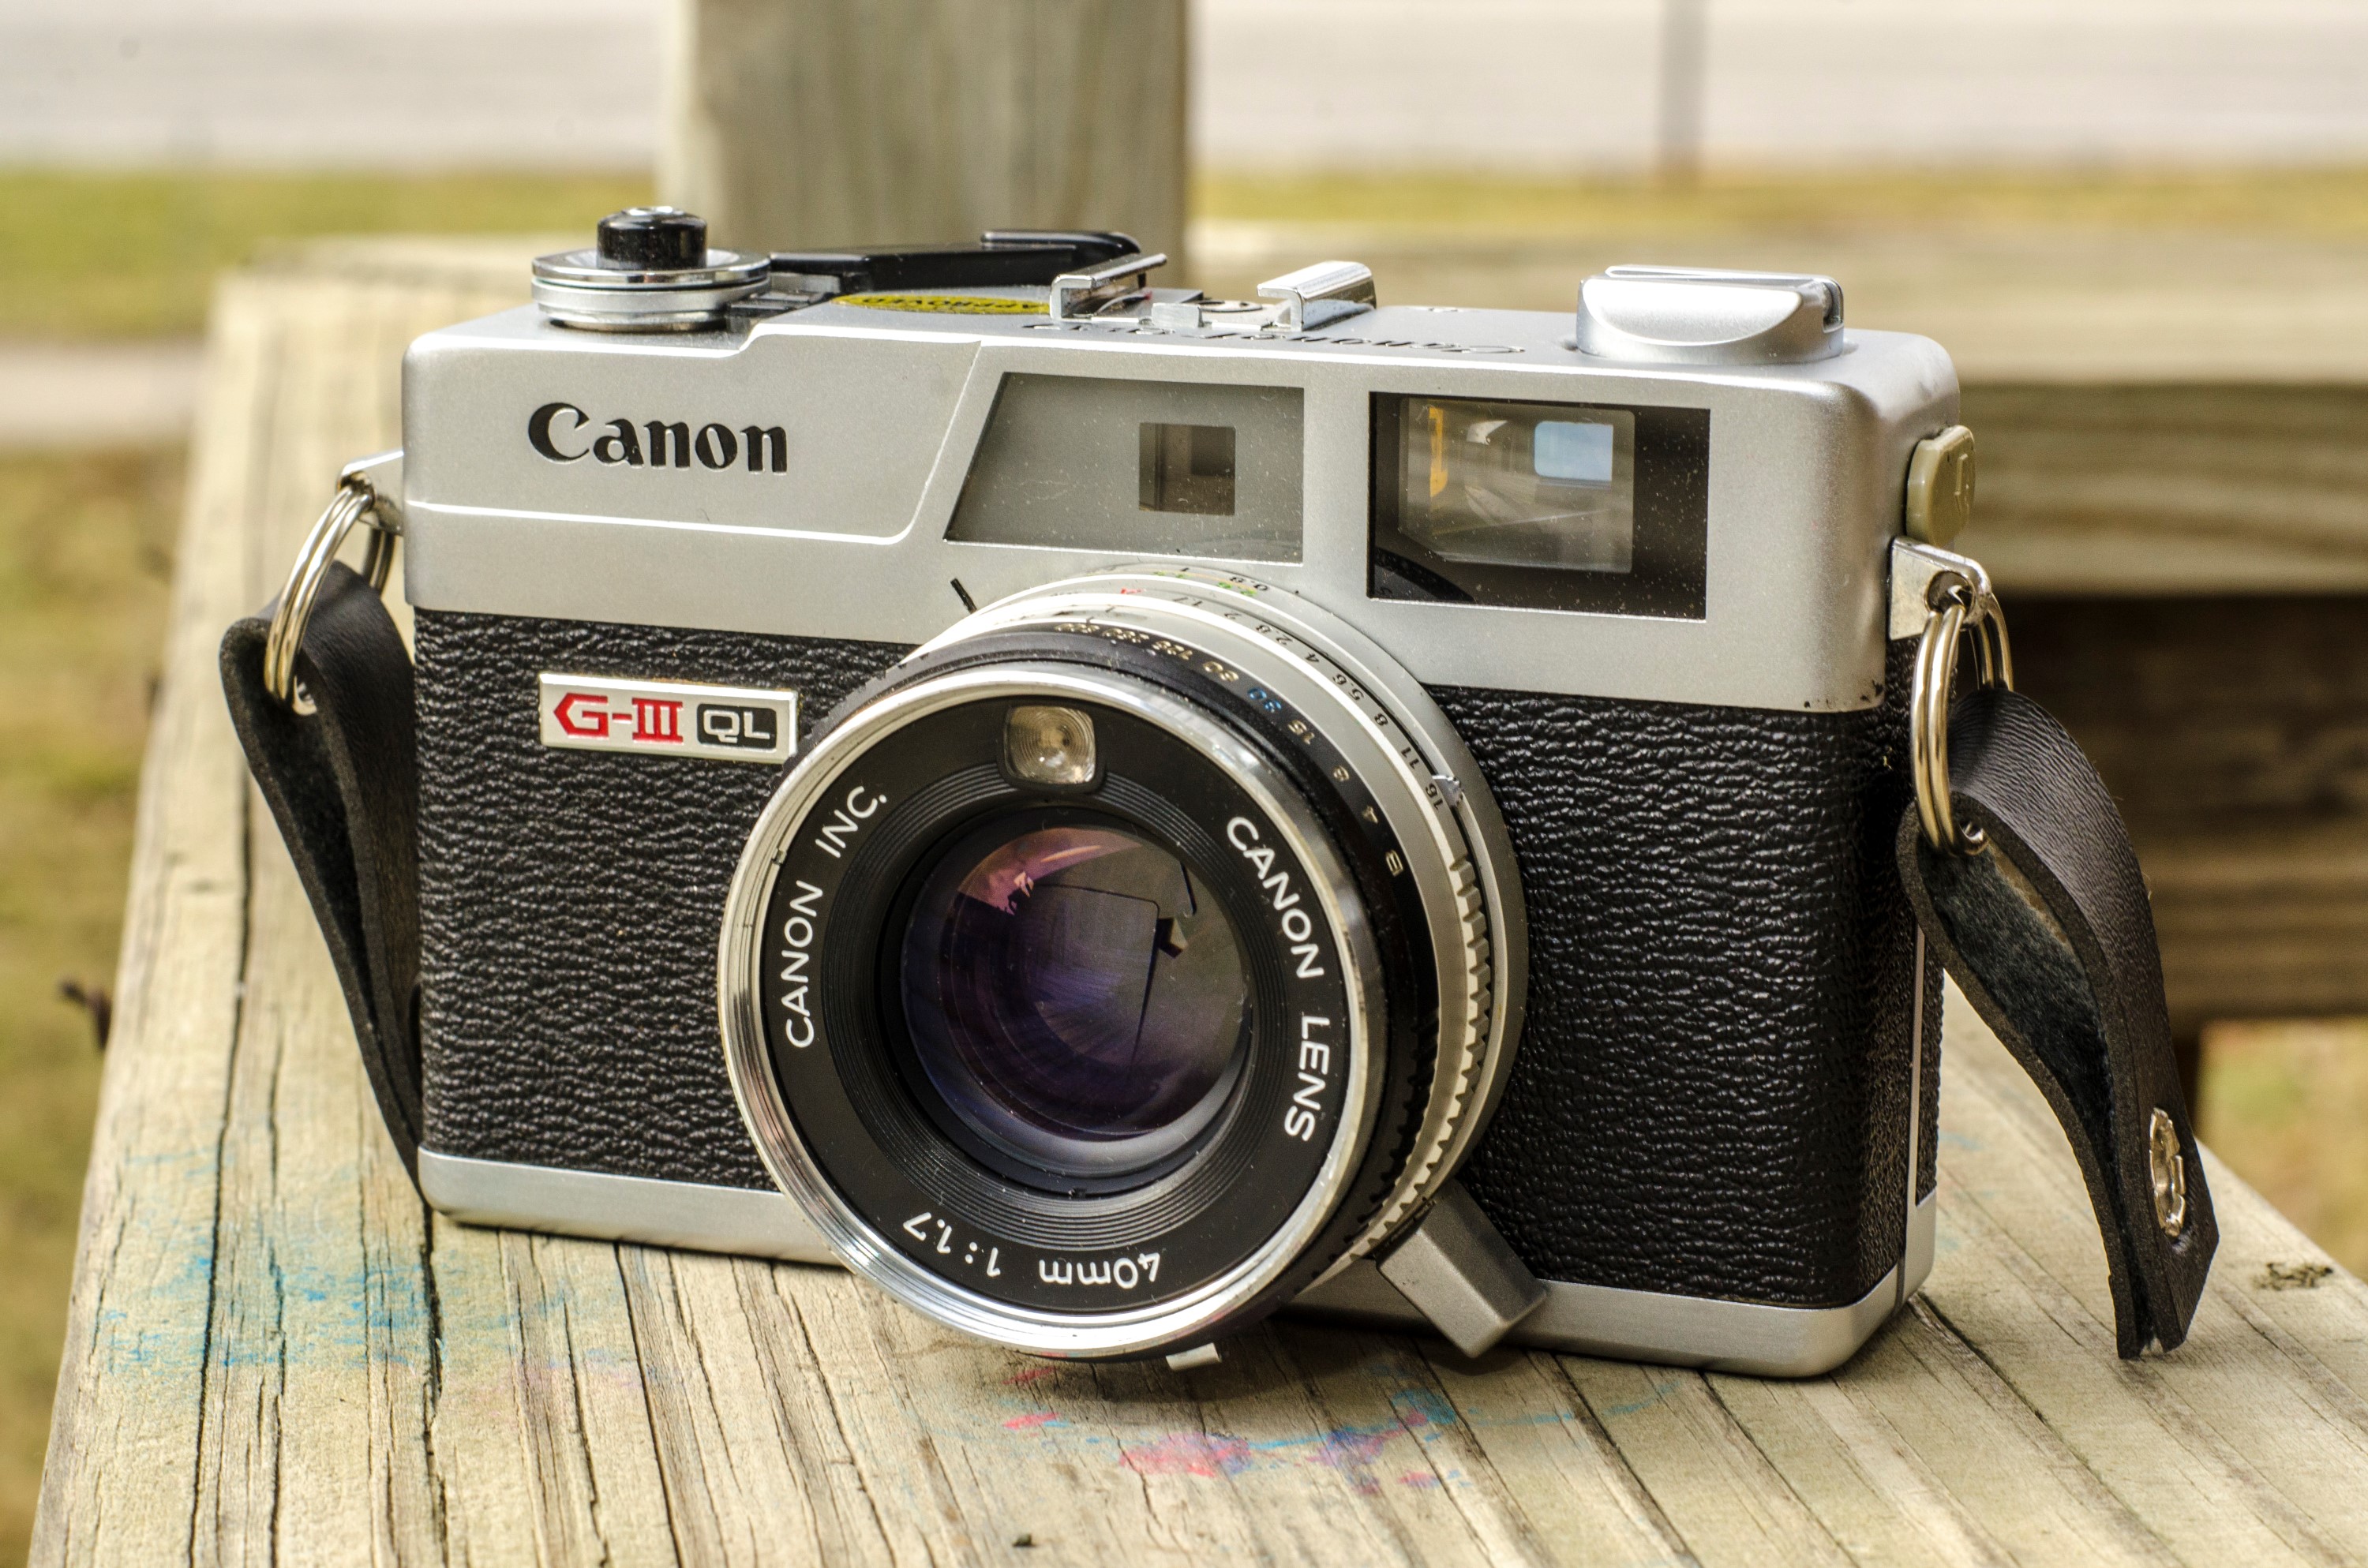
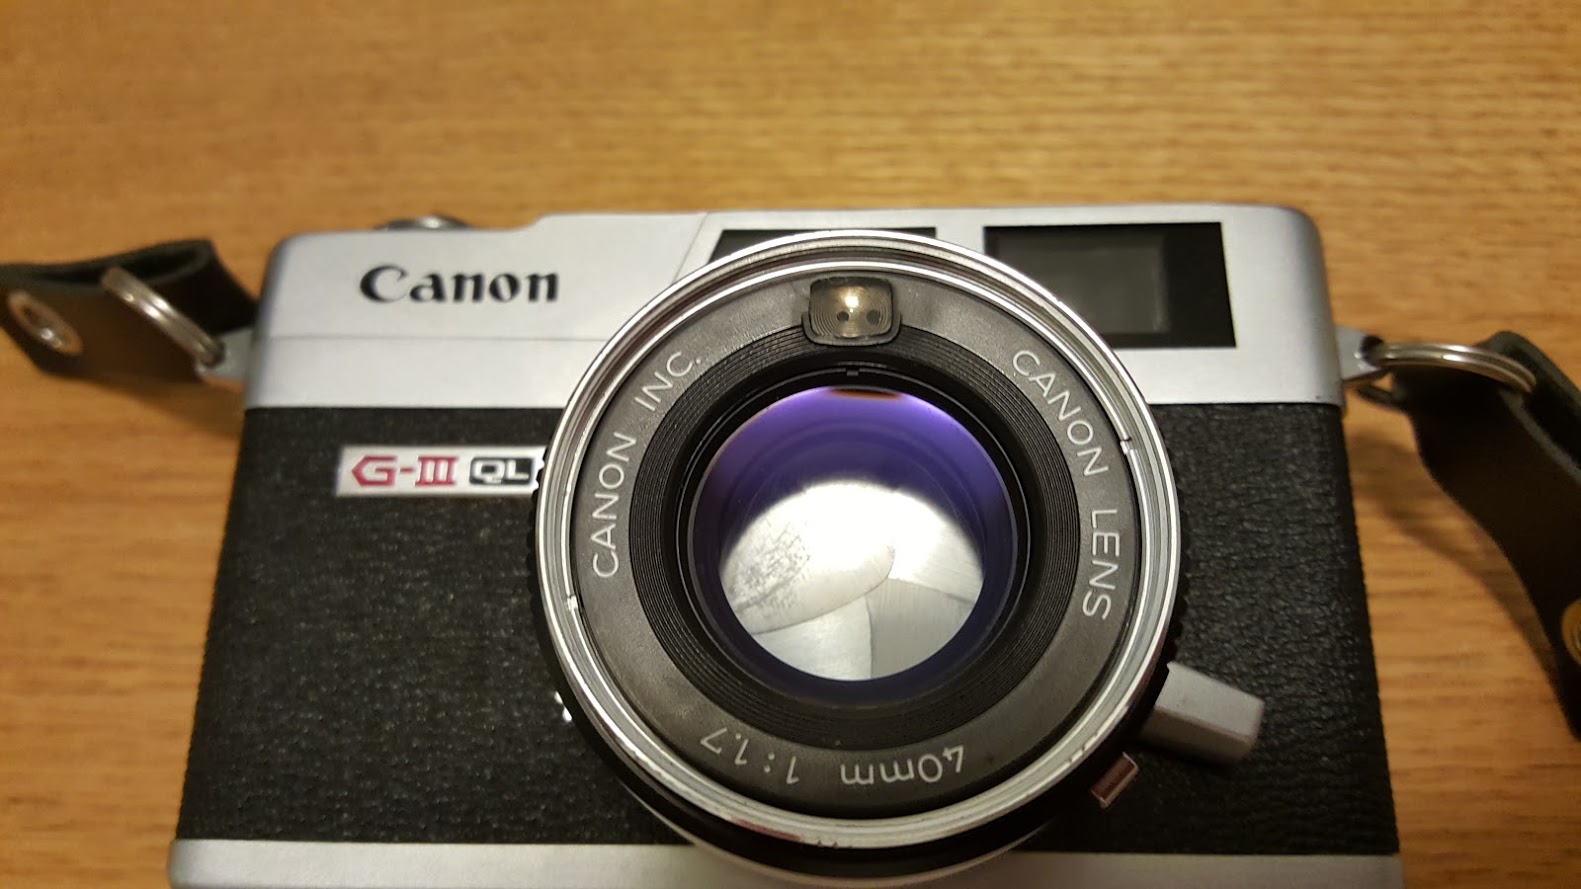
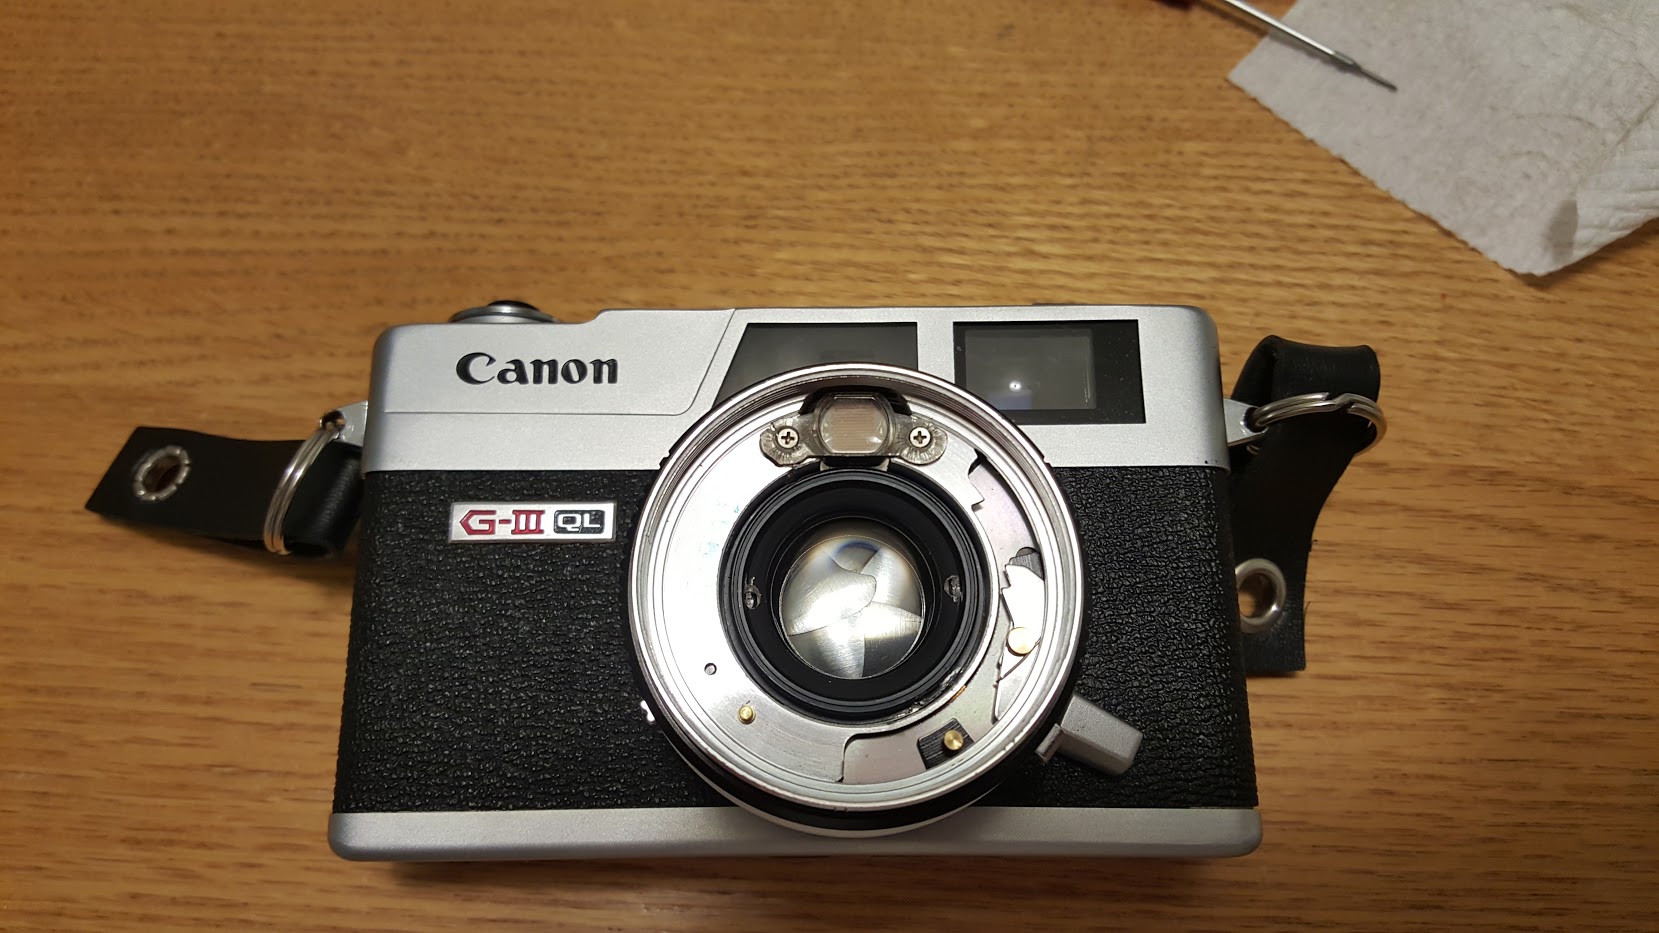
This is a Canonet G-III QL17 fixed lens 35mm rangefinder camera. It was the last in a line of successful Canonet rangefinder cameras starting with the original Canonet from 1961. This model was made between 1972 and the summer of 1982 and sold over 1.2 million copies worldwide. The G-III in the name signifies the third generation of Canonet QL17 models. Other than the red logo on the front of the camera, the most obvious change between earlier models was a battery check light to the left of the rear viewfinder window. This camera is considered a high mark in rangefinder design. It is light weight and easy to hold, has an accurate meter, full manual control, and an excellent 6-element lens which still compares favorably to the best lenses today. Being the highest spec model, it is often the most desirable of all Canonet cameras and therefore demands the highest prices.
 Film Type: 135 (35mm)
Lens: Canon 40mm f/1.7 coated 6 elements
Focus: 2.6 feet to Infinity
Type: Coupled Rangefinder
Shutter: Leaf
Speeds: B, 1/4 – 1/500 seconds
Exposure Meter: CdS lens mounted
Battery: PX625 Mercury
Flash Mount: Electronic flash sync hotshoe and PC socket
Manual: http://www.cameramanuals.org/canon_pdf/canonet_g-iii_17.pdf
My Final WordHow these ratings work |
The Canonet series of rangefinder is one of the most desirable among collectors and shooters of film photography today. They are often high on the list of most recommended cameras for those looking to get back into film as their compact size, ease of use, and excellent optics tick all the important marks of a great camera. Of the Canonet series, the G-III QL17 is the most desirable of the bunch. After using the camera, it is exactly as described. This camera is compact, easy to use, it has a great viewfinder and rangefinder, and it takes great photos. If I stopped writing here, this should be one of my favorite cameras, but it’s not. Due to curious design choices by Canon, they are almost always broken when you receive them. Bent speed selector pins and sticky shutters are extremely common with these cameras. They also have some of the thickest light seals of any camera I’ve replaced them on. Sure, once the camera is serviced, it should be a gem to use, and it is, but there’s just nothing that really gets my excited to come back to again. It works well, takes great pictures, and I guess that’s all you should expect from a camera, but simply, this camera is the khaki jeans and vanilla ice cream of film rangefinder cameras. | ||||||
| Images | Handling | Features | Viewfinder | Feel & Beauty | History | Age | |
| 2 | 2 | 1 | 2 | 2 | 1 | 0% | |
| Bonus | None | ||||||
| Final Score | 10.0 | ||||||
History
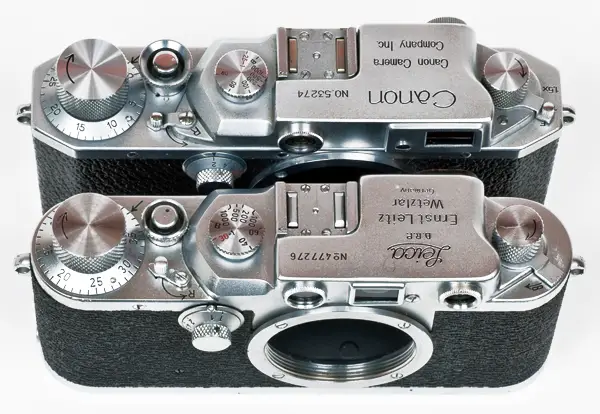
Canon’s history of making rangefinders dates to before WWII. Known then as Seiki Kogaku Kenkyusho, they started with the Kwanon prototype in 1934. This camera was heavily inspired by the Leica II rangefinder. In the next few years, Canon would experiment with various design elements and features and release the Canon S and J models.
In April 1939, the price for a Canon S was 480 yen w/ Nikkor 50mm f/2.8, lens hood, 2 film magazines, film take-up spool, and case. Buyers had a choice of a variety of Nikkor lenses made by Nippon Kogaku, who would later become Nikon, one of Canon’s biggest rivals.
In the years after the war, Canon would continue to refine and improve upon that original Leica design making a variety of interchangeable lens rangefinders culminating with the Canon 7 in 1961 and 7s in 1965, which to this very day, are still considered to be two of the best rangefinders made by any company, ever.
By 1961, when Canon was releasing the 7, the market for high end interchangeable lens rangefinder cameras was starting to fall out of favor with photographers. The sudden rise in popularity of the Single Lens Reflex (SLR) in the late 1950s and early 60s meant that serious photographers were no longer interested in expensive rangefinder cameras. Canon knew that in order to stay on top of the market, they would need to include more SLRs and less rangefinders. That didn’t mean the rangefinder was completely dead, however. SLRs were new and expensive, and there were a lot of amateurs and families that didn’t need a state of the art professional camera.
Enter the Canonet rangefinder of 1961. This original model had an all new solid body with a fixed f/1.9 45mm lens, a selenium cell exposure meter, and sold for under 20,000 yen which was less than half the price of a Canon 7 with 50mm f/1.4 lens. The Canonet rangefinder was an immediate success and sold very well as an intermediate option to higher priced SLRs and the high end Canon 7.
In 1963, an even more basic model, the Canonet Junior was released with an even smaller and lighter body, a 40mm f/2.8 lens, selenium cell exposure meter, but no rangefinder. It sold for 11,800 yen, a savings of almost 40% making it Canon’s first entry level “point and shoot camera”.
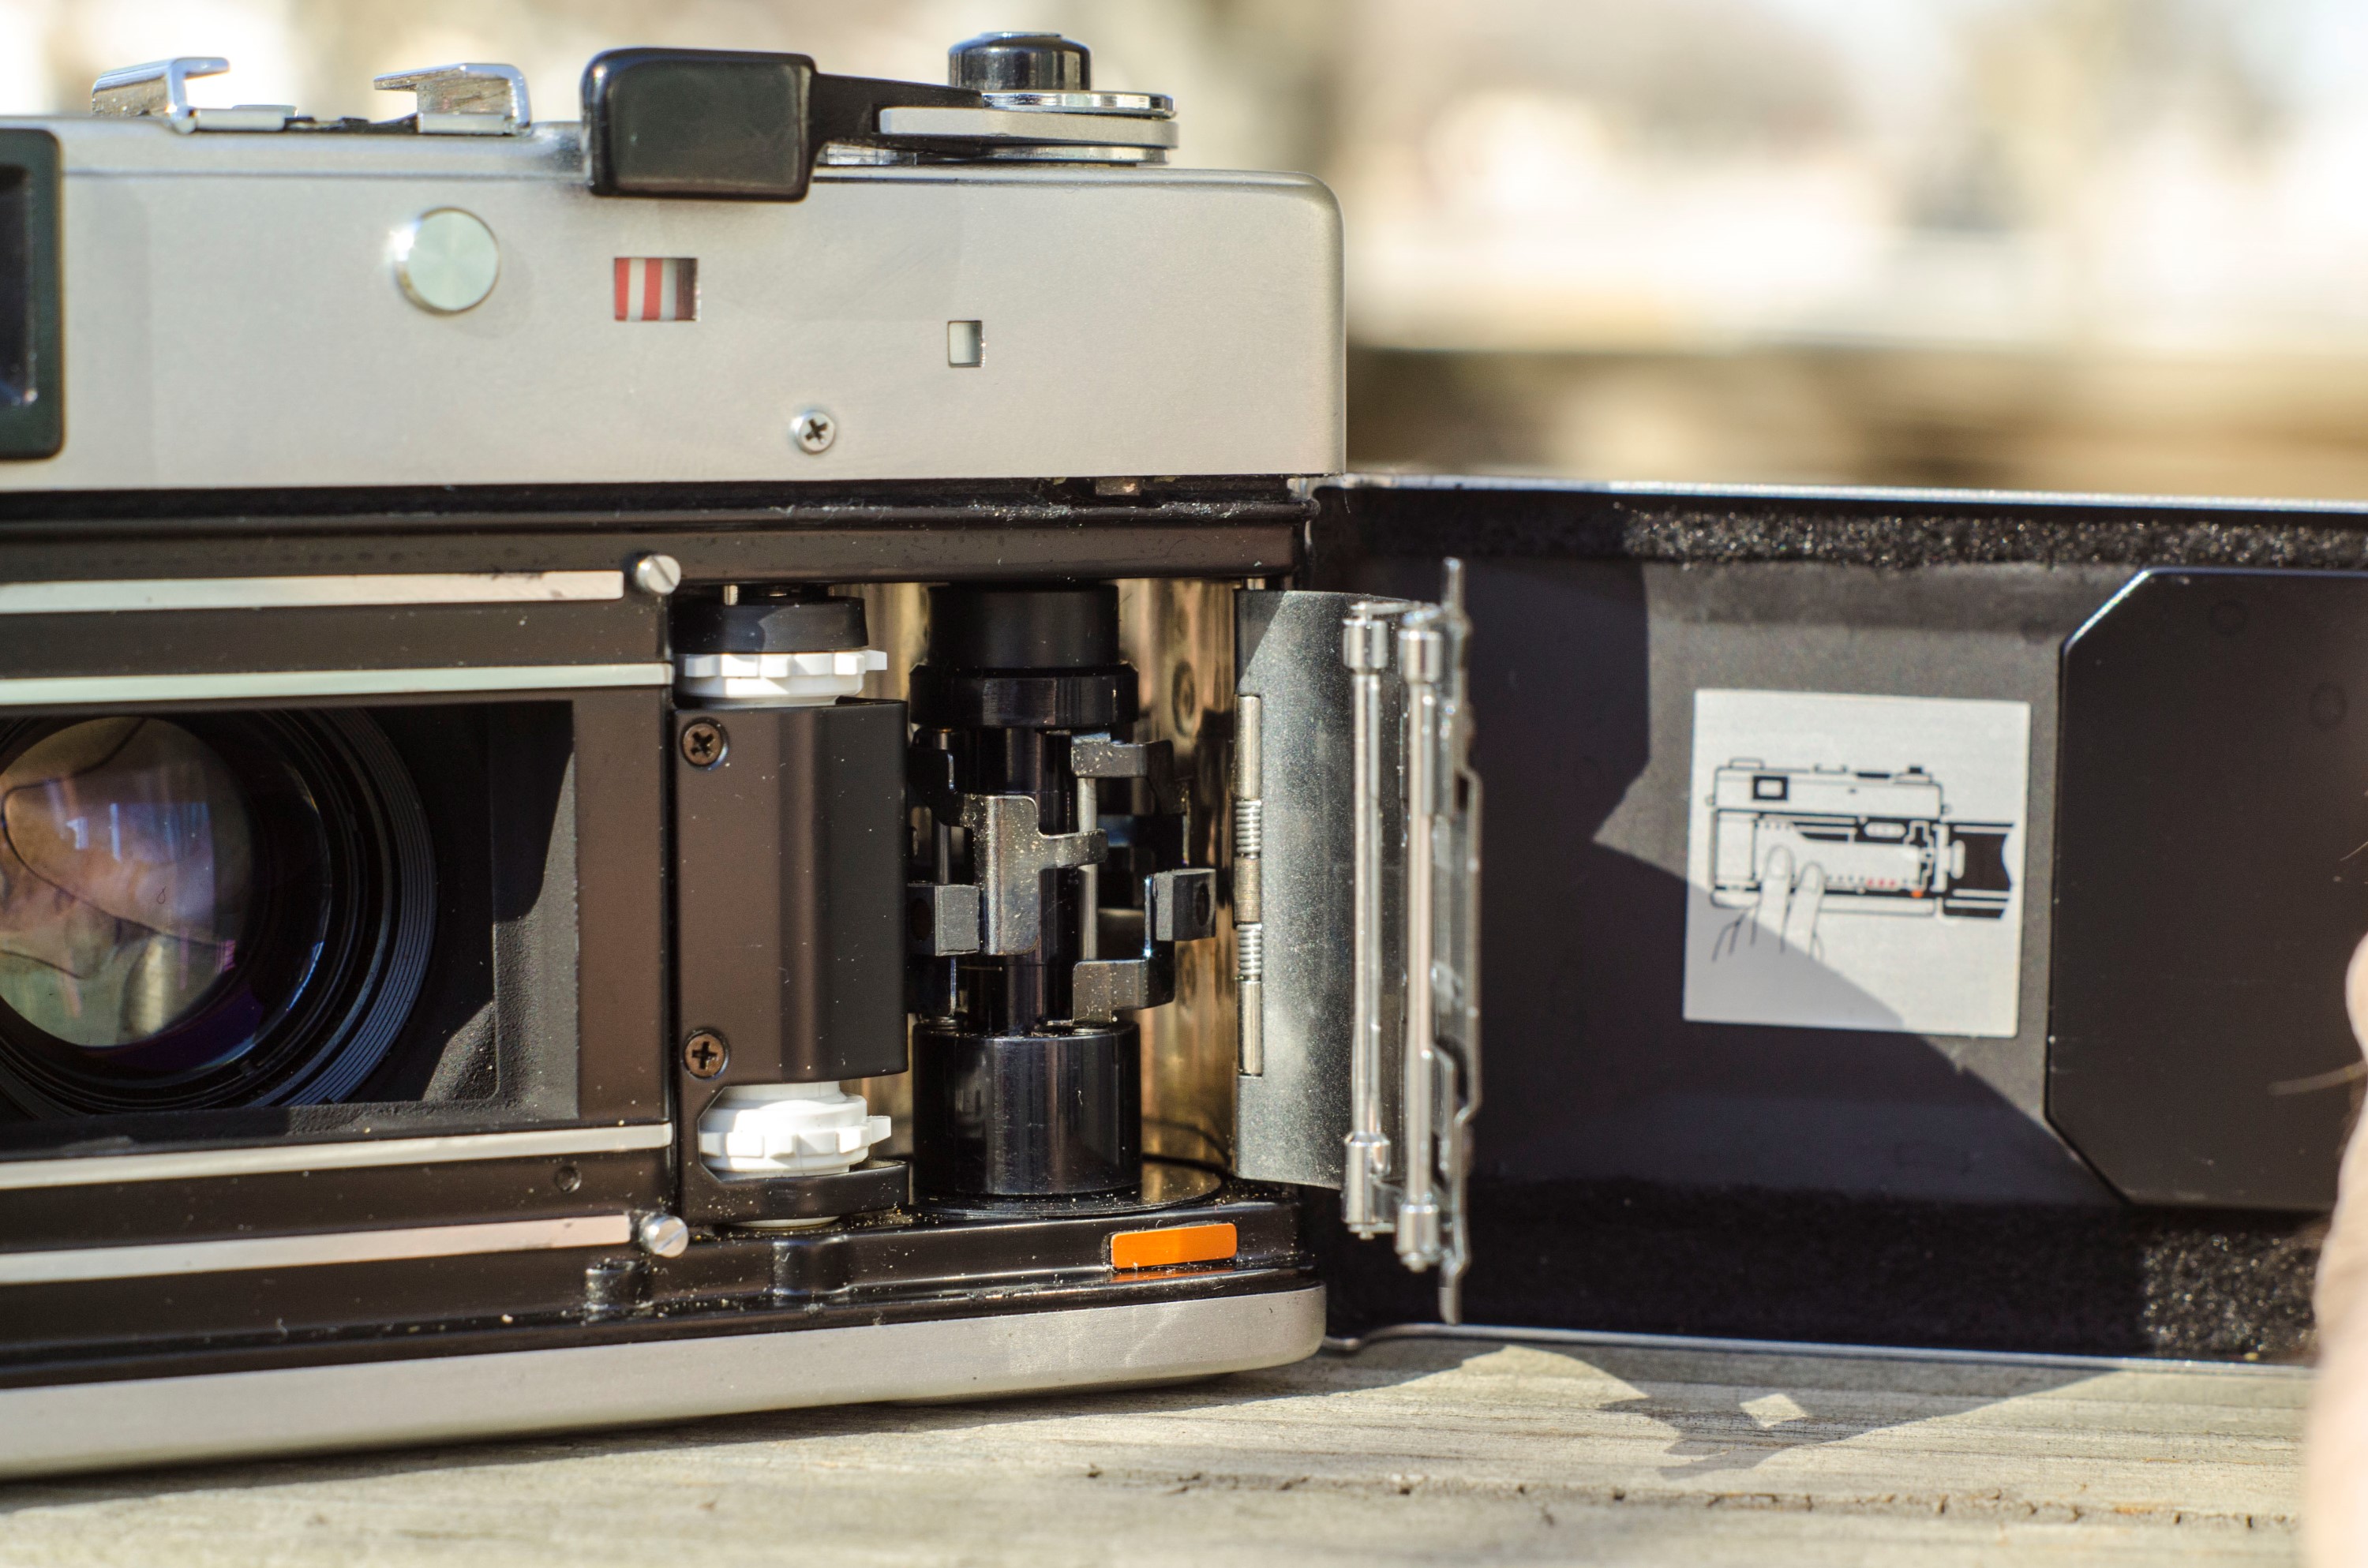
In 1965, Canon would release the Canonet QL17 which had an all new body design that was smaller and lighter than the original model, but contained advanced features like a CdS exposure meter, shutter priority auto exposure, and Canon’s new Quick Load feature which simplified film loading making it almost impossible to improperly insert a new roll of film. The QL17 was the top of the line of the Canonet series and offered photographers a very fast f/1.7 lens with excellent optics, an accurate exposure meter, and excellent rangefinder for a price of 23,800, only 15% higher than the original model.
In the coming years, many different variants of the Canonet would come and go, some with f/1.9, f/2.5, and f/2.8 lenses. All models except the f/2.8 ones would have the QL feature and a rangefinder.
In 1969, Canon would once again redesign the Canonet series simply referring to them in marketing materials as the “New Canonet”. The body of the camera would not say it was the new model, but it was very easy to tell the difference as the new models were significantly smaller and lighter. Compared to the original QL17, the new QL17 was 20mm narrower, 4mm shorter, and weighed over 200 grams less. Despite these size reductions, the new model retained the same excellent f/1.7 6-element lens, QL feature, CdS exposure meter, and shutter priority auto exposure.
The rest of the line would follow with the “New” smaller and lighter bodies. Even the Canonet 28 would finally receive a rangefinder unlike earlier models which were scale focus only.
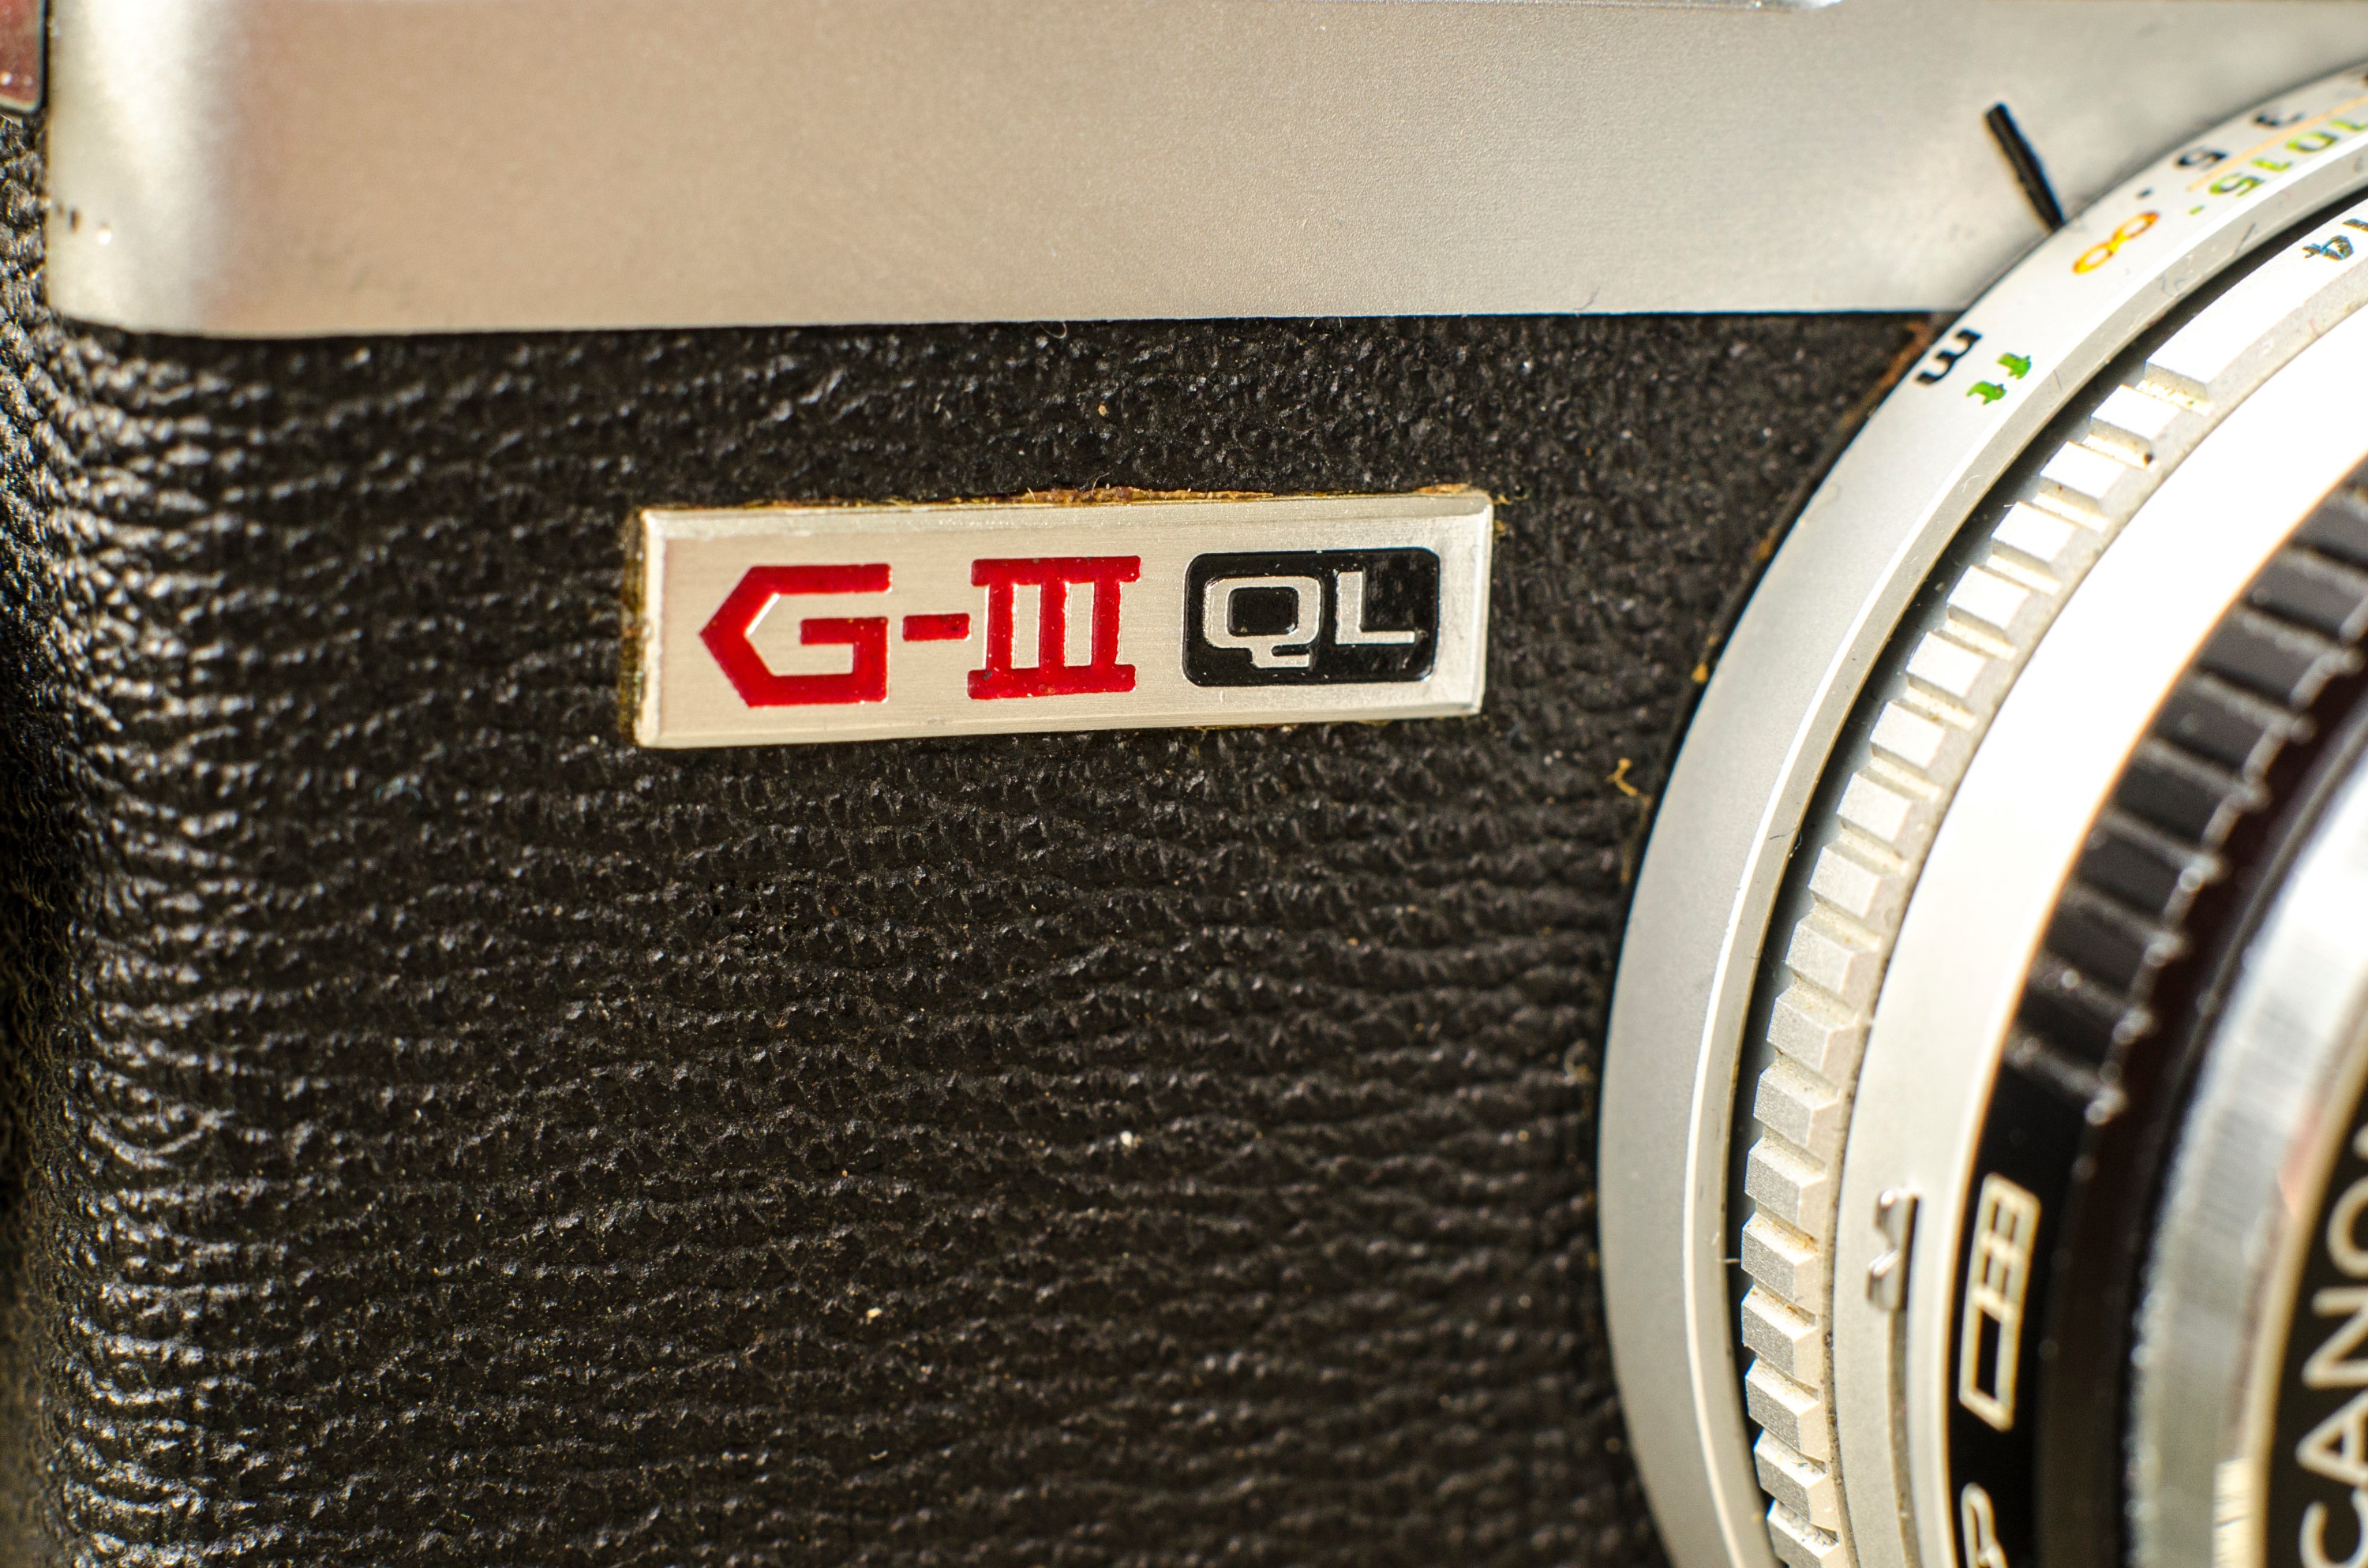
By 1972, the Canonet series was 11 years old, and even though it was a popular model, the winds of change were blowing once again. SLRs had been dominating the professional market for over a decade, but more and more intermediate and even some entry level models were starting to enter the marketplace which further ate into rangefinder sales. The time of the rangefinder was drawing to a close. Canon made one last effort to improve upon the Canonet, this time calling the top of the line model the Canonet G-III QL17. The “G-III” in the name indicated this was the third generation of the Canonet which might sound like a big deal, but in reality, other than a new battery check light, not much was different from the non G-III New Canonet QL17.
When released, the Canonet G-III QL17 sold for 29,000 yen and was available worldwide. It remained in production from the spring of 1972 to the summer of 1982 making it one of Canon’s highest selling and longest lived models. An estimated 1.2 million units were made.
Despite the success of the Canonet model line, it would be the last new model made with the name “Canonet”. Other non-SLR models would continue to be made, but the emphasis on simplicity, light weight plastic bodies, and simpler lenses spelled the end of the rangefinder era.
Today, the Canonet series enjoys a positive reputation among collectors and photographers. The G-III QL17 is the most sought after model, however the G-III QL19 version is almost as good, and only a fraction of a stop slower. Prices for the more desirable Canonets can sometimes exceed $100 even though there were many other competing rangefinders from the same era with similar specs. If anyone is looking for an easy to use rangefinder that is compact and takes excellent photographs, you really won’t find a better option than this, so I suspect they will remain popular for quite some time.

Repairs
At this point in the review, the Canonet G-III QL17 might sound like the perfect vintage film camera, but I am sorry to say that there is a pretty big “yeah…but” that affects many Canonet rangefinders, and that is a sticky shutter. The problem is, whatever type of lubricant Canon used back then, turns to a crusty and sticky goo over time, which gets all over the shutter, causing it not to fire. This is actually a pretty common problem on many leaf shutter cameras, but on many of them, the shutter will still fire, but usually only the slow speeds are affected. Unlike these other models, if the Canonet shutter gets sticky, it will not fire at any speed. You can put a battery in the camera and everything will appear to work, but you’ll press the button and nothing happens.

Another somewhat common problem, but one that mine had also, is that the shutter speed dial can become jammed, not allowing you to rotate it fully. This issue is caused by misuse by a previous owner who most likely tried to force the shutter speed ring to “B” mode without pressing the release catch for it. For some reason, Canon designed the Canonet to lock out “B” mode unless a separate catch is pressed in while rotating the speed dial to “B”. If you try to force the dial to “B” without pressing down this catch, you can bend a metal lever inside the shutter which messes up all of the speeds. While this is clearly the fault of someone who didn’t know how to properly use the camera, I can’t let Canon off the hook completely because this “feature” was very poorly implemented and completely unnecessary. In my opinion, there is no reason to lock out Bulb mode and add an additional failure point.
I have only owned two Canonets, the first of which was a Canonet S, and both of them had a sticky shutter, but this QL17 was the only one with the jammed speed dial. While I understand the sticky shutter is something that plagues all Canonets, I don’t know if the jammed speed dial is common on other models, but in either case, to resolve both issues, you have to open the lens. There are a few articles online talking about completely disassembling the camera, and some people have even suggested trying to clean the shutter through the rear element, but I have found that going through the front element is the best option. It’s certainly not easy, but it’s the one that will give you the most access to what needs to be repaired.
The following steps are needed to resolve both problems, so if you have a Canonet with only one problem or the other, you can follow these steps and adjust as necessary. I am also not sure how much of this applies to other Canonet models. I am sure there will be some similarities, but not everything will be exactly the same.
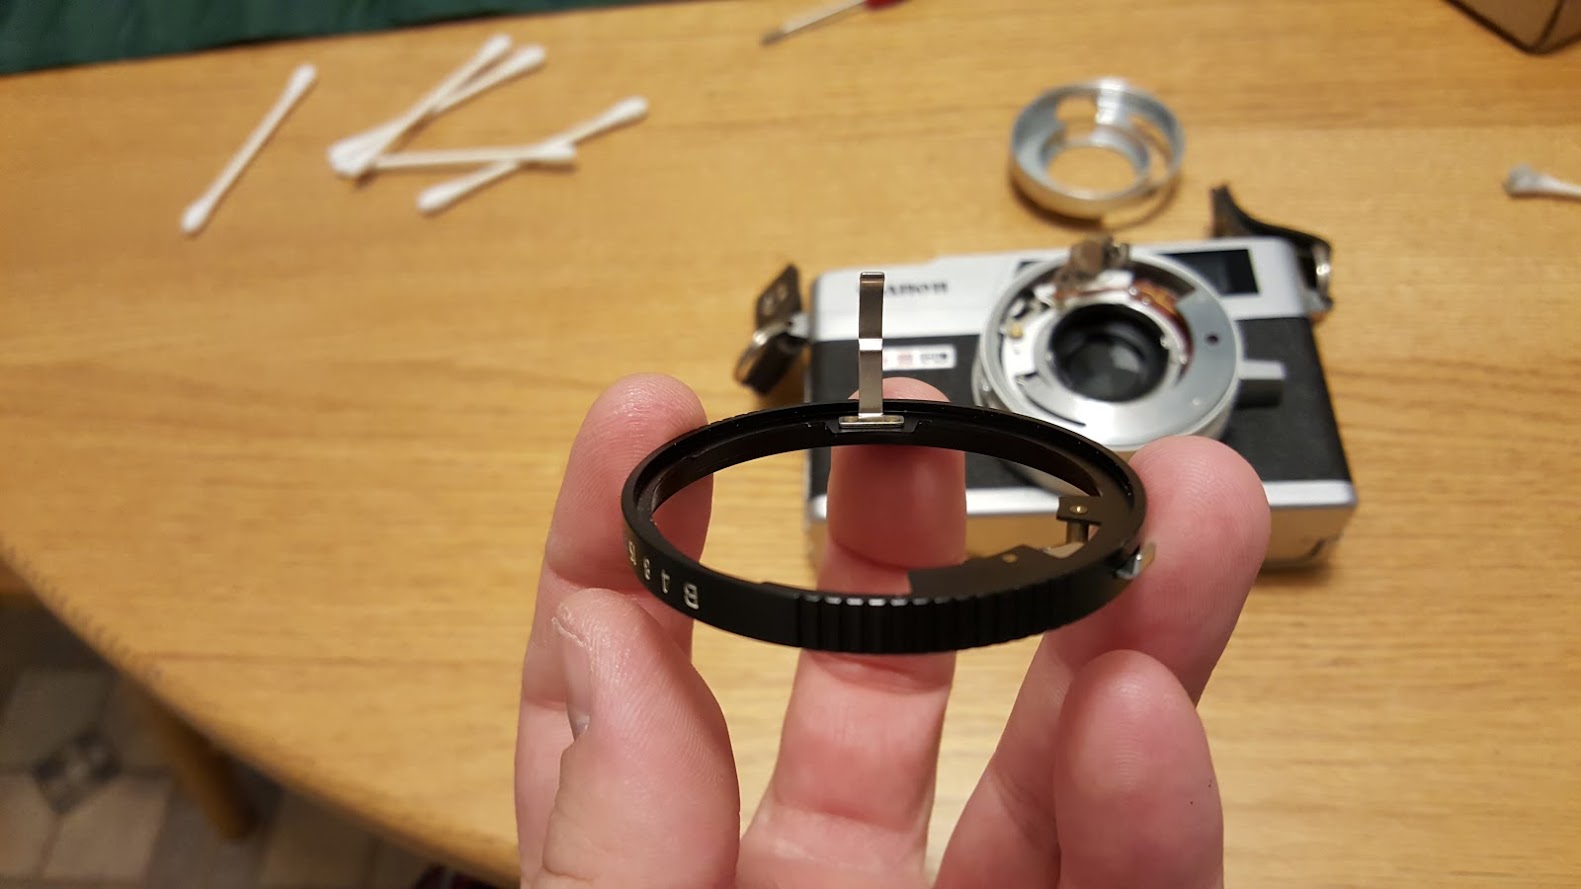
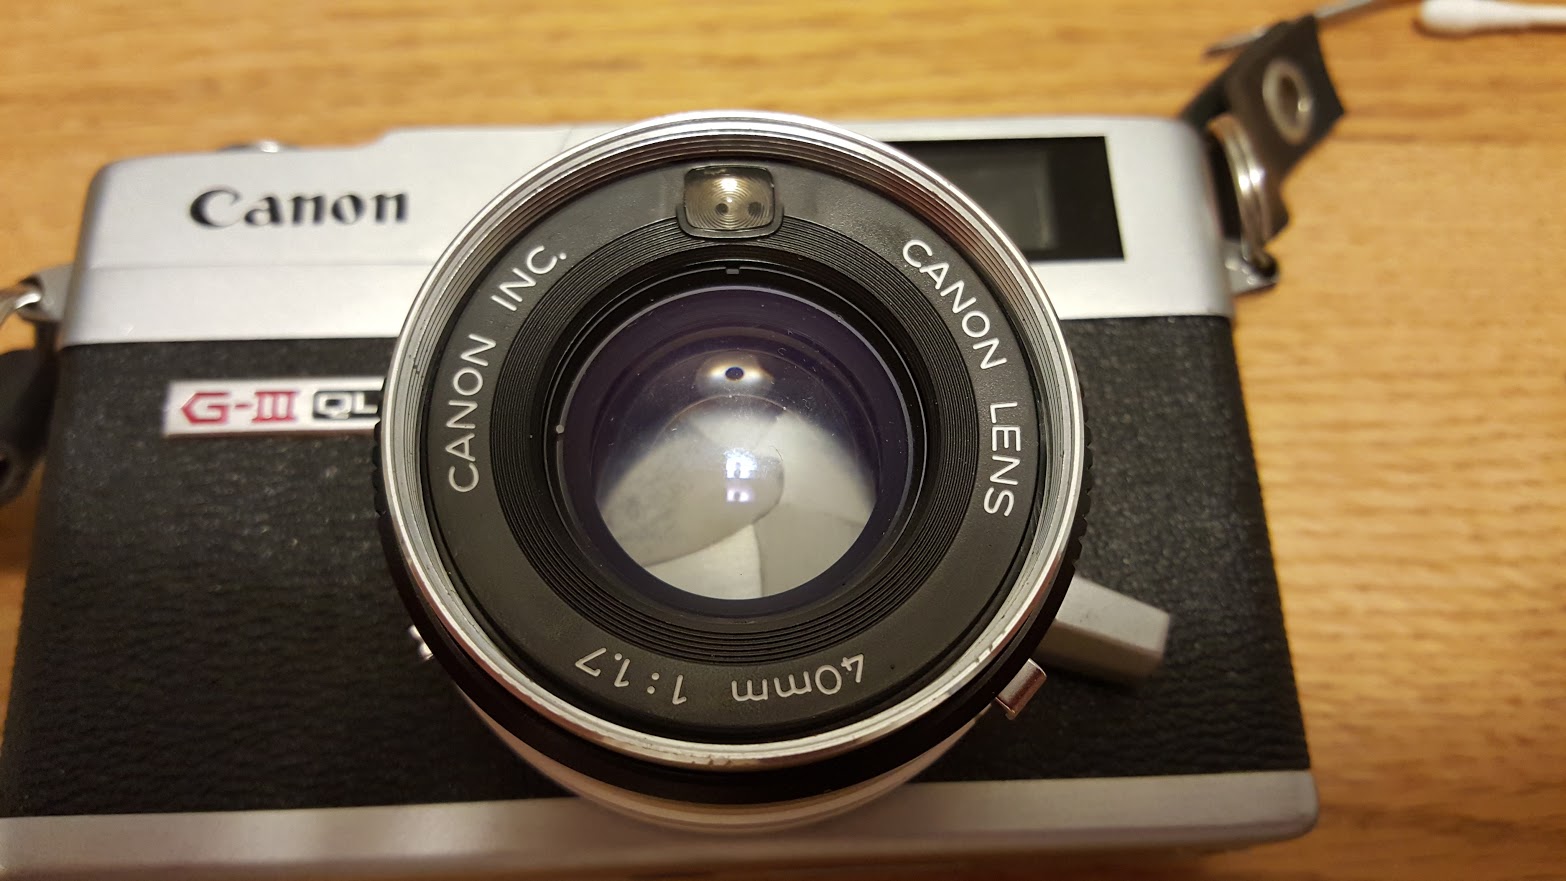 Step 1: Remove the chrome ring that is screwed into the filter threads. This ring has two notches for a lens spanner, and holds the black plastic cosmetic ring in place.
Step 2: Lift off the black plastic cosmetic ring. The meter “window” is just a piece of plastic, it is not connected to anything. Put both the metal retainer ring and plastic ring somewhere safe.
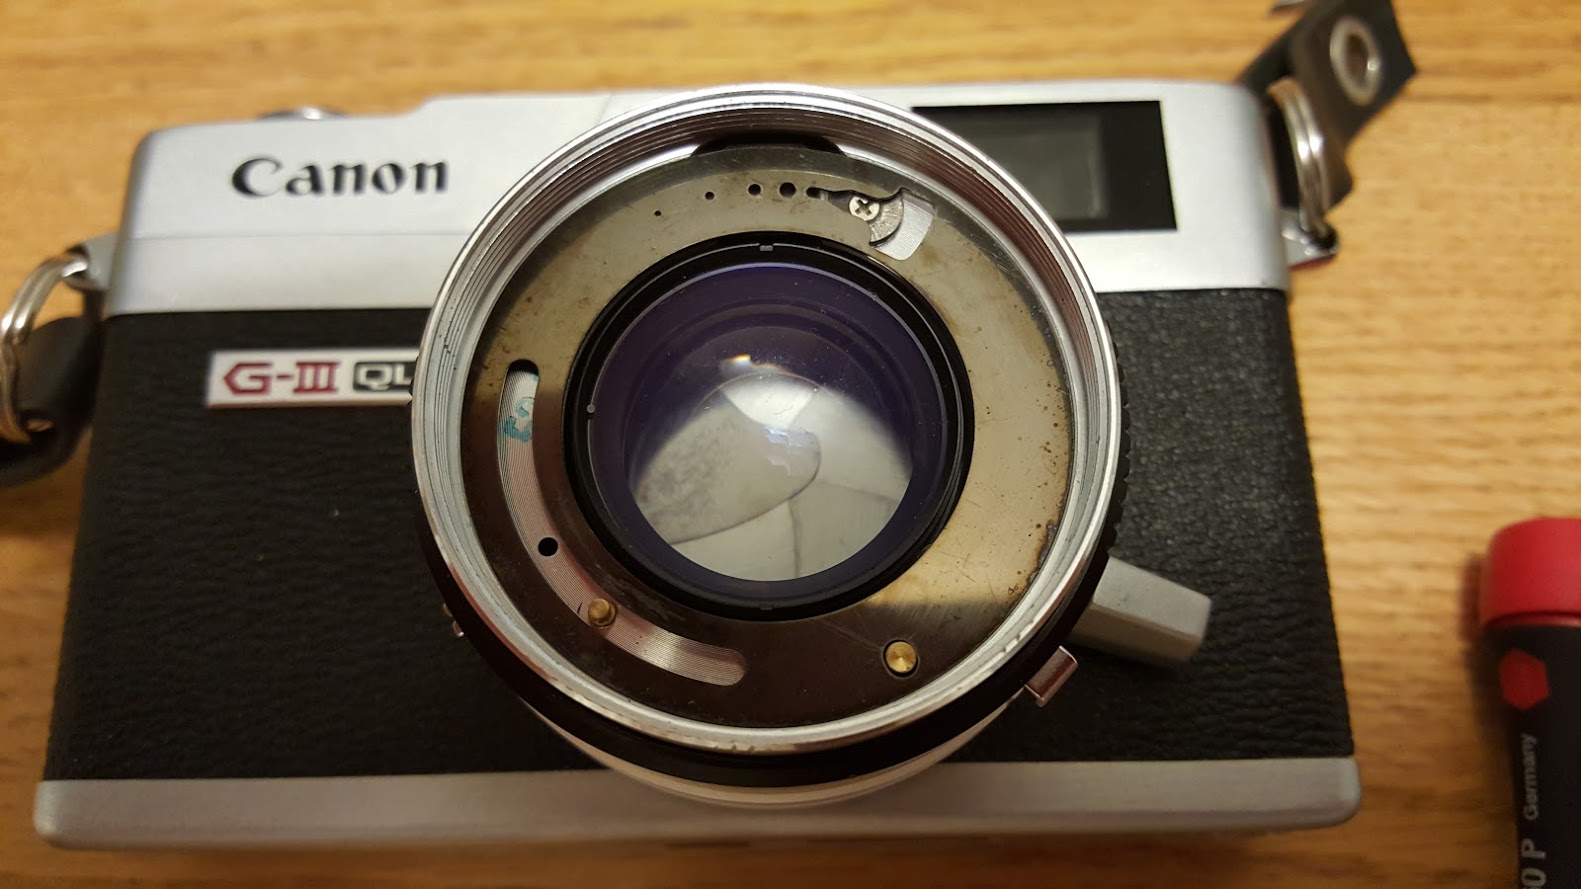
 Step 3: Lift the metal ring off paying attention to the orientation of it, so you can replace it back in the same position when reassembling the camera. This ring has varying size holes that restricts the amount of light that hits the CdS meter depending on which shutter speed you have selected.
Step 4: Remove the two screws holding the CdS meter in place.
 Step 5: Next, you have to remove the middle lens element in order to go any deeper into the lens. This is the part I struggled with the most as this ring has no notches or holes for a lens spanner. I did exhaustive research online looking for people who have removed this ring previously. I believe that on some Canonets, the black metal ring around the lens element does have notches for a lens spanner, but apparently the G-III QL17 does not. I do not know enough about the entire Canonet series to know which models have notches and which do not. All I can tell you is that if your camera looks like mine did, this middle lens element is very difficult to remove.
Some have suggested using a grippy tool or some homemade gripper made from furniture legs, but nothing I tried worked. Building off my experience working on a Kodak 35, I had the brilliant idea of drilling two small holes in the black metal surrounding the lens element so that my lens spanner had something to grip. While this ended up working perfectly, I never considered that this black metal ring is completely visible through the front lens element when the camera goes back together. Sadly, I did not discover this until after I put the camera back together and it kinda ruins the beauty of the camera, not to mention probably kills it’s resale value, but it does work, and will allow you to repair your camera. If your only concern is using the camera, this is a small price to pay, but if you are trying to retain the value of this camera, you may want to try to find another way to get this middle element out.
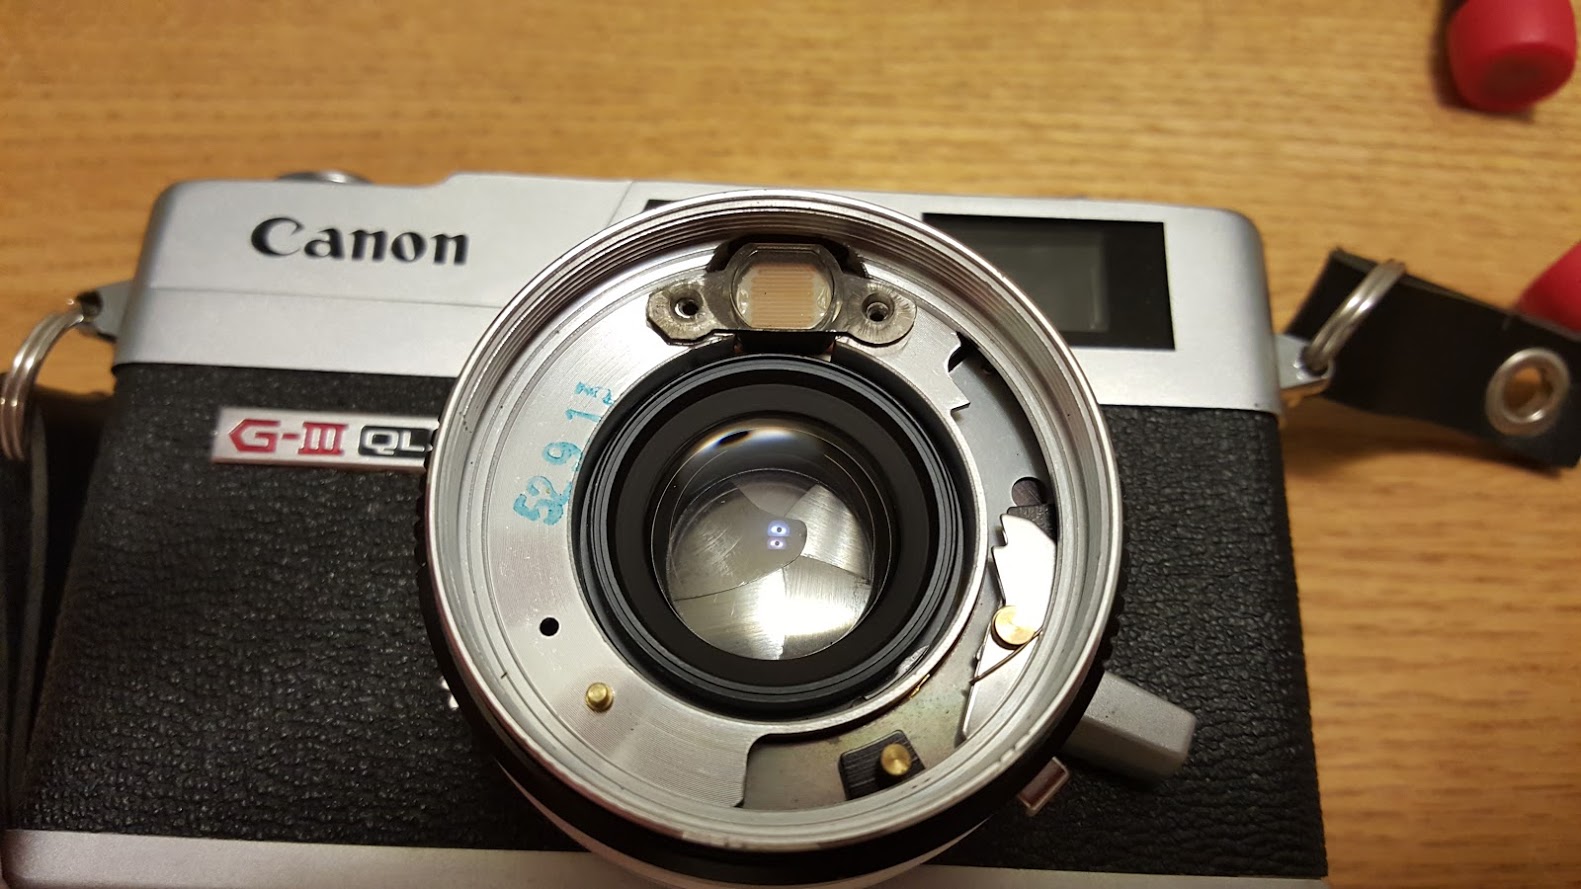
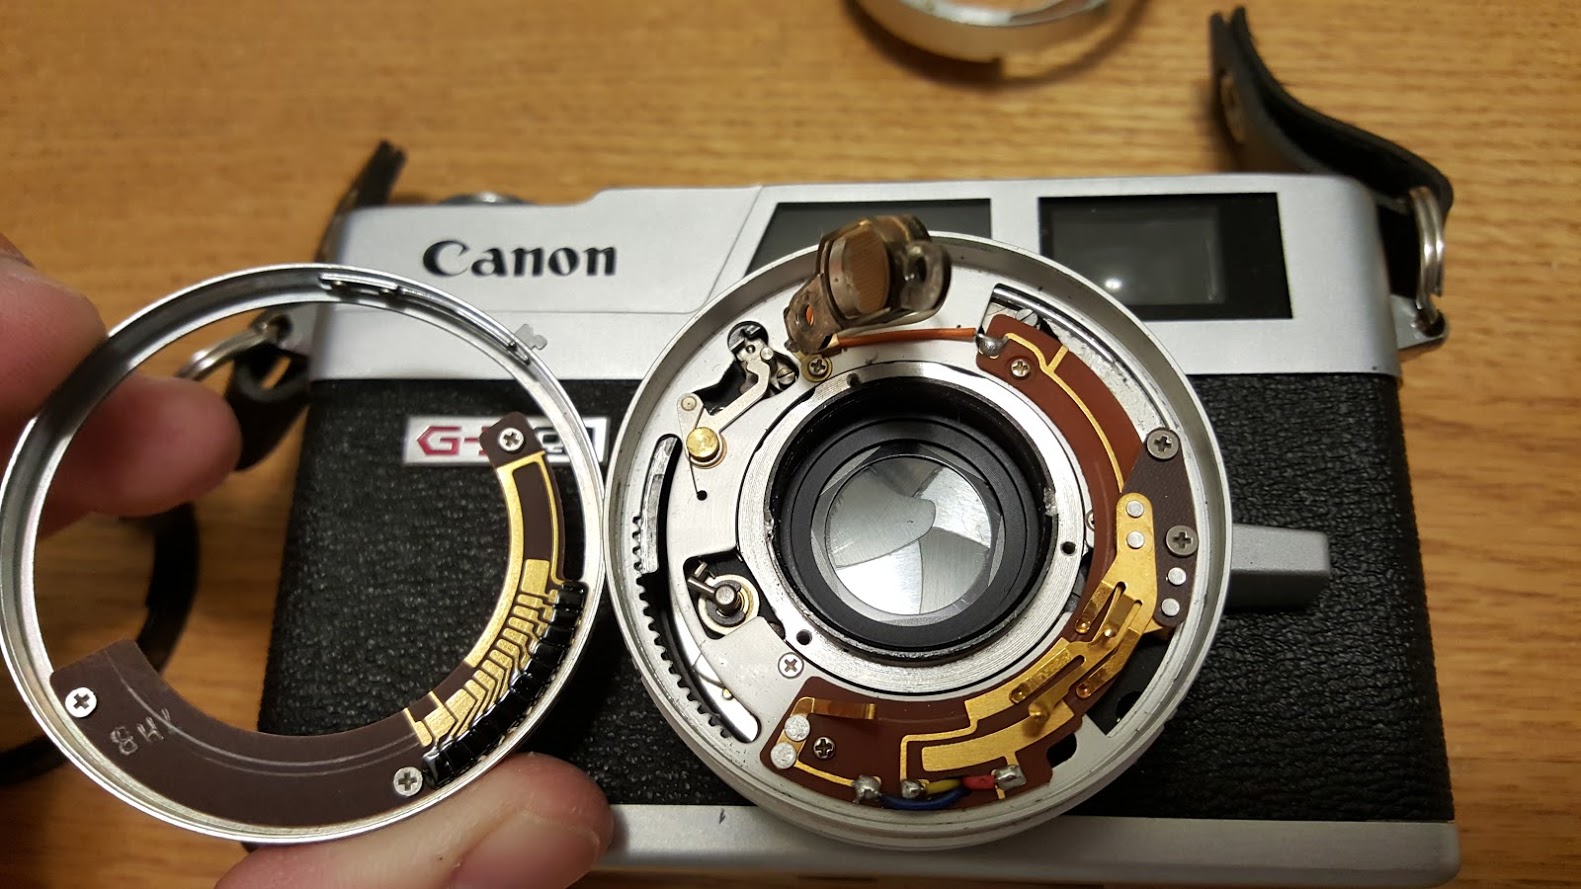
 Step 6: Beneath the middle lens element are 3 screws holding the inner lens plate in position. Remove these 3 screws, and lift the metal plate that the CdS meter was screwed into and put it aside. It should lift straight off but you’ll have to guide the “ears” of the CdS meter through the hole. Be careful not to tug too hard on the meter as you don’t want to break the wires.
 Step 7: Lift the black shutter speed ring straight off and look at it. If you have the problem where this ring is jammed, the metal “finger” that sticks out will be bent at an angle. Unfortunately, I did not take a picture of how it was when I pulled this off, but the picture to the right shows how it should look. If that metal “finger” is not perfectly straight like in the picture, the camera will not work correctly.
 Step 8: This step is actually optional, and involves lifting off the electrical contact plate (with the ASA speed selector) off. By doing this, you can get to the electrical contacts that tell the camera which shutter and film speed selections you have chosen. It’s worth inspecting these contacts to make sure they haven’t oxidized or become dirty. If they have, use an electrical contact cleaner to clean them. A rubber pencil eraser can also come in handy to remove dirt from the contacts, just be careful not to damage them.
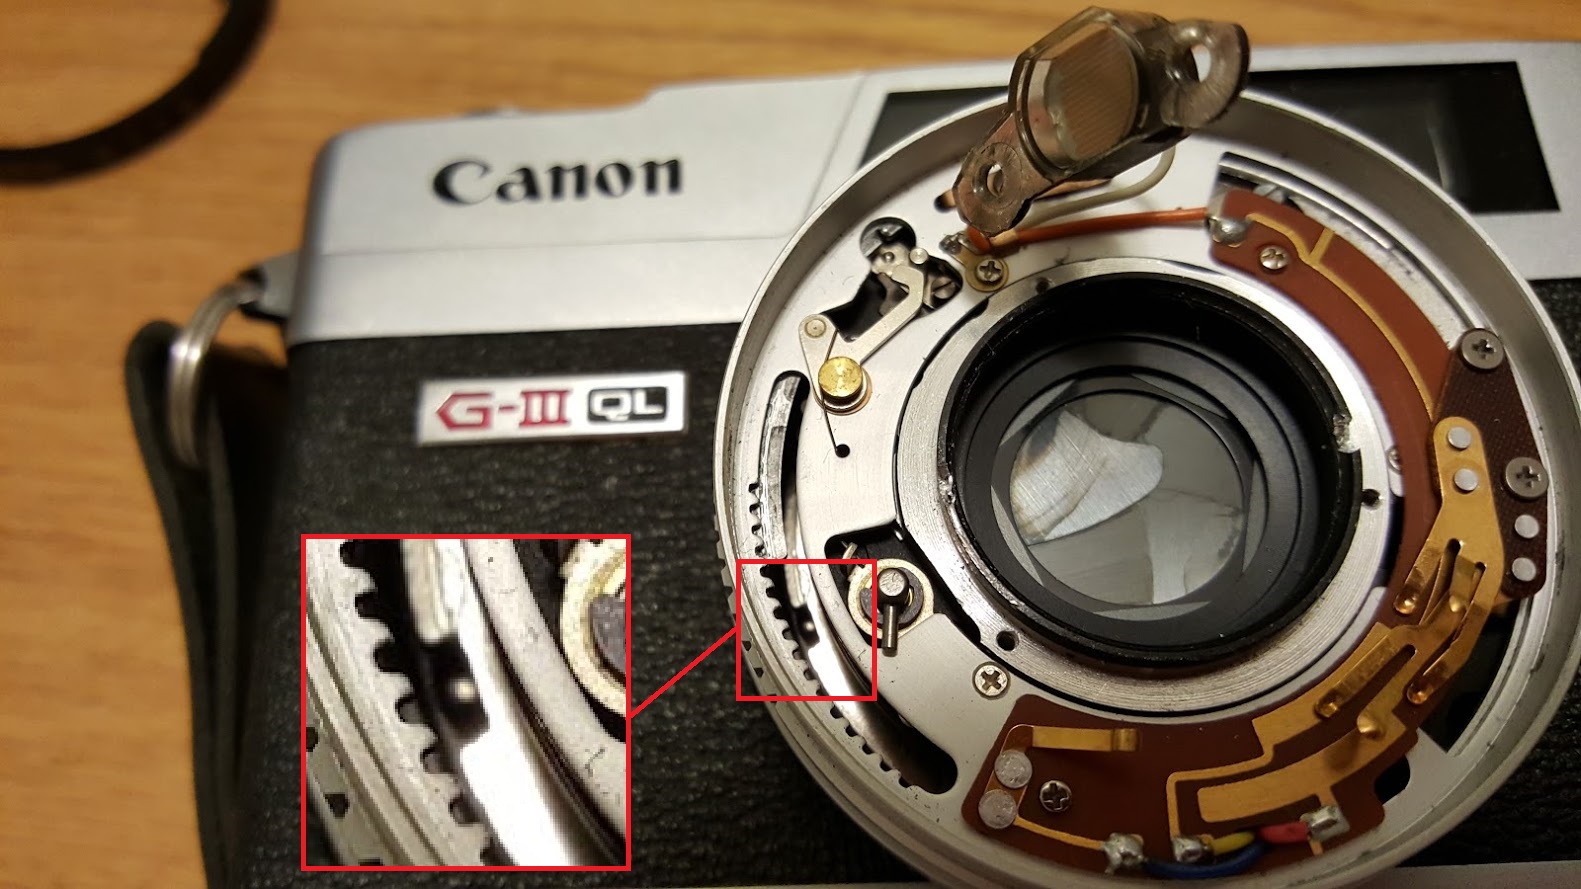 With this ring still off, it is easier to see how the shutter speed selector works. The black shutter speed ring in step 7 has a long metal “finger” attached to it. This finger goes through the lens and rests between a notch in a piece of metal. In the image to the right, I zoom in showing the notch where the “finger” needs to go into. When the camera is assembled and you turn the shutter speed selector, the “finger” rotates the piece of metal which is actually what changes the shutter speeds. When the finger is bent, it does not rest inside of this notch meaning, that you cannot properly change shutter speeds. This explanation will probably make a lot more sense when you are at this step and can piece it together to see how it fits.
Step 9: This last step is where you clean the shutter with lighter fluid. Even though it’s normally best to remove a shutter from the camera. Doing this on the Canonet is prohibitively difficult to do, so you’ll just have to do it with it still attached.
I don’t have any pictures of this step, but if you’ve ever cleaned a shutter before, it’s the same basic process. You will get some fluid on the inside of the inner rear lens element, but it will not hurt anything. You will just need to make sure to clean that lens element with the shutter open once you are done. Repeat a cycle of bathing the shutter blades with lighter fluid, and gently rubbing excess fluid off with some lighter fluid while firing the shutter over and over, then letting it dry for a couple of hours, and repeat the process over and over again until the shutter continues to work after it is dry.
You will notice the shutter will appear to work normally when it is wet, but as soon as it dries, it will most likely stick again. This process sometimes needs to be repeated many times. Sometimes as many as 20-30 cycles, but don’t get discouraged, it will eventually stop sticking.
Step 10: Once you are sure the shutter is working consistently when it is totally dry, you can put everything back together in the opposite of how you took it apart. Pay attention to the orientation of the discs and make sure you screw the middle lens element all the way.
Now that camera is back together, we’re still not done. As is common with almost every single Japanese made camera from the 1960s – early 1980s, the foam light seals had turned into a sticky mess and required replacement.
While this process on the Canonet is mostly like other rangefinders of the era, the light seal on the rear door is quite a bit wider than on most cameras, so there’s just more of it to scrape off. It’s a messy process which I cover in my article “Breathing New Life into Old Cameras”, so I won’t go into great deal about it here, but here are some pictures of the completed job.


My Thoughts

It would be hard to talk to other collectors of old cameras and never hear anyone talk about the Canonet series, especially the QL17. This is actually one of the more popular models and one that I had been familiar with since I bought my earliest cameras. As a matter of fact, I talk about the differences between the Yashica Electro and the Canonet in my review for the Yashica Electro.
It took me a while to acquire one, mostly because of their price. The one thing that comes with popularity is high prices. I took a quick look at sold auctions on eBay for Canonet QL17s and the prices are consistently near, and in some cases exceeding, $100. That’s not to say that this camera isn’t worth that price, but you can have cameras of similar quality for much less. Yashica Electros, Konica Auto S2s, and Minolta Hi-Matic 7s often go for $20 – $30 in good shape, so if you’re a buyer of value cameras like I am, it’s hard to justify the cost of a Canonet when comparable cameras are so much less expensive.
 I don’t know if it was luck or what, but I managed to score this Canonet for $20 from a local pawn shop who had it listed online with really crappy pictures. I’ve found that when buying old cameras, the less effort put in by the seller, the greater of a chance for a bargain.
Was it really a bargain though? After all, the camera had a sticky shutter that required cleaning, a damaged shutter speed selector, and crumbly light seals. I can honestly say, this Canonet required more effort to get back into working condition than any other camera in my collection. Still, I think that for $20, now that it’s working, I feel I came out ahead.
After confirming the camera worked, I loaded in a roll of film and went shooting. The Canonet is a nice camera. I would say it’s most immediate “pro” is the compact size. Second would be the large and bright viewfinder. Third would be the ability to choose manual shutter speeds.
Based on features alone, the Canonet is “better” than one of my all time favorite film cameras, the Yashica Electro. The Electro is both heavier and larger than the Canonet, and it also lacks the ability to shoot manual shutter speeds, yet I find myself less than enthralled with the Canonet. I really can’t put a finger on why. Maybe the large and heavy feel of the Electro gives a more satisfying experience, or maybe the bright red and yellow “over/under” lights in the Yashica’s viewfinder make more sense to me. Regardless of the reason, while I didn’t hate shooting with the Canonet, I never got that feeling of excitement shooting with it where I knew I would revisit this camera again. I own 2 working Yashica Electros and have shot with them at least 4 or 5 times. I don’t know when I’ll want to come back to this Canonet.
I am a big fan of analogies. One analogy I often have is what I call the “$10 Steak”. If you go to a cheap family restaurant and see that they have a $10 steak on their menu and you order it and it’s just OK, you’re still pretty happy with yourself because you got an OK steak for $10. However, if you go to a reputable steak house that often gets rave reviews and order their best steak and you aren’t overly pleased with it, you’ll walk away disappointed even if it’s still OK. I think that’s kind of what I got here. Even though I didn’t pay much for this Canonet, I walked away from it just feeling OK about it.
My Results
Knowing the positive reputation of the Canonet, I decided to approach it a little differently than some of my other new cameras. I decided to stack the odds against it from the get go. For my first roll, I shot expired drug store 400 speed film indoors of my 2 year old. I thought that by taking a risk right out of the gate, I would give the Canonet the chance to really wow me with it’s results.


Let me be clear on something here. The Canonet is a wonderful camera. It is compact, easy to hold, has a bright and easy to focus rangefinder, and an outstanding lens. It was in production for over 10 years and sold over 1.2 million copies worldwide.
My overwhelming feeling of “ho-hum” regarding this camera has absolutely nothing to do with it’s results, because all of the shots above are pretty impressive considering the conditions I threw at it. I had no issue properly focusing any of the images, even the ones involving a hyper-active 2 year old going down a slide or playing in a ball pit. The meter had no issue handle the difficult lighting conditions as well.
It should be known that you really have to try to not capture great images from the Canonet, but frankly, that bores me, and I really think that is why I am not more excited about it. Should you penalize a camera because it is really good at what it does? Not really, but if I just wanted an easy to use camera that always gave me great shots every time, I could use my Nikon N80 or (gasp) my D7000.


Film is an awesome medium to capture shots that you cannot recreate digitally, but the reason I still shoot film and review these cameras is because I love the process too. With the Canonet, the results are great, no argument there. It’s the process that I am having a hard time swallowing. The camera is just too darn good, when shooting with it, I don’t even feel like I am using an antique camera. Maybe that is the ultimate compliment for this camera, but like I keep saying, the process is forgettable and it makes it hard to want to come back to it later.
I am sure I will come back to the Canonet, it’s too good of a camera not to. Who knows, maybe I can use this camera to be the “gateway drug” for my wife or friends to want to get into film photography. Maybe this Canonet could open the door to the great world of film photography for someone else. I am happy I own it. I have a feeling of immense satisfaction that I was able to bring it back from the dead and that it is able to make more photographs.
Additional Resources
https://www.cameraquest.com/canql17.htm
http://camerapedia.wikia.com/wiki/Canon_Canonet_QL_17_GIII
http://mattsclassiccameras.com/canonet_QL17.html
https://en.wikipedia.org/wiki/Canonet_G-III_QL17
http://www.filmshooterscollective.com/analog-film-photography-blog/canon-canonet-review-4-23
http://www.photoethnography.com/ClassicCameras/CanonCanonetGIIIQL17.html
https://casualphotophile.com/2014/06/24/canon-canonet-ql17-the-ultimate-street-shooter
http://www.canon.com/c-museum/en/product/film74.html
http://www.japancamerahunter.com/2012/05/the-canonet-ql17-mini-review/
I wish this article had been around when I set out to repair a sticky shutter in a GIII in 2005. I used the method you did, two small holes, very shallow, with a Dremel tool. I covered them with dark nail polish when done. I was more concerned with stray light bouncing around than the cosmetic appearance.
thanks.. its help me to clean may canonet lens.
There is a spot for a spanner wrench on the middle lens assembly! It is not on the top like some of the other Canonet models I have worked on. If you look very closely down further into the lens right on the edge of the black lens assembly, you can see two small slots for a spanner wrench. Now, I have no idea what kind of spanner wrench could possibly get down into there so you have to improvise. I used the smallest slotted screwdriver in my set and just really torqued it. But, it worked and no holes where they shouldn’t be!
Really helpful info on the bent shutter speed bar. That was exactly what was wrong with mine. Thank you!
That is interesting. I did this Canon repair quite a while ago, so I don’t recall exactly how it looked, but I am pretty sure I looked thoroughly, and didn’t see anything. Perhaps you are right though and I just missed it. If I ever happen to attempt a repair on another, I’ll be sure to check!
Mine had the notches too, but mine is the prior model – the QL17-L.
Mike, I almost thought I was reading an older post by you on this camera, almost sure you reviewed it a while ago. But glad you did. This was one of the first cameras I sought out to try and yes it had the sticky shutter, but can’t remember that it had the B switch problem. Either way, I sent it off for a repair CLA. After a roll, I came away with the same exact feelings you were trying to express about where the excitement was. The only thing I would add would be that it seemed a tad heavy, since I started shooting rangefinders with the Olympus RD.
Yeah, this was an older review from 2016 that I made a few corrections and updates to, and WordPress registered it as a new post. Glad you saw it though. The QL17 is a nice camera, but sadly I haven’t touched mine in nearly 4 years.
Mike, for a short while, I owned one of the original Canonets in Bell & Howell USA version. This was the big body with the selenium light meter cell surrounding the lens. Some thoughts:
1. It was beautifully crafted and assembled, almost Leica craftsmanship.
2. This was a big and heavy camera, with 55mm lens filter size.
3. The selenium cell worked!
4. The rangefinder was decent.
5. Bad news: it had the infamous sticky Canon shutter syndrome. Some speeds worked sometimes.
I sent it on to someone else who was willing to disassemble it. The size turned me off; if I was willing to carry this mass, I may as well carry my Leica M2 and some lenses in my bag. I bet this original ƒ/1.9 Canonet was excellent optically. Try one sometime if you can find a clean example with good selenium.
I have a really nice working Canonet 19 as well and can confirm all of your bullet points except 5. It is a beautiful camera with superb craftsmanship, and mine has a good rangefinder and working meter, but amazingly, the shutter works too! I am familiar with the weak shutters on the later Canonets, but had thought that perhaps the earlier ones were more stout. It seems I am just lucky and got a good one!
Of course, I say all of this not yet having shot that camera. Perhaps I should do it soon!
Mike, that is good news. I wonder:
1. Did someone clean and adjust the shutter of your Canonet? Or,
2. Did the previous owner use it regularly?
I think construction was not the issue but the type of lubricant used back then. Regardless, I’d love to see your review (in progress, right??).
Great article and super useful Mike! I just got a QL17-L for about $75. What was strange is it seemed to work perfectly other than stiff aperture rings and winding lever, but after I put it in my dry box overnight, the sticky shutter thing happened. I did 10 rounds of lighter fluid and left it overnight. I was dismayed in the morning when the aperture blades seem to stick on 16 when turning from 16 back to 1.7. The great news – the aperture won’t open back up when turning the aperture dial until the shutter is wound. If the aperture is set to f16, and one winds the shutter first, then we can see the blades open as we turn back to f1.7. I probably spent 30 minutes too long cleaning the shutter and aperture blades while not understanding this function of the QL17. My first observations are exactly as you put it – the machine is so well designed and usable that there’s no magic to taking a great photo with it. It’s not like a Rollei 35 – when you get the film back and zone focused a shot perfectly, or a meter-less camera and the guess exposure/sunny 16 rule worked out for most of a roll. I’m hoping that with the camera out of the way (aside from the sturdy and assuring heft), I will be able to compose and capture some great street shots. Thanks for being a great source of information and provided such detailed repair info – I’m also fixing a “broken” Yashica Half 17 that probably just needs the selenium cell contacts cleaned and silver penned as you mention in another article.